22 Halloween Window Painting Ideas to Make Your Home Stand Out
Halloween window painting is one of those projects that feels bigger than it is. You grab a few paint markers, clear off an afternoon, and suddenly your windows are the talk of the block. I started doing this a few years back on our front porch window and now I plan the design before pumpkins even hit the store shelves. The best part is that you do not need to be an artist. Most of these designs are just shapes, dots, and simple outlines that anyone can copy with a steady hand and some patience. Below you will find twenty two ideas that work for any size window, from a small entry sidelight to a big picture window in the living room. Grab some washable window paint or paint markers, tape off your edges if you want clean lines, and pick whichever idea matches your house best.
1. Spooky Spider Web
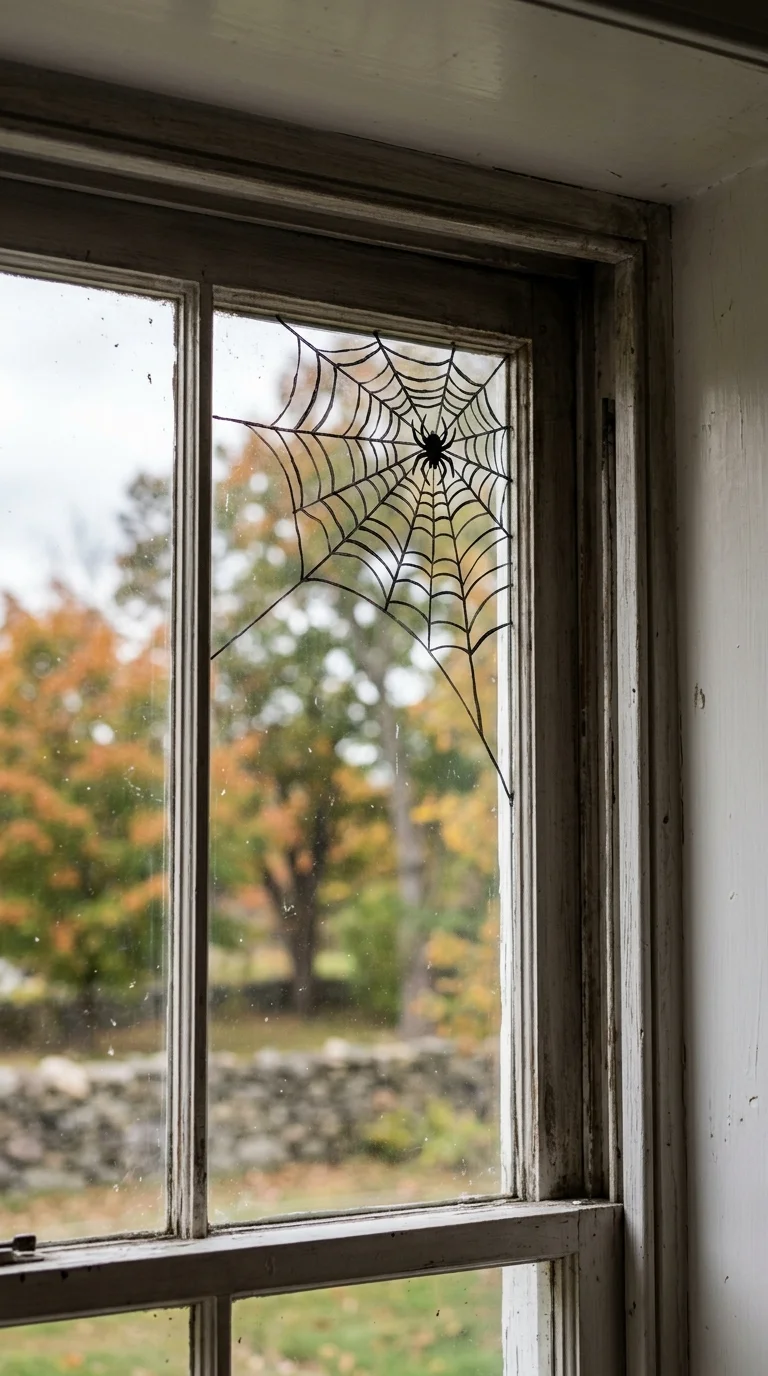
A spider web painted across the corner of a window is one of the easiest Halloween designs to pull off, and it always looks impressive from the street. Start in the corner with a few straight lines that fan out like spokes on a wheel, then connect them with curved lines that get bigger as you move outward. Use black window paint or a paint pen for the sharpest look, and add a fat little spider sitting in the middle using two dots and eight thin legs. This works great on a front door sidelight or a small bathroom window where you want something spooky but not overwhelming. If you want it to glow at night, trace the web again with white paint over the black so it catches porch light. Kids love helping with this one because the lines do not need to be perfect to look good.
2. Grinning Jack-o-Lanterns
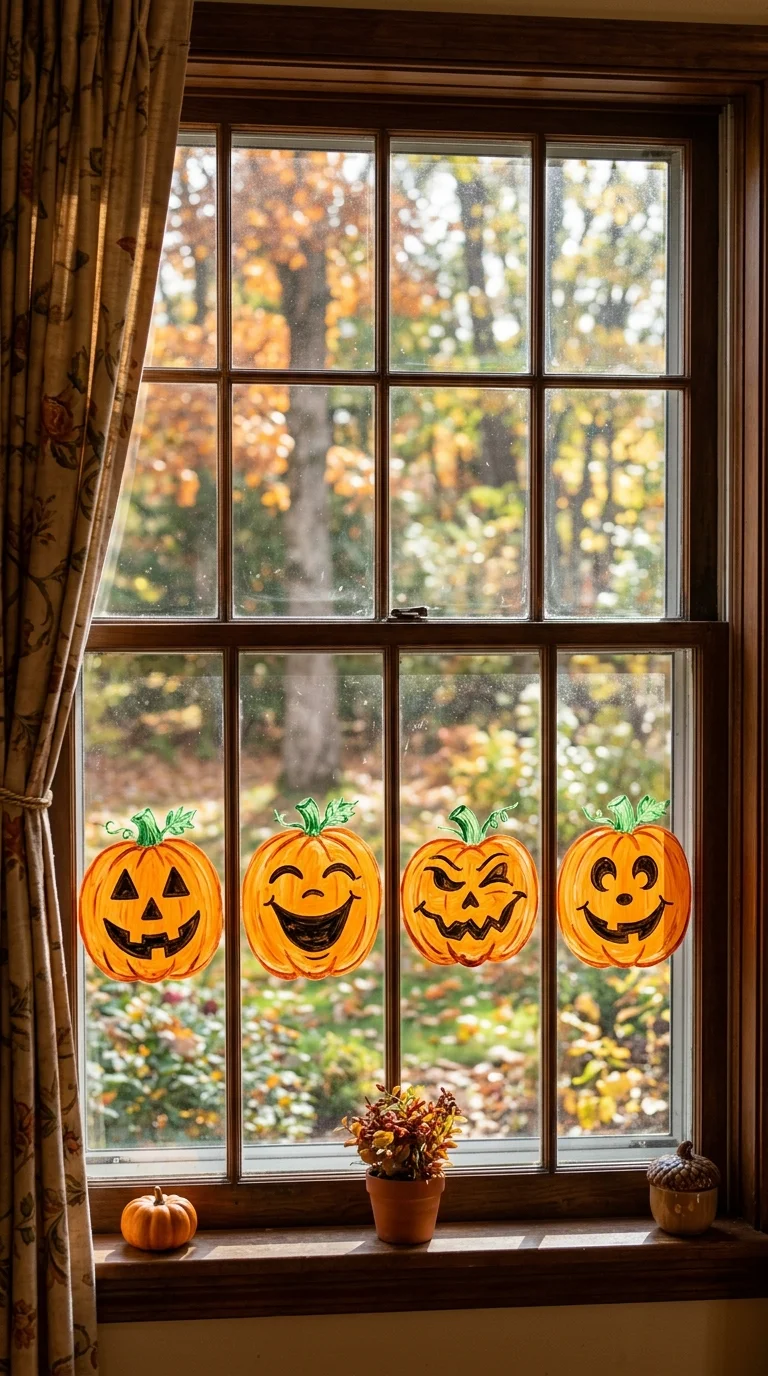
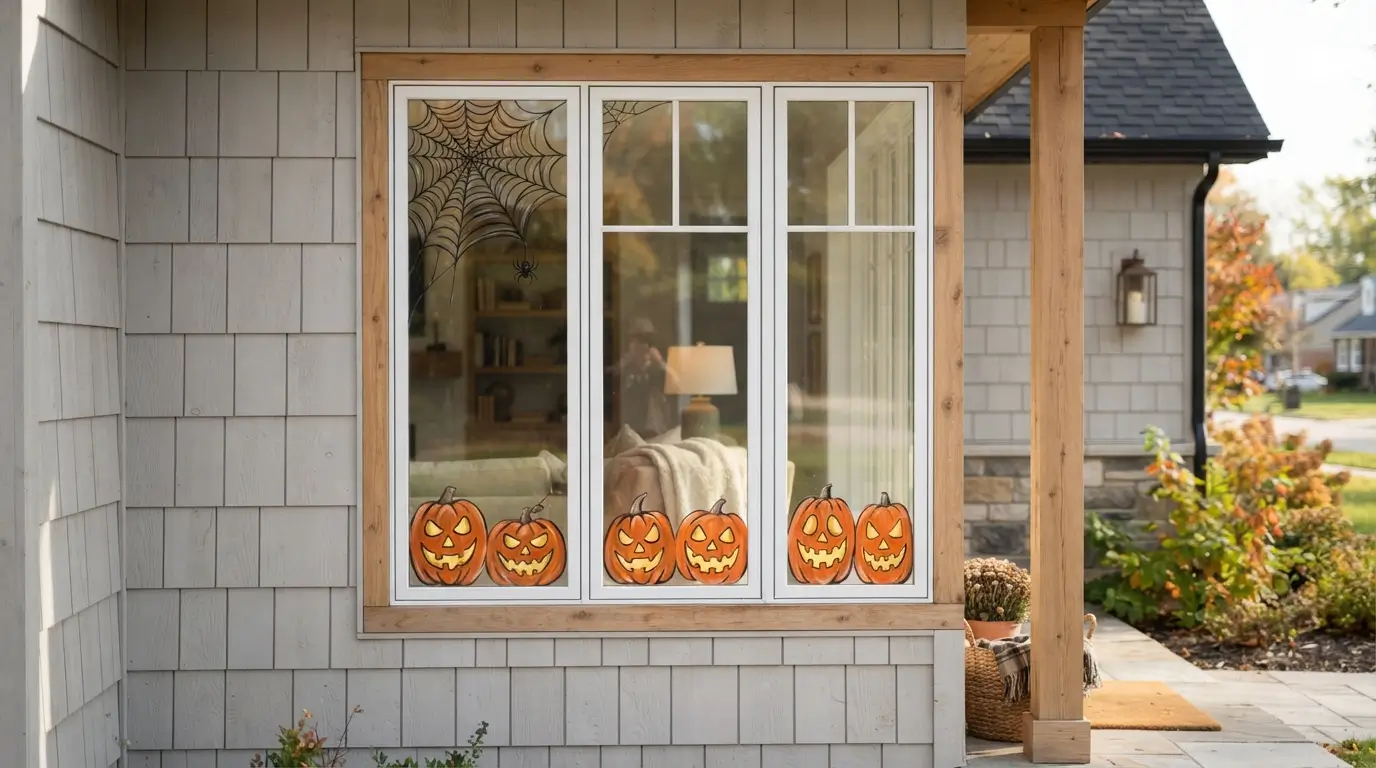
A row of jack-o-lantern faces painted along the bottom of a window instantly says fall and Halloween at the same time. Paint three or four round pumpkin shapes in orange, leave them unfilled if you want a stained glass look, then add the classic triangle eyes and a jagged smile in black. Vary the faces a little, one winking, one surprised, one with a gap tooth grin, so the row feels playful instead of repetitive. This idea works best on a wide window like a dining room or living room window where there is enough space for several faces side by side. Add a short green stem on top of each pumpkin and a curly vine line connecting them for extra charm. This is a good beginner project because pumpkins forgive uneven circles, and the black features cover any small mistakes in the orange base coat.
3. Flying Witch Silhouette
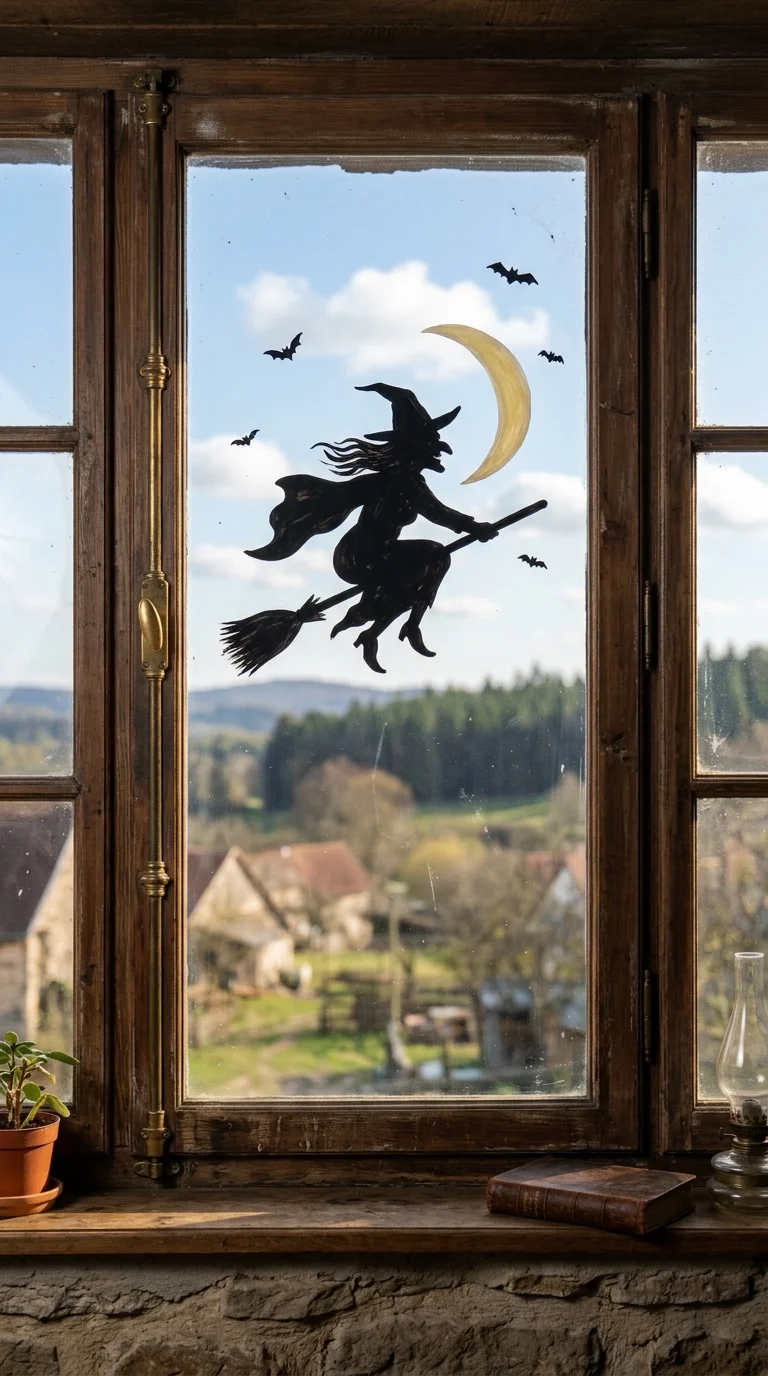
A witch flying across her broom against a full moon is a classic image that reads well even from far away. Paint a simple crescent or full circle moon in white or pale yellow, then add a black silhouette of a witch on a broomstick crossing in front of it, cape trailing behind her. You do not need fine detail here, a solid black shape with a pointed hat and flowing cape outline is enough to sell the look. This design works beautifully on an upstairs window or a window that faces the street at an angle, since the silhouette reads clearly even in daylight. At night with a light behind it, the whole scene glows softly. Add a few small black bats scattered near the broom for movement and to fill empty space around the moon.
4. Black Cat Duo
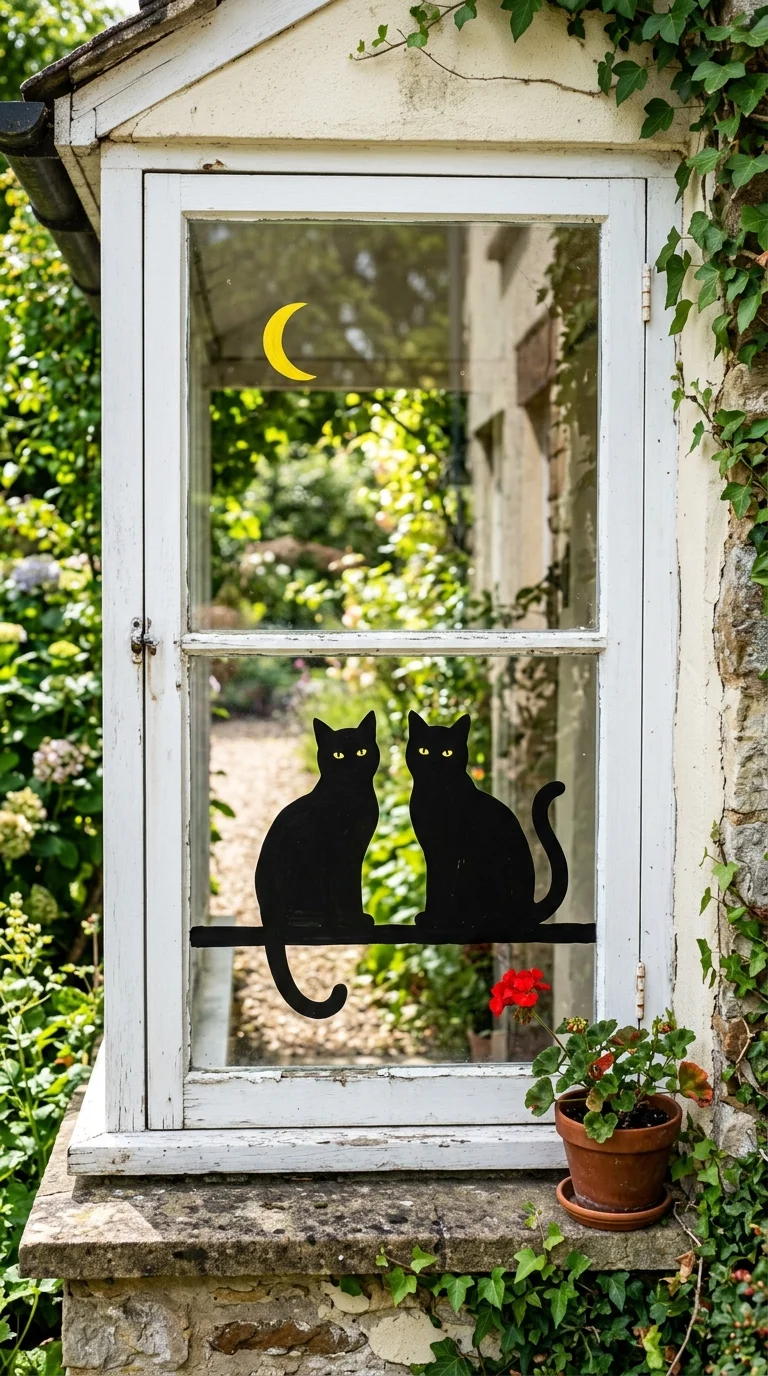
Two black cats sitting side by side on a windowsill design brings a cozy, slightly spooky feel without going too dark or gory. Paint two simple cat silhouettes, arched backs or sitting upright with tails curled around their feet, using solid black paint. Add small triangle ears and two dot eyes in yellow or green for a bit of glow. This idea is perfect for a lower window, like a kitchen or den window, where the cats appear to be watching people walk by. Place them near the bottom edge of the glass so they look like they are perched on the actual sill. Add a small crescent moon or a scattering of stars above them to round out the scene. This one is quick to paint, usually under twenty minutes, which makes it a good choice if you are short on time.
5. Haunted Graveyard Scene
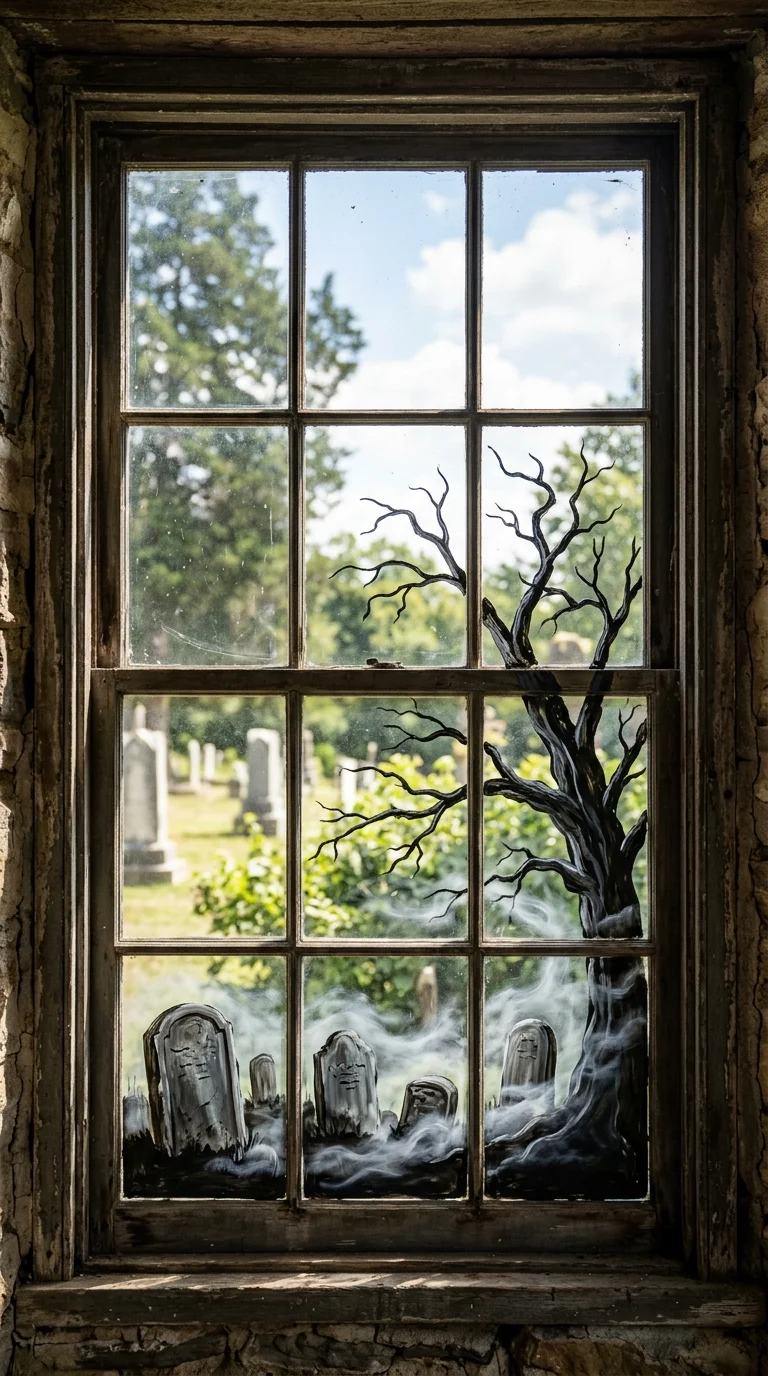
A mini graveyard scene painted across the bottom third of a window adds spooky detail without covering the whole pane. Paint several tombstone shapes in gray or black, some rounded on top and some with a simple cross shape, spacing them unevenly so it looks natural. Add a bare, twisted tree silhouette off to one side with a few bare branches reaching upward. A thin fog line in white paint swirling around the base of the stones adds atmosphere. This design works well on a larger window, like a front picture window, where there is room for several tombstones plus the tree. Keep the color palette simple, mostly black, gray, and white, so it reads as eerie rather than cluttered. A single small bat flying above the scene finishes it off nicely.
6. Dripping Orange Drips
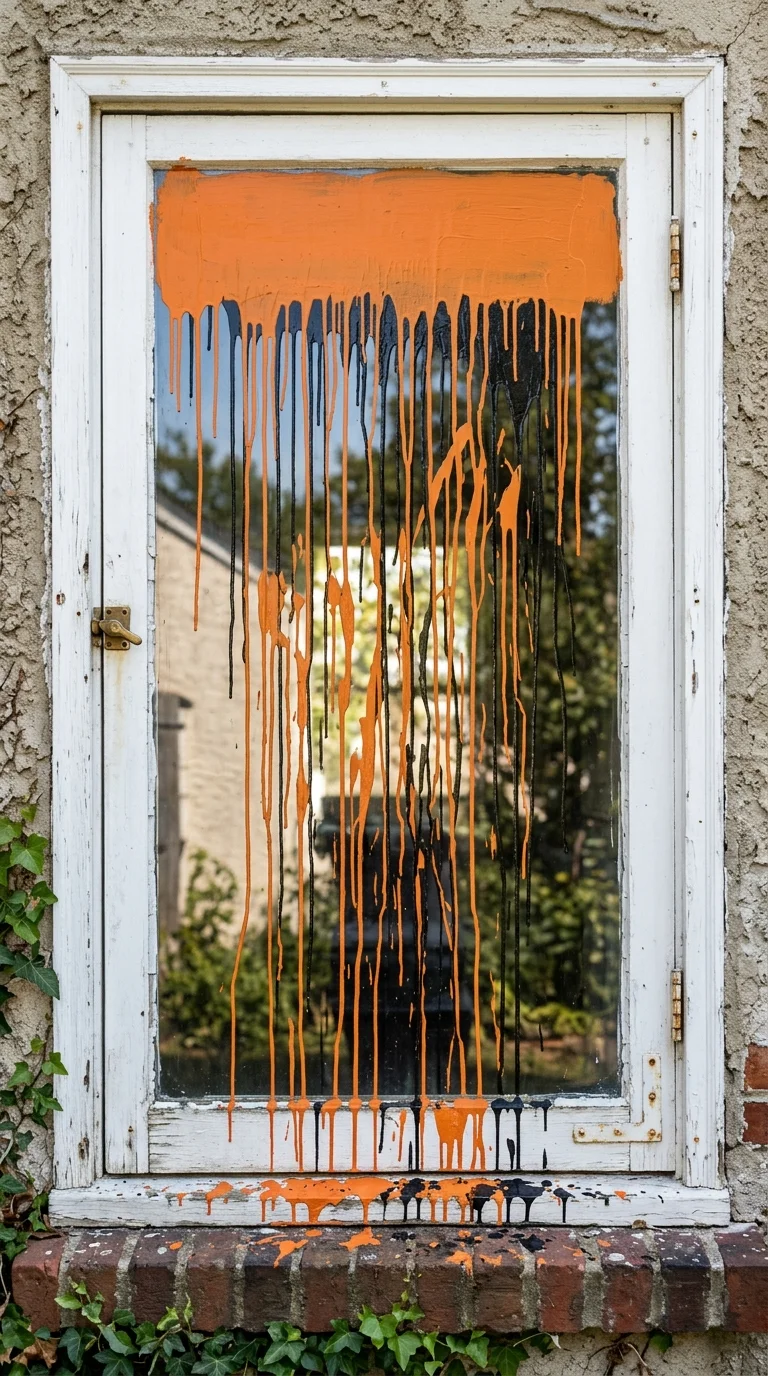
Painted drips running down the top of a window in orange and black create a fun, almost cartoonish Halloween effect that is different from the usual pumpkin or ghost themes. Paint a solid band of orange across the very top of the window, then use a slightly thinner brush to pull short, uneven drips downward, some longer than others, so it looks like the color is melting down the glass. Add a few smaller black drips mixed in for contrast. This idea is fast, usually takes fifteen minutes or less, and works on any window size since you can adjust how far down the drips reach. It pairs nicely with other simpler designs, like a small painted pumpkin sitting below the drips, so the two elements feel connected rather than random.
7. Friendly Ghost Family
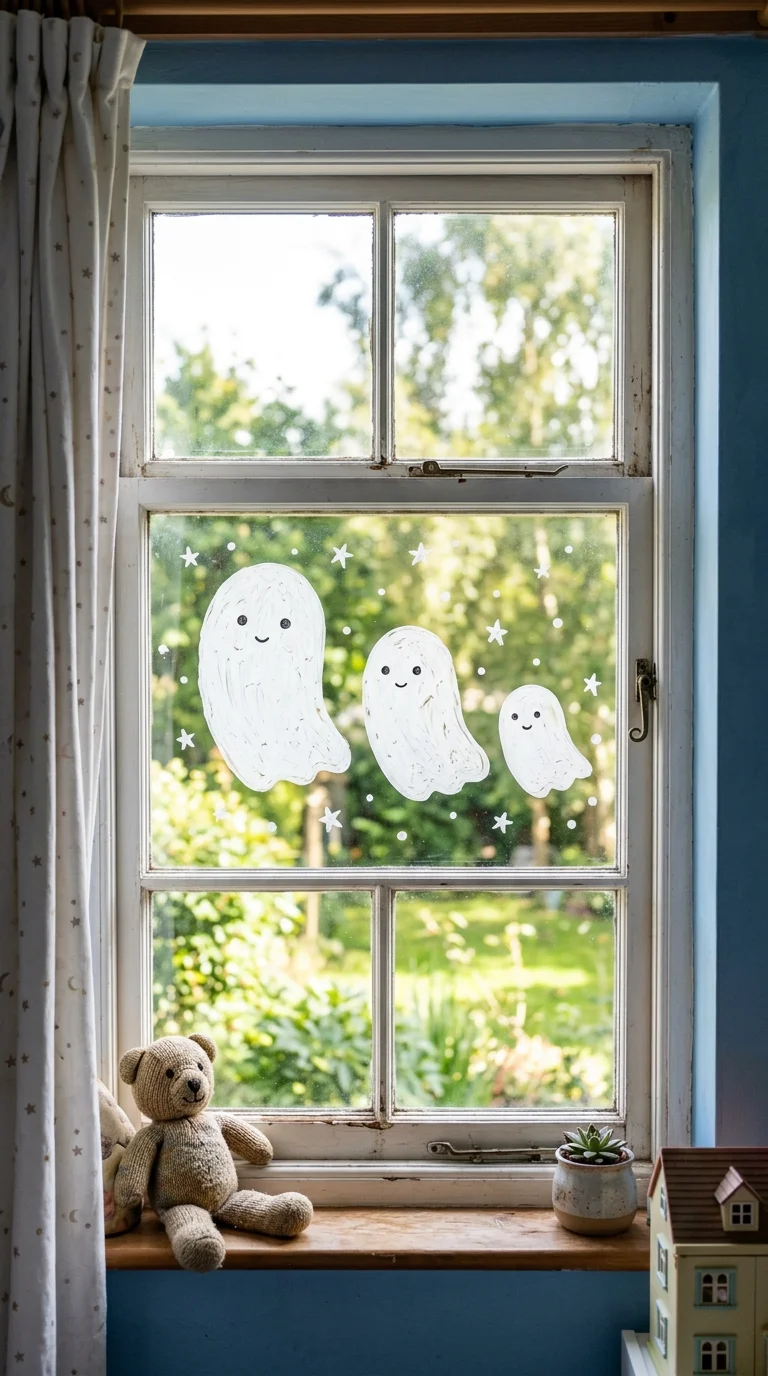
A little group of round, friendly ghosts floating across a window brings a softer, kid friendly take on Halloween decorating. Paint three or four ghost shapes using white paint, rounded heads with wavy bottoms instead of straight lines, so they look like they are floating and moving. Add simple black dot eyes and an open oval mouth on each one for a surprised or happy expression. Vary the sizes so it looks like a family, one big ghost and a couple of smaller ones trailing behind. This design works especially well on a child’s bedroom window or a playroom window since it is spooky enough to feel festive but not scary. Add a few small stars scattered around the ghosts to fill empty space and give the design some movement across the glass.
8. Candy Corn Stripes
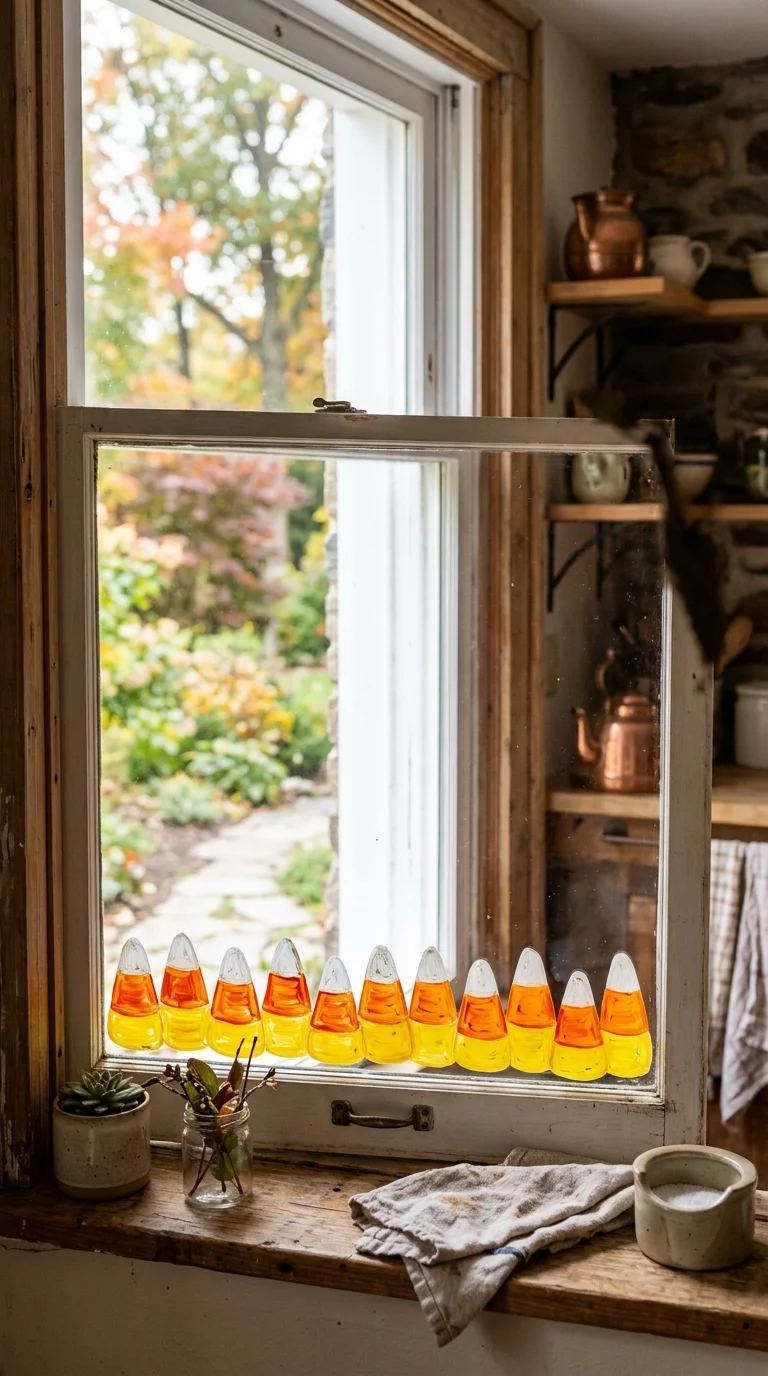
Candy corn shapes lined up along the bottom of a window bring in the classic Halloween color palette of orange, yellow, and white in a design that feels bright and cheerful rather than spooky. Paint a row of triangle shapes with rounded bottoms, each one divided into three sections, yellow at the bottom, orange in the middle, white at the tip, just like the candy itself. Keep the lines between colors clean by letting each layer dry a little before adding the next. This idea works great alongside other Halloween window art since the bright colors balance out darker designs like witches or graveyards. It also looks great on its own for a kitchen window where you want something festive but not scary. Kids enjoy painting these since the shape is simple and repetitive.
9. Full Moon Bats
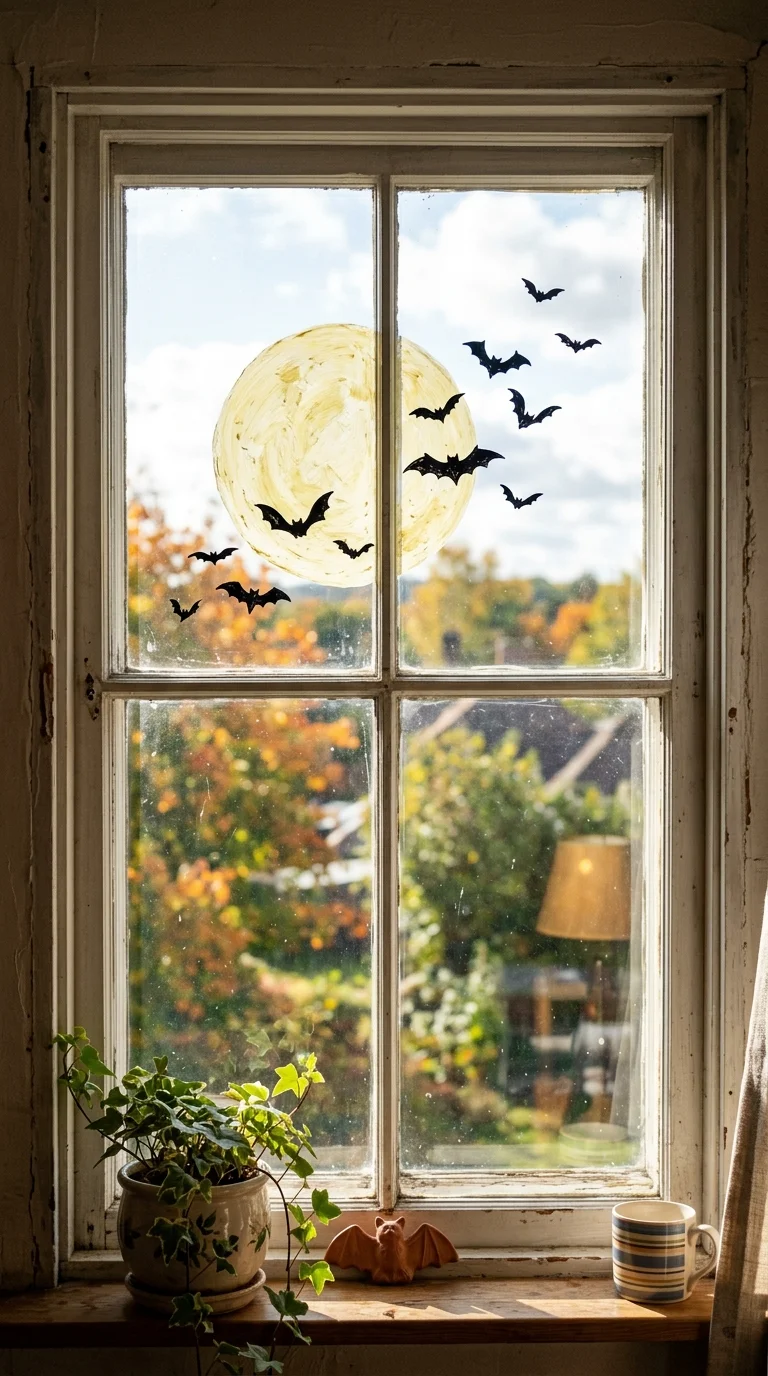
A cluster of bats silhouetted against a big painted moon is a simple design that reads beautifully from a distance. Start with a solid circle in white or pale yellow for the moon, positioned slightly off center on the window. Add several small bat shapes in black, two curved wings meeting at a point in the middle, scattered around and in front of the moon in different sizes to suggest they are flying at different distances. Keep some bats overlapping the moon edge and others further out for depth. This design works on almost any window shape and size, and it looks especially striking at night when the moon shape glows from porch or room lighting behind it. It is also one of the faster designs on this list since the bat shapes are quick to repeat.
10. Vintage Halloween Sign
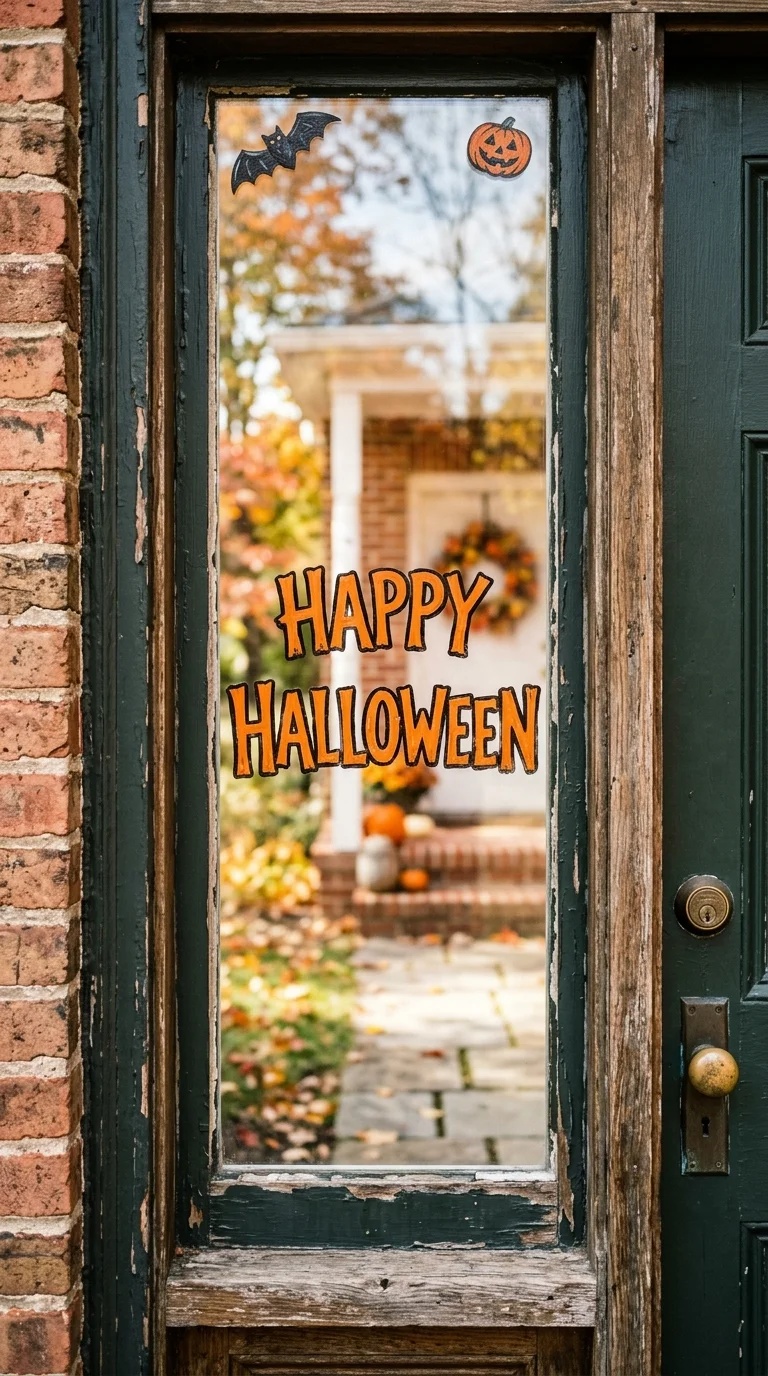
A painted sign style design with lettering like Happy Halloween or Trick or Treat surrounded by simple Halloween icons gives your window a shop window feel. Paint the words in the center of the glass using a bold, slightly whimsical font, block letters work well if you are not confident with cursive. Surround the text with small painted icons, a tiny bat in one corner, a pumpkin in another, a spider dangling from a thread near the top. This design works best on a smaller window, like a front door sidelight or a mudroom window, where the text can be the main focus without competing for space. Use orange or black for the lettering depending on your window trim color, choosing whichever will stand out most clearly against your house exterior.
11. Pumpkin Patch Row
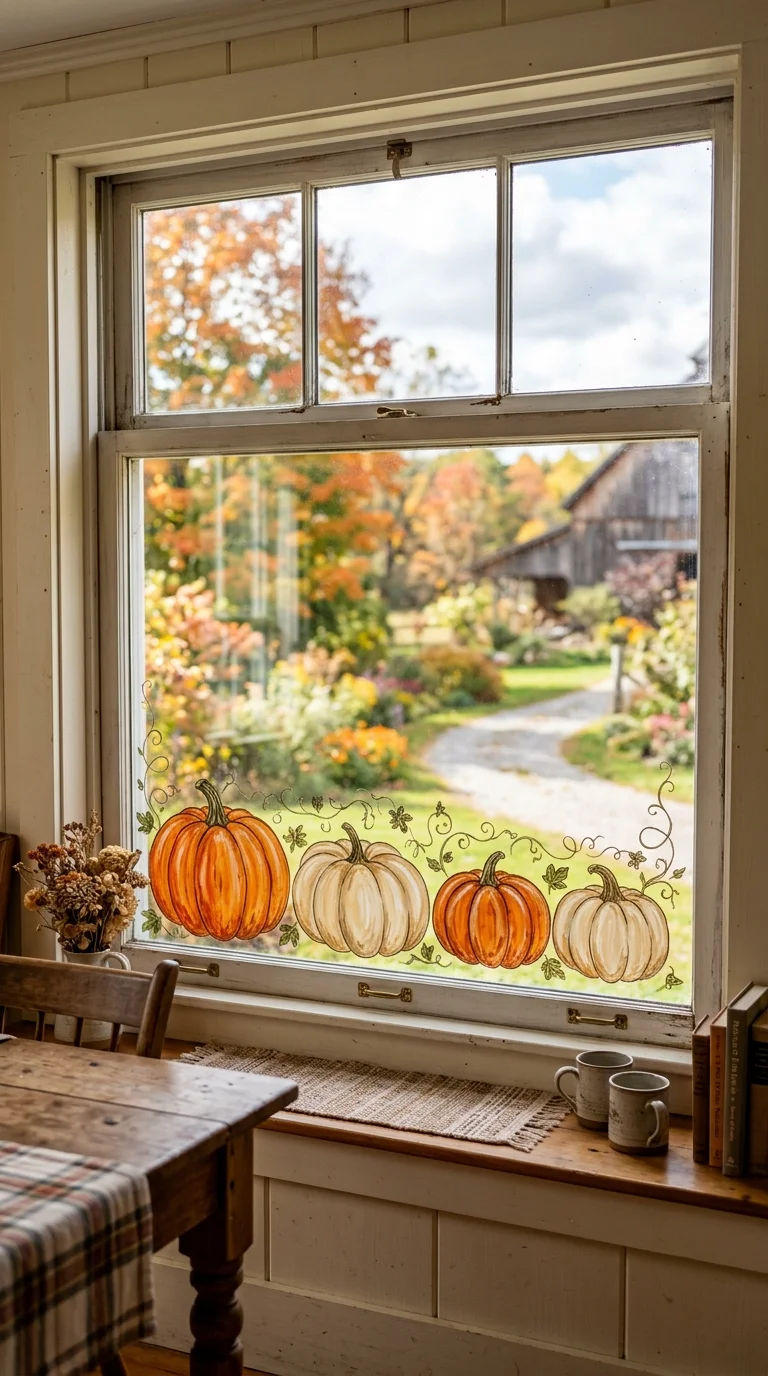
A whole pumpkin patch scene painted along the bottom of a window brings a farmhouse feel to your Halloween display. Paint several pumpkins of different sizes sitting on a painted ground line, some round, some slightly oval, in shades of orange with a few in cream or white for variety. Add curling vine lines connecting the pumpkins and a few simple leaf shapes scattered between them. This design works particularly well on a wide window, like a dining room or family room window, where there is enough horizontal space to fit a full row of pumpkins without crowding. Keep the pumpkins unfilled or lightly shaded rather than solid so light can pass through, giving a stained glass effect at night. A small scarecrow silhouette standing among the pumpkins is a nice optional addition if you have extra room.
12. Creepy Tree Silhouette
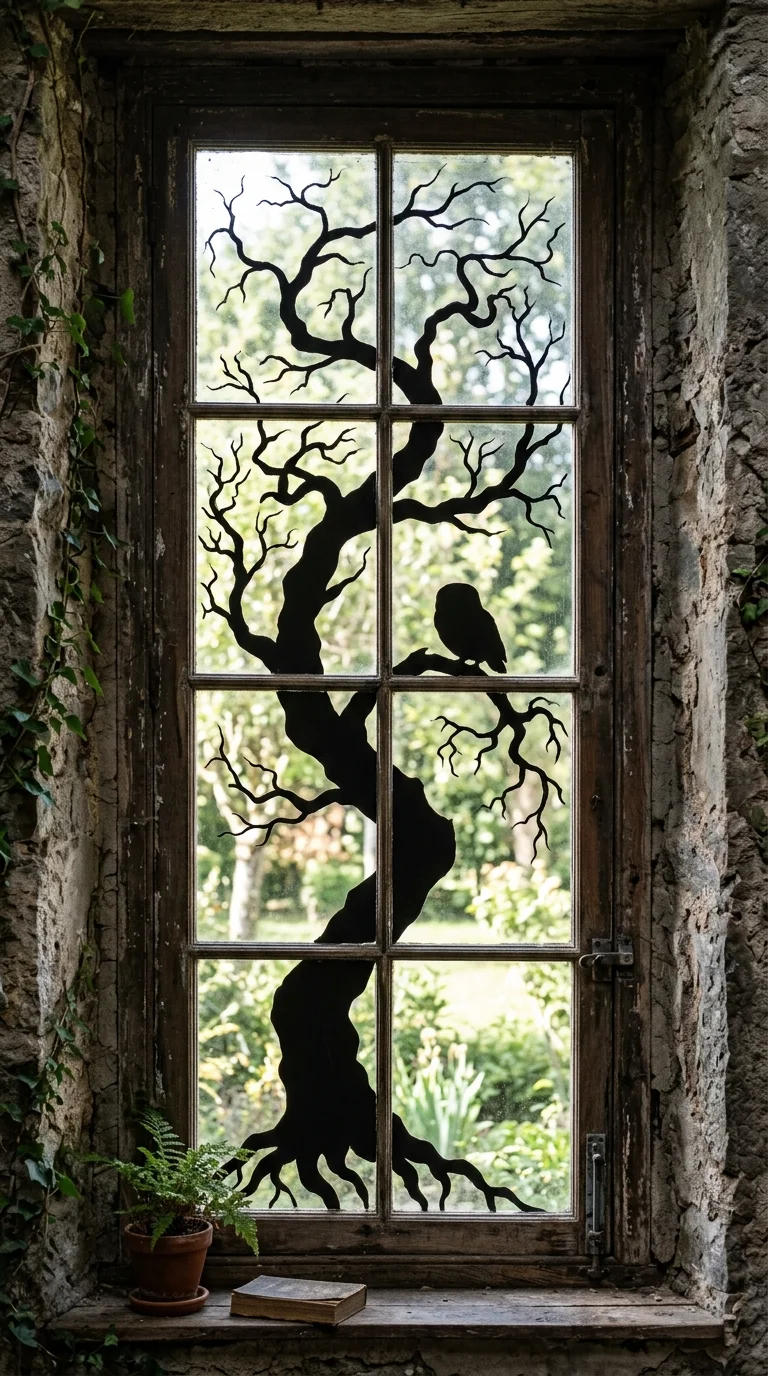
A bare, twisted tree silhouette stretching across a window creates instant Halloween atmosphere with very little painting required. Paint a single trunk starting from the bottom edge of the window, then branch it out into several thin, crooked limbs reaching in different directions, some curling like claws. Use solid black paint for the whole tree so it reads as a strong silhouette. Add a few bats or an owl perched on one of the branches for extra detail, or leave it plain for a cleaner, more graphic look. This design works especially well on a tall, narrow window where the trunk can run the full height of the glass. It also pairs nicely behind other designs, like a moon or a flying witch, since the tree naturally frames the scene without taking up too much space itself.
13. Witch’s Cauldron Bubbles
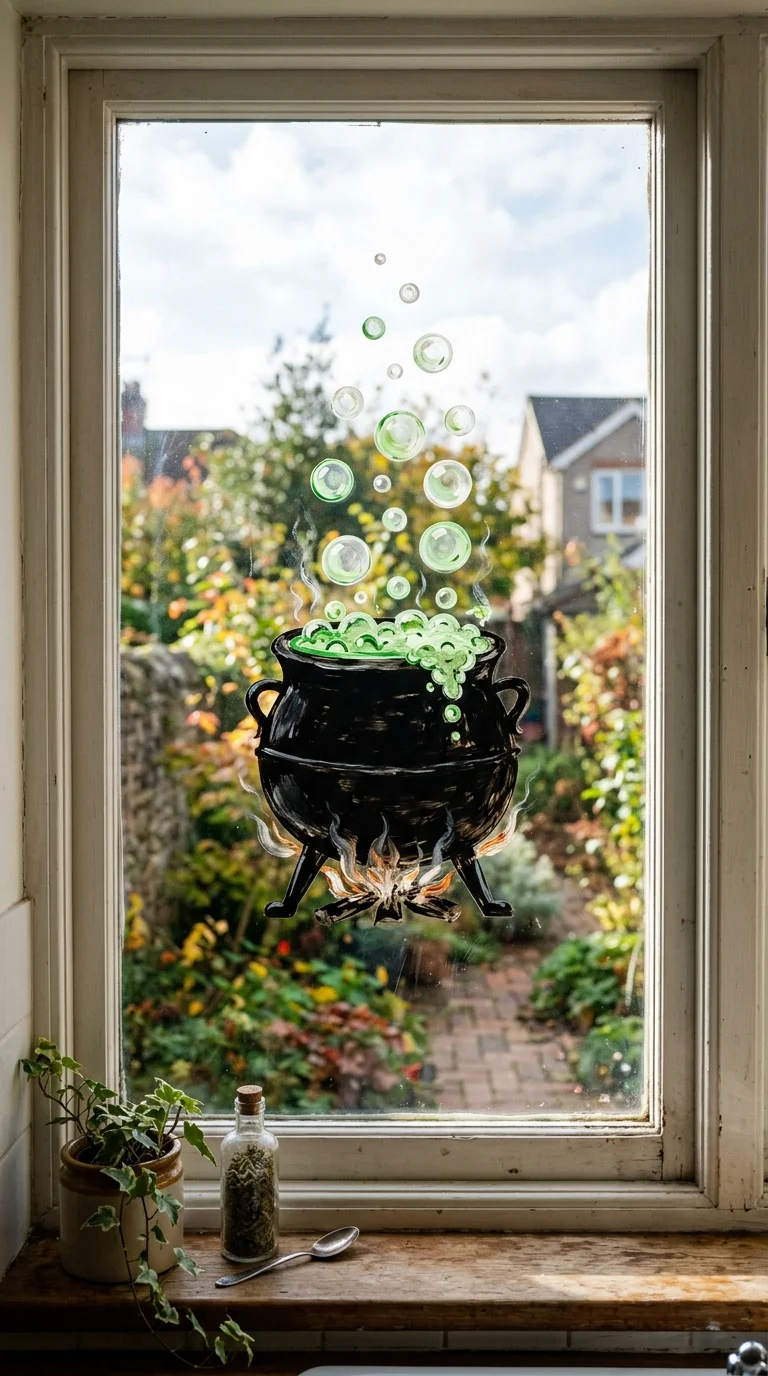
A bubbling cauldron scene painted on a lower window pane adds a playful, slightly mischievous touch to your Halloween display. Paint a rounded black cauldron shape sitting on three short legs, then add a green or purple bubbling liquid spilling slightly over the rim with a few round bubble shapes floating above it. A wooden spoon or ladle sticking out of the top adds a nice detail. This design works well on a kitchen window or a smaller side window where the scene can sit at eye level. Add a few stray sparkles or small stars rising from the bubbles to suggest a bit of magic happening. Keep the color palette limited to black, green, and maybe one accent color so the cauldron stands out clearly rather than blending into a busy background.
14. Owl on Branch
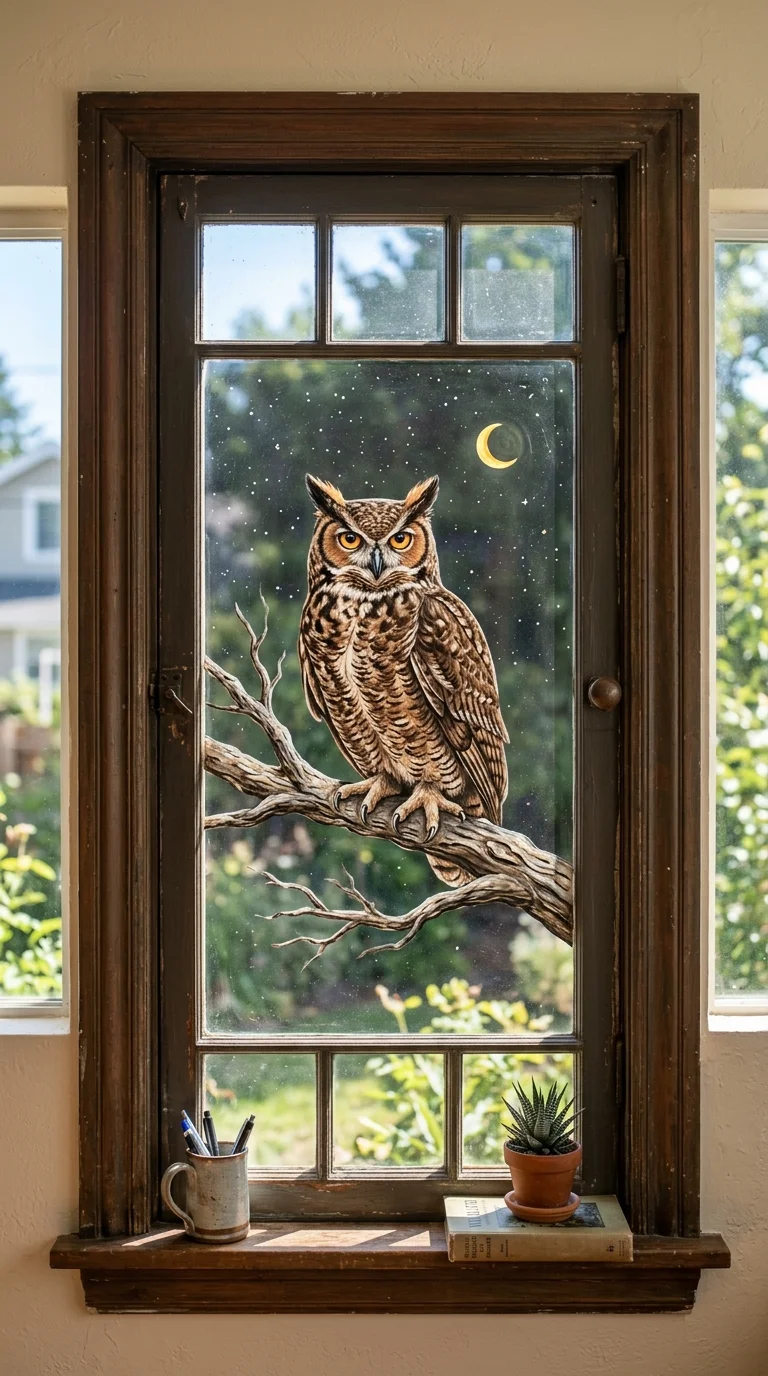
A single owl perched on a bare branch is a quieter, more elegant take on Halloween window art that still fits the fall and spooky season. Paint a simple branch running horizontally or diagonally across the window, then add a rounded owl body sitting on top, big round eyes, a small triangle beak, and short wing shapes tucked at its sides. Use brown, tan, or black depending on the look you want, softer colors for a fall feel, solid black for something spookier. This design works nicely on a smaller window, like a home office or reading nook window, where you want something decorative without a full Halloween scene. Add a small crescent moon in the background and a couple of falling leaves near the branch to tie in the autumn season alongside the Halloween theme.
15. Skeleton Hands Reaching
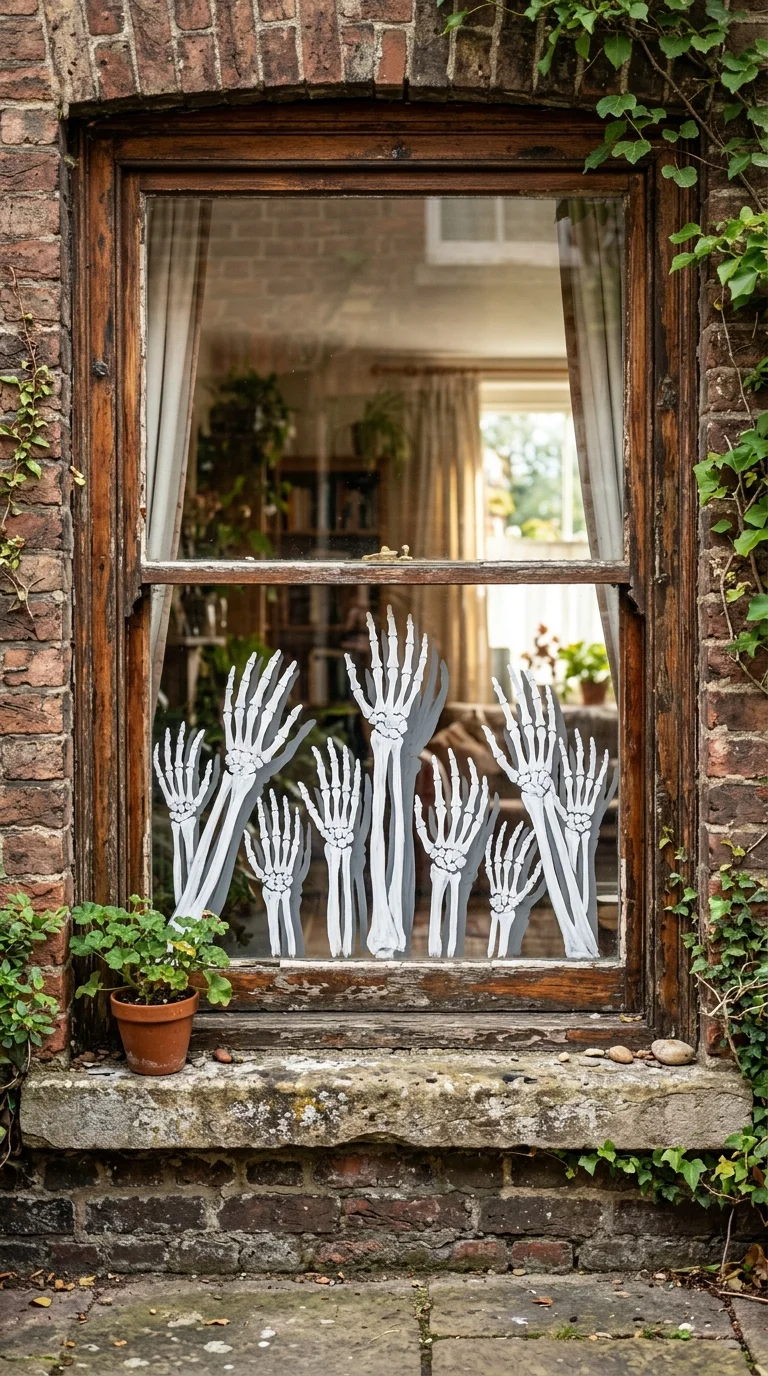
Skeleton hands painted as if reaching up from the bottom edge of a window create a startling, fun effect, especially when viewed from outside at night. Paint several bony hand shapes in white with black outlines, fingers spread wide, reaching upward from the bottom of the glass as though something is trying to climb out. Vary the heights and angles slightly so the hands look like they belong to different figures. This design is best suited for a lower window, like a basement window or ground floor window, where the reaching effect looks most convincing. Add a light gray shadow behind each hand to give a bit of depth. This idea tends to get a strong reaction from trick or treaters, so it works especially well near your front entry where people will walk right past it.
16. Haunted House Outline
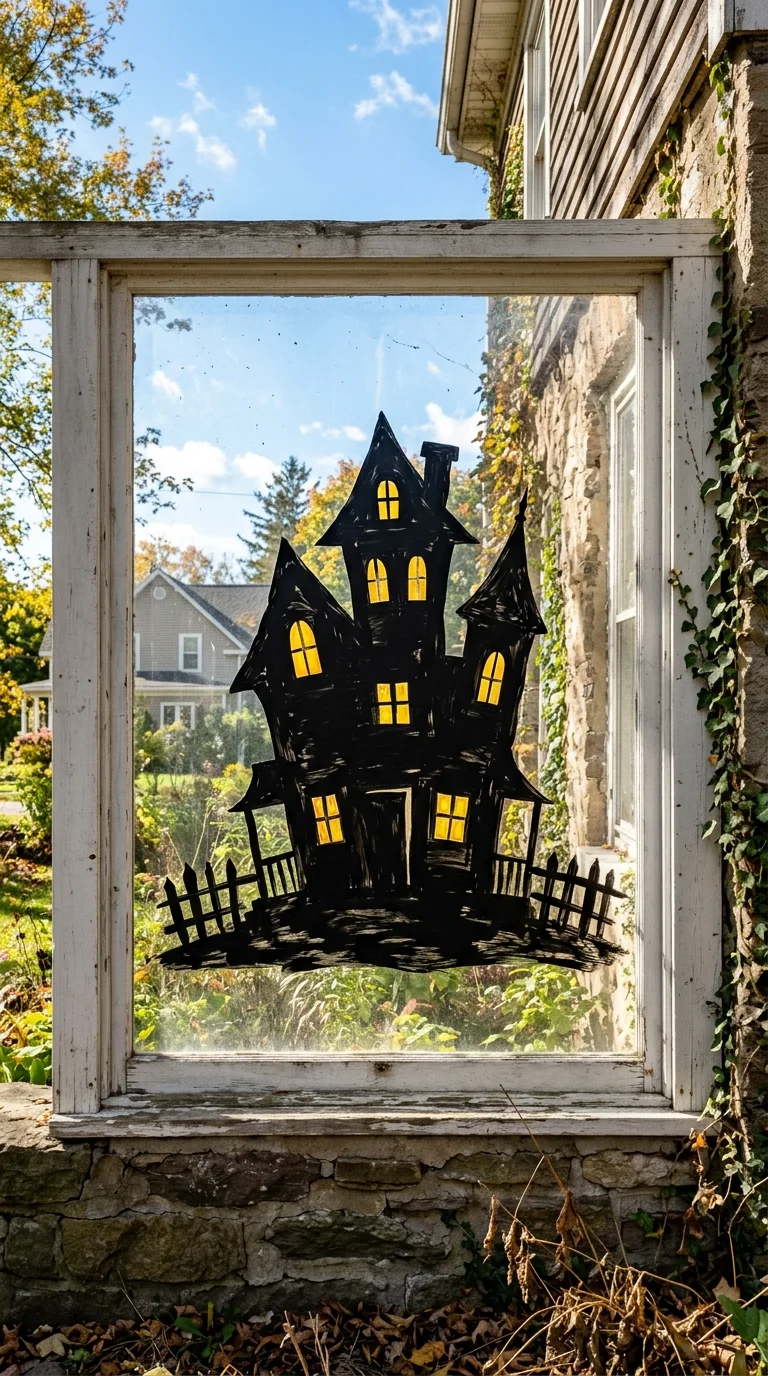
A simple silhouette of a haunted house, complete with a crooked roofline and a few glowing windows, makes for a striking centerpiece design. Paint the house shape in solid black, including a tilted chimney and a pointed rooftop, keeping the lines slightly uneven on purpose for that spooky, leaning feel. Leave a few small window shapes within the house unpainted or filled with yellow so they look lit up from inside. Add a bare tree or a fence silhouette beside the house for extra atmosphere. This design works best on a larger window since the house shape needs enough room to read clearly. It looks especially good at night with a light placed behind the glass, making the little yellow windows glow through the dark silhouette of the house.
17. Trick or Treat Banner
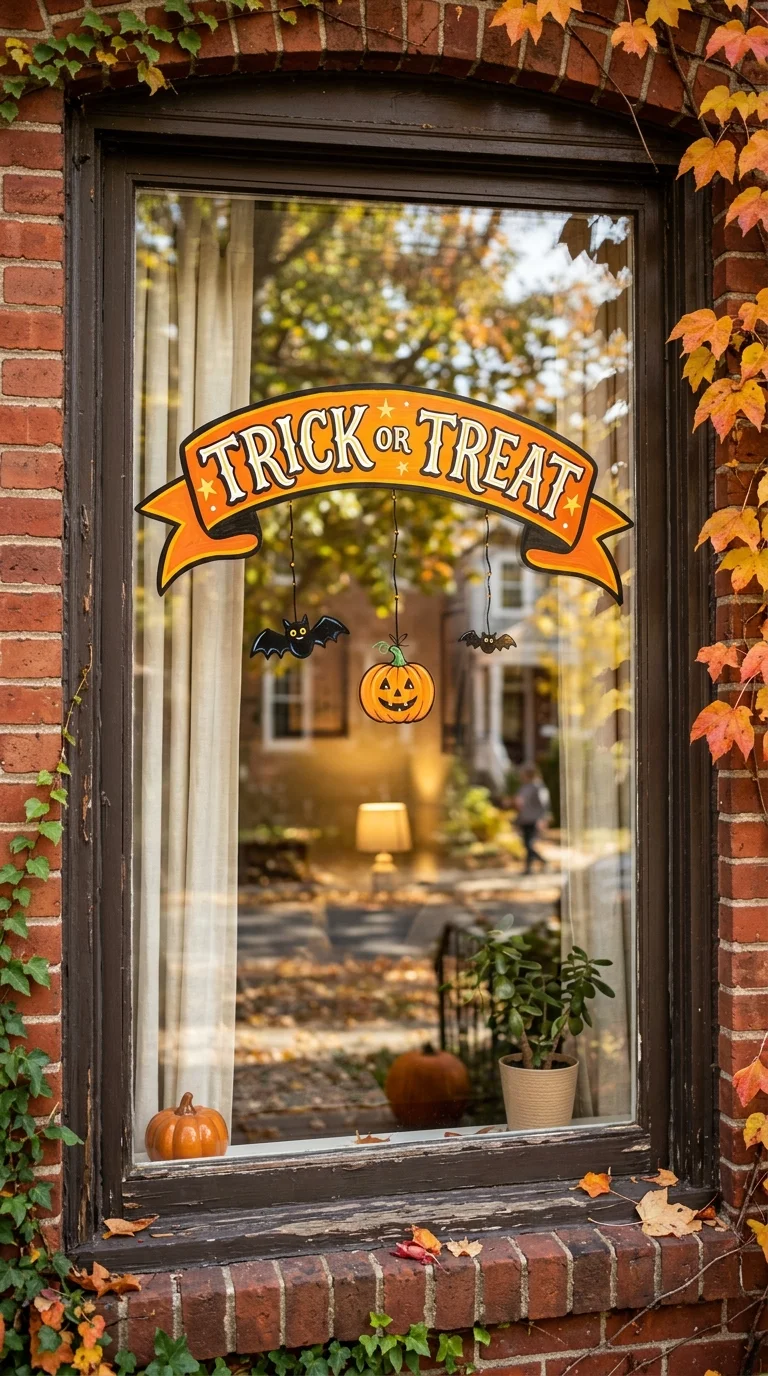
A painted banner style design with the words Trick or Treat stretched across the top of the window in bold letters adds a festive, welcoming touch for visiting kids. Paint a ribbon or banner shape first, slightly wavy with pointed ends, then fill in the lettering inside it using orange or black paint. Add small Halloween icons hanging below the banner on thin painted strings, a tiny bat, a small pumpkin, a little ghost, so it feels connected and layered. This design works well on a front window near the door where trick or treaters will see it right away. Keep the banner near the top third of the window so there is still room below for another simpler design, like a row of pumpkins or a scattering of stars, without the window feeling too crowded.
18. Purple Night Sky
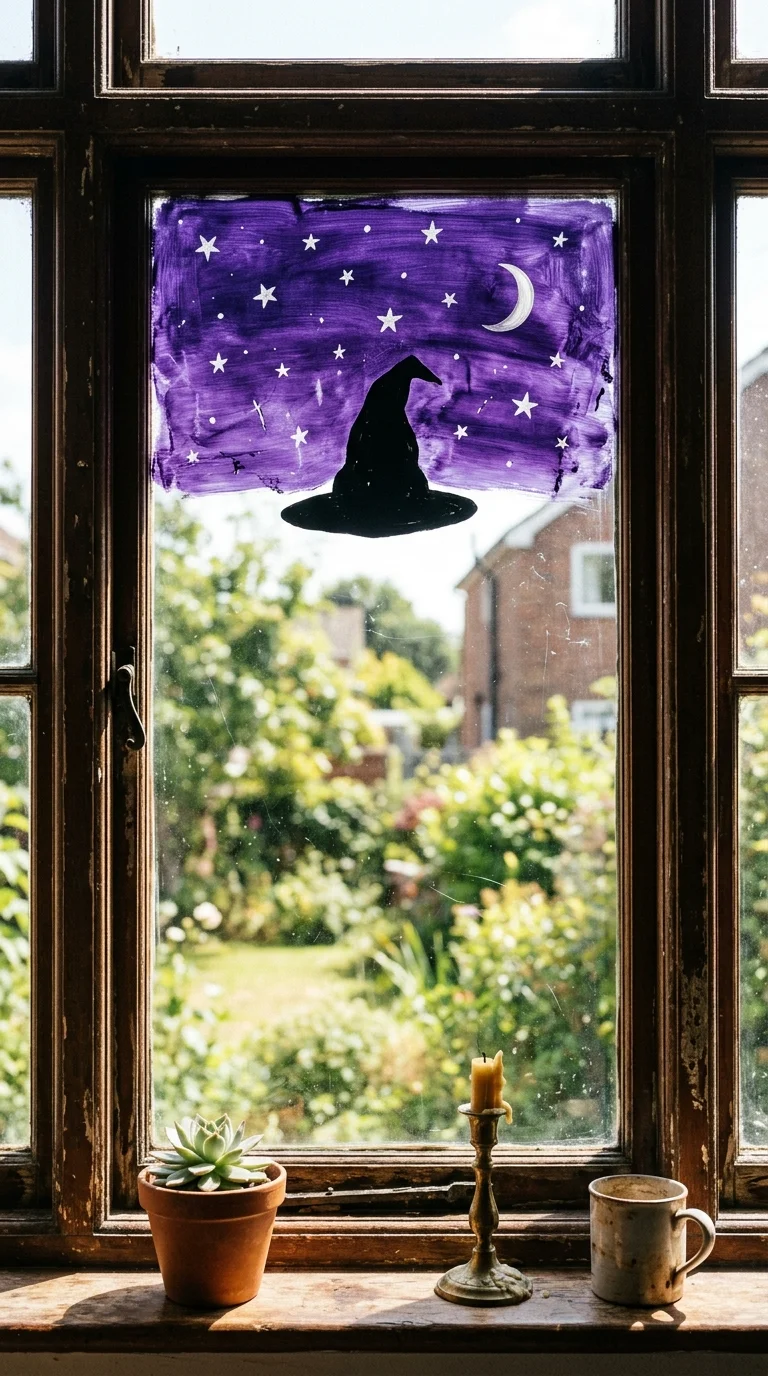
Instead of the usual orange and black, this design uses a deep purple night sky as the backdrop for smaller Halloween shapes, giving the window a slightly magical, whimsical feel. Paint a wash of purple across the upper half of the window, then add a scattering of small white stars and one larger crescent moon within the purple area. Below the sky, add simple black silhouettes, a witch’s hat, a flying bat, or a small cat, sitting along the transition line where the purple meets the clear glass. This design stands out from typical orange and black Halloween decor and works especially well if your porch lighting has a warm glow, since the purple will look rich and deep against it. It suits a front window or a window near outdoor seating where the color will be noticed after dark.
19. Spiderweb Corner Frame
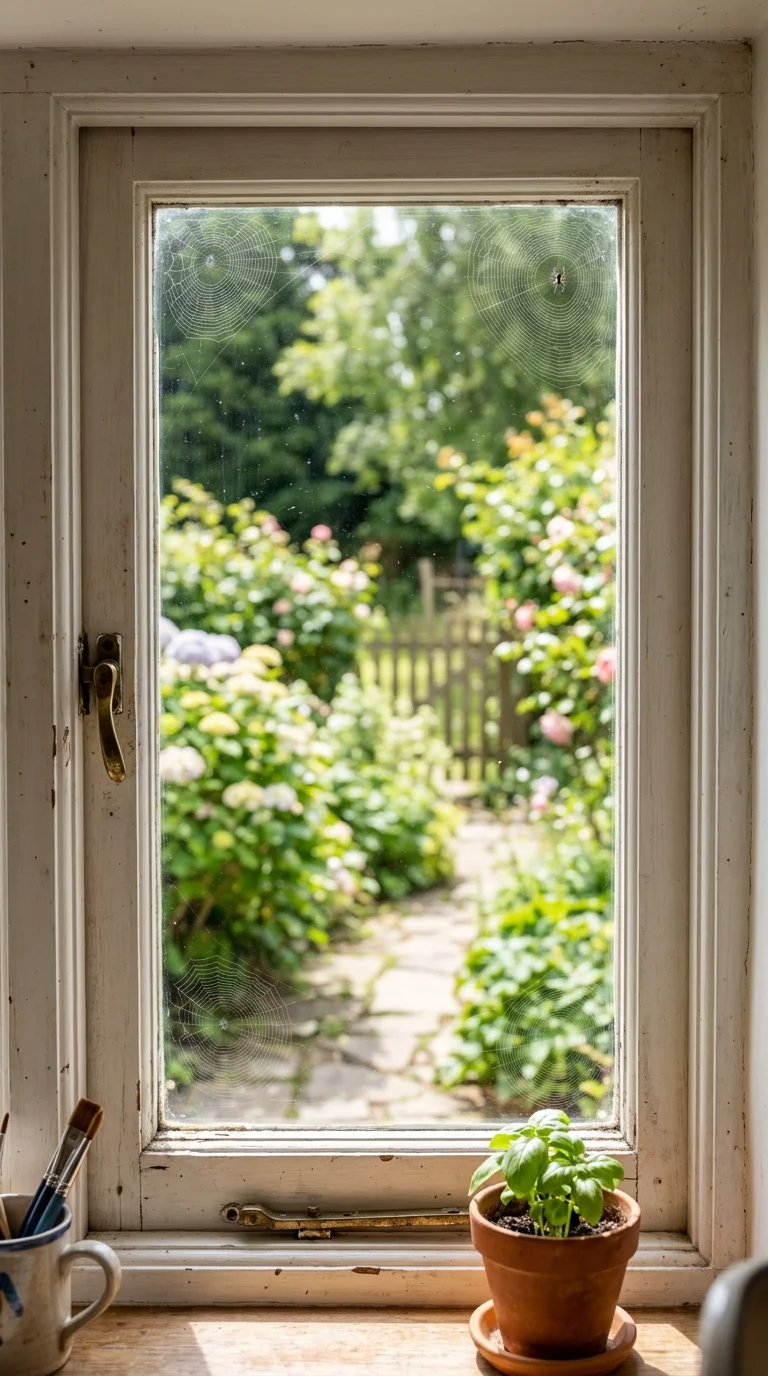
Rather than one big spider web, this idea uses four smaller webs painted into each corner of the window, framing the glass without covering the center. Paint each web using the same fan and connecting line method as a single corner web, keeping them consistent in size so the design feels balanced. Add one small spider in just one corner rather than all four, so the eye has a clear focal point. This design is a good option if you want a Halloween touch that still lets you see clearly through the window during the day, since the center stays completely clear. It works well on a kitchen window above the sink or any window you look through often. Keep the webs in classic black or try a metallic silver paint for a slightly fancier, less traditional look.
20. Scarecrow in Field
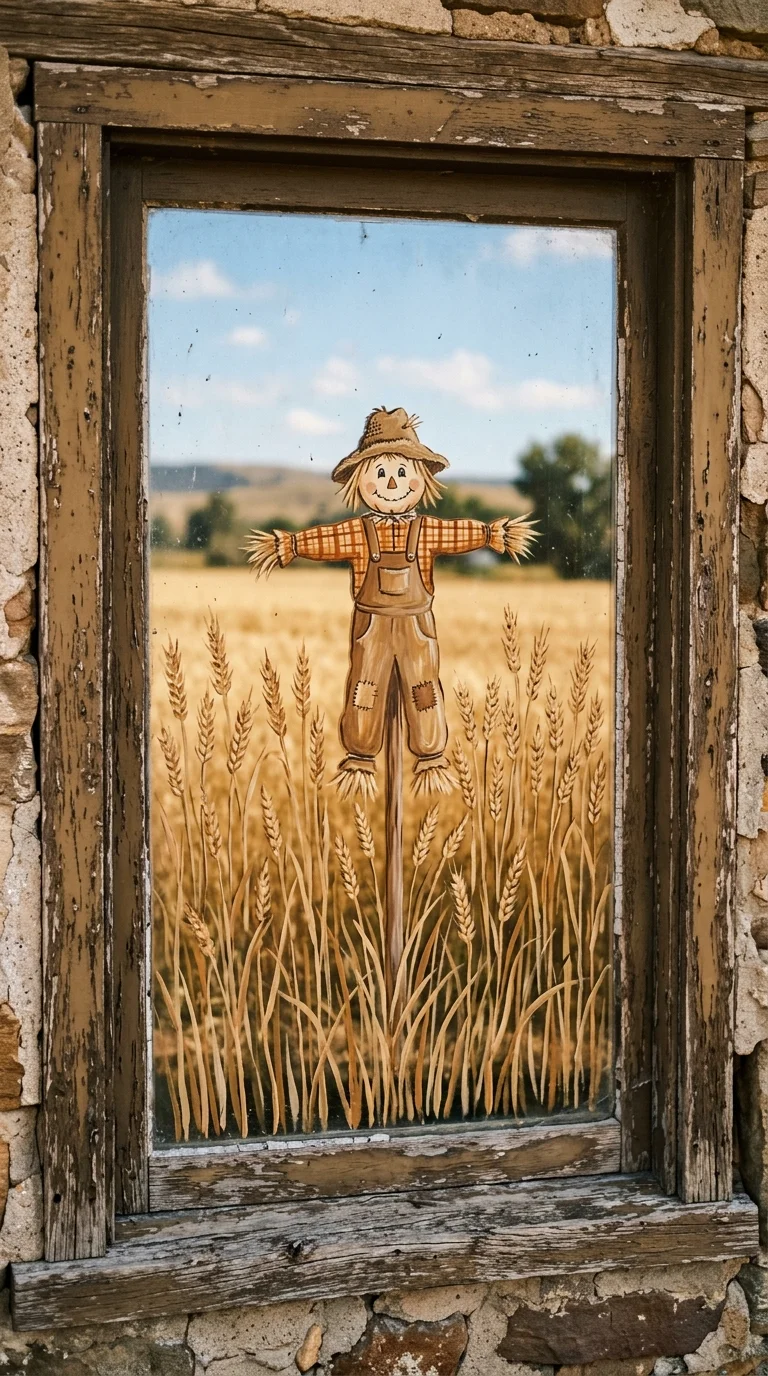
A scarecrow standing among painted crops or tall grass brings a farmhouse fall feel that works for both Halloween and general autumn decorating. Paint a simple scarecrow shape, a round stuffed head, an X shaped wooden post for arms, a patched shirt, and straw poking out from the sleeves and collar. Add a few tall, thin stalks of painted wheat or corn around the base to suggest a field setting. This design pairs naturally with a pumpkin patch design if you have a wide enough window to include both, or it can stand alone on a smaller window. Keep the color palette warm, browns, tans, and a bit of orange, so it feels connected to the season rather than strictly Halloween. This idea tends to work well into November too, since it reads as general fall decor.
21. Halloween Countdown Chalk
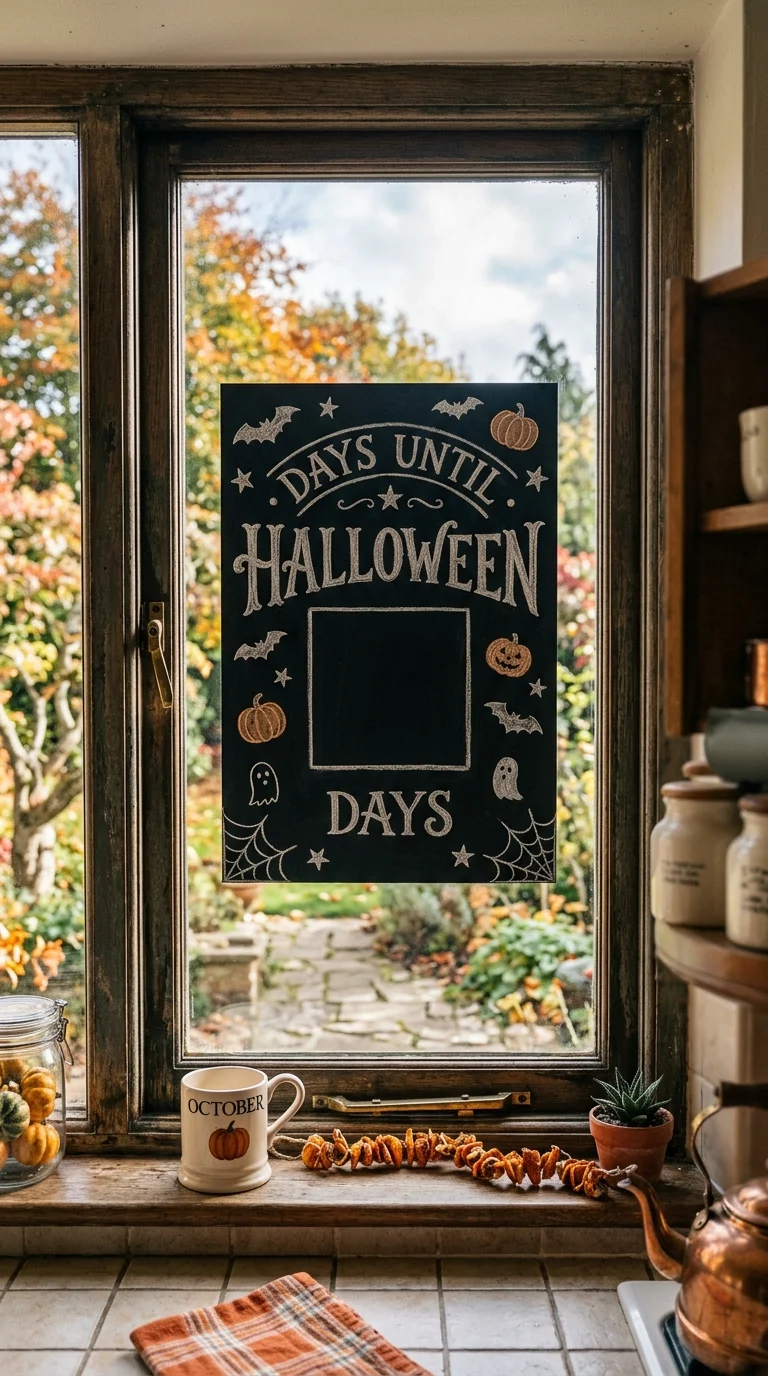
Using chalk style window paint, this idea turns your window into a countdown board with the words Days Until Halloween and a spot to write or update the number each day. Paint a simple chalkboard style rectangle or banner shape with a thin border, then add the text inside using a font that looks like handwriting. Leave a blank space or a small circle where you can update the number using a wipeable paint marker as the days go by. Add a couple of small icons, a bat, a pumpkin, around the border for decoration. This design works great on a kitchen window where family members will see it daily, and it gives kids something fun to check every morning. It also makes for a nice change from the usual static designs since it updates throughout the month.
22. Glow in Dark Eyes
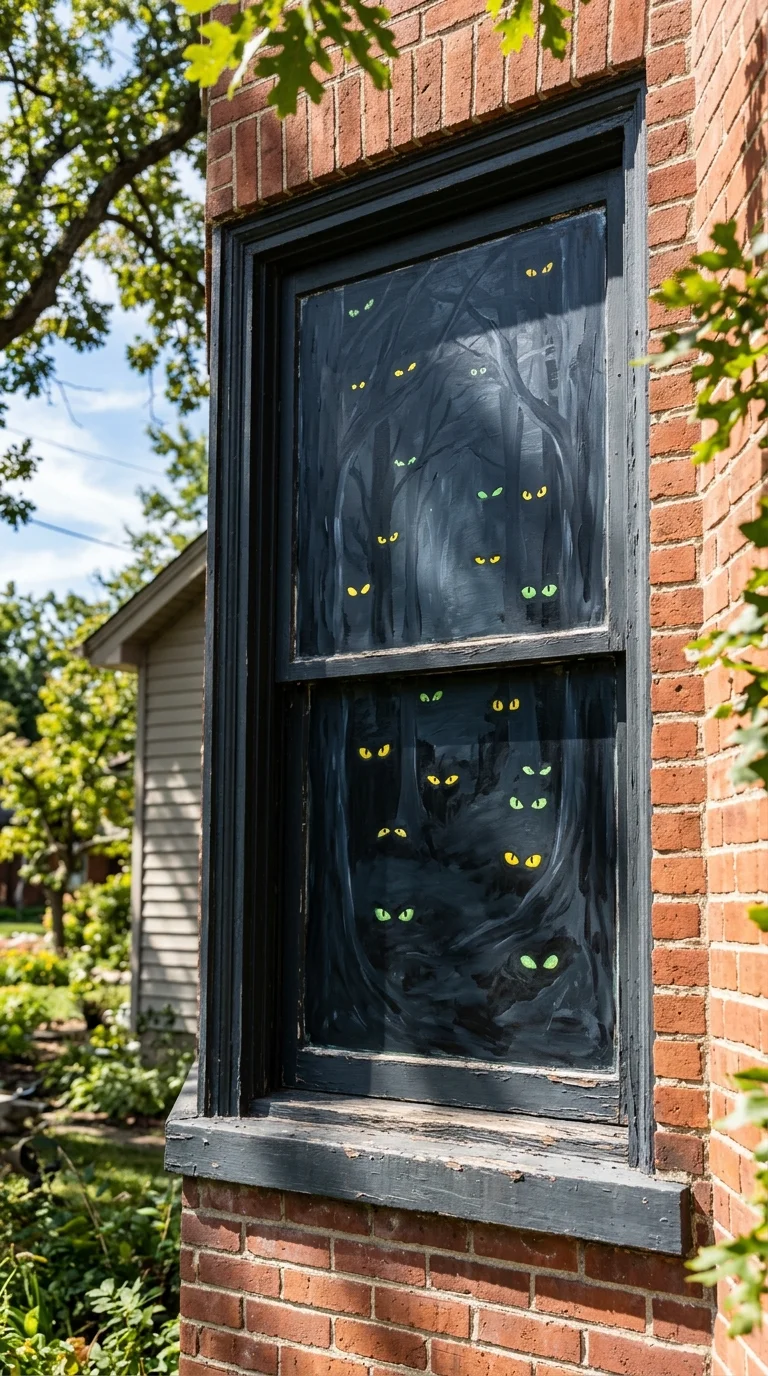
A row or scattering of glowing eyes peeking out from painted darkness is a simple but effective design, especially for a window that gets very little natural light. Paint the window glass mostly black or very dark gray to look like nighttime or a dark forest, then add several pairs of small oval or slit shaped eyes in bright yellow, green, or white scattered at different heights across the glass. Use glow in the dark paint for the eyes if you can find it, so the design lights up after dark for a spookier effect. This idea works especially well on a side window or a window that faces a less visible part of your yard, since the mysterious darkness fits naturally there. Keep the eyes uneven in placement and size so it looks like several creatures are hiding rather than one repeated pattern.