22 Clever Camper Kitchen Remodel Ideas for Small Spaces
Camper kitchens are a whole different puzzle compared to a regular home kitchen. You are usually working with a few feet of counter space, one small sink, and cabinets that were built for looks rather than actual storage. I learned this the hard way on my first long road trip when I could barely fit a cutting board next to the stove. Since then I have picked up a lot of small fixes that make a camper kitchen genuinely usable, not just cute for photos. These 22 ideas cover storage, counter space, lighting, and a few smart swaps that make cooking on the road feel less like a workout and more like an actual kitchen. Whether you are remodeling a vintage trailer or updating a newer rig, these changes are simple enough to do over a weekend and make a real difference every time you cook.
1. Fold-Out Counter
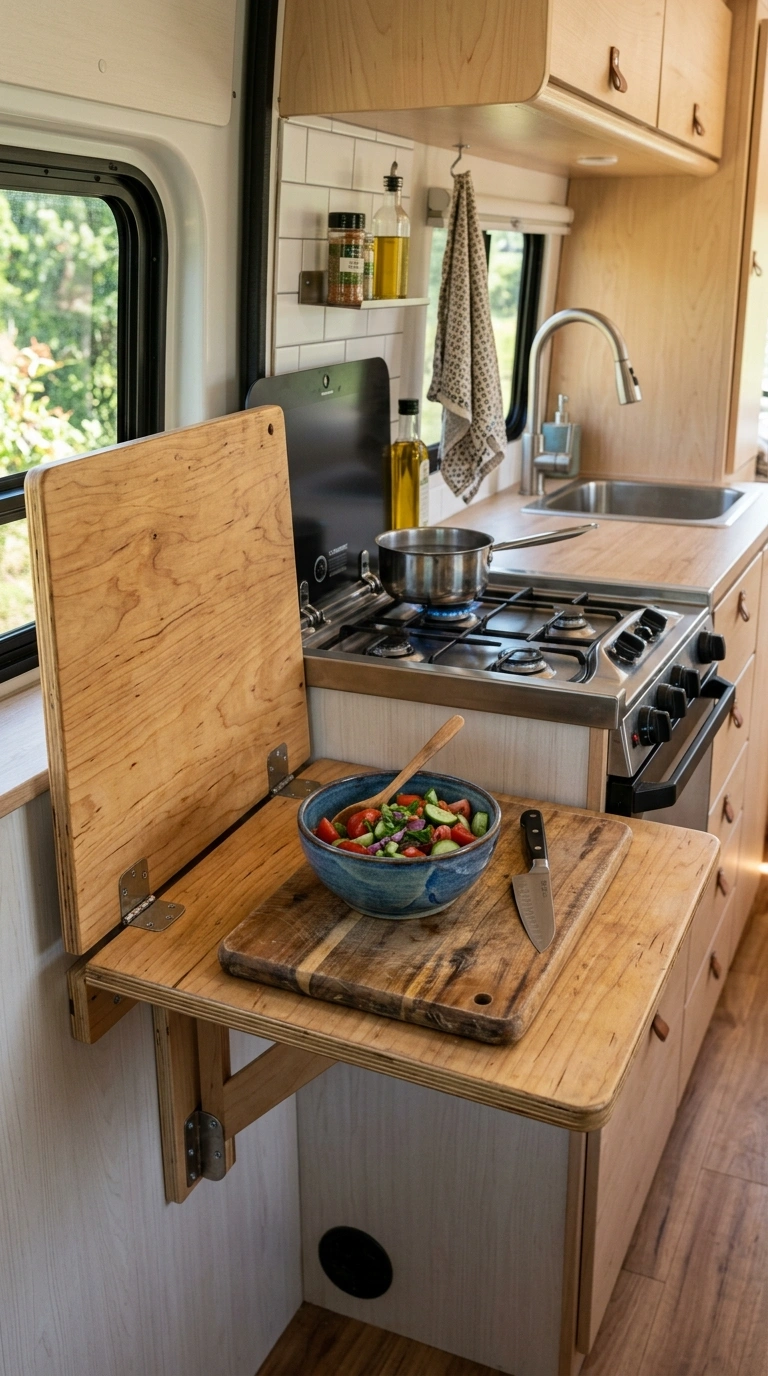
Adding a fold-out counter extension is one of the most useful upgrades you can make in a tight camper kitchen. A hinged piece of butcher block or laminate board attaches to the wall or cabinet edge and folds down flat when not in use, giving you a few extra inches of prep space exactly when you need it. When you are done cooking, it folds back up and stays out of the way.
Choose a sturdy hinge and a support bracket rated for at least 20 pounds so it can hold cutting boards, bowls, or a small appliance without wobbling. Match the wood tone or laminate color to your existing cabinets so it blends in when folded up against the wall. This works especially well next to the stove or sink, where prep space is usually the tightest. It is one of those small changes that makes cooking a full meal in a camper feel far less cramped.
2. Magnetic Spice Wall
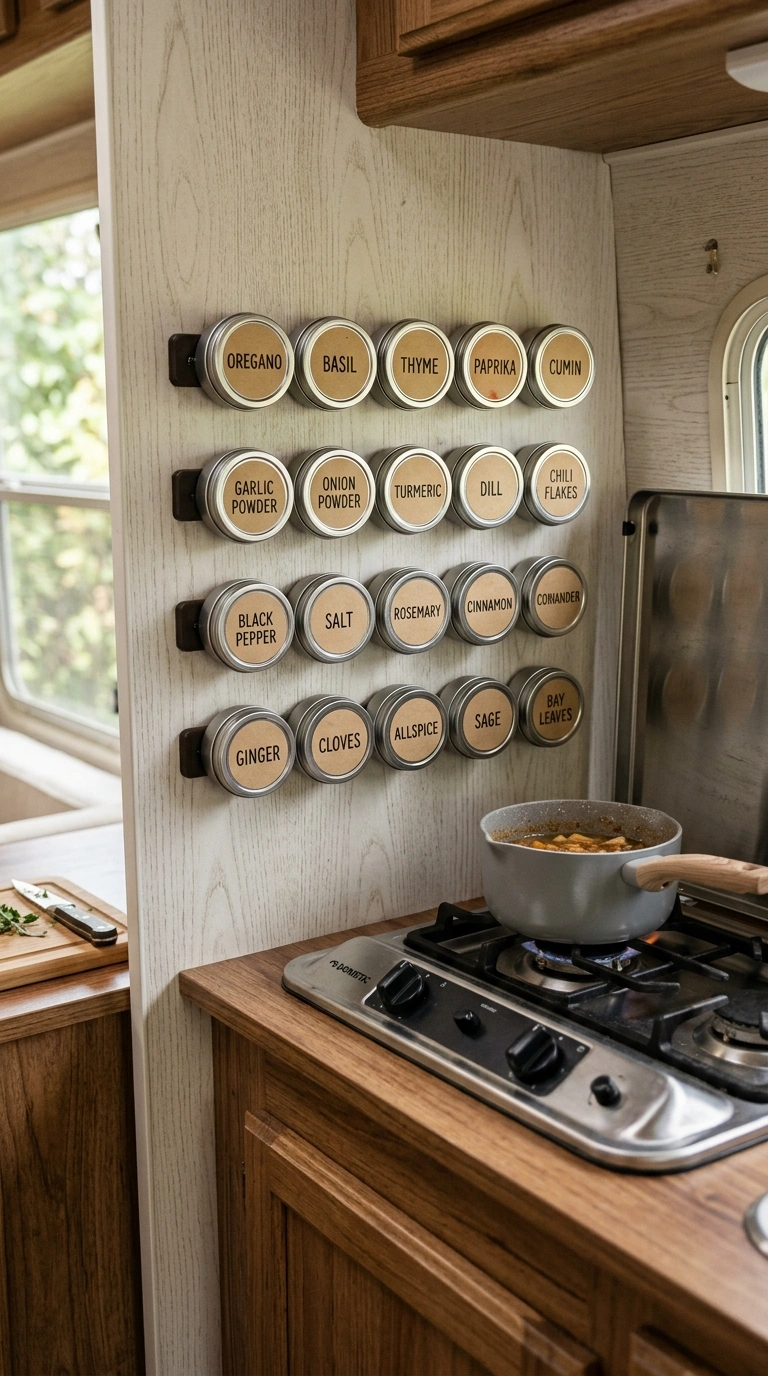
A magnetic spice rack mounted on the wall next to your stove keeps seasonings within reach without using up any cabinet or counter space. Small metal tins with magnetic backs stick directly to a steel plate or magnetic sheet installed on the wall, and you can label each one so everything is easy to find while cooking.
This setup works great in campers since nothing falls or slides around while driving, unlike jars on a shelf. Choose tins in a uniform size for a clean look, and arrange them by how often you use each spice, keeping the most common ones at eye level. A magnetic strip can also hold small metal kitchen tools like graters or bottle openers nearby. This idea frees up an entire drawer or shelf that would otherwise be dedicated to spices, which is valuable real estate in a small camper kitchen.
3. Slide-Out Pantry
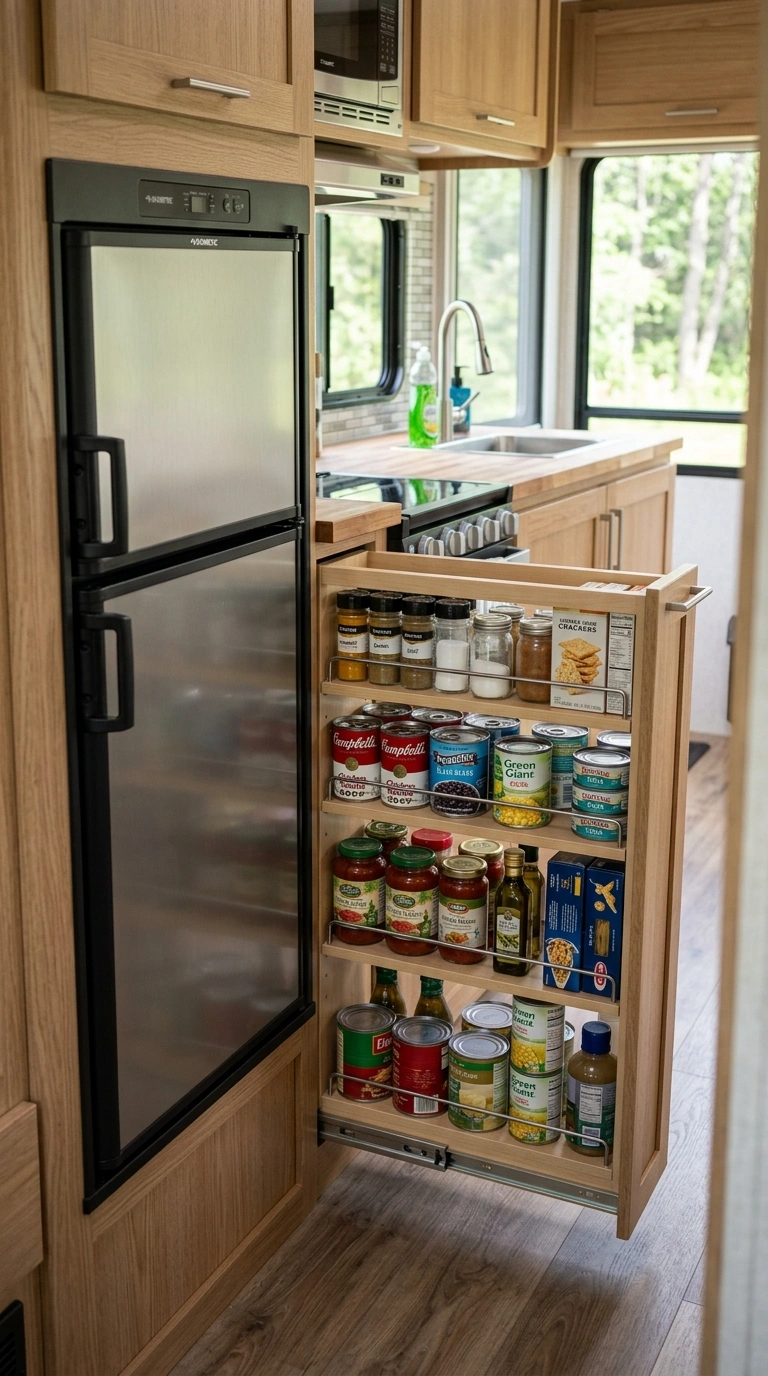
Installing a slide-out pantry drawer in an empty gap next to your stove or fridge turns wasted space into real storage. These narrow pull-out units, usually just 6 to 10 inches wide, hold canned goods, snacks, and small jars while keeping everything visible and easy to grab without digging through a deep cabinet.
Look for a pre-built slide-out pantry kit designed for RVs, since these are made to handle the vibration and movement of travel without shelves sliding open. Add small lips or edges to each shelf to keep items from sliding out while driving. This is a great option for the narrow gap that often exists between the fridge and a cabinet or wall in older campers. It turns a completely unused sliver of space into a functional part of your kitchen storage.
4. Under-Sink Bins
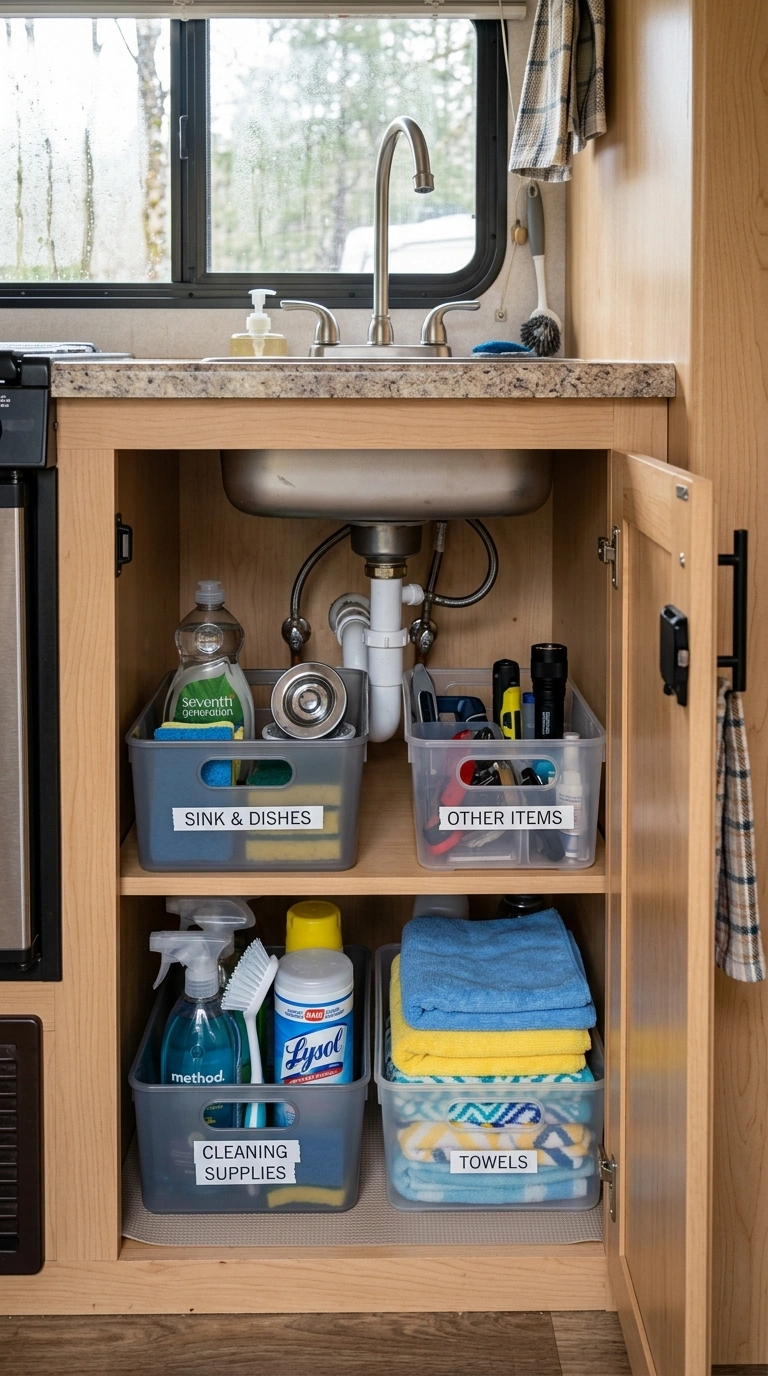
Stackable bins under the sink keep cleaning supplies, trash bags, and extra dish towels organized instead of piled in a loose heap. Measure the space carefully first, since camper plumbing pipes often take up more room than in a home kitchen, then choose bins sized to fit around them rather than one giant bin that will not slide in properly.
Label each bin so you know exactly what is inside without pulling everything out to check. Use a small tension rod across the front of the cabinet to hold a spray bottle upright, keeping it from tipping over while driving. This setup makes a normally chaotic cabinet feel organized and predictable, which matters a lot in a small kitchen where you cannot afford to waste time searching for things. It also protects items from shifting and spilling on bumpy roads.
5. Hanging Pot Rack
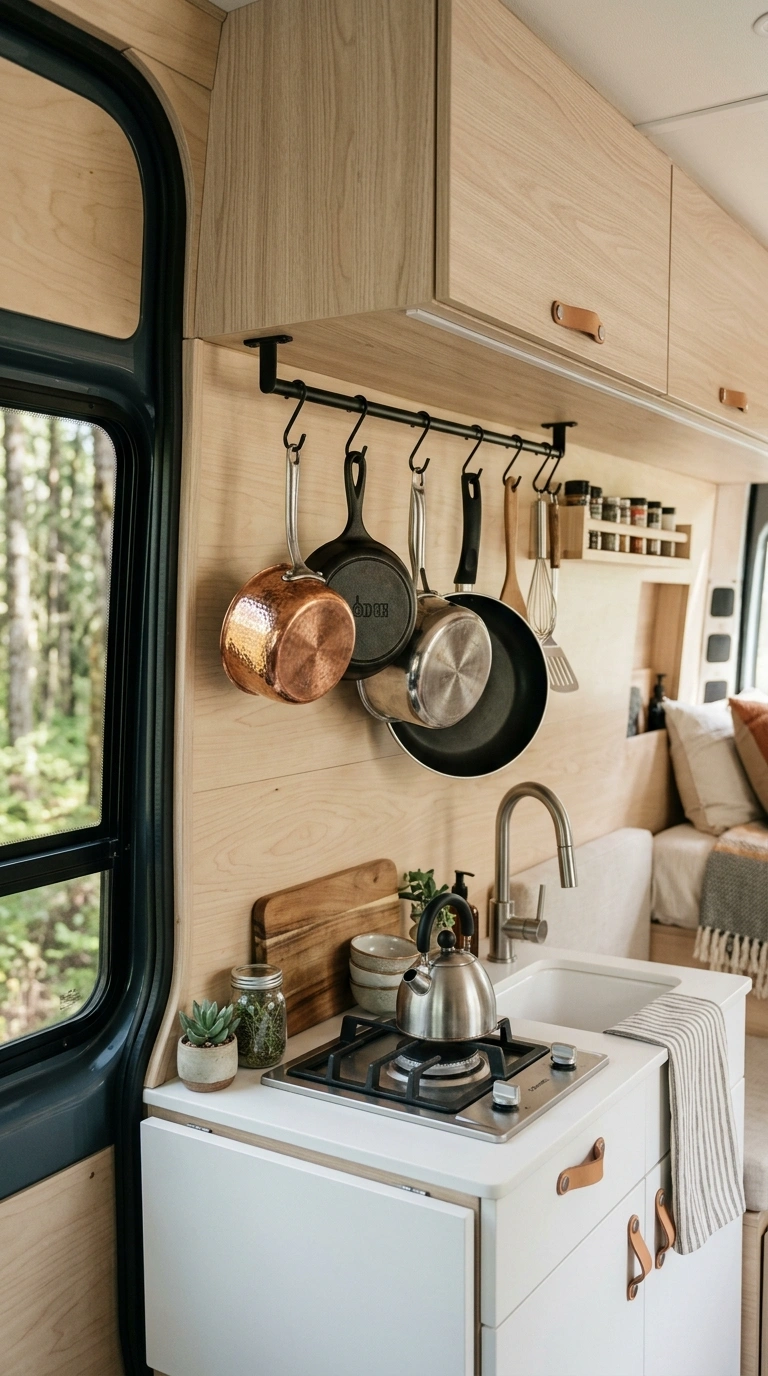
A small hanging rack mounted under a cabinet or on the wall near the stove gives you a spot to hang pots, pans, and lids without stacking them inside a cabinet. This is especially helpful in campers where cabinet space is limited and pots often take up more room than anything else in the kitchen.
Choose a compact rack with S-hooks rated to hold cast iron or heavier cookware if that is what you travel with. Mount it securely into a wall stud or cabinet frame rather than just drywall, since movement during travel puts extra strain on hardware. Hanging pans also means you can see and reach them instantly instead of pulling out three pans to get to the one on the bottom. This small change frees up a surprising amount of lower cabinet space for other items.
6. Butcher Block Cover
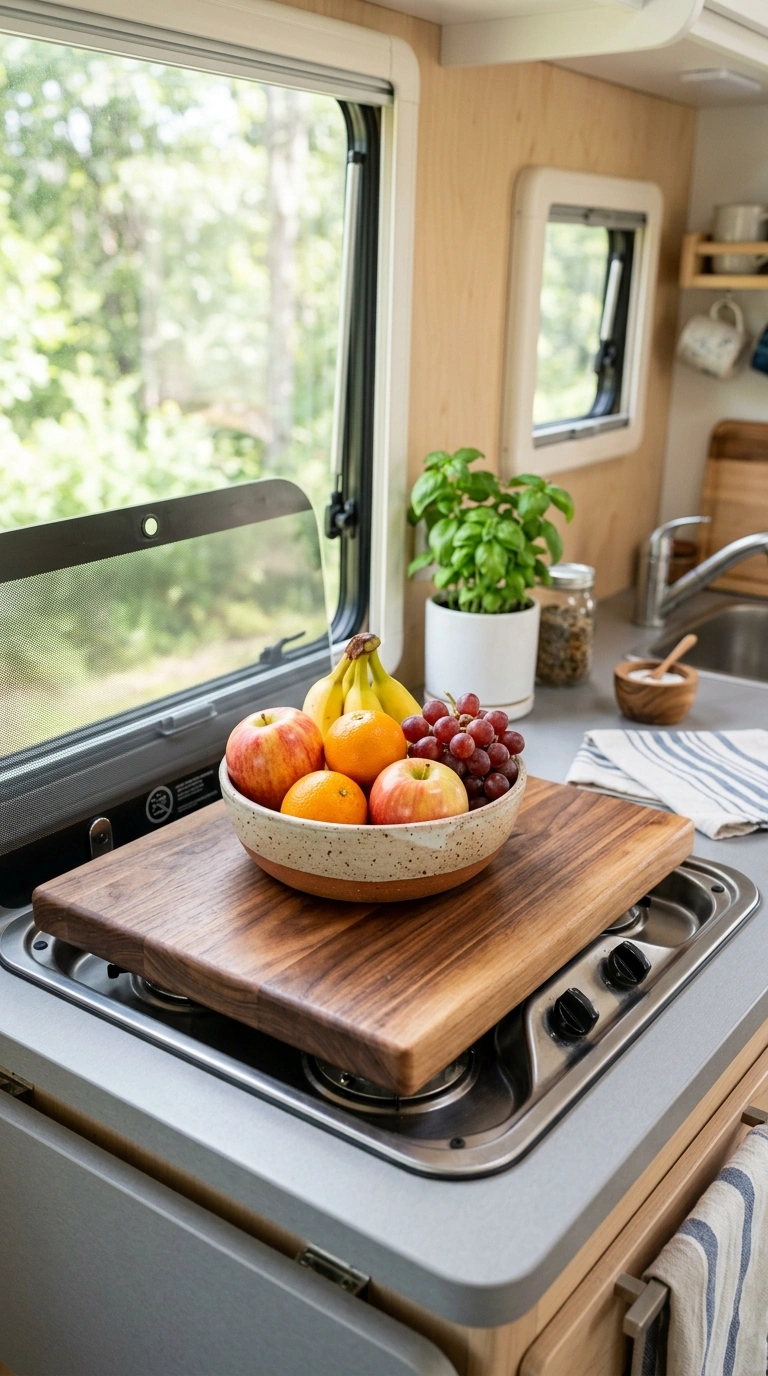
A custom-cut butcher block cover that fits over your stovetop or sink instantly adds counter space when you are not actively cooking or washing dishes. This simple piece of wood, cut to the exact size of your stove or sink opening, sits on top and gives you a flat surface for prep work, serving, or just extra room to set things down.
Choose a sealed, food-safe wood so it holds up to spills and can be wiped down easily. Add small rubber feet or a non-slip pad undernepath so it does not shift around while the camper is moving or parked on uneven ground. This is one of the simplest and most affordable upgrades on this list, often costing less than fifty dollars, yet it makes a real difference in how much workspace you have during meal prep. Many campers use this trick over both the stove and the sink for maximum flexibility.
7. Tension Rod Divider
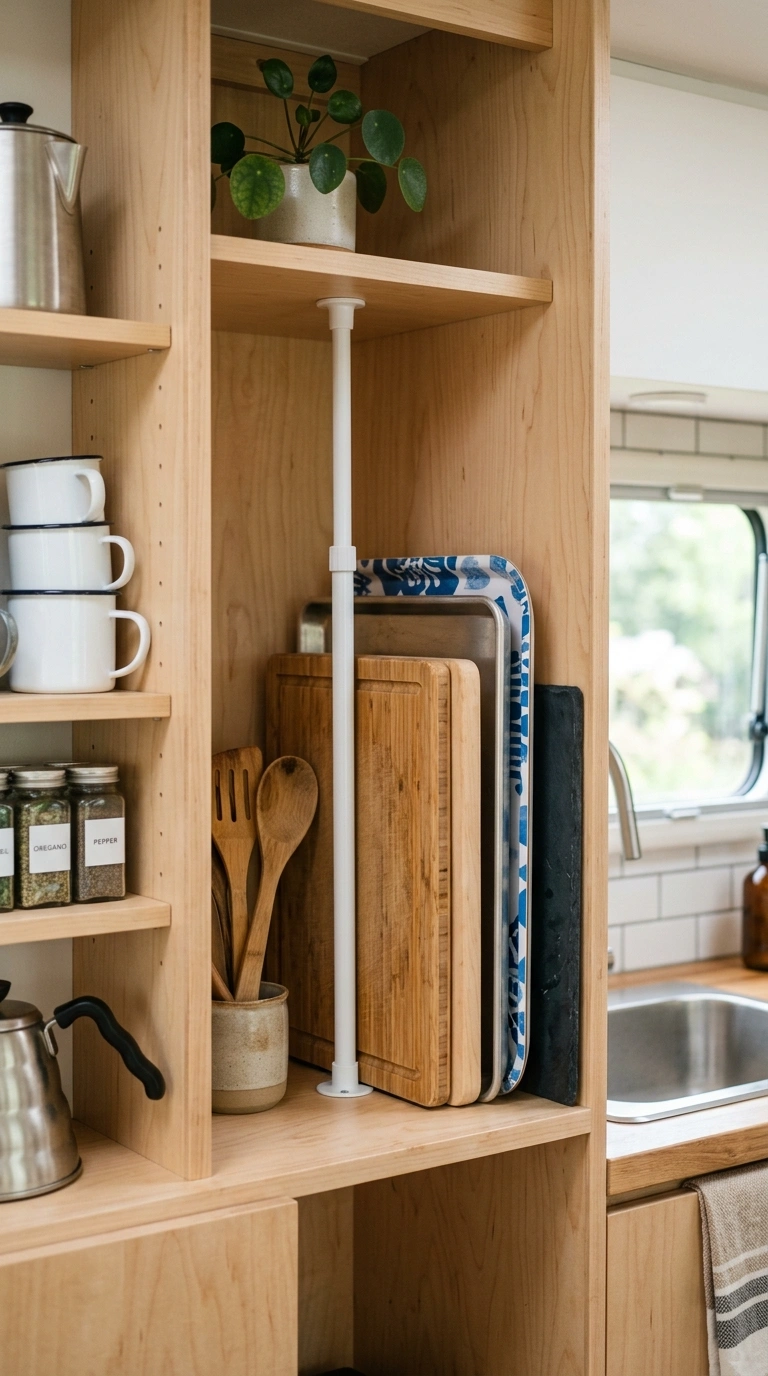
A simple tension rod installed inside a cabinet creates an instant divider for storing baking sheets, cutting boards, and trays upright instead of stacked flat. Flat stacking wastes space and makes it hard to grab the item on the bottom without pulling everything else out first, which is a common frustration in camper kitchens.
Install the rod vertically inside a tall, narrow cabinet, then slide flat items in on their sides so they stand upright like books on a shelf. This works well for cutting boards, sheet pans, cooling racks, and even trays used for serving. Choose a rod with a rubber grip end so it does not slip loose while driving over bumps. This is one of the cheapest organizing tricks available and takes less than five minutes to install, yet it solves one of the most common camper kitchen headaches.
8. Utensil Rail
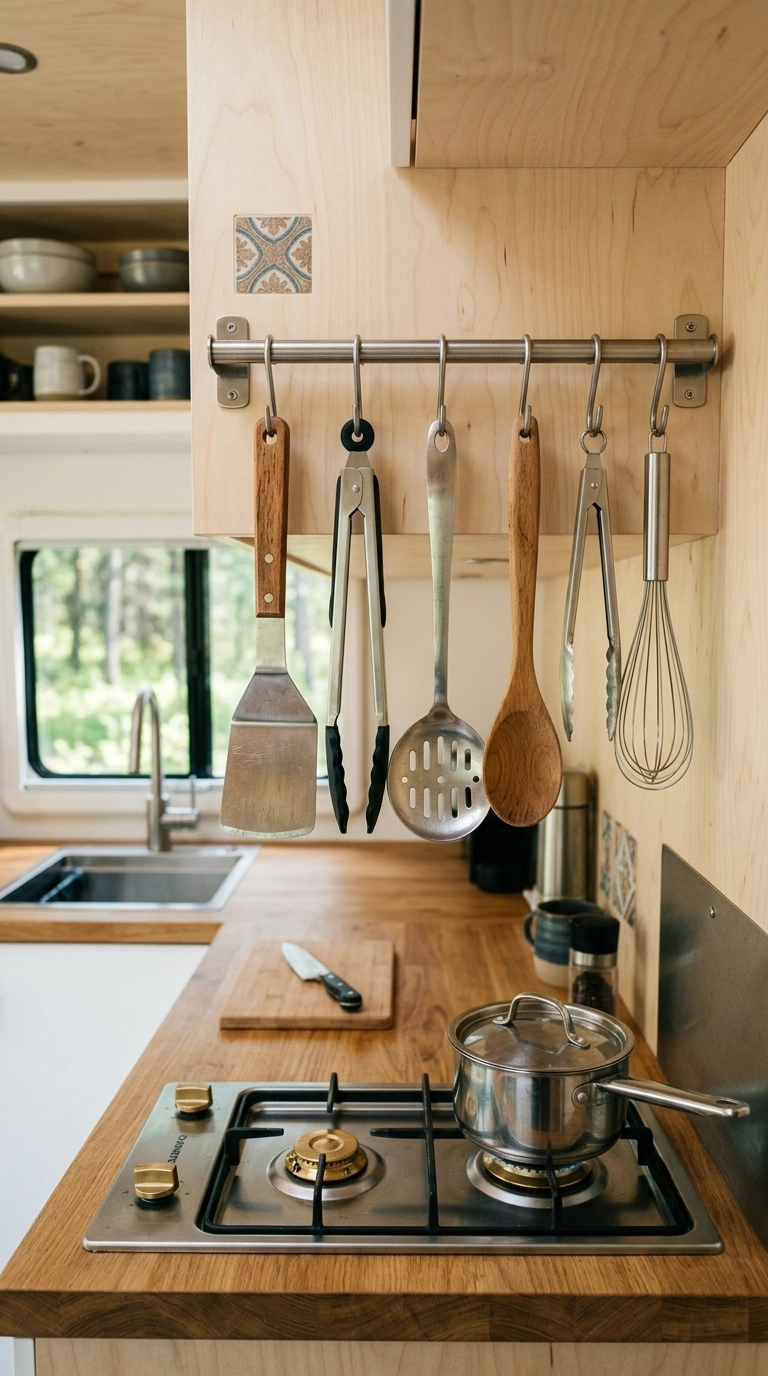
A wall-mounted utensil rail with S-hooks keeps your most-used cooking tools within arm’s reach of the stove, saving drawer space for less frequently used items. Mount a simple metal or wood rail on the wall or backsplash near your cooking area, then hang spatulas, tongs, and serving spoons directly from hooks.
This setup keeps utensils visible and easy to grab mid-cooking, which matters in a small kitchen where turning around to open a drawer can be awkward in tight quarters. Choose hooks that close slightly at the top so utensils do not bounce off while the camper is in motion. Group utensils by type or by how often you use them, keeping your everyday spoon and spatula closest to the stove. This idea also adds a nice visual layer to an otherwise plain kitchen wall.
9. Bin Fridge System
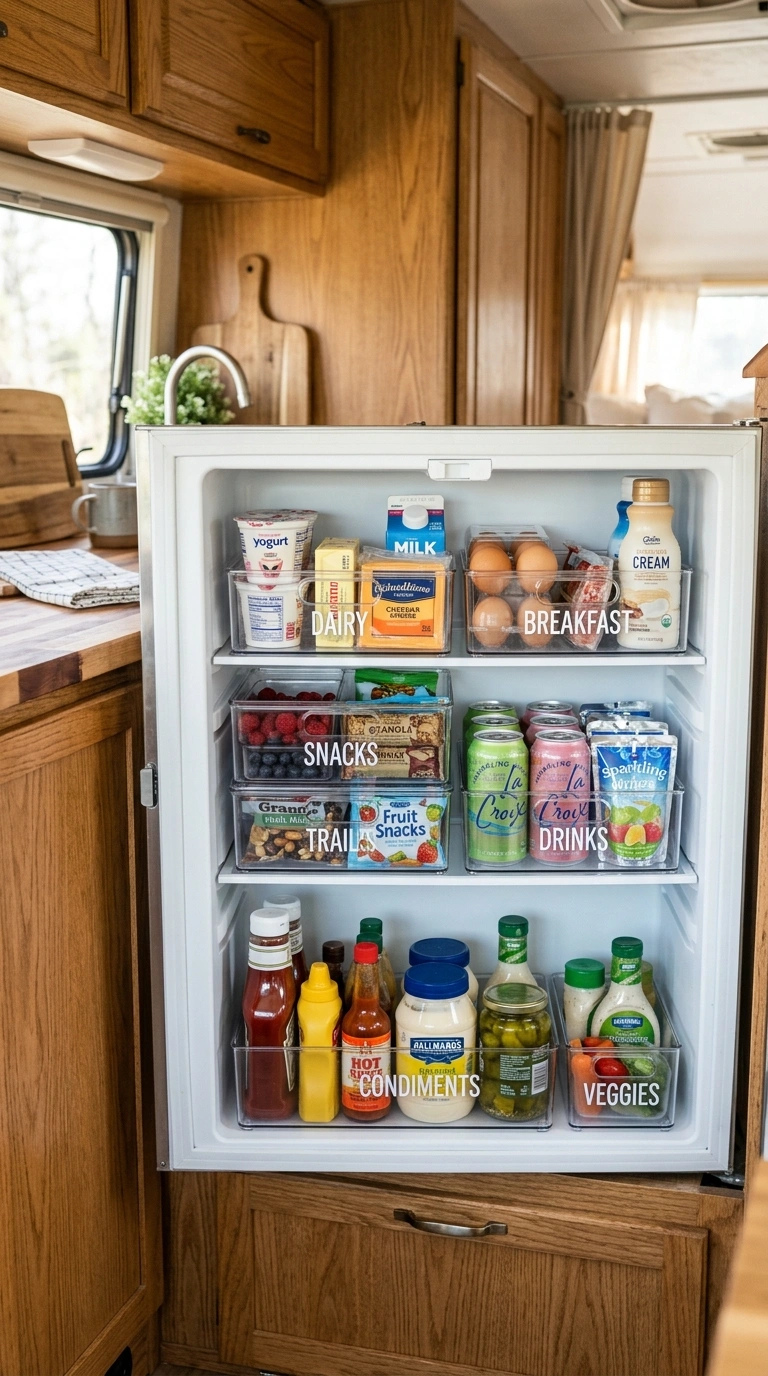
Using stackable, uniform bins inside your camper fridge keeps food organized and prevents items from sliding around and spilling during travel. Group similar items together, such as one bin for condiments, one for dairy, and one for snacks, so you can pull out exactly what you need without rearranging the whole fridge.
Choose bins with open tops or low sides so they are easy to slide in and out of a small fridge opening. Clear bins work best since you can see contents at a glance without opening each one. This system also protects glass jars and bottles from clinking together and breaking on rough roads. Camper fridges are often oddly shaped with awkward shelf heights, and a bin system helps make the most of every inch, keeping things from tipping when the rig is moving.
10. Lazy Susan Corner
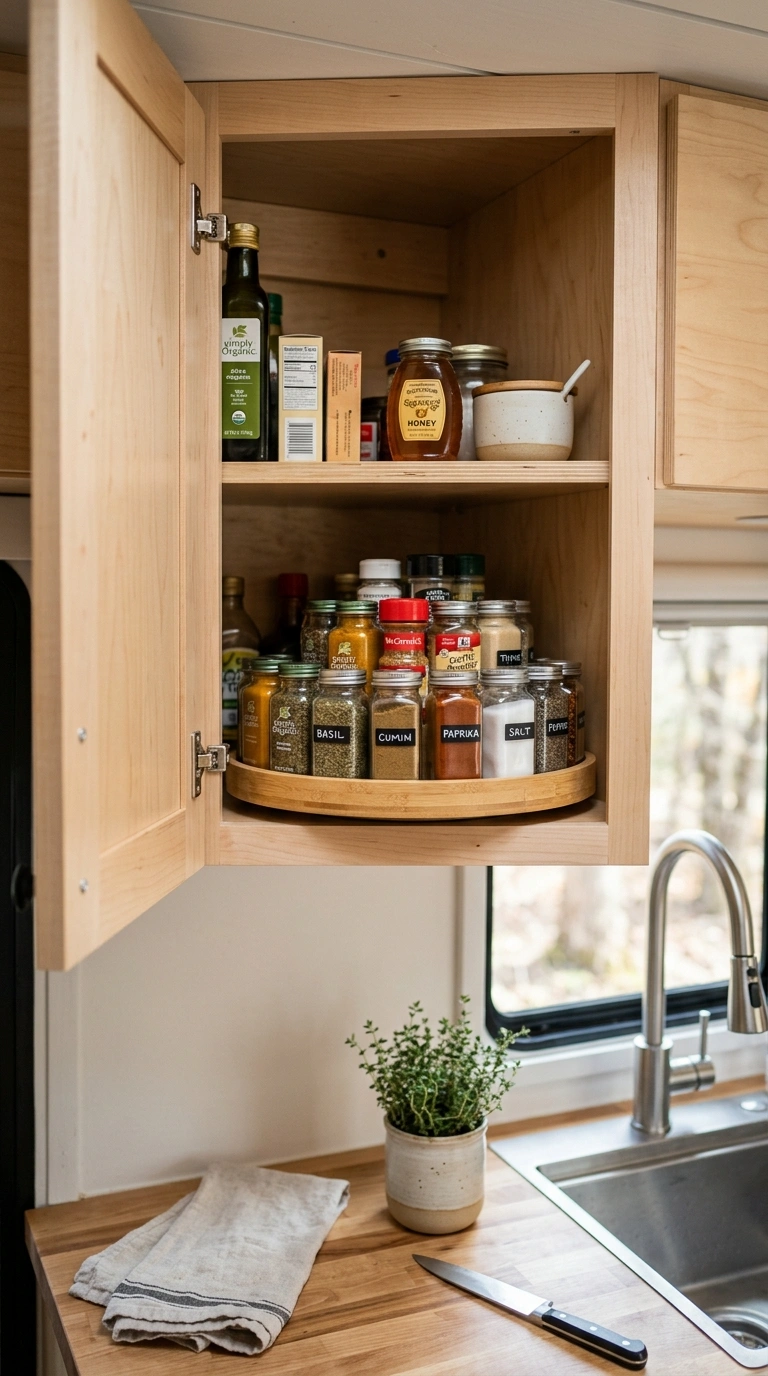
A small lazy Susan installed in a corner cabinet makes use of space that is normally hard to reach in a camper kitchen. Corner cabinets often become a black hole where things get pushed to the back and forgotten, but a rotating tray solves that by bringing everything within reach with a simple spin.
Choose a lazy Susan sized specifically for RV cabinets, usually smaller than standard home versions, and look for one with a raised lip around the edge to keep items from sliding off during travel. Use it for spices, canned goods, or small jars that would otherwise get lost in the back corner. This is a simple add-on that usually installs in under ten minutes, yet it can dramatically improve how usable an awkward cabinet space becomes. It is one of the best upgrades for older campers with deep corner cabinets.
11. Fold-Down Table
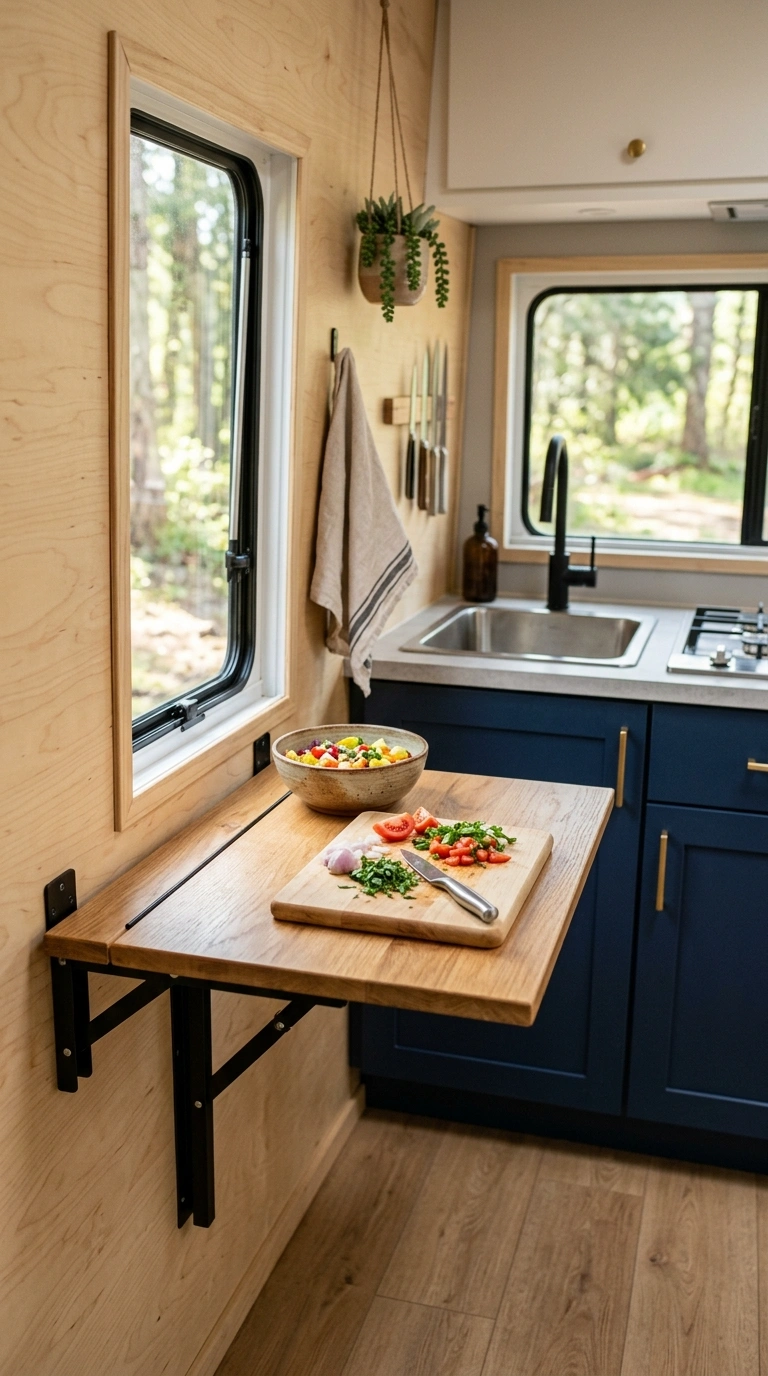
A fold-down table attached to the kitchen wall gives you extra prep or dining space without permanently taking up floor room. When folded flat against the wall, it stays completely out of the way, then drops down when you need a spot to chop vegetables, roll dough, or eat a quick meal.
Choose a table with a locking hinge so it stays firmly in place while in use and does not wobble while cooking. Pick a size that fits your available wall space, usually somewhere between 18 and 24 inches wide works well in most campers. Add a simple wood or laminate finish that matches your existing cabinetry so it blends in seamlessly when folded away. This is one of the most versatile additions you can make to a small camper kitchen, serving as both workspace and a casual dining spot.
12. Peel Stick Backsplash
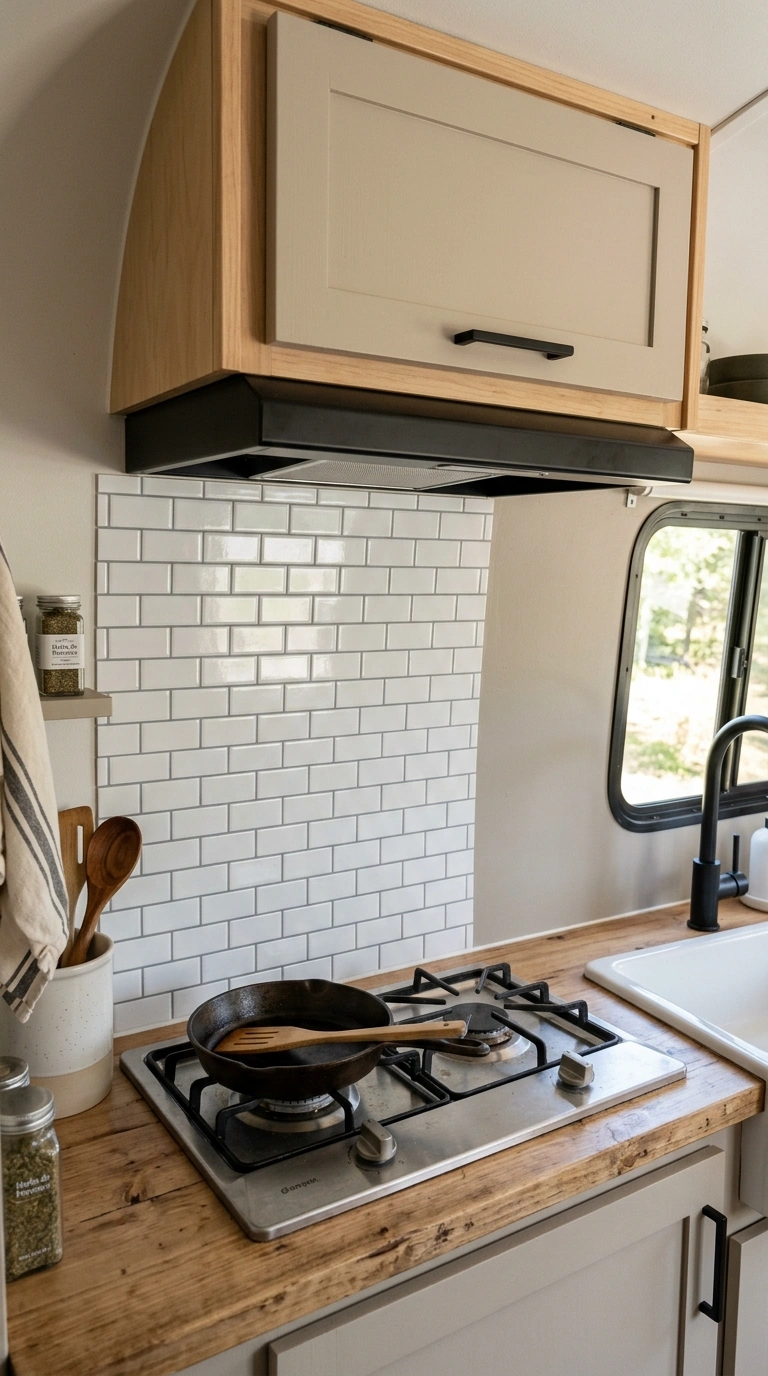
Adding a peel and stick tile backsplash behind your stove or sink is one of the easiest ways to update the look of a camper kitchen without any major renovation work. These tiles come in sheets that stick directly to a clean, flat surface and can be trimmed with scissors or a utility knife to fit around outlets and edges.
Choose a heat-resistant option if you are installing it directly behind the stove, since regular vinyl backsplash tiles can warp near heat sources. Clean and prime the wall surface first so the tiles adhere properly and do not peel off during travel. This update usually takes an afternoon and instantly makes an older camper kitchen feel refreshed and current. It also protects the wall behind the stove from grease splatters, making cleanup much easier during regular cooking.
13. Under-Cabinet Lighting
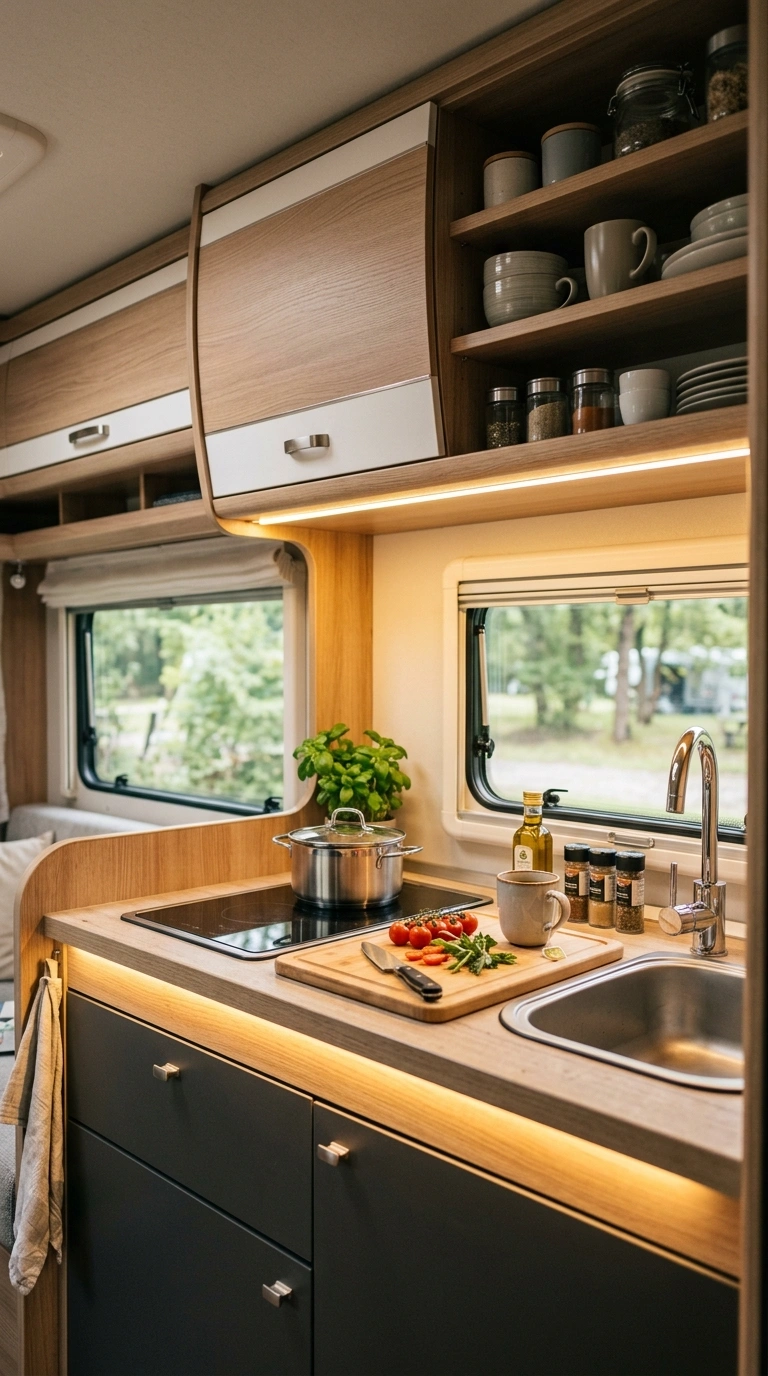
Adding a battery-powered or hardwired LED light strip under your upper cabinets brightens up counter space that is often shadowed by cabinets above. Camper kitchens tend to rely on one overhead light, which leaves the counter dim exactly where you need to see clearly while chopping or prepping food.
Battery-operated strips with a stick-on adhesive back are the easiest option since they require no wiring and can be removed if you upgrade the camper later. Choose a warm white light rather than a cool blue tone, since warm lighting feels more like a home kitchen. Position the strip toward the front edge of the cabinet so light falls directly onto the counter rather than the backsplash. This small update makes cooking in the evening far easier and adds a nice glow to the whole kitchen area.
14. Curtain Cabinet Doors
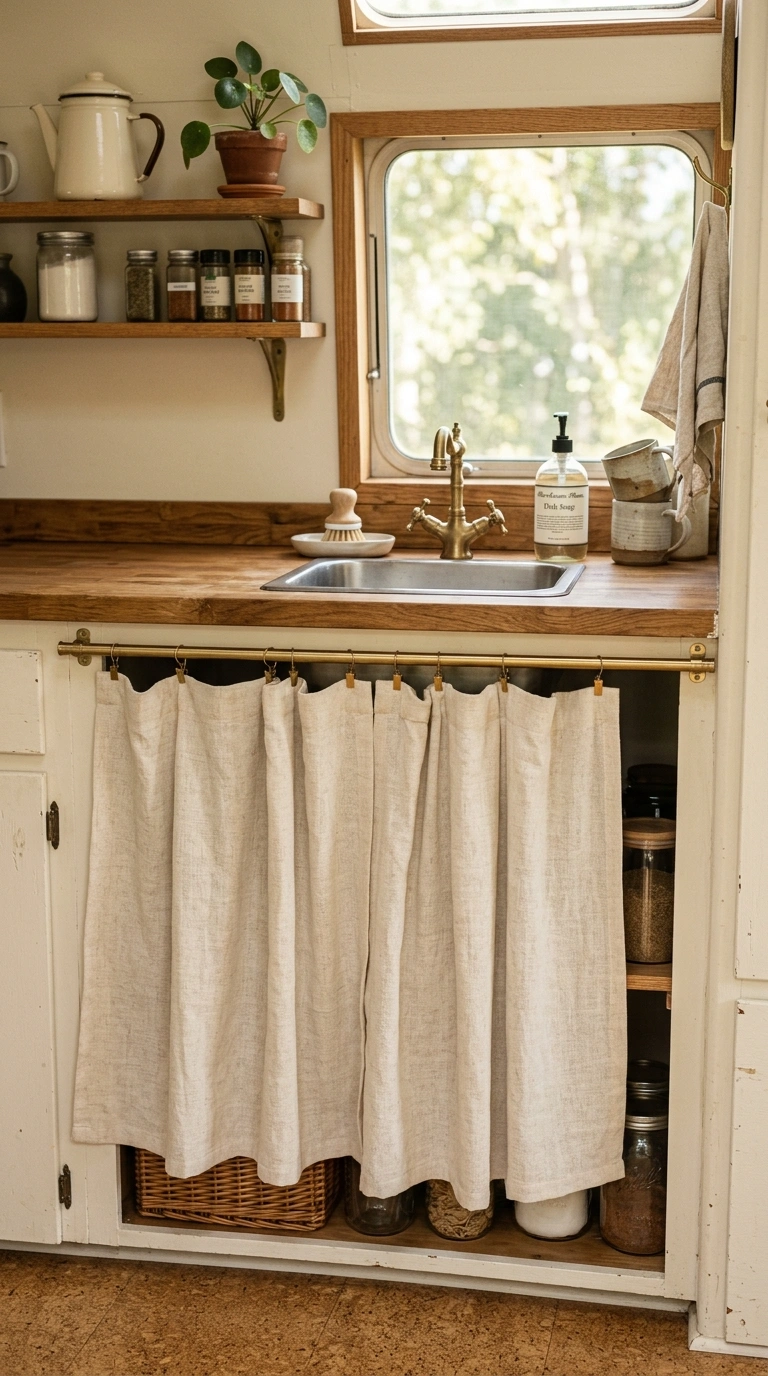
Swapping solid cabinet doors for a simple curtain on a tension rod is a lightweight way to update the look of an outdated camper kitchen while also making it easier to grab items quickly. This works especially well on lower cabinets where a swinging door can be awkward in a tight kitchen aisle.
Choose a fabric that matches your kitchen’s color scheme, and pick something washable since kitchen curtains catch splatters and spills over time. Install a simple tension rod inside the cabinet frame rather than drilling new hardware, which keeps the change fully reversible if you decide to switch back later. This idea is popular in vintage camper renovations for good reason, since it adds charm while solving the real problem of cabinet doors that swing into a narrow walkway. It is also one of the cheapest updates on this entire list.
15. Rolling Cart Storage
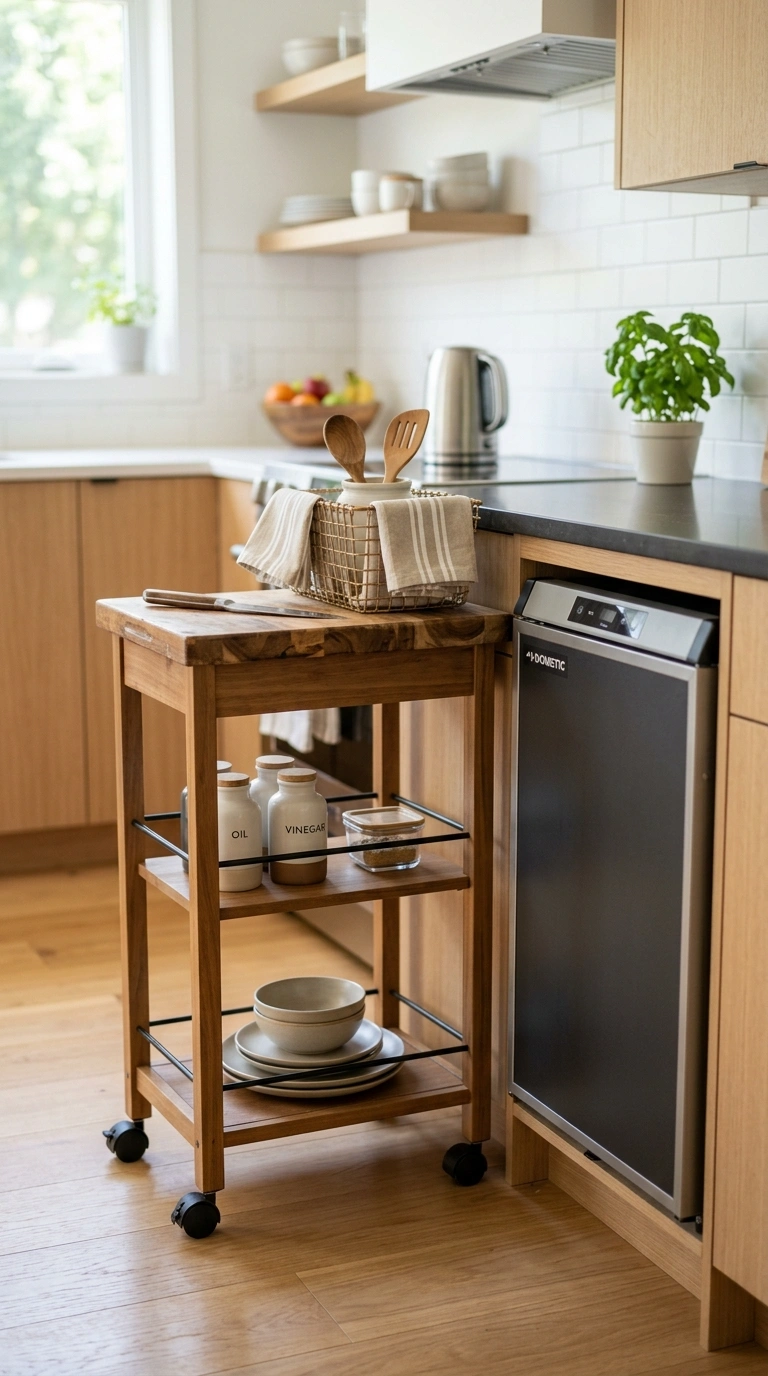
A small rolling cart tucked next to the fridge or stove adds extra storage and counter space that can be moved out of the way when not needed. Choose a slim cart, generally no wider than 12 to 15 inches, so it fits into narrow gaps common in camper kitchens without blocking walkways.
Use the cart for items you reach for often, like cutting boards, dish towels, or a small basket of snacks, keeping the top surface clear enough to use as extra counter space during cooking. Look for a cart with locking wheels so it stays put while the camper is parked and can be secured or removed before driving. This is a flexible option for campers that need extra storage in different spots depending on the trip, since the cart can move wherever it is needed most that day.
16. Vertical Cutting Boards
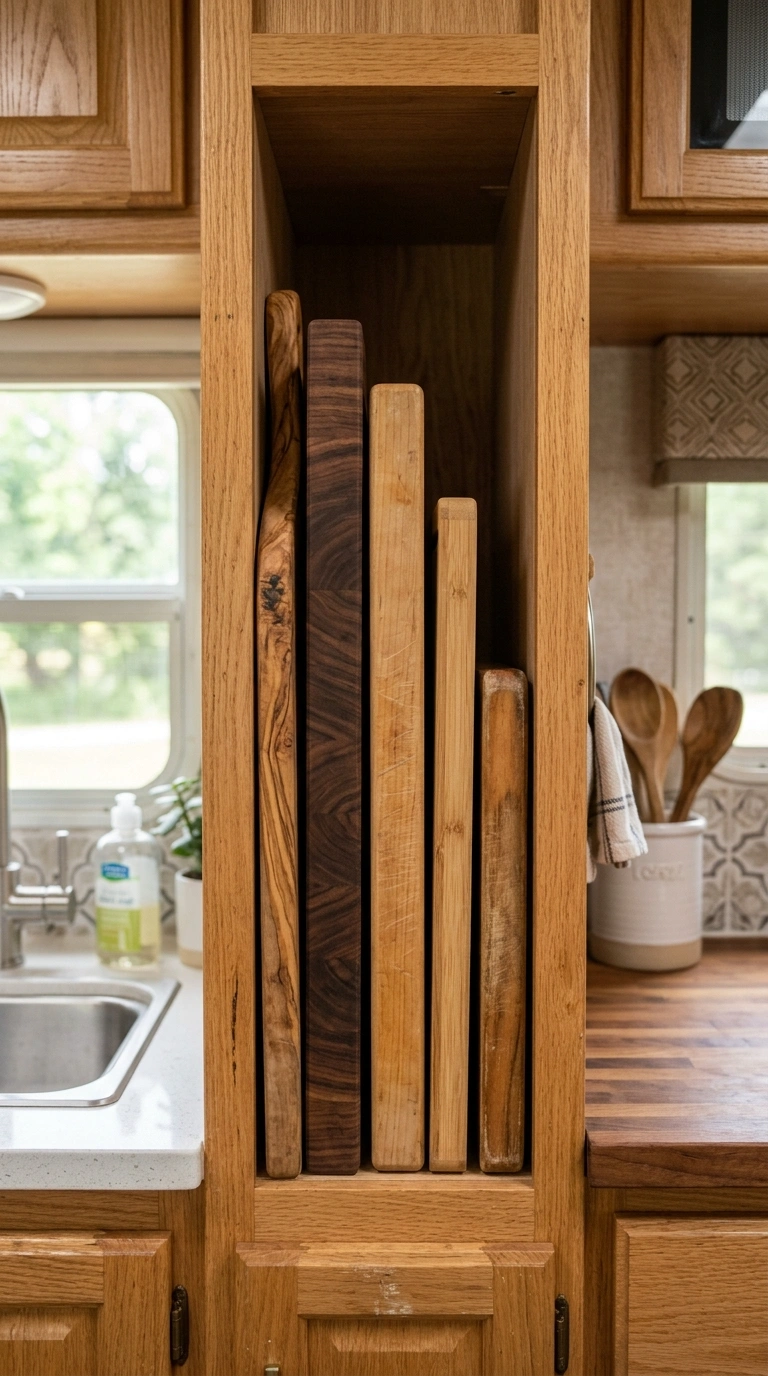
Storing cutting boards vertically in a slim slot next to the counter or inside a cabinet saves significant space compared to stacking them flat. A simple wood or wire divider, similar to a file organizer, holds two or three boards standing upright side by side, making it easy to grab the one you need without lifting the others.
This works especially well in the narrow gap often found between a fridge and cabinet, or built into a lower cabinet using a tension rod as a divider. Choose boards of different sizes for different tasks, keeping a small one for quick snacks and a larger one for meal prep. Storing them vertically also allows them to air dry more effectively after washing, which helps prevent the mildew smell that can happen in humid camper conditions. It is a small change that keeps prep tools organized and easy to access.
17. Overhead Cabinet Baskets
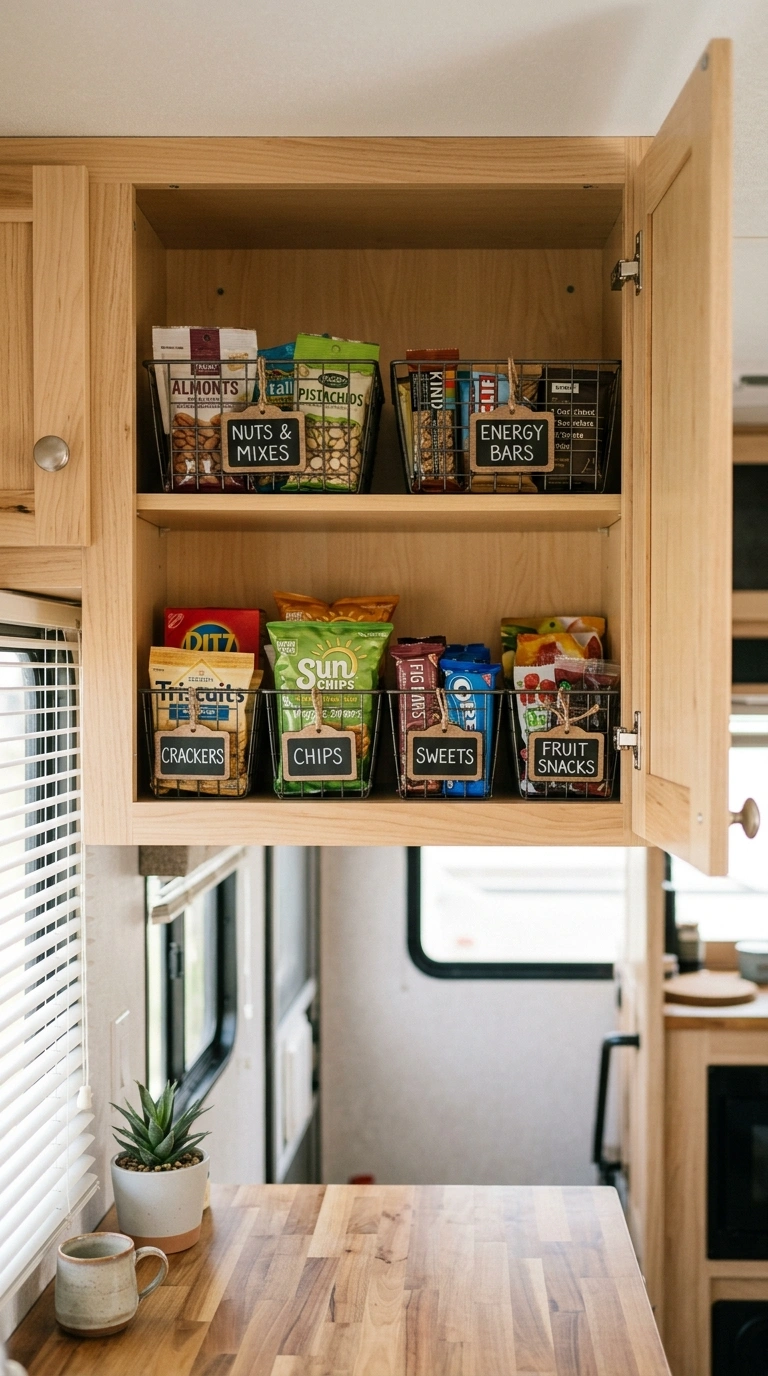
Adding wire baskets inside upper cabinets creates defined sections for smaller items that would otherwise slide around and become disorganized. Baskets work well for grouping things like snack packets, tea bags, or small condiment bottles, keeping the cabinet from turning into a jumbled mess after a few days of travel.
Choose baskets with solid bottoms rather than an open wire weave, since small items can slip through gaps otherwise. Label each basket so everyone in the camper knows where things belong, which helps keep the system working over a long trip. Secure taller baskets with a small strip of removable adhesive or a bungee cord across the cabinet opening for extra stability while driving. This simple system makes overhead cabinets, which are often awkward to organize, feel far more usable and tidy.
18. Compact Dish Rack
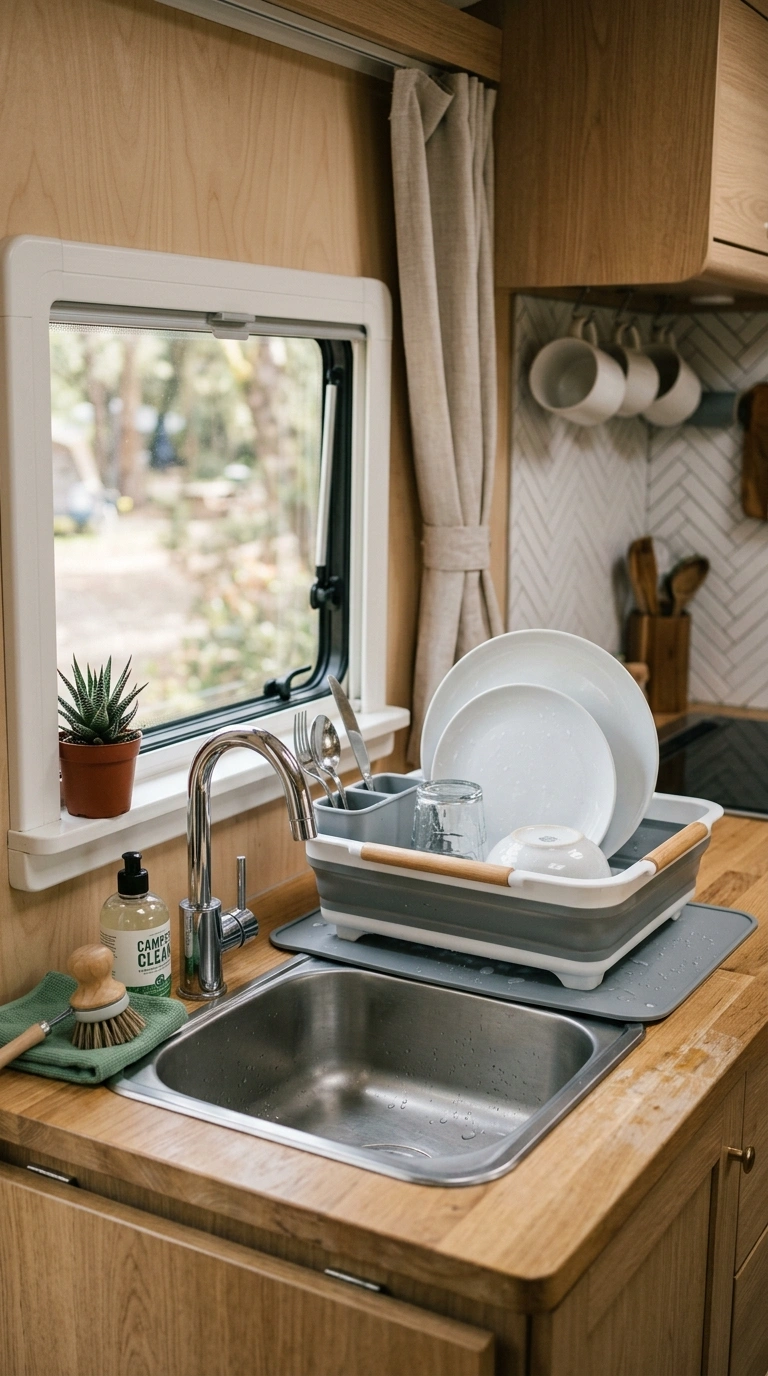
A collapsible or slim dish rack designed specifically for small kitchens gives you a spot to air dry dishes without permanently taking up counter space. Look for a rack that folds flat or rolls up when not in use, since a standard home dish rack is usually too bulky for a camper counter.
Choose one with a built-in tray to catch drips, since camper counters do not always slope toward a drain the way home counters do. Position the rack near the sink but angled so water drains directly into the basin rather than pooling on the counter. After dishes are dry, fold the rack away to free up prep space for the next meal. This small, inexpensive tool solves one of the most common daily annoyances in a camper kitchen, which is finding a spot for wet dishes.
19. Door Organizer
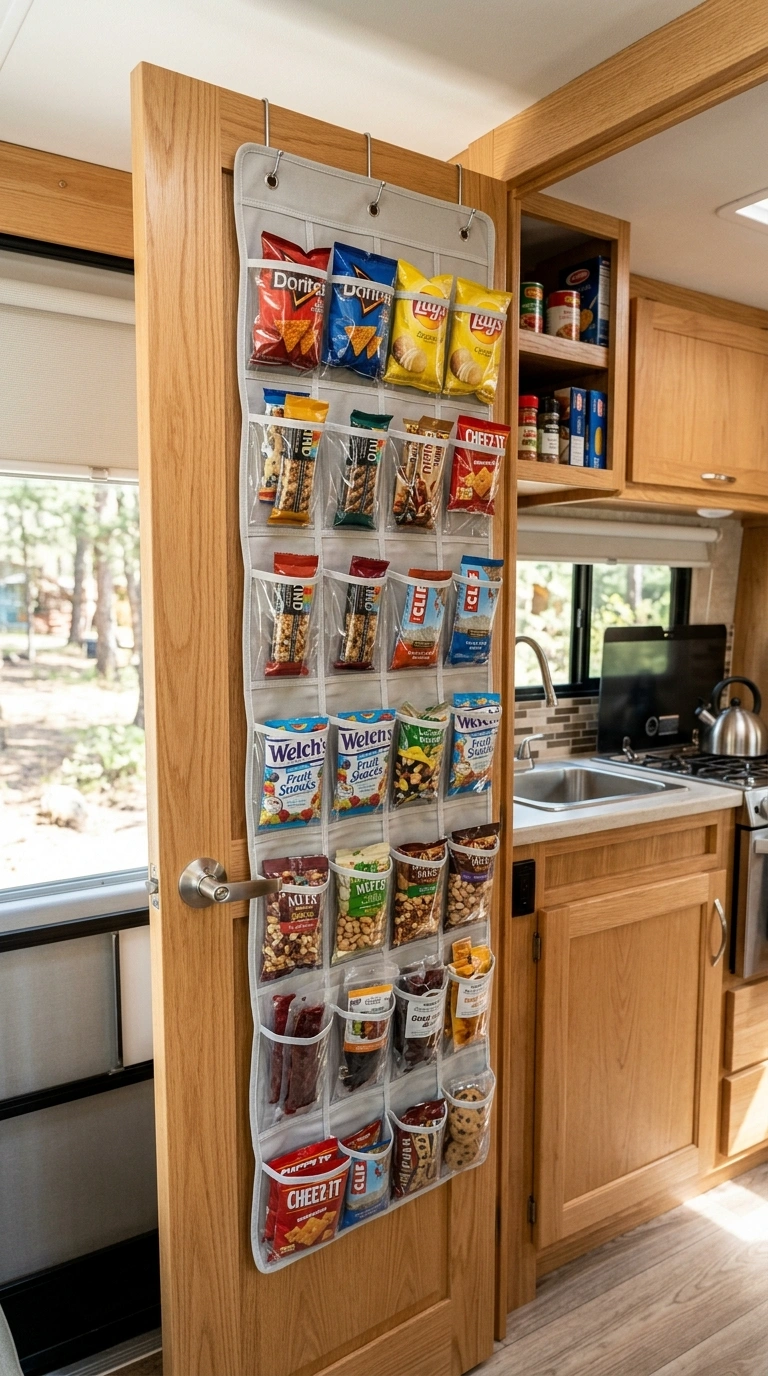
Attaching an over-the-door organizer to a pantry or cabinet door adds a whole new layer of storage using space that is usually wasted. These fabric or wire organizers hold small items like spice packets, snack bars, or cleaning supplies in individual pockets, keeping them visible and easy to grab.
Choose a lightweight organizer rather than a heavy metal one, since camper cabinet doors are not always built to support a lot of extra weight over time. Secure it with the included hooks or a few strips of hook and loop tape for extra stability while traveling. This is a great spot for items you use daily but do not want taking up shelf space, like reusable bags or paper towels. It is one of the simplest ways to add storage without any tools or major installation.
20. Mini Herb Garden
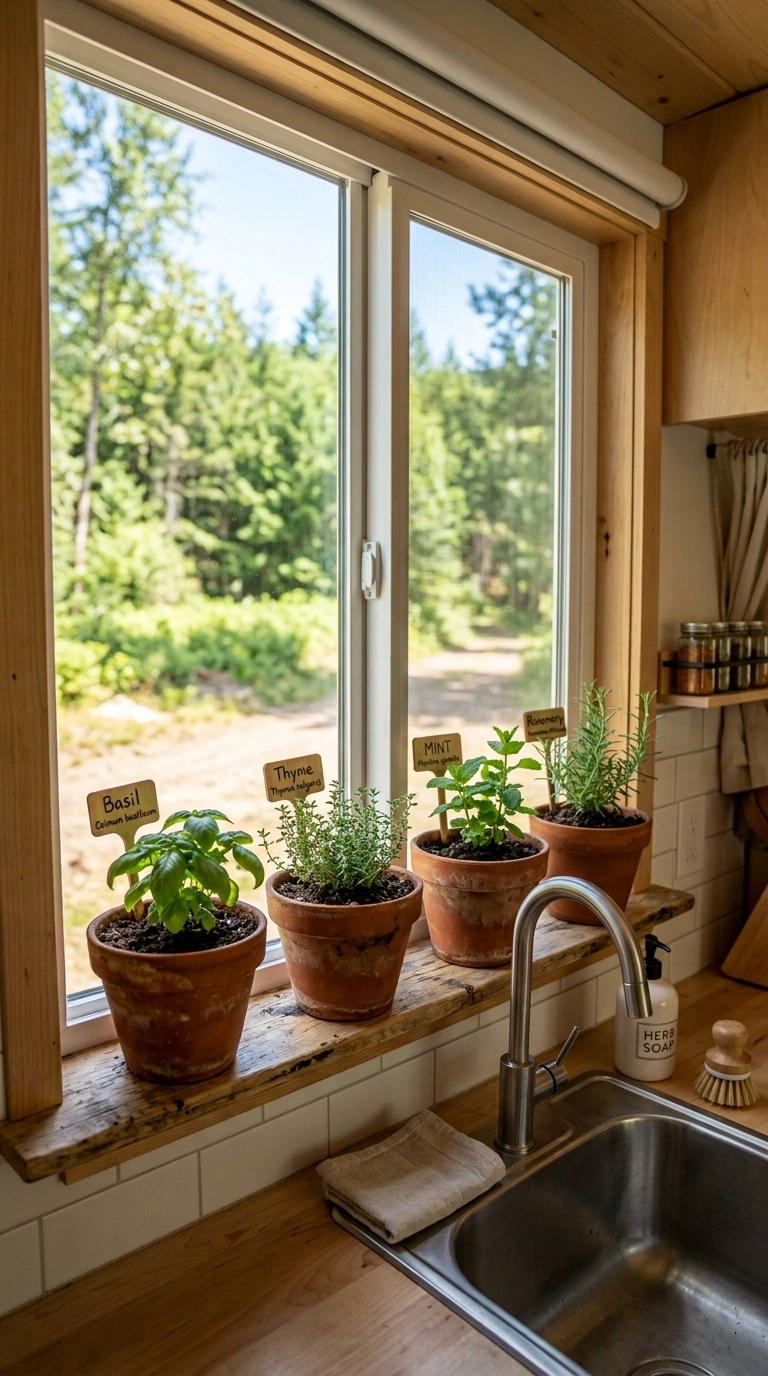
A small herb garden on the windowsill above the sink adds fresh flavor to meals and a nice bit of greenery to an otherwise all-hardware kitchen space. Use small terra cotta pots or a compact planter box sized to fit the depth of your camper windowsill, and choose herbs like basil, mint, or parsley that do well in containers.
Make sure the pots have proper drainage and sit on a small tray to catch excess water, since camper windowsills are not always sealed the way home counters are. Secure the pots with a thin strip of removable adhesive or a small rail along the windowsill edge so they do not tip over while driving. This little garden adds a nice pop of color and life to the kitchen while giving you fresh herbs for cooking, something that is hard to come by while traveling.
21. Fold-Out Step Stool
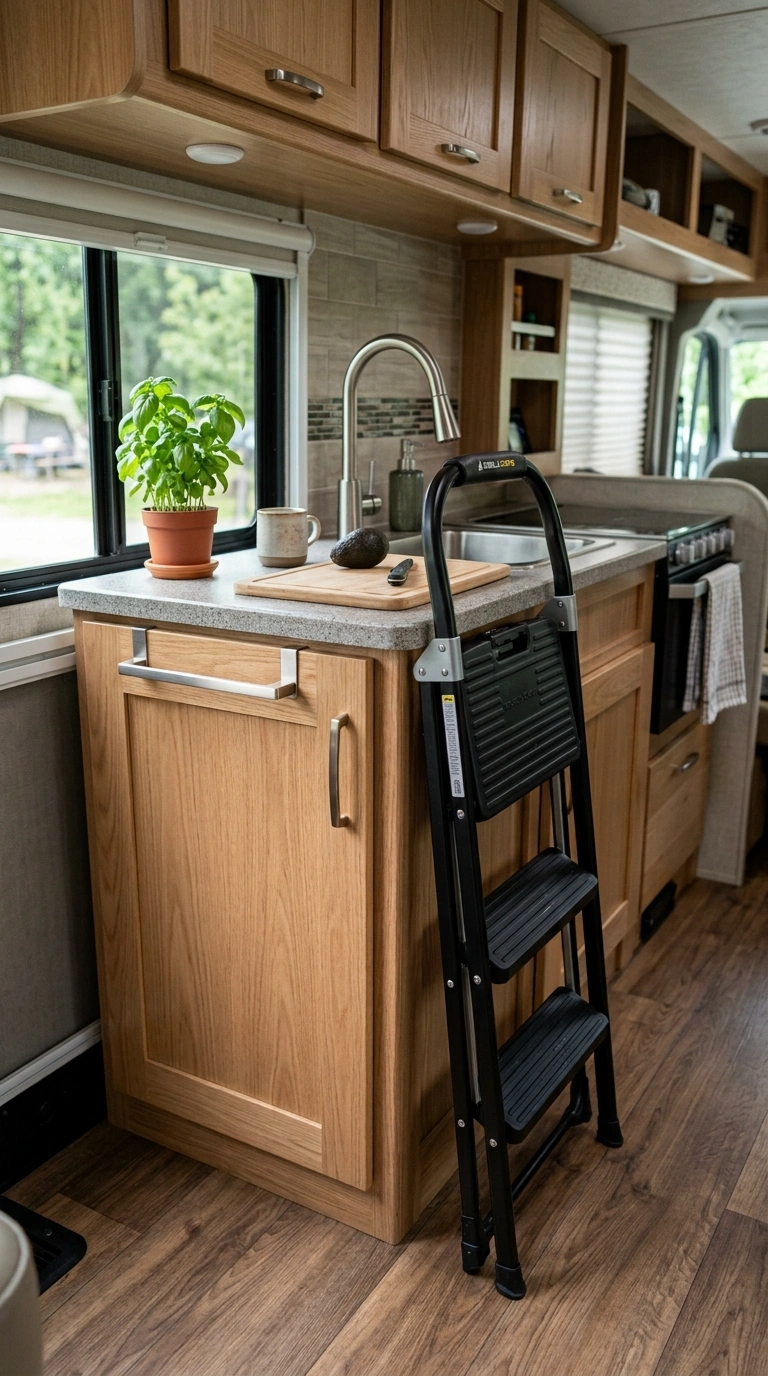
A slim, fold-out step stool stored flat against the side of a cabinet or pantry gives you extra reach for high shelves without taking up floor space when not in use. Camper kitchens often have tall upper cabinets that are hard to reach, especially for shorter cooks, and a stool solves this without needing to stand on a counter or chair.
Choose a stool that folds down to just a few inches thick so it can be tucked behind a pantry door or hung on a hook when not in use. Look for a non-slip rubber tread on the step surface, which matters more in a moving vehicle than in a regular home. This small tool makes upper cabinets actually usable rather than just for items you rarely need, since reaching them becomes far easier and safer.
22. Multi-Purpose Trays
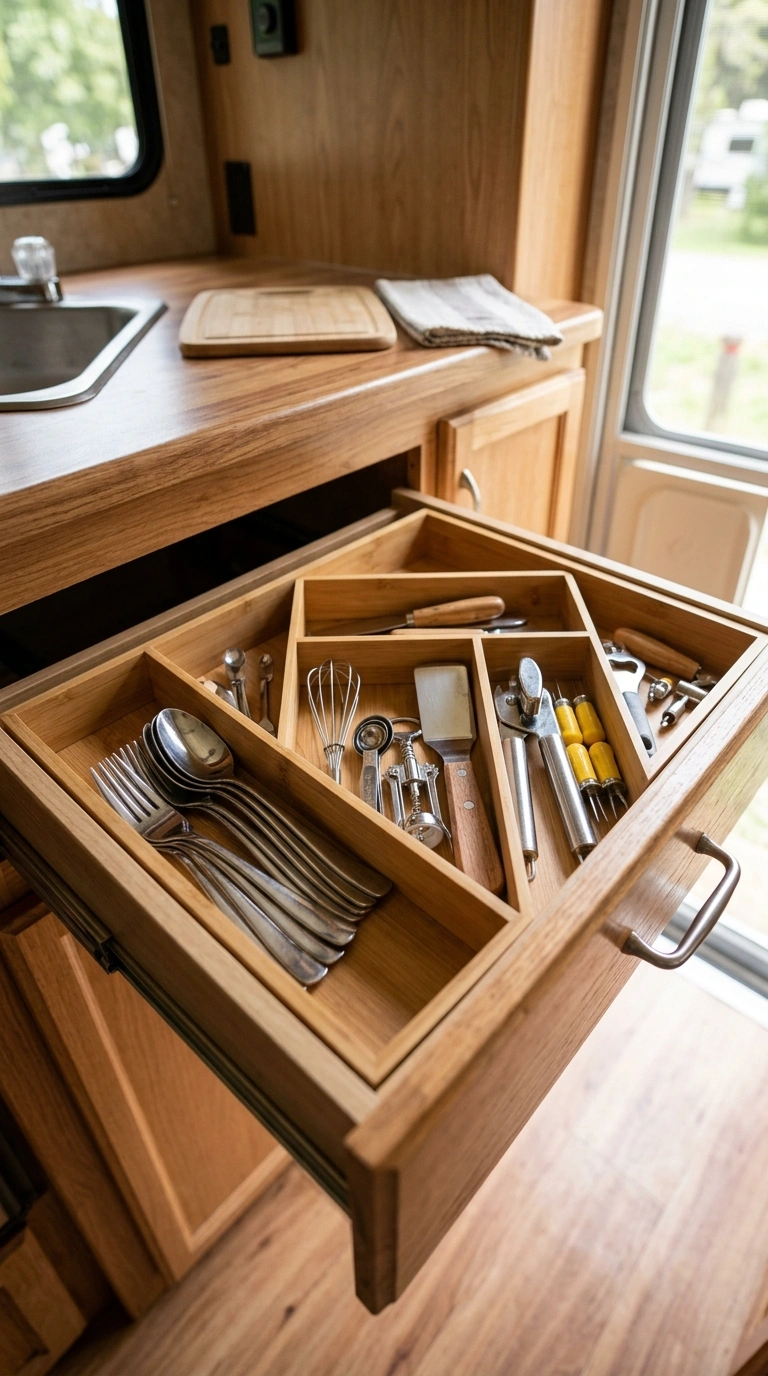
Adding removable trays inside deep drawers keeps utensils, small tools, and gadgets from sliding into one big pile every time the camper moves. Trays with multiple small sections work best, separating items like measuring spoons, can openers, and peelers so everything has a defined spot instead of shifting around together.
Choose trays sized specifically to fit RV drawer dimensions, since standard kitchen drawer organizers are often too wide or too deep for camper drawers. Look for trays with a slight lip or raised edge to help keep smaller items from bouncing out of their sections on bumpy roads. This system turns a chaotic junk drawer into an organized, functional space where you can find what you need in seconds rather than digging through a jumbled mess before every meal.
Final Thoughts
A small camper kitchen does not have to feel like a constant struggle to cook, store, and clean up. With a few smart storage add-ons, some fold-out extras, and a little reorganizing, even the tightest galley kitchen can start to feel like it actually works for you instead of against you. Try a handful of these ideas on your next remodel weekend and see how much smoother meal time on the road becomes.