21 Dollar Tree Halloween DIY Ideas for a Spooky Home
Halloween decorating does not have to drain your wallet. Some of the best spooky touches come from a quick trip down the Dollar Tree aisles and a little bit of glue. I have spent years pulling together Halloween looks for my own porch and kitchen table, and I can tell you the cheapest supplies often make the most charming projects. You just need a few basic tools, some paint, and an hour or two on a weekend afternoon. Below are 21 ideas that turn plain dollar store items into things that actually look put together. None of these require special skills. If you can glue, paint, or tie a ribbon, you can make every single one. Grab your supplies, clear off the kitchen table, and let’s get your home ready for trick or treaters and Halloween guests alike.
1. Spooky Mason Jar Lanterns
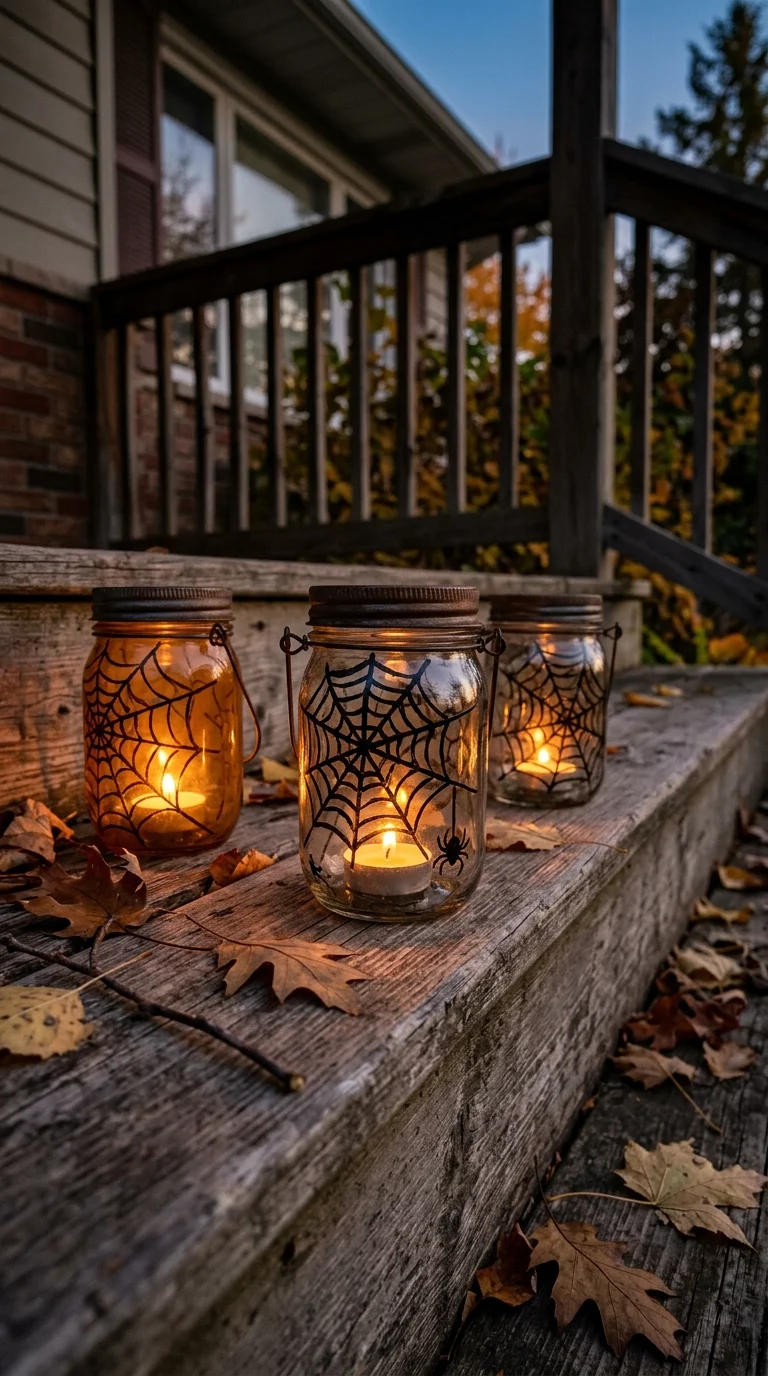
Pick up a few small glass jars and some black craft paint from the Dollar Tree, then paint spider webs or simple bat shapes on the outside with a fine brush. Once dry, drop in a battery tea light and set these along your porch steps or windowsill at night. The paint blocks just enough light to create a soft glowing pattern that spills onto the floor. Use different jar sizes for a layered look and cluster three or four together near your front door. For extra texture, wrap a bit of cheesecloth around the jar base before painting to give it an aged, cobweb feel. These lanterns work indoors on a mantel too, and they hold up season after season if you store them in a box once November hits.
2. Ghost Bottle Centerpiece
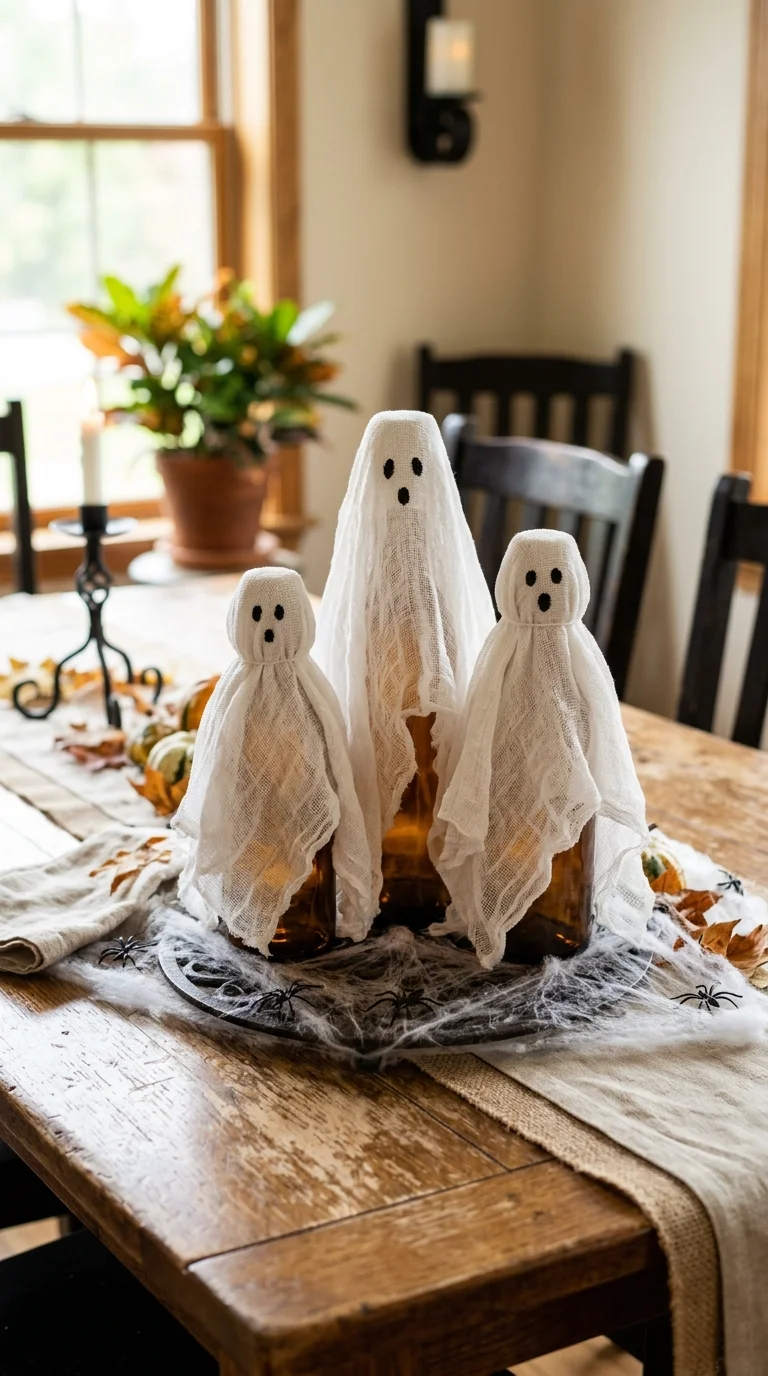
Grab a few clear plastic or glass bottles and white fabric or cheesecloth from the craft section. Drape the fabric over the top of each bottle, cinch it slightly below the neck with a rubber band to form a head shape, then draw on simple black dot eyes with a permanent marker. Line these ghost bottles down the center of your dining table or cluster them on a side table with some fake spider webbing tucked underneath. Vary the heights by using different bottle sizes so the group looks more natural and less like a factory line. This project takes about fifteen minutes total and gives you a centerpiece that guests will actually comment on, without spending more than a few dollars on supplies.
3. Spider Web Doormat
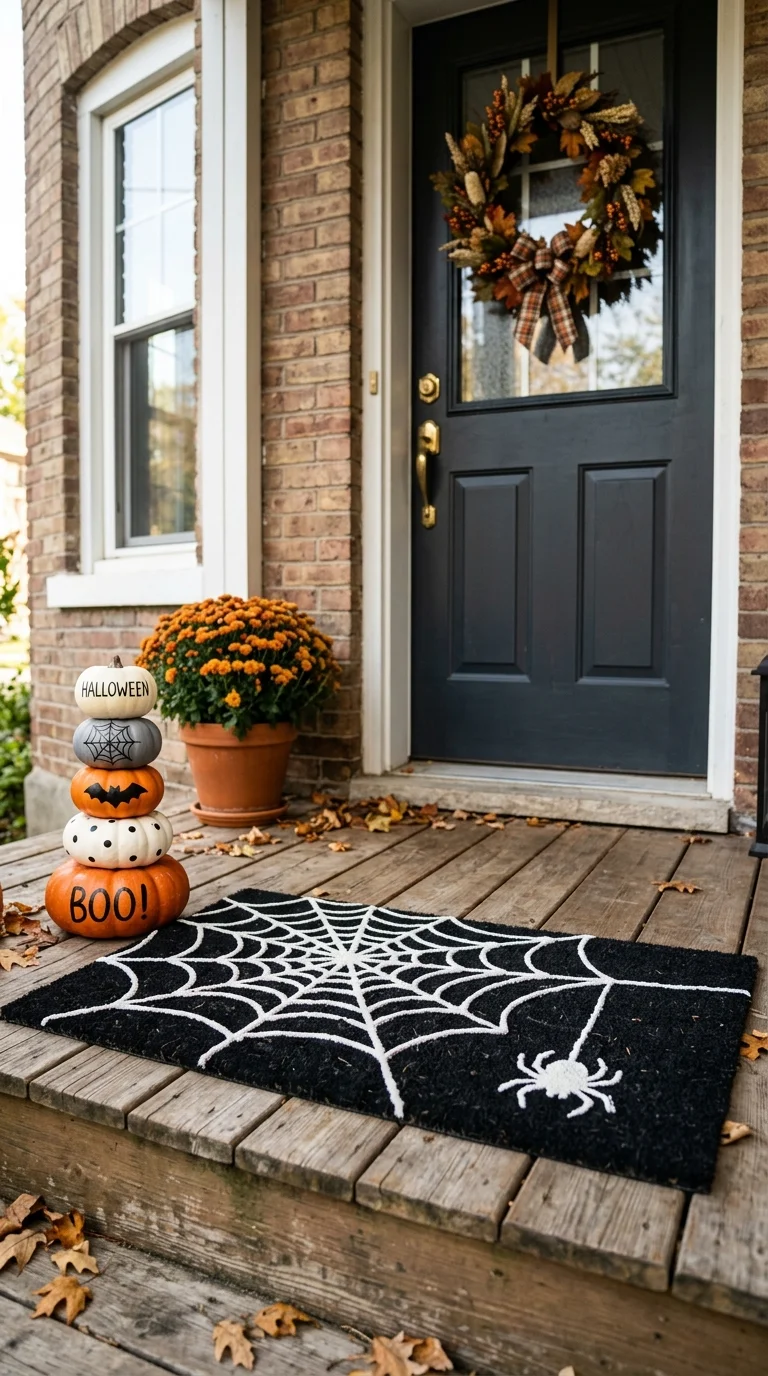
Buy a plain black doormat and a tube of white puffy fabric paint, both easy finds at the Dollar Tree. Sketch a light web pattern with chalk first if you want guide lines, then trace over it with the fabric paint in slow, steady strokes. Let it dry flat for a full day before placing it outside your front door. The raised texture of the puffy paint catches porch light nicely at night and gives your entryway an instant seasonal update. If painting freehand feels tricky, you can also use painter’s tape to block off straight web lines before filling them in. This doormat holds up well through October and can be wiped down after trick or treating traffic tracks in leaves and dirt.
4. Skeleton Hand Candle Holder
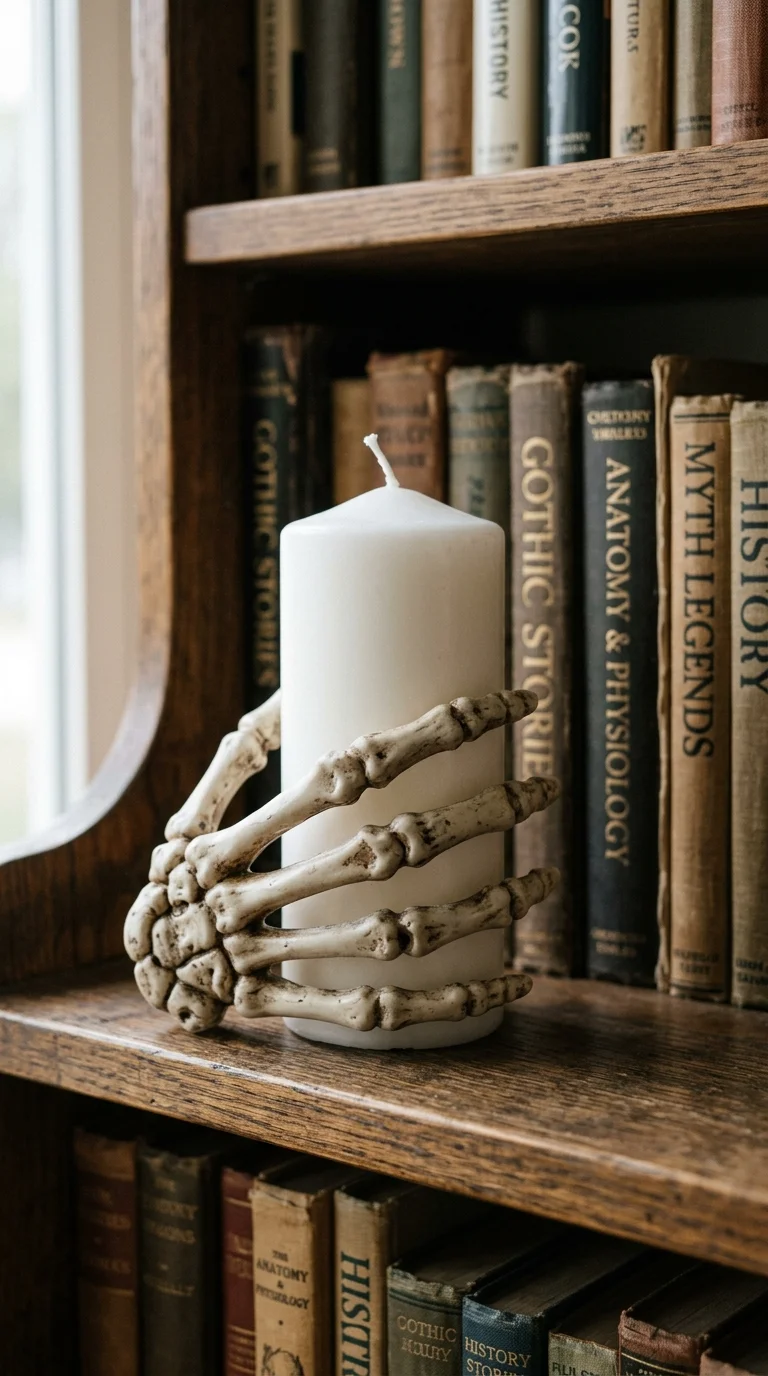
Find a plastic skeleton hand prop at the Dollar Tree and a small pillar candle or battery candle to match. Position the hand so the fingers curl loosely around the base of the candle, almost like the skeleton is holding it up. You can secure the hand to a small wooden base or plate with hot glue so it stands upright on its own. Place this on a bookshelf, bathroom counter, or entry table for a simple but eerie accent. For a spookier finish, dry brush a little black or gray paint over the fingertips to age the bone color. This piece works as a standalone accent or paired with a few of the mason jar lanterns for a cohesive tablescape.
5. Painted Pumpkin Trio
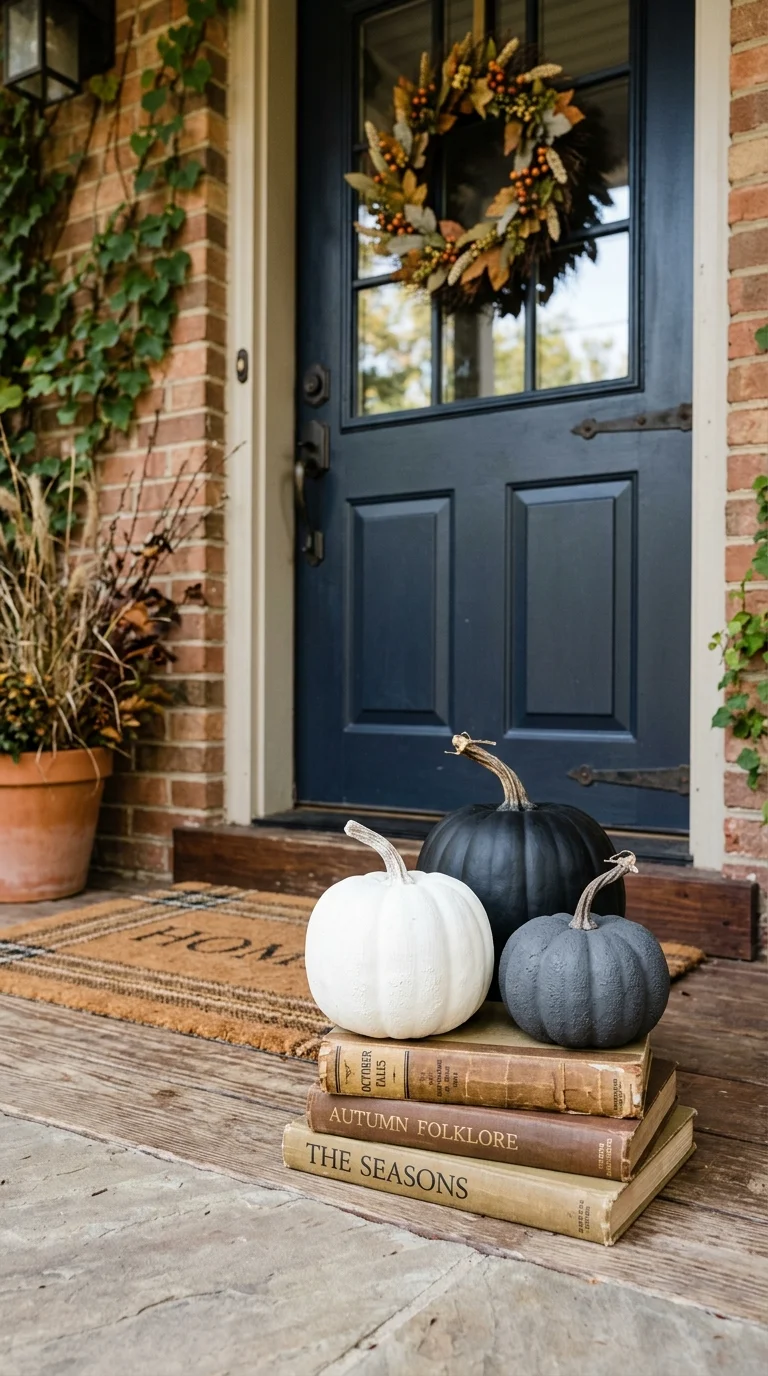
Pick up three small foam or plastic pumpkins in different sizes. Instead of carving, paint them in matte black, white, and a muted charcoal gray for a modern farmhouse Halloween look. Once the base coat dries, use a fine paintbrush to add simple details like a stitched mouth on one pumpkin or a small painted bat on another. Group the trio on your porch steps, a console table, or a stack of books near your front door. Varying the heights and finishes keeps the display visually interesting without looking cluttered. This is one of the easiest projects on the list, and the pumpkins can be repainted next year in different colors if you want to switch up your look.
6. Black Cat Silhouette
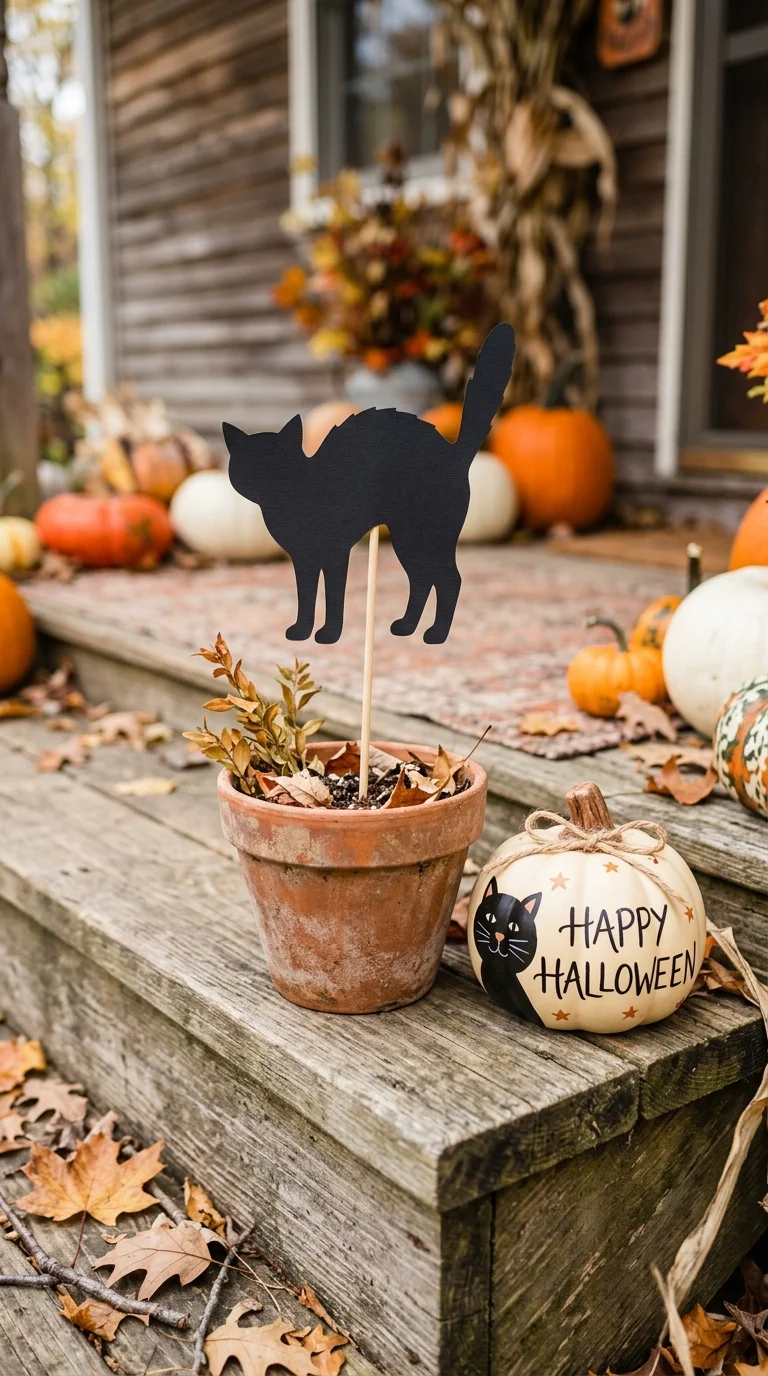
Buy a sheet of black craft foam or cardstock and trace a simple arched cat silhouette onto it, then cut it out with scissors. Mount the cat shape onto a small dowel or wooden skewer with hot glue so it can stand upright in a planter, pumpkin, or flower pot near your entry. You can make a few in different sizes and place them peeking out from behind a pumpkin display or along a windowsill. If you want it to glow at night, tape the silhouette to the inside of a window with the porch light behind it so it casts a shadow. This project costs almost nothing and adds a classic, slightly spooky shape that reads as Halloween from across the yard.
7. Halloween Candy Jar
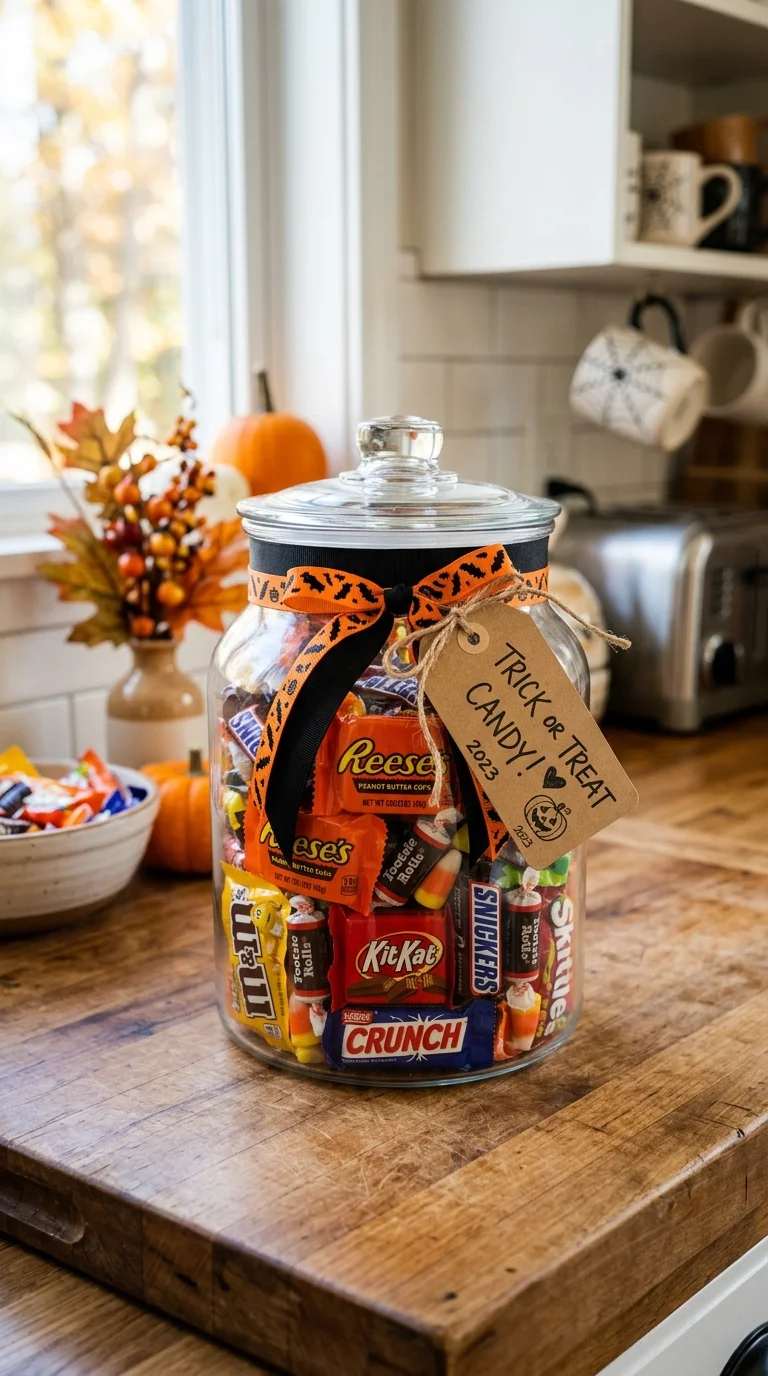
Take a plain glass jar with a lid and wrap the middle with a strip of black and orange ribbon or washi tape. Fill it with wrapped candy for trick or treaters or seasonal snacks for your own family. Add a small tag with baker’s twine that says something simple like “treats” in handwritten style. Set the jar on your kitchen counter or entry table so it does double duty as decor and a functional candy station. If you want a spookier version, paint a small skull or bat sticker onto the front of the jar instead of using a tag. This is a five minute project that makes candy storage feel intentional instead of just a bowl sitting out.
8. Eyeball Garland Display
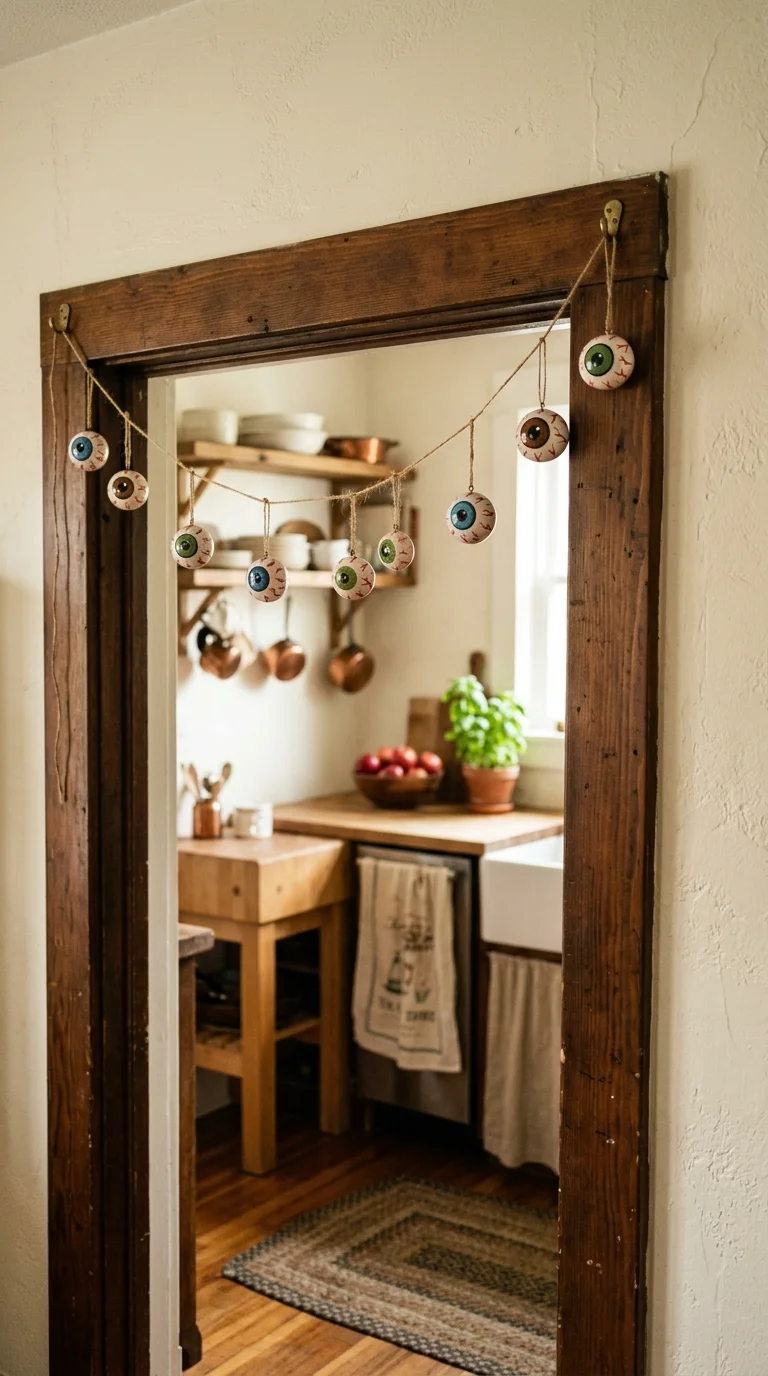
Find small foam or plastic balls at the Dollar Tree and paint each one with a simple eyeball design, a white base with a colored iris and black pupil. Once dry, string them together with fishing line or thin twine, spacing them a few inches apart, and hang the garland across a doorway, mantel, or window frame. The uneven spacing and slightly wobbly painted details actually add to the creepy charm rather than take away from it. This garland works especially well in a kitchen or hallway where guests will walk directly underneath it. For a bigger visual impact, make two garlands and layer them at slightly different heights so the eyes seem to be looking from multiple directions.
9. Witch Hat Centerpiece
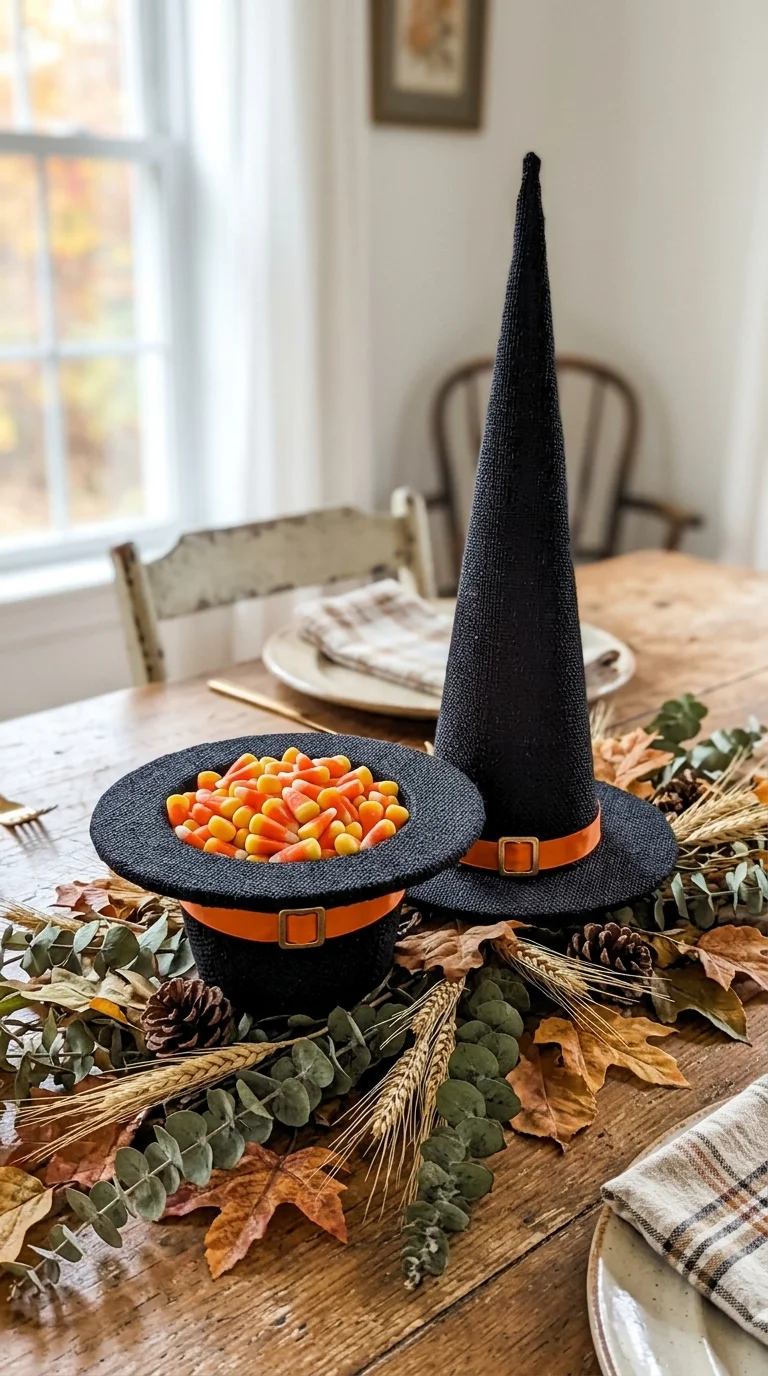
Buy a couple of small foam witch hats, sold cheap around Halloween at the Dollar Tree, and turn them into a fun tablescape anchor. Flip one hat upside down to use as a small bowl for candy corn or mixed nuts, and stand another hat upright next to it as a decorative accent. Add a bit of raffia or dried greenery tucked around the base for texture. This works great as the centerpiece for a Halloween dinner or a fall gathering where you want a nod to the holiday without going overboard. You can also scatter a few loose fake leaves around the hats to soften the display and tie it into the broader autumn season.
10. Bat Silhouette Window
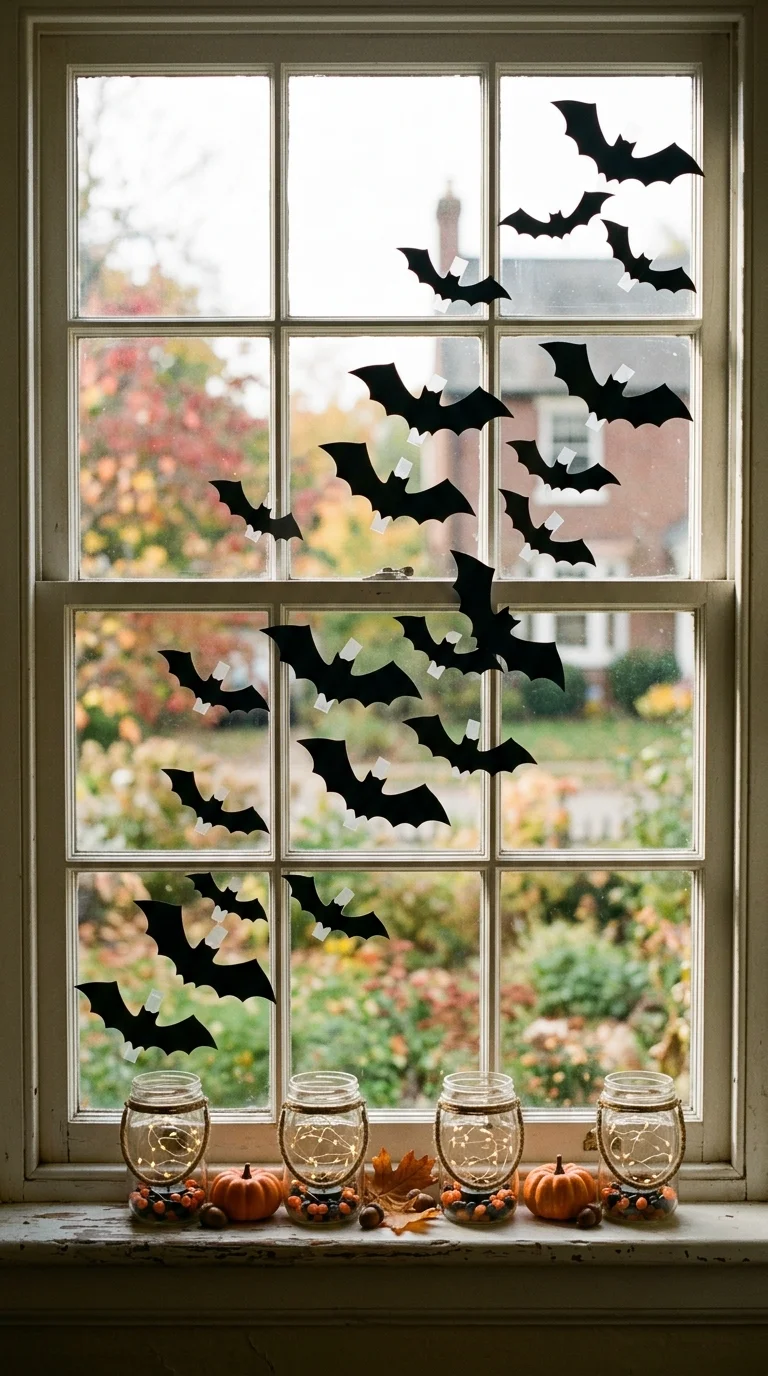
Cut simple bat shapes out of black cardstock or craft foam using a printed template as your guide, then attach them to your windows with a bit of removable tape or window cling adhesive. Arrange the bats in a loose flying pattern, some bigger and some smaller, to suggest movement across the glass. This works best on a front facing window where the shapes will be visible from the street both day and night. Because the bats are flat and lightweight, they stay up easily through the whole season and peel off without leaving marks. Pair this with your mason jar lanterns on the sill below for a full window display that looks great after dark.
11. Spooky Tree Branches
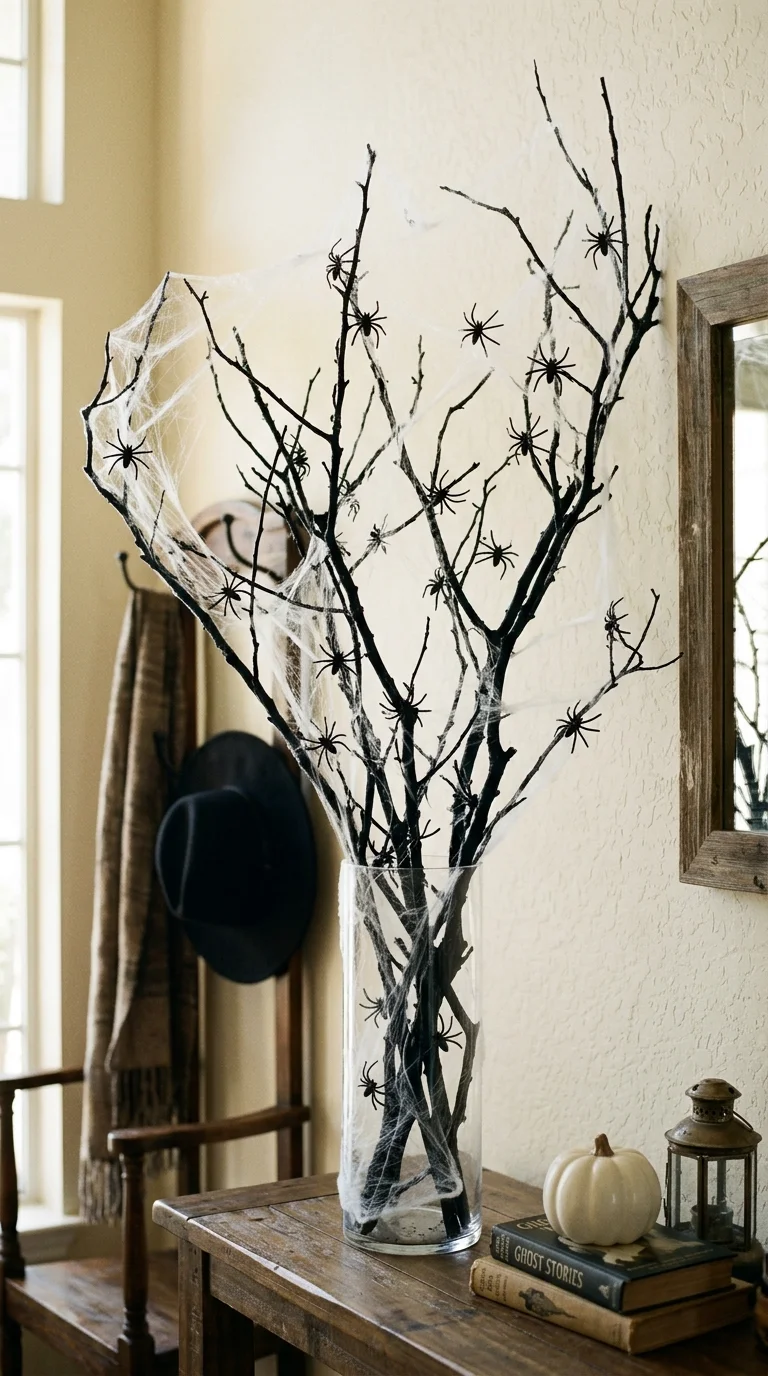
Collect a few bare branches from your yard, or pick up faux stems from the Dollar Tree, and spray paint them matte black. Once dry, arrange them in a tall vase or an empty glass container as a centerpiece or entryway accent. Wrap a bit of stretchy spider web material around the base of the branches for extra texture, and tuck a few small plastic spiders into the webbing. The bare, twisted look of the branches gives an eerie forest feeling without needing much effort. This piece works well in an entryway corner or on a mantel, and it can stay up through the rest of fall if you remove the spider details after Halloween.
12. Halloween Welcome Sign
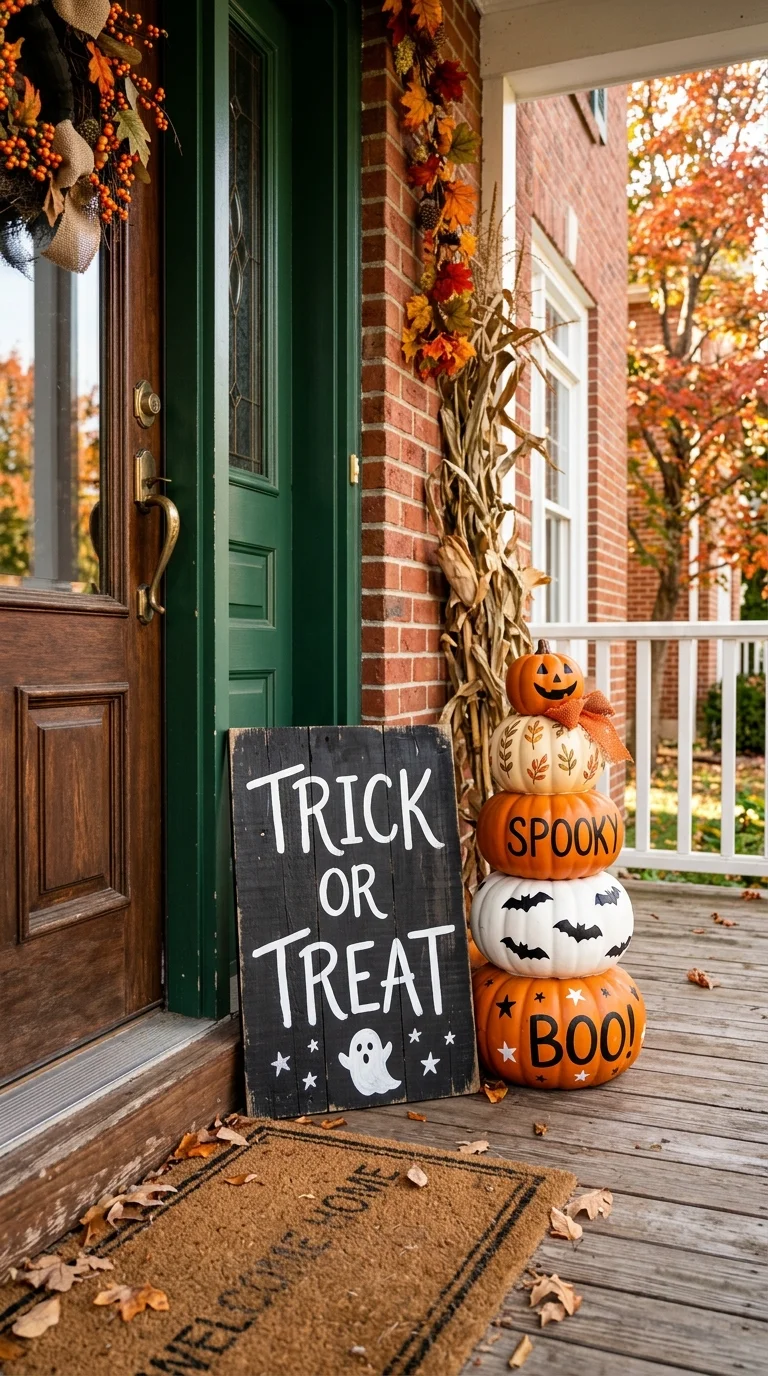
Grab a small wooden sign blank or a piece of thick cardstock and paint it black or deep purple as your base. Once dry, use a white or metallic paint pen to write a short, simple greeting like “trick or treat” or “welcome witches” in your own handwriting style. Add a small painted pumpkin or bat doodle in the corner for extra charm. Prop the sign against your front door, hang it with twine on a hook, or lean it on your porch steps next to your pumpkin display. Handwritten signs like this feel personal and give your entry a warm, welcoming Halloween touch that store bought signs often miss.
13. Creepy Cloth Ghosts
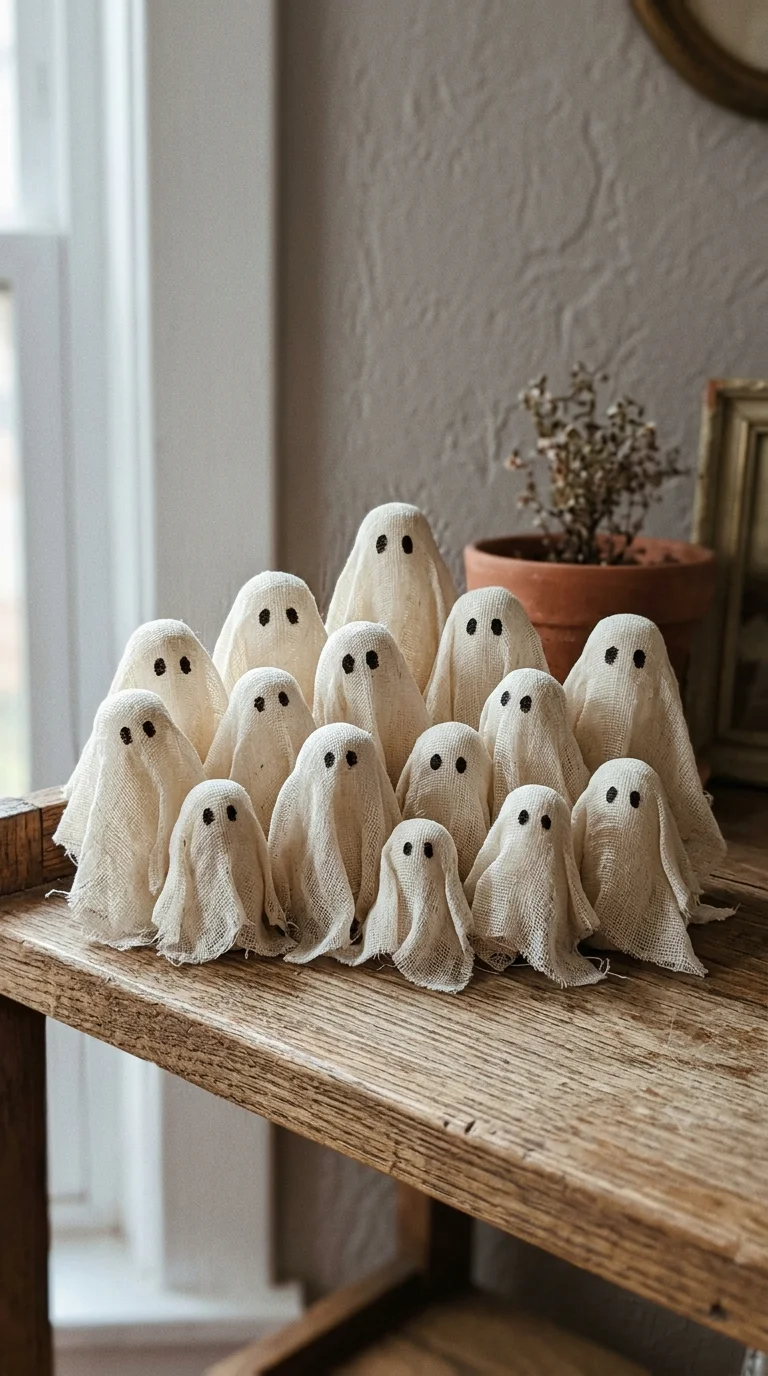
Take a few squares of white cheesecloth or thin fabric and drape them over small foam balls or crumpled paper to create rounded ghost heads. Dip the fabric in a mixture of water and fabric stiffener, then let it dry completely so it holds its shape. Once stiff, add simple black dot eyes with a marker or fabric paint. Cluster a group of these ghosts on a shelf, hang a few from string at different heights near your entry, or scatter them across your front lawn on wooden stakes. The stiffened fabric gives them a slightly haunted, floating look that plain paper ghosts cannot match, and they last for years if stored flat.
14. Pumpkin Spice Wreath
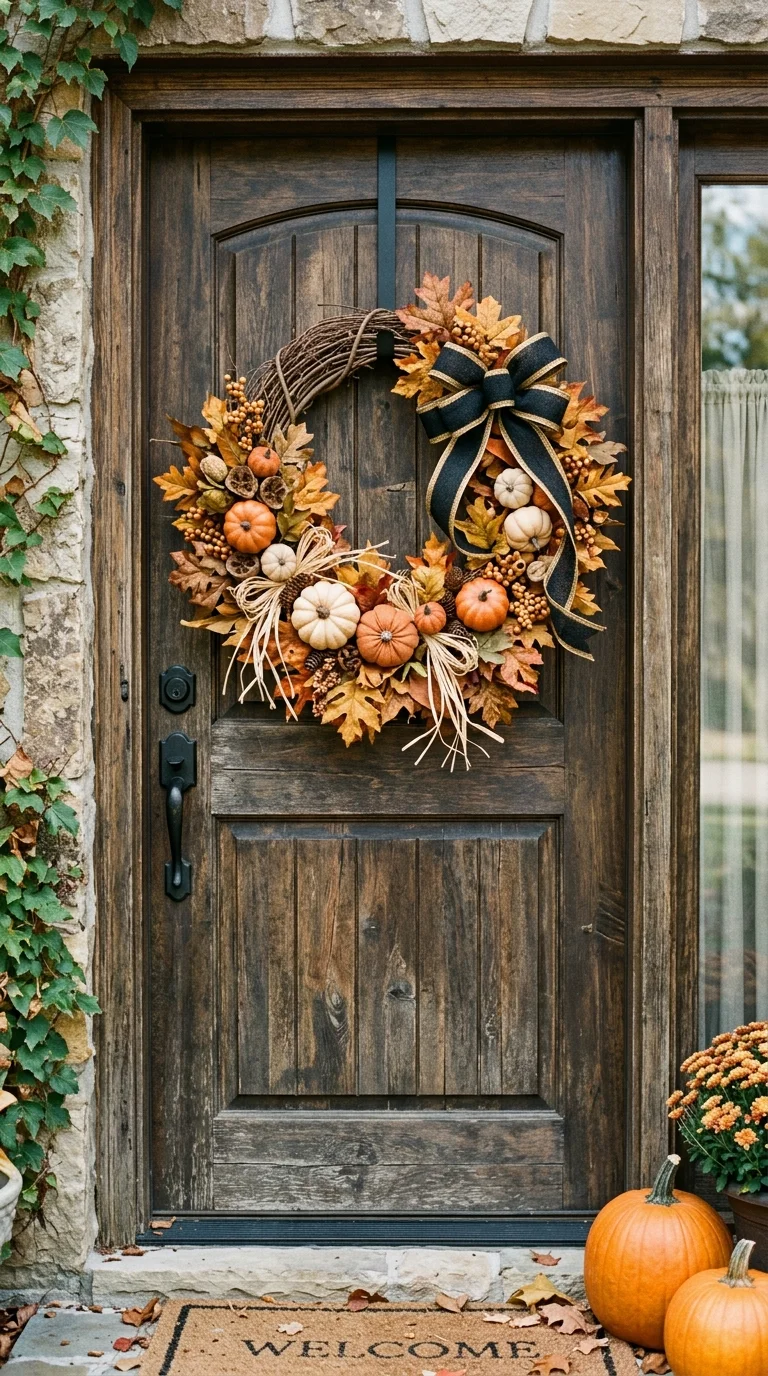
Start with a plain foam or grapevine wreath base and hot glue small artificial pumpkins, dried leaves, and bits of raffia around the front in a loose, natural pattern. Mix in one or two black accents, like a small plastic crow or a strip of black ribbon, to tie it into the Halloween theme without making it look purely seasonal. Hang the finished wreath on your front door or above your fireplace mantel. This wreath works as a nice transition piece because it leans more toward general fall decor with just enough Halloween mixed in, so it can stay up through Thanksgiving if you remove the darker accents after October.
15. Graveyard Tombstone Markers
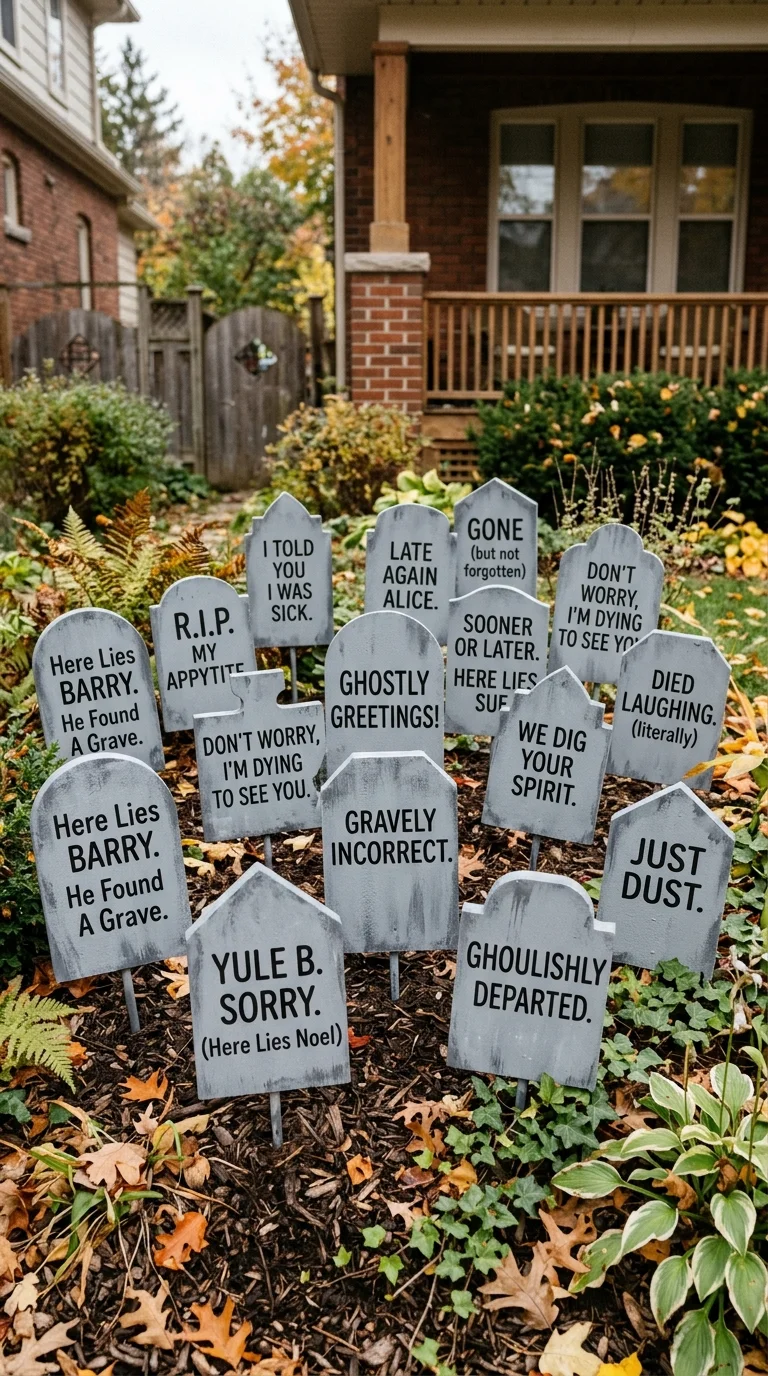
Cut simple tombstone shapes out of thick foam board or cardboard and paint them gray with a lightly textured brush technique to mimic stone. Write short, playful epitaphs on each one with black paint or marker, things like “rest in pieces” work well for a lighthearted tone. Stake these into your front yard or garden bed using wooden skewers taped to the back for support. Arrange three or four at slightly different angles, as if they have settled unevenly into the ground, for a more realistic look. This is one of the more involved projects on the list, but it makes the biggest visual impact from the street and gives trick or treaters something fun to notice.
16. Spider Egg Jars
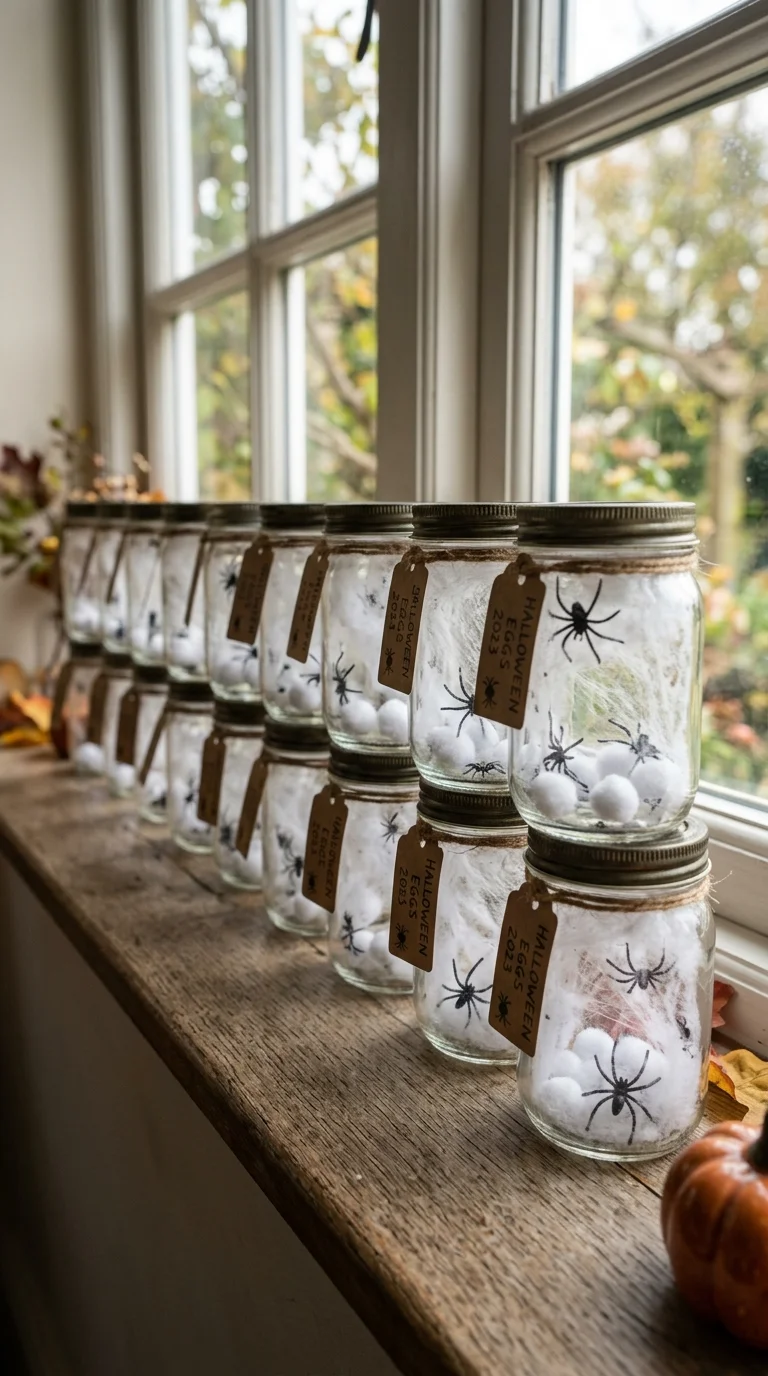
Fill a few small glass jars with cotton balls stretched thin to mimic spider webbing, then tuck a couple of small plastic spiders and tiny white pom poms into the cotton to look like egg clusters. Screw the lids on loosely or leave them open depending on the jar style. Line these jars along a windowsill, bathroom counter, or entry table shelf. The cotton webbing catches light nicely and gives a slightly unsettling but not overly gory effect that works well for family friendly Halloween decorating. This project takes only a few minutes per jar, making it an easy one to knock out while you are working on other projects on this list.
17. Halloween Throw Pillow
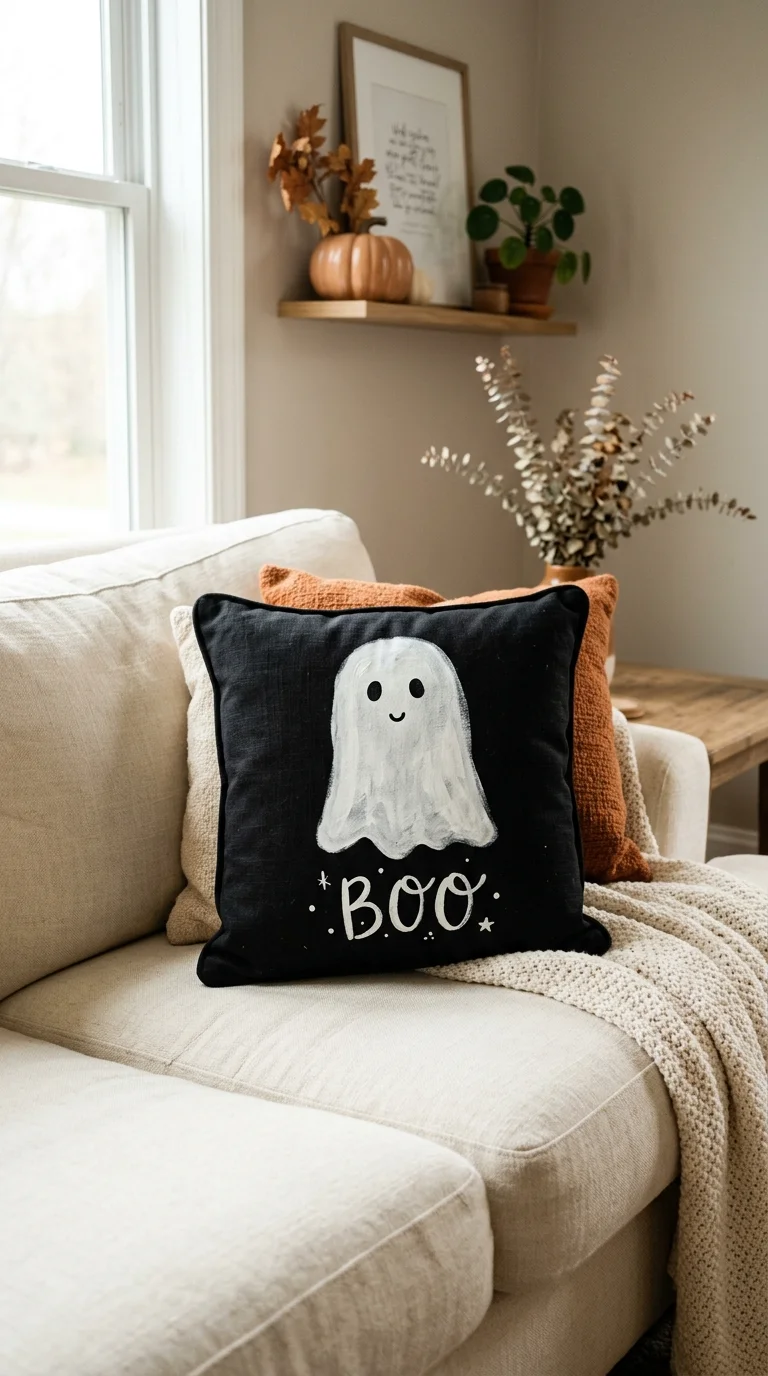
Buy a plain pillow cover in black, orange, or cream from the Dollar Tree and use fabric paint or iron-on vinyl to add a simple design, like a small ghost, a moon shape, or a short seasonal phrase. Keep the design centered and not too large so it looks intentional rather than crowded. Once the paint is fully dry, stuff the cover with an old pillow insert or with polyester fiberfill, also available cheap at the Dollar Tree. Toss the finished pillow onto your couch, reading chair, or entryway bench for a soft seasonal touch. This project adds texture to your Halloween decorating scheme beyond the usual hard surfaces like pumpkins and jars.
18. Monster Eye Balloons
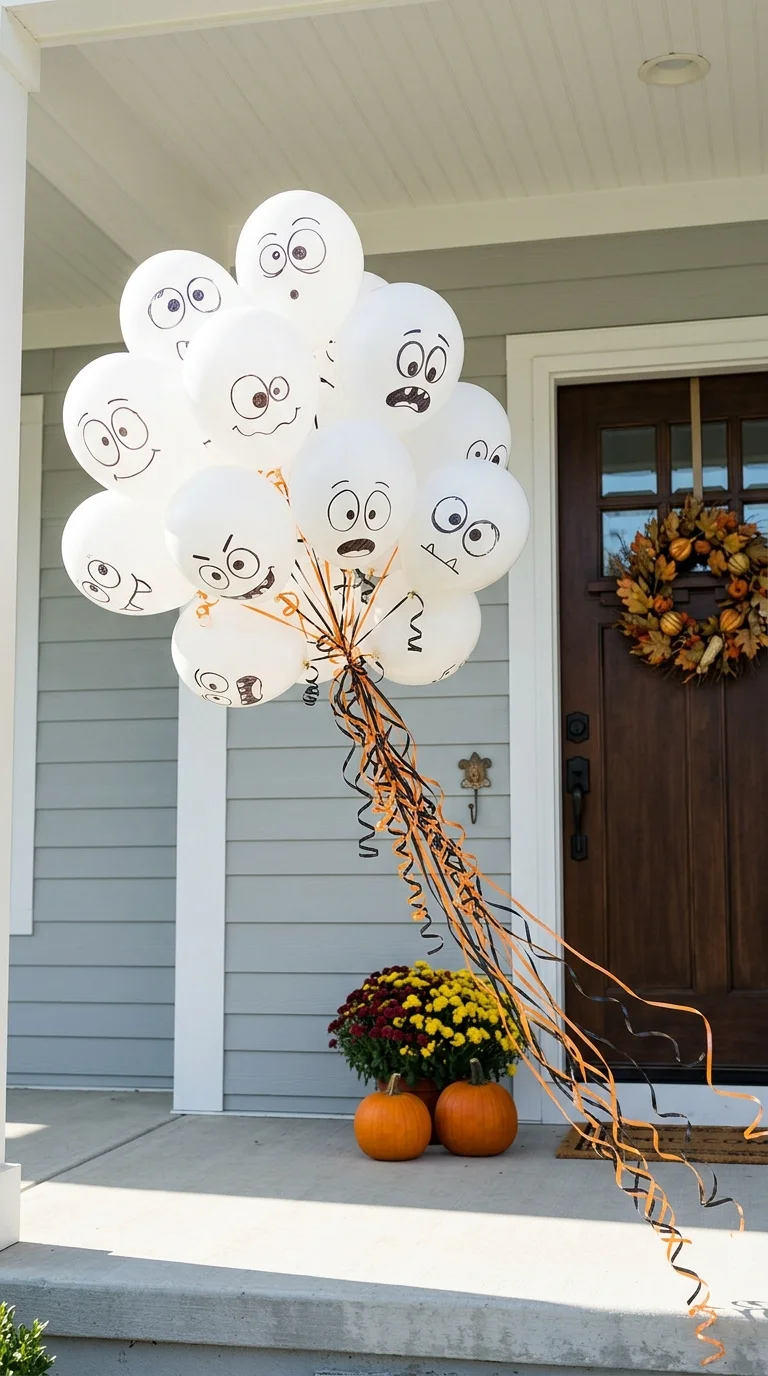
Blow up a handful of white or clear balloons and use a black marker to draw simple monster eyes on each one, varying the size and position of the pupils for a fun, uneven effect. Tie the balloons in a loose cluster near your front door, over a dessert table, or along a stair railing for a Halloween party. Because balloons are so cheap, this is an easy way to fill space and add a playful, slightly silly element to balance out the spookier projects on this list. Add a few strands of curling ribbon in black and orange to the balloon strings for extra movement and color when there is a breeze.
19. Spooky Book Stack
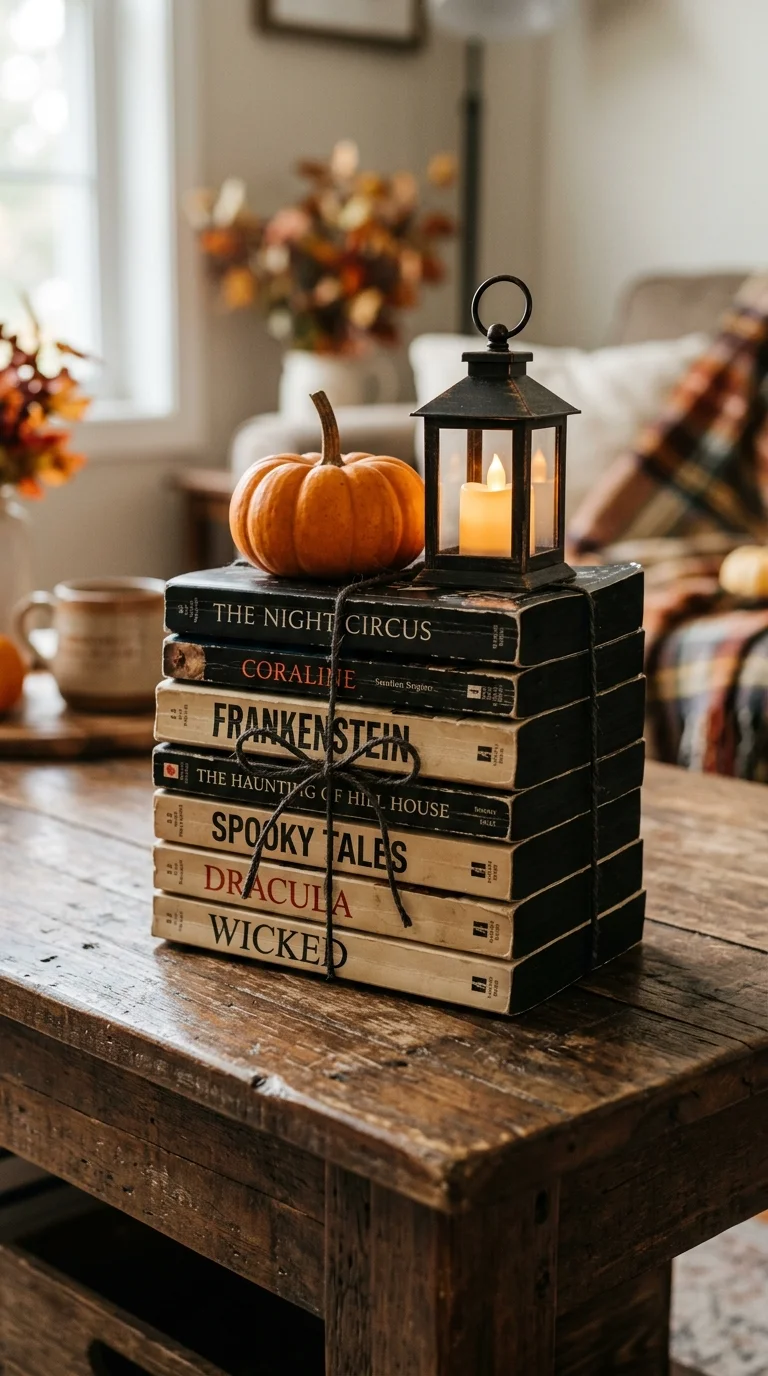
Take a few old paperback books you do not mind altering, or pick up cheap ones from a thrift shop, and spray paint the edges black or dark gray for an aged look. Stack three or four together and tie the stack with black ribbon or twine. Set a small pumpkin, a mini lantern, or a plastic spider on top of the stack as a finishing touch. This works beautifully on a coffee table, entryway console, or bookshelf where you want a layered, styled moment rather than just a single decoration sitting alone. The aged book edges give an old library or apothecary feeling that pairs nicely with the mason jar lanterns from earlier on this list.
20. Halloween Light Jars
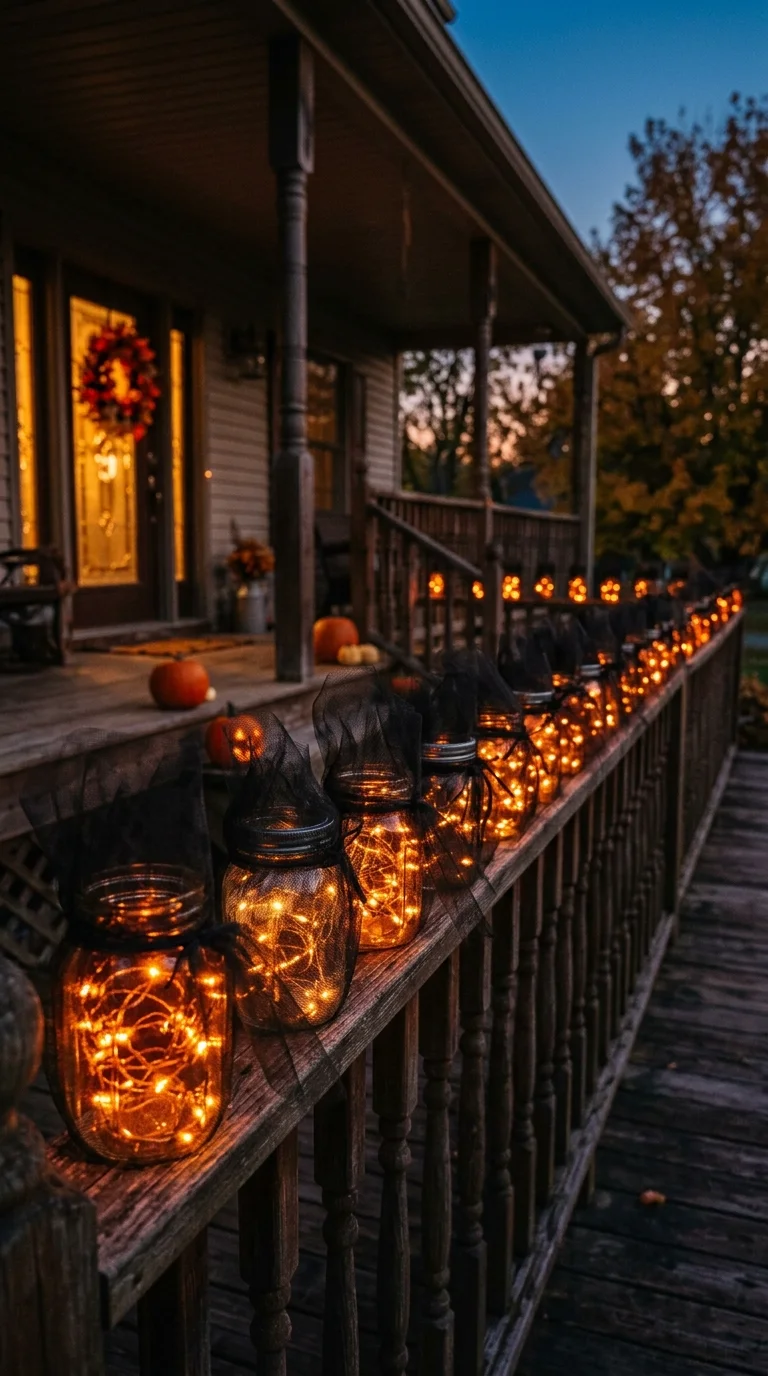
Fill a few small glass jars with orange or purple string lights, tucking the battery pack underneath the jar so it stays hidden. Add a strip of black tulle or spider webbing around the jar opening for texture, and set these along your porch railing, front steps, or windowsill. The soft glow through the glass creates a warm, inviting Halloween look after dark without needing any carved pumpkins or open flames. This is a great project if you want lighting that is safe around kids or pets, since everything runs on battery power. Space several jars evenly along a walkway for a simple but effective lit path leading up to your front door.
21. Trick or Treat Bowl
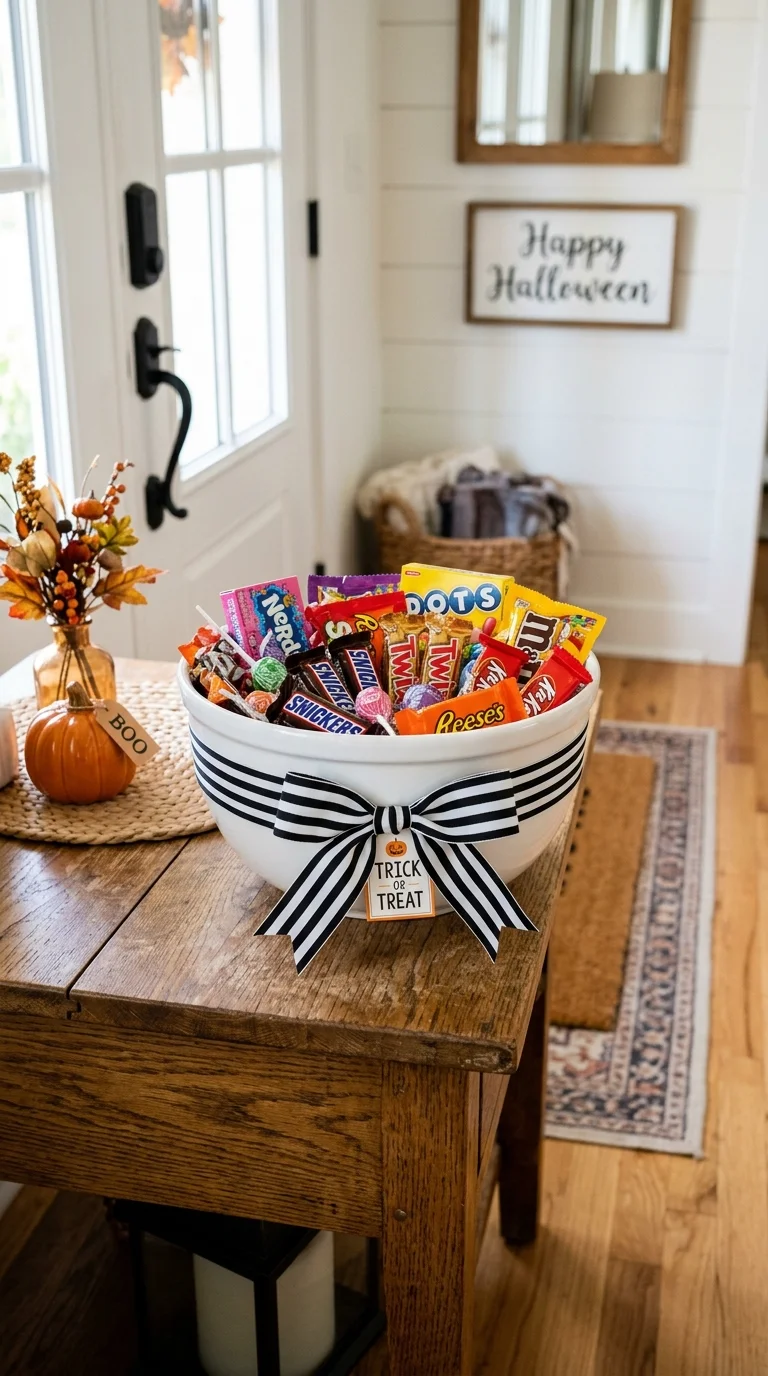
Take a plain plastic or ceramic bowl and wrap the outside with a strip of black and white striped washi tape or ribbon for a simple, graphic Halloween look. Add a painted spider or small bat sticker to one side for extra detail. Fill the bowl with candy and set it by your front door for trick or treaters, or use it inside as a catch all for keys and mail during the season. This tiny project takes less than ten minutes but ties together the rest of your Halloween decor by giving your candy station the same color palette and style as everything else in your home this season.
Conclusion
That covers all 21 ideas, and hopefully a few of them are already calling your name for this weekend’s project list. None of these need more than a Dollar Tree trip and a little bit of patience. Mix and match a handful of these around your home and you will have a Halloween look that feels intentional, not thrown together at the last minute.
FAQs
Q: How much does it cost to decorate for Halloween using only Dollar Tree items? A: Most of these projects cost between one and five dollars each, so decorating your whole entryway or dining table rarely goes past twenty or thirty dollars total.
Q: Can these Dollar Tree Halloween crafts be reused next year? A: Yes, almost all of these hold up well if stored in a dry box after the season. Painted pumpkins, jars, and wreaths especially last for several years.
Q: Are these Halloween DIY ideas safe for kids to help with? A: Most projects like painting pumpkins, filling candy jars, and drawing on balloons are great for kids. Save the spray paint and hot glue steps for adults.
Q: What tools do I need to complete most of these projects? A: A hot glue gun, scissors, craft paint, and a fine paintbrush will cover almost every project on this list without needing anything specialized.
Q: How long does it take to make all 21 Halloween decorations? A: Spread across a weekend, most people can finish all 21 in about four to six hours total, since many projects only take ten to fifteen minutes each.