
22 Dollar Tree Bathroom Makeover Ideas Without the High Price
Bathroom updates get expensive fast, and most of the quotes start with tearing something out.
A new vanity, tile, even a basic mirror can wipe out a small budget before you touch the details that actually make the room feel finished. That is why Dollar Tree bathroom makeover ideas work so well for renters and homeowners who need a change this weekend, not this year.
You are not looking for cheap looking fixes. You are looking for storage that hides the clutter, cleaner counters, and a few finished touches that make morning routines calmer.
Every idea below uses items you can find in one store run, most for a few dollars each. Some take five minutes. Others are small weekend projects. Pick three to start, or work through the full list for a room that feels pulled together without a contractor, a demo day, or a credit card bill you regret.
1. Matching Storage Bins for Under-Sink Organization

Under-sink cabinets fail in a predictable way. Bottles drift to the back, pipes block wide boxes, and cleaning supplies end up in a loose pile.
Matching bins fix the visual part and the practical part at once. Measure the cabinet width, then leave a clear gap in the middle for the pipes. Buy two or three bins in the same color and shape so the cabinet reads as one system, not a mix of leftovers.
- Left side: Daily items you reach for with wet hands
- Right side: Cleaning supplies, kept apart and upright
- Front edge: One small bin for the items that always get lost
UNDER-SINK BIN MAP
Left bin
Keep clear
Right bin
Measure first. Pipe space decides bin size, not the other way round.
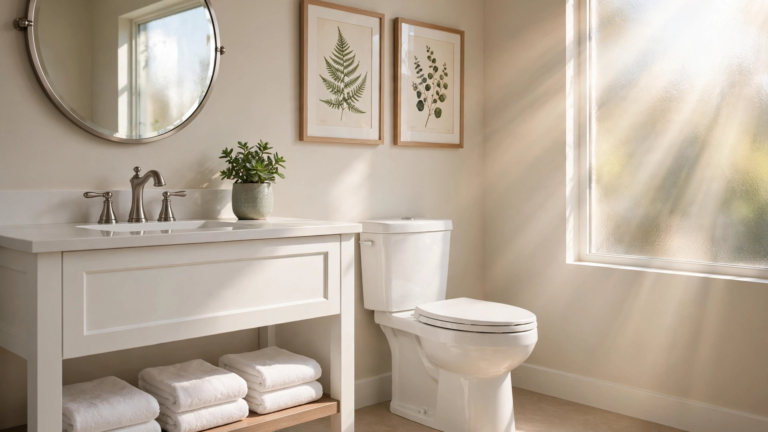
2. Spray-Painted Frames as Bathroom Art

Tired picture frames get a second life here, and the paint is what ties them together.
- Pick two or three frames in different sizes, but with similar thickness.
- Wipe them clean, let them dry fully, then paint them one solid color outdoors or in a ventilated spot.
- Add a clear coat if your bathroom runs steamy, so the finish holds up longer.
- Fill them with printable art, fabric scraps, postcards, or pages with simple line drawings.
Hang the group at eye level above the towel bar or beside the mirror. One color across mixed frames looks planned. Mixed colors across mixed frames looks accidental.
Watch out: Skip glossy paper prints in a very steamy bathroom with no fan. Steam curls paper fast. Laminated prints, fabric, and sealed frames last longer.
3. Bud Vases for Simple Florals

A single stem in a narrow vase does more for a small bathroom than a big arrangement fighting for counter space.
Group three bud vases at different heights on a shelf, a windowsill, or the back of the toilet tank. Keep the stems simple. One branch, one dried stem, or one faux flower per vase is enough, and the empty space around each stem is part of the look.
Tall vase at the back. Short one in front. Nothing so wide that it crowds the faucet or tips when you reach past it.
THE THREE HEIGHT RULE
Tall stem: back position, adds height beside a mirror
Medium stem: middle position, fills the gap
Short stem: front position, stays clear of the sink
Odd numbers group better. Three vases read as a set. Two often read as a pair that lost one.
4. Glass Jars as Apothecary Storage

Loose cotton balls in a torn bag make any counter look untidy, even a clean one.
Clear glass jars solve that in about two minutes. Fill each jar about three quarters full, leave the lids loose on top or off for the items you grab daily, and keep the contents to one type per jar. Mixing items in one jar brings the clutter back, just behind glass.
- Cotton swabs: Tall jar, lid on, stays dust free
- Cotton balls: Wide jar, lid off, easy to grab
- Bath salts: Short jar, lid on, keeps moisture out
Quick check before you buy: Run one finger around the rim. Skip any jar with a chipped edge or a lid that wobbles. It will annoy you every single day.
5. Command Hooks for Extra Towel Storage

Towel bars rarely hold enough in a shared bathroom, and drilling into tile is not an option for many people.
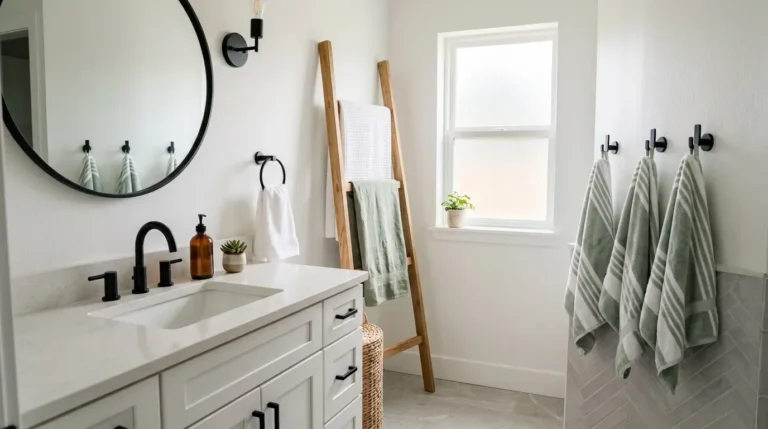
Adhesive hooks fill the gap on the back of the door, on a smooth wall beside the shower, or inside a cabinet door for washcloths. Clean the spot first, press the hook on firmly, then wait the full time listed on the pack before hanging anything heavy. Rushing that step is why most hooks fail.
Space hooks wide enough that damp towels hang apart and dry. Two towels bunched on one hook stay damp and start to smell.
HOOK PLACEMENT GUIDE
Full size towels
Towel in use
Washcloths
Hand towel
6. Trays for Countertop Styling

Counters look messy when every bottle sits on its own. A tray groups those same bottles into one tidy footprint.
Place the tray beside the sink and treat its edges as a hard limit. Soap, lotion, and your daily items live on the tray. Everything else goes in a drawer or cabinet. If an item does not fit on the tray, it does not live on the counter.
Wood trays bring warmth to a white bathroom. Mirrored or metal trays suit a cooler scheme. Wipe the tray weekly, since toothpaste splashes and water rings show up fast on a flat surface.
TRAY ZONES
Back row: Tall bottles and a small plant
Middle: Soap dish or dispenser
Front: One small dish for rings or hair ties
Off the tray: Everything else, no exceptions
7. Faux Plants for Greenery

Real plants struggle in many bathrooms. Low light, no window, and forgetful watering finish most of them off.
Faux plants skip all three problems. Put a trailing style on a high shelf so the leaves hang down and soften the hard lines of tile and porcelain. Set a small upright plant on the counter or the toilet tank where a real plant would block light or crowd the sink.
Dust is the one giveaway. Rinse faux leaves under the tap once a month, shake them dry, and they keep looking fresh instead of grey.
LIGHT FREE PLANT MAP
High shelf: Trailing leaves, hangs down, fills empty height
Counter corner: Small upright plant, stays out of the splash zone
Floor corner: Larger plant only if the room has spare floor space
Window ledge: Skip it if real sunlight fades the leaves
8. Contact Paper for Drawer and Shelf Liners

Drawer bottoms in older bathrooms are often stained, rough, or hard to clean. Contact paper covers that surface and wipes clean in seconds.
- Empty the drawer and measure the inside base twice.
- Cut the paper a little large, then trim the edges with a craft knife after you lay it down.
- Peel back a small strip at a time and smooth as you go, pushing air bubbles toward the edge.
- Press the corners down firmly so they do not lift when items slide.
Pick a light pattern for dark drawers. It makes small items easier to spot at 6 in the morning.
Common mistake: Cutting to the exact size before you lay the paper. Drawers are rarely square. Cut large, lay it, then trim. That order saves a wasted sheet.
9. Grouped Candles for Ambiance

Candles earn their spot at bath time, not during a rushed weekday shower. Group them where they stay dry and out of the way the rest of the week.
Use three candles in different heights on a small tray, a shelf, or a wide windowsill away from towels and the shower curtain. Keep the colors the same across the group so the mix of heights looks deliberate.
Unscented candles work best in a small bathroom, since scent builds up fast in a closed space. If you like scent, use one scented candle and keep the rest plain.
CANDLE GROUP FORMULA
One tall pillar: back, gives the group height
One medium jar: middle, main light source
One short tealight: front, low glow near bath level
One tray under all three: catches wax, keeps the group in one place
10. Layered Bath Mats

One thin mat in front of a tub often slides, soaks through, and looks lost on a big floor. Two layers handle all three issues.
Start with a larger, plain base mat in a neutral color. Lay a smaller, patterned or textured mat on top, centered, so a border of the base mat shows on every side. The base layer catches most of the water. The top layer carries the pattern and washes easily.
Size guide for most tubs: a base mat around 24 by 36 inches, with a top mat around 20 by 30 inches. Adjust down for a small ensuite.
LAYER PAIRINGS THAT WORK
White base + striped top: clean, suits most tile
Grey base + white top: hides lint between washes
Natural base + solid dark top: warm, good with wood tones
11. Suction Hooks for Shower Organization

Shower walls are wasted storage, and a crowded caddy hanging off the shower head helps no one.
Suction hooks spread the load across the tile. Stick one high for a back brush, one at hand height for a razor or a washcloth, and one lower down for kids items or a small bath toy net. Press each hook onto clean, dry, smooth tile and test it with a light pull before you trust it with a heavy bottle.
They will not hold on rough stone, textured tile, or grout lines. Smooth surfaces only.
SHOWER WALL ZONES
Brush
Razor
Kids items
12. DIY Rope Wreath Accent

You need four things for this one: a foam or wire wreath form, a roll of rope or thick twine, a hot glue gun, and one small faux stem or bow for the finish.
Wrap the rope around the form in tight rows, adding a dot of glue every few turns so the rows stay put. Keep the tension even. Loose rows gap, tight rows sit flat and neat. Tuck the end at the back, glue it down, then add your stem or bow at the bottom side.
Hang it on the bathroom door or above the towel hooks. Keep it away from direct shower steam if your glue is not heat rated.
MATERIALS CHECKLIST
☐ Wreath form, 8 to 10 inches suits most doors
☐ Rope or thick twine, one full roll
☐ Hot glue gun and spare sticks
☐ One small accent stem or ribbon bow
13. Small Wood Crates for Storage

Crates beat baskets when you need storage you can stack, and they beat bins when you want the contents on show in a tidy way.
Stacked upright, a crate works like a small shelf for rolled towels. Turned on its side, it holds bottles with the labels facing out, so nothing hides at the back. Two crates stacked give you shelf height without a single screw.
Leave wood crates natural for a warm look, or paint them white to match a light scheme. Sand rough edges first. Snagged towels get old fast.
TWO WAYS TO STACK
Rolled towels, toilet rolls, spare soap
Bottles, jars, folded washcloths
14. Layered Mirrors for a Gallery Look

Two mirrors on one wall sound like too much, until you see the light they bounce around a small room.
Hang one larger round or oval mirror as the anchor, then add one or two smaller mirrors beside it, slightly lower, with a hand width of wall showing between each frame. Keep the frames in one finish so the group reads as one piece.
This works best on the wall beside a window or above a wide vanity. Test the layout on the floor first, take a photo, and only then start drilling.
Height tip: Keep the center of the main mirror at eye level for the people who use the room most. Decorative mirrors hung too high help no one and look lost.
15. Chalkboard Labels for Jars and Bins

Labels sound like a small detail. They are the detail that stops everyone asking where things go, and stops bins turning into mixed piles again.
Stick a chalkboard label on the front of each jar and bin, write the contents in a chalk marker, and keep the words short. One or two words beat a full sentence every time. If the contents change, wipe the label clean and write the new word.
Use the same label shape and the same writing style across the whole room. That sameness is what makes a budget setup look planned.
LABEL WORDING THAT STAYS CLEAR
Vague label: Stuff → Clear label: Cotton swabs
Vague label: Bath → Clear label: Bath salts
Vague label: Extra → Clear label: Refills
Vague label: Mine → Clear label: Name of the person
16. Upgraded Shower Curtain Rings

Rings should glide. When they catch, squeak, and tear at the curtain holes, the whole shower feels worn out, even after a deep clean.
Swapping to smooth metal rings or roller ball rings takes five minutes and no tools. Take the curtain down, swap the rings one section at a time so the curtain keeps its order, then rehang it. Count your curtain holes before you shop, since most curtains need 12 rings and packs do not all match that count.
Match the ring finish to your faucet or towel bar if you can. Small matching details add up.
RING CHOICE GUIDE
Roller ball rings: Best glide on a straight rod
Simple metal rings: Lowest cost, classic look
Double hooks: Curtain on one side, liner on the other, easy liner swaps
17. DIY Reed Diffuser

A reed diffuser suits a bathroom better than a spray, since it works all day with no effort after you set it up.
- Pour a light carrier oil into a small glass bottle with a narrow neck.
- Add 15 to 20 drops of your chosen scent oil and swirl the bottle gently.
- Stand five to seven reed sticks in the oil and let them soak for one hour.
- Flip the sticks once, then flip them again every few days when the scent fades.
Keep the scent mild. A small room needs far less oil than a living room mix.
SCENT STRENGTH GUIDE
Mild: 10 drops, small ensuite or powder room
Medium: 15 to 20 drops, standard family bathroom
Strong: 25 drops, large bathroom with a fan running often
Start mild. You can add drops. You cannot take them back out.
18. Basket Lids as Wall Decor

A flat basket lid on a wall fills a blank patch for very little money, and the woven texture warms up all the hard, shiny surfaces in a bathroom.
Look for lids and flat woven trays in different sizes. Arrange three in a loose triangle on the wall above the toilet or beside a mirror, with the largest in the middle. Hang each one on a small nail or an adhesive hook rated for its weight, and step back after the first one to check your spacing before you commit to the rest.
Warm wood tones pair well with white walls and black fittings.
BEFORE YOU HANG
☐ Lay the full arrangement out on the floor first
☐ Mark each spot lightly in pencil
☐ Check the door swing clears the lowest lid
☐ Keep lids clear of direct shower spray
19. Ribbon Curtain Tiebacks

Curtains and fabric shower curtains puddle, cling, and block light when they hang straight all day. A ribbon tieback holds the fabric to one side in seconds.
Cut a length of wide ribbon, loop it around the curtain at about waist height, and fix it to a small hook on the wall beside the window or tub. Satin ribbon suits a soft scheme. Grosgrain holds its knot better and slips less.
Use the same ribbon color on both sides, and swap the color with the seasons if you like a small, cheap change.
TIEBACK PLACEMENT
Window curtain: Hook at waist height, fabric pulled to the outer edge
Shower curtain: Tie loosely, leave the liner hanging straight and wet side in
Door privacy curtain: Tie during the day only, close it fully at night
20. Under-Sink Bin Organization

This second under-sink system is about zones, not matching bins. It suits a cabinet that already has mixed containers you do not want to replace.
Sort everything into three zones by how often you use it. Daily items sit at the front, easy to grab without kneeling. Weekly items sit behind them. Refills and bulk packs go at the very back or up high, since you only touch them when a front item runs out.
- Daily zone: Toothpaste, deodorant, hair brush
- Weekly zone: Nail kit, deep conditioner, spare razor heads
- Refill zone: Bulk cotton balls, spare soap, new toothbrushes
When a daily item empties, pull one refill forward the same day. That one habit keeps the zones working.
ZONE TEST
Can you name the zone for every item in the cabinet in under ten seconds? If not, the zones need clearer labels, not more bins.
21. Refilled and Relabeled Dispensers

Mismatched shampoo, soap, and lotion bottles in bright brand packaging fight with every other choice in the room. Matching dispensers calm the whole counter down.
Fill one dispenser with hand soap, one with lotion, and one with hand wash or shampoo if your shower shelf needs it. Add a simple waterproof label to each one so guests are not guessing. Test each pump before you fill it fully, since a weak pump will drip or clog.
Amber and white dispensers hide the color of the liquid inside. Clear dispensers look best when the liquids match in tone.
COUNTER LINEUP
By the tap
Middle
Guest side
Same bottle, same label style, same pump. That is the whole trick.
22. Faux Succulents in Repurposed Jars

Save the smallest jars for last. A tiny jar that held cotton swabs badly holds one small faux succulent well.
Fill the bottom of the jar with small pebbles or coarse sand so the plant sits at the right height, press the stem in firmly, then add a top layer of pebbles to hide the base. Group two or three finished jars on a windowsill, a shelf, or beside the sink where a real plant would get splashed daily.
These need almost no care. A quick rinse under the tap clears dust and water spots in one go.
Small warning: Keep pebble filled jars out of reach of very young children. Loose pebbles and toddlers are a bad mix, so use a high shelf in a family bathroom.
FAQs
How much does a full Dollar Tree bathroom makeover cost?
It depends on how many ideas you use. As a rough example, 10 core items at around $1.25 each in many stores comes to about $12.50, while a full run of 25 to 30 items lands closer to $35 to $40 before tax. Prices and stock vary by store, so treat those numbers as planning maths, not a promise.
What’s the single best Dollar Tree bathroom upgrade?
Matching storage bins, for most rooms. Clutter is the main reason a bathroom looks tired, and bins fix clutter in one trip with no tools and no drying time. A tray for the counter runs a close second if your sink area is the main problem spot.
Are Dollar Tree faux plants convincing enough for a styled bathroom?
Close up, most people can tell they are faux. At shelf height or on a toilet tank, they read as greenery and that is the job they need to do. Pick matte leaves over shiny plastic, keep the size small, and dust them monthly so they do not give themselves away.
Do Dollar Tree adhesive hooks actually hold towels securely?
Yes, on the right surface and with the wait time done properly. Smooth tile, glass, and painted wood hold best. Rough walls and steamy spots right beside a hot shower are the weak points. Clean the surface, press firmly, wait as the pack directs, then hang a dry towel first as a test.
What Dollar Tree bathroom ideas require the most DIY effort?
The rope wreath and the spray painted frames take the longest, mostly due to drying time and steady wrapping or painting. Contact paper liners sit in the middle, since measuring and trimming needs patience. Everything else on this list takes under 15 minutes, and most of it takes under five.
Final Thoughts
Start with the storage ideas if your bathroom feels messy, and start with the trays, mirrors, and candles if it already stays tidy but feels flat. Three changes in one afternoon will show you what the room needs next, and you will spend very little finding out.
Add one zone at a time, live with it for a week, then decide on the next step. Small rooms reward that patience, since every item has to earn its space.
Save this list to your bathroom board on Pinterest so you have it open on your phone during your next store run.