19 Easy Wall Ideas To Make Any Room Look New
Look at the walls in the room you are sitting in right now. Are they empty, or do they just fade into the background? Walls take up more space than any chair or rug, yet they often get the least attention. A small change on one wall can make the whole room feel different, and you do not need to knock anything down to do it. Most of these ideas take a day or a weekend. Some use paint, some use paper or wood, and some are only about hanging things in a smarter way. I chose ideas that work in rentals, in small rooms, and in big open spaces. Read through them, pick the one that fits the wall you see most, and gather your supplies. A blank wall is a good place to start.
1. Deep Color Accent Wall
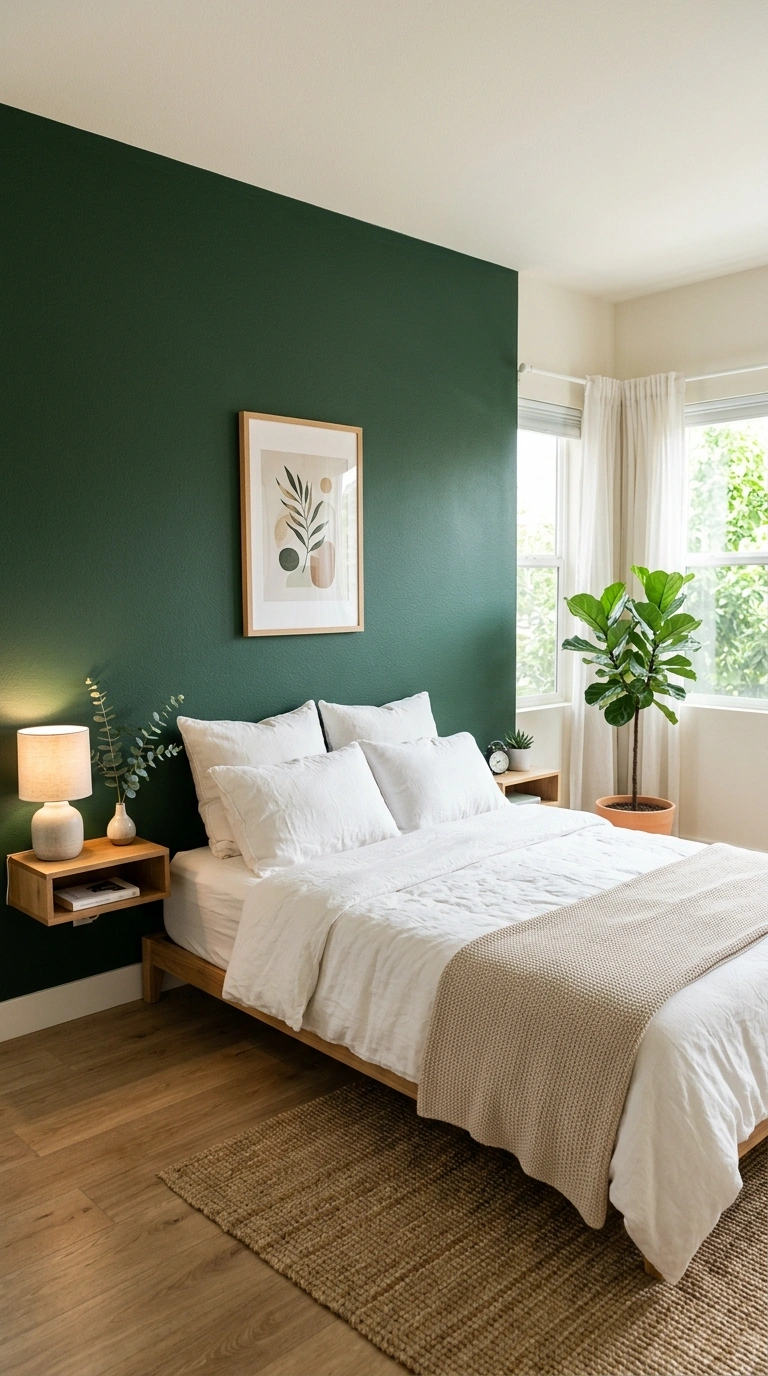
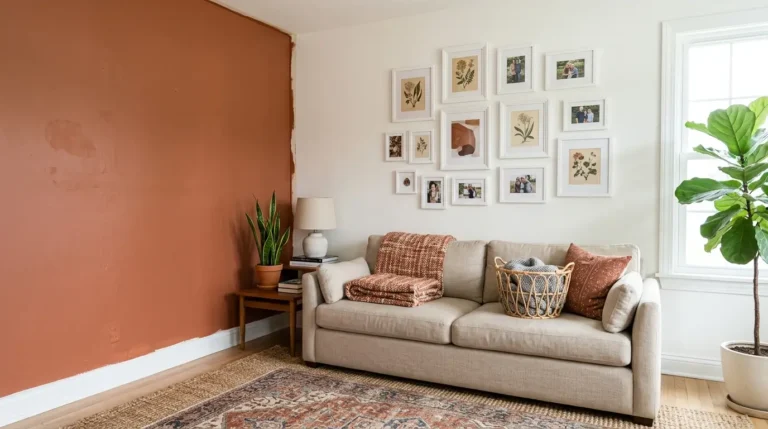
A single wall in a deeper color can change how a room feels without the work of painting everything. Pick the wall you see first when you walk in, or the one behind your bed or sofa. Colors like deep green, warm terracotta, muted navy, and dusty plum feel rich next to lighter walls. Test the color first by painting a big sample on poster board and taping it up for a few days. Look at it in the morning and again at night. Tape off the edges with painter’s tape and cut in the corners with a small brush before you roll. Use two coats, and pull the tape off while the paint is still a little wet so the edge stays sharp. Add a lamp, a wood shelf, or a piece of art in a lighter color so the wall has something to play against. Keep the other walls and the trim soft white, and let the deep wall do the work.
2. Picture Frame Molding
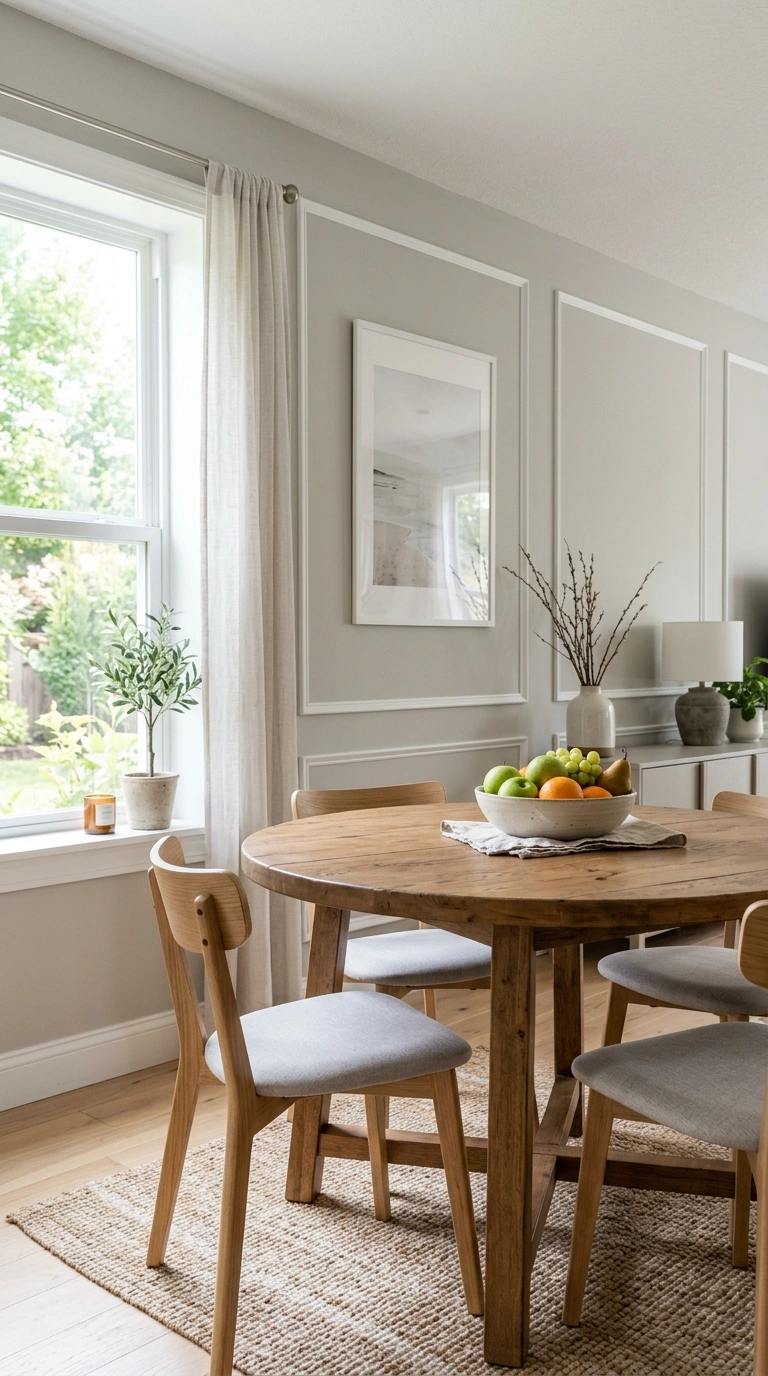
Thin strips of trim set in rectangles give a flat wall a classic look. This is called picture frame molding, and it looks like it costs much more than it does. Use narrow MDF or pine strips about one inch wide, and cut the ends at 45 degree angles for neat corners. Mark the wall lightly with a pencil and a level before you glue anything. Attach the strips with construction adhesive and a few small nails, then fill the holes and seams with caulk. Paint the trim and the wall inside the boxes the same color, such as soft gray, warm white, or sage. Using one color lets the shadows do the work. This idea looks lovely in a dining room, a hallway, or behind a bed. Try boxes about 18 by 24 inches with even spaces between them. Leave 3 to 4 inches from the ceiling and the baseboard so the rectangles feel balanced.
3. Slat Panel Wall
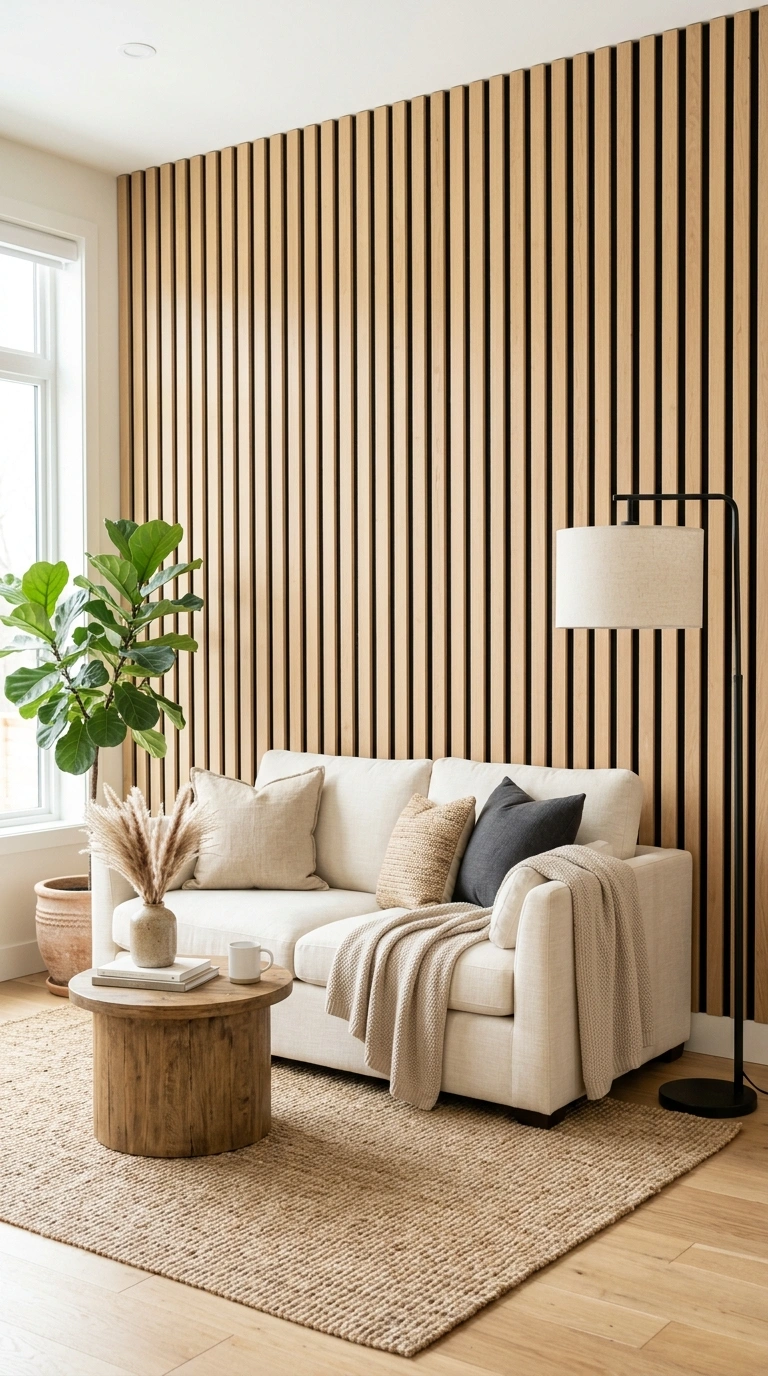
Vertical wood slats add warmth and texture to a plain wall. Use thin strips of pine or oak, about half an inch thick and 2 inches wide, and space them about half an inch apart. Stain them in a light oak or natural finish, or paint them the same color as the wall for a softer look. Glue and nail each strip straight onto the wall using a level, or buy a ready made slat panel that hangs on a rail. A slat wall looks great behind a sofa, a TV, or a bed. Stick a strip of black felt behind the slats to give a deep shadow and a more finished look. Sand the edges so nothing snags on sweaters. A floor lamp beside the wall makes the wood grain glow. In a small room, keep the slats at eye level or below and leave the upper wall smooth. Dust the gaps with a soft brush attachment.
4. Peel And Stick Wallpaper
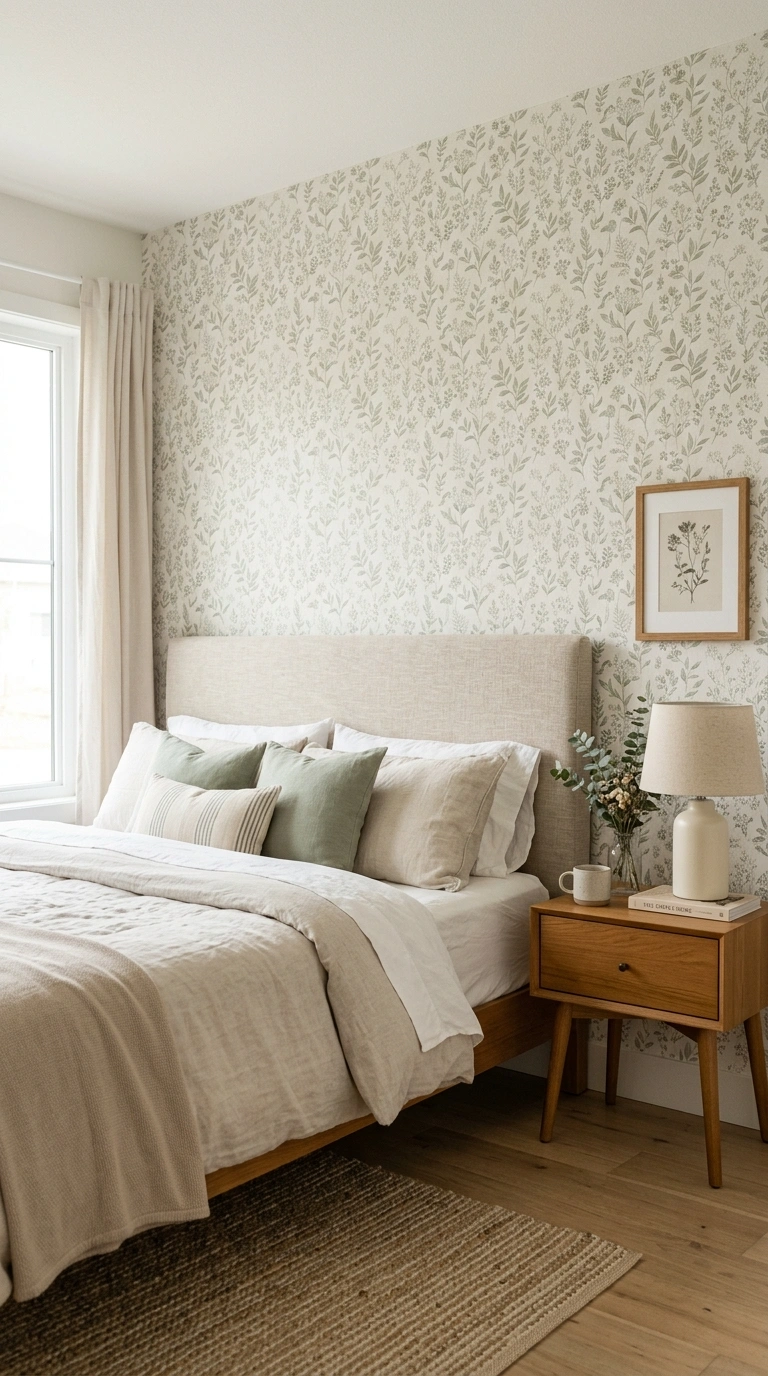
Peel and stick wallpaper is one of the easiest ways to change a wall in a few hours. Choose a pattern in soft tones, like a small botanical print, a fine stripe, or a plain grasscloth look. Clean the wall and let it dry, and make sure any new paint has cured for about four weeks. Start at the top corner, peel back a few inches of the backing, and press it flat with a smoothing tool. Work down slowly and lift the paper to fix any bubbles. Line up the pattern with the next strip and butt the seams together. Trim at the ceiling and baseboard with a sharp blade. This idea works well behind a bed, inside a bookcase, or on the wall of a small nook. Match the room with one accent, such as a pillow or a lamp in a color from the pattern. Keep leftover pieces for repairs, and use a hair dryer on low to loosen the paper when you move out.
5. Simple Gallery Wall
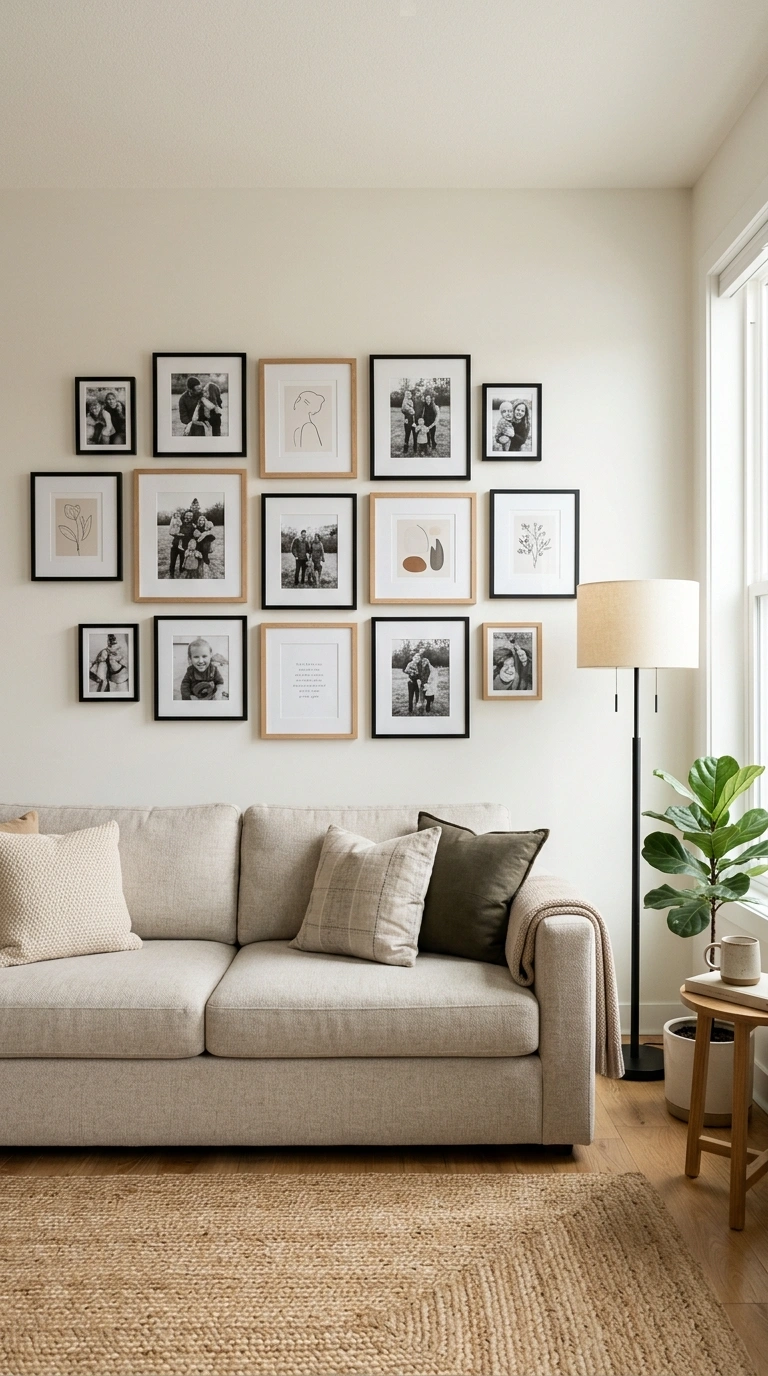
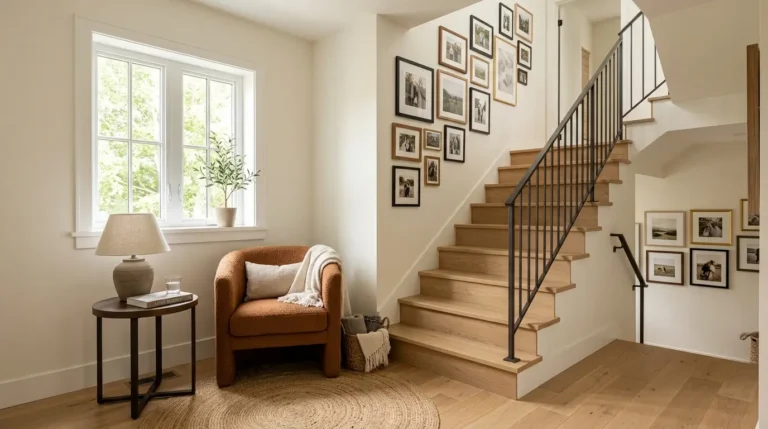
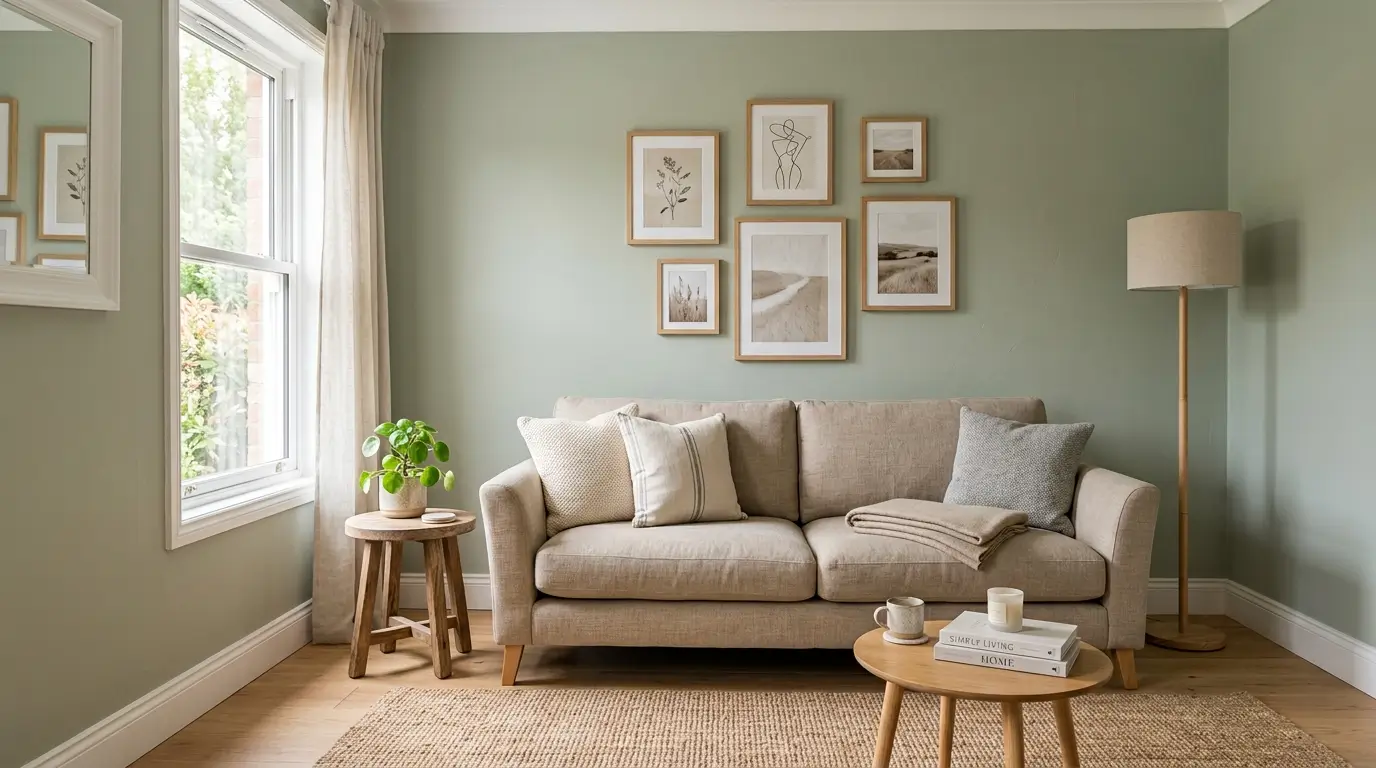
A gallery wall is a group of frames hung together, and it looks neat when you plan it. Choose frames in one or two finishes, like black and light oak, so the group feels connected. Use art you love, like family photos, prints, and small paintings, and add a few with white mats for breathing room. Trace each frame on kraft paper, cut the shapes out, and tape them to the wall. Move them around until the spacing feels right, about 2 to 3 inches between frames. Then hang the real frames using a level. Place the center of the whole group about 57 inches from the floor. Hang it above a sofa or console, or along a staircase. If you would rather not use nails, use adhesive strips rated for the weight of each frame. Keep the group about two thirds the width of the furniture beneath it. Start with the biggest frame and work outward from there.
6. Picture Ledge Display
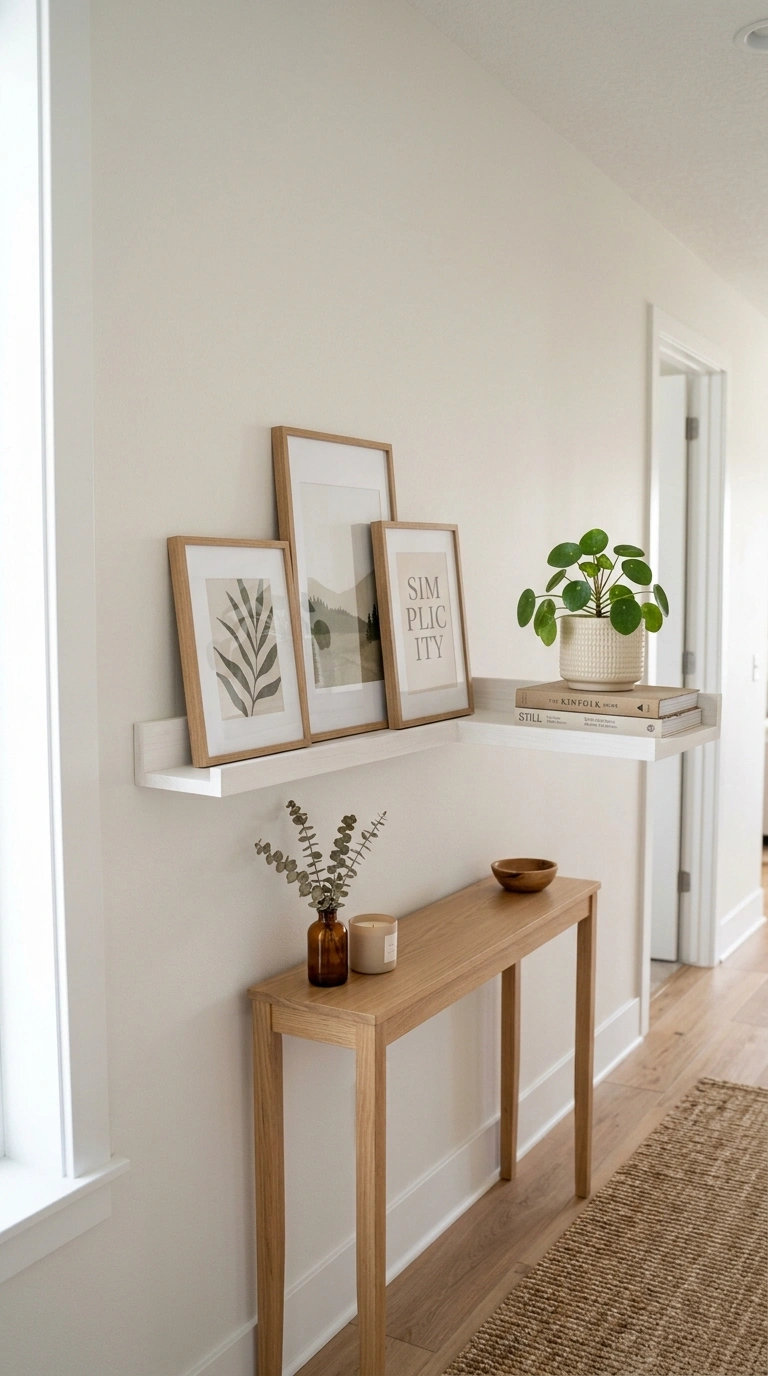
A picture ledge is a shallow shelf that lets you lean frames and swap them without making new holes. Choose a ledge about 3 to 4 inches deep in white, oak, or black, and hang it with the screws from the box, going into wall studs or anchors. Lean two or three frames on it and let them overlap a little. Add a small plant, a stack of books, or a ceramic bowl so the arrangement feels casual. This idea works above a sofa, in a hallway, in a kid’s room, and in a home office. Change the art with the seasons, or whenever you get a new print. Keep the biggest frame in the middle or on one end and let the smaller ones fill in. Hang the ledge about 60 inches from the floor. A long ledge, about 4 feet, looks great over a bed. Wipe it with a dry cloth so dust does not build up behind the frames.
7. Two Tone Wall
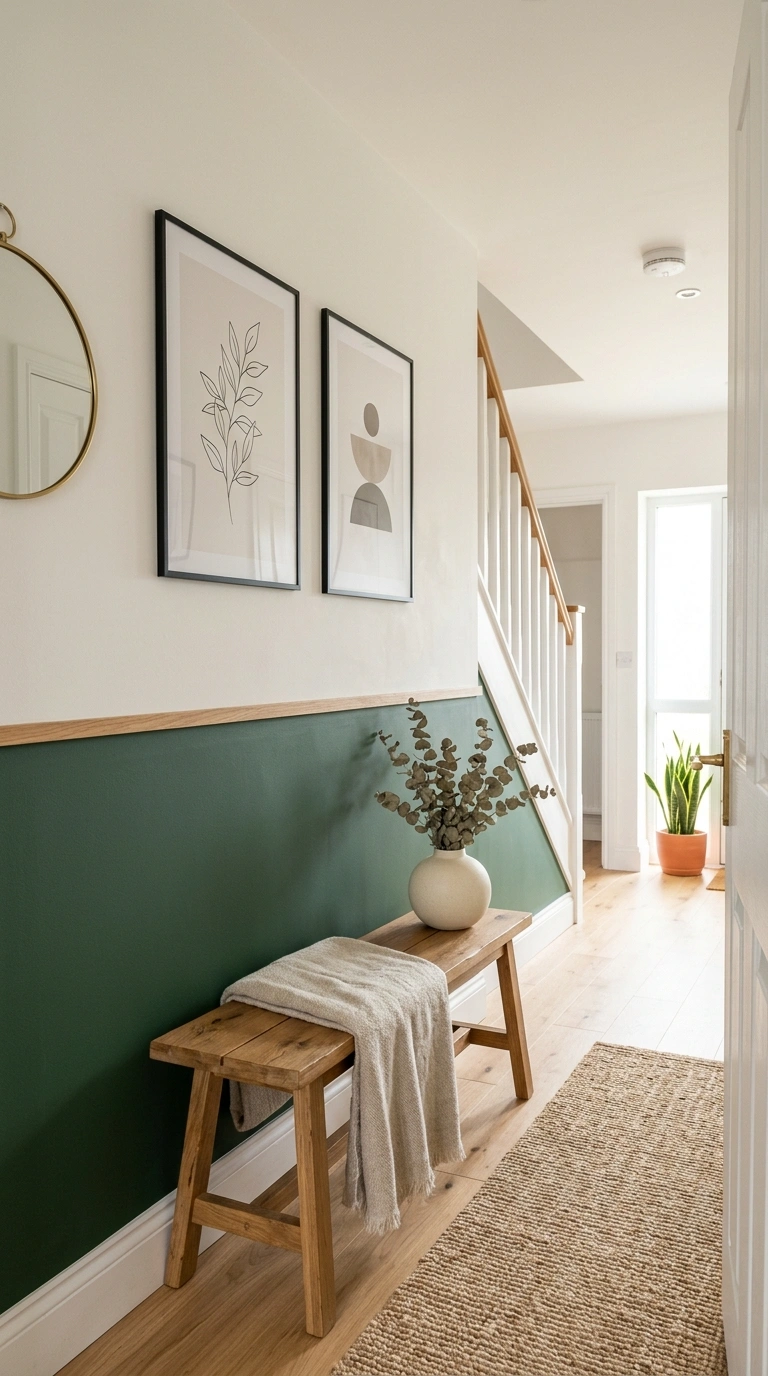
A two tone wall uses one color on the lower part and another on the top. It makes a room look taller and gives a wall some structure. Pick a darker color for the bottom, like deep green or warm gray, and a soft white or pale cream for the top. Put the dividing line at about one third to one half of the wall height, and mark it with painter’s tape and a level. Press the tape edge down with a plastic card so paint cannot bleed underneath. Paint the top color first and let it dry. Then tape and paint the lower color. Add a thin wood rail or a strip of trim on the line for a finished look. This suits a dining room, a hallway, or a kid’s room, because the darker lower half hides scuffs. Use a durable satin paint on the bottom. Pull the tape off at a low angle while the paint is still slightly wet.
8. Painted Arch Shape
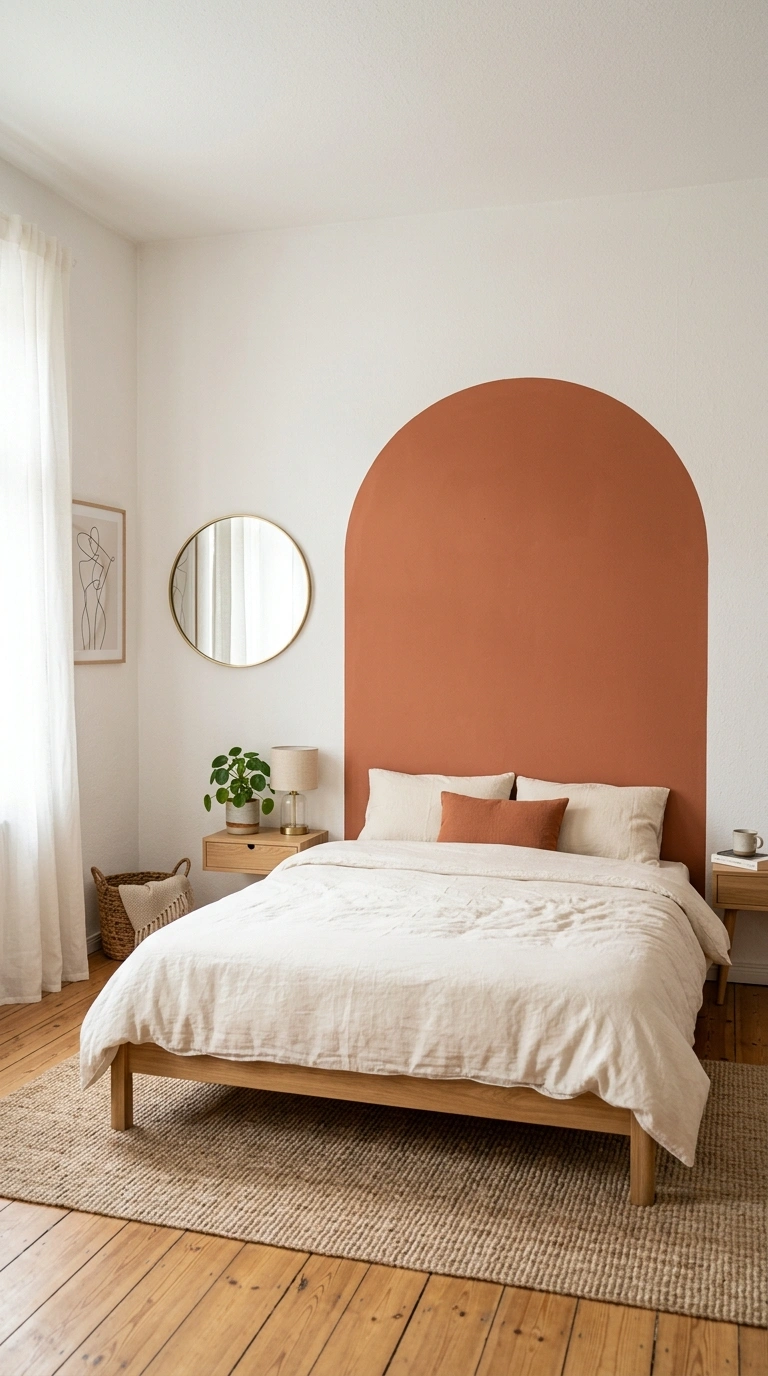
A painted arch is a bold shape on a plain wall, and it can act like a headboard, a frame for a mirror, or a backdrop for a plant. Draw the curve with a string tied to a pencil, or trace a big round object like a bucket lid for the top. Measure the width and height, center the shape behind the bed or sofa, and lightly sketch it with a pencil. Tape the edge and paint the inside in a color like terracotta, sage, or deep blue. Use two coats, and pull the tape while the paint is slightly tacky. The arch works best in a room with plain furniture. Place a low bed, a bench, or a simple console in front of it. Add a wooden frame with a round mirror or a plant nearby. If you do not want to paint a big shape, try a smaller arch around a wall hook or a mirror. Pick a color close to something already in the room.
9. Grouped Round Mirrors
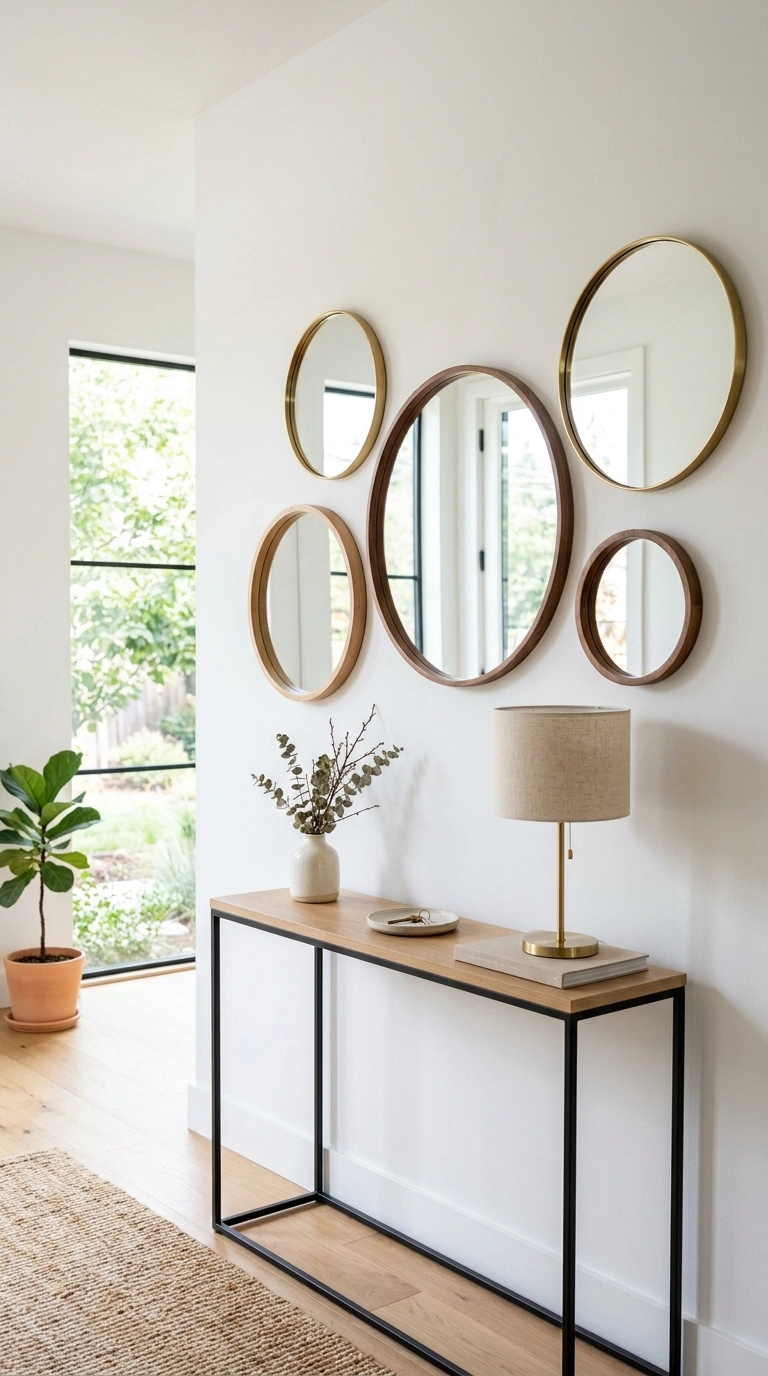
A cluster of round mirrors adds shine and shape, and it brings more light into a room. Use three to five mirrors in different sizes, like 8, 12, and 20 inches, with thin frames in brass, black, or natural wood. Lay them on the floor first and move them around until the group looks balanced. Then trace them on paper, tape the paper to the wall, and mark the hook spots. Hang the group over a console, a sofa, or a bed, and place the largest mirror slightly off center so it feels natural. Keep about 3 inches between mirrors so each shape shows. Use hangers rated for the weight of each mirror. A wall that faces a window is best, since the mirrors bounce daylight back into the room. Avoid hanging them where they reflect clutter. Clean them with a dry cloth and a little glass spray, and check each one with a small level.
10. Basket Wall Display
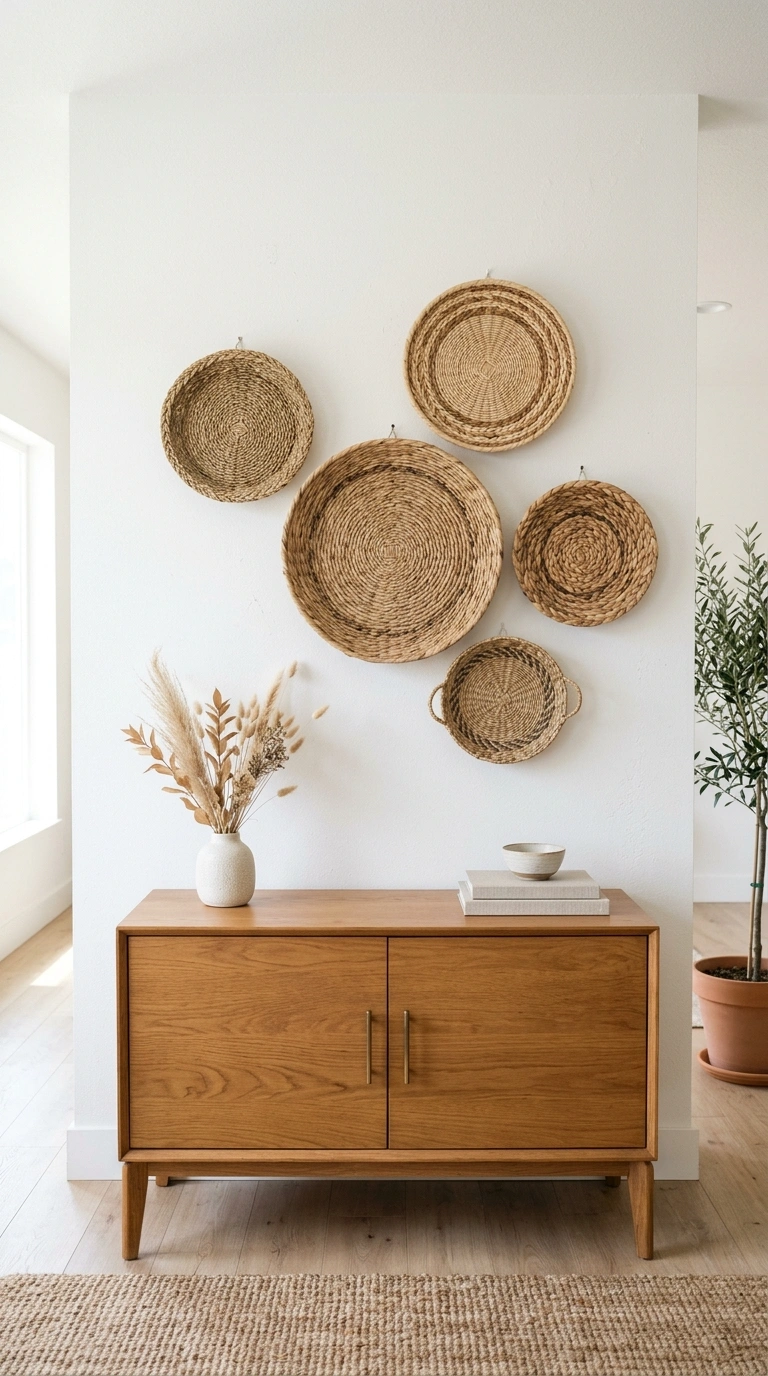
Woven baskets look great on a wall, and they add texture without adding weight. Gather baskets in different sizes but in a similar color, like natural seagrass, rattan, or dark brown. Try three, five, or seven, since odd numbers tend to look best. Hang each one on a nail or a small hook, using the natural weave or the handle. Arrange them in a loose circle or a tall column above a dining table or a sideboard. Keep about 2 to 3 inches between baskets so they do not touch. Lay them on the floor before hanging so you can shift them around. Baskets look good in a hallway, over a sofa, or above a bed. Choose flat baskets, sometimes called wall baskets or trays, since they sit close to the wall. Add one or two dried stems in a tiny vase on a shelf below. Stick with lightweight baskets so the nails do not pull out.
11. Textile Wall Hanging
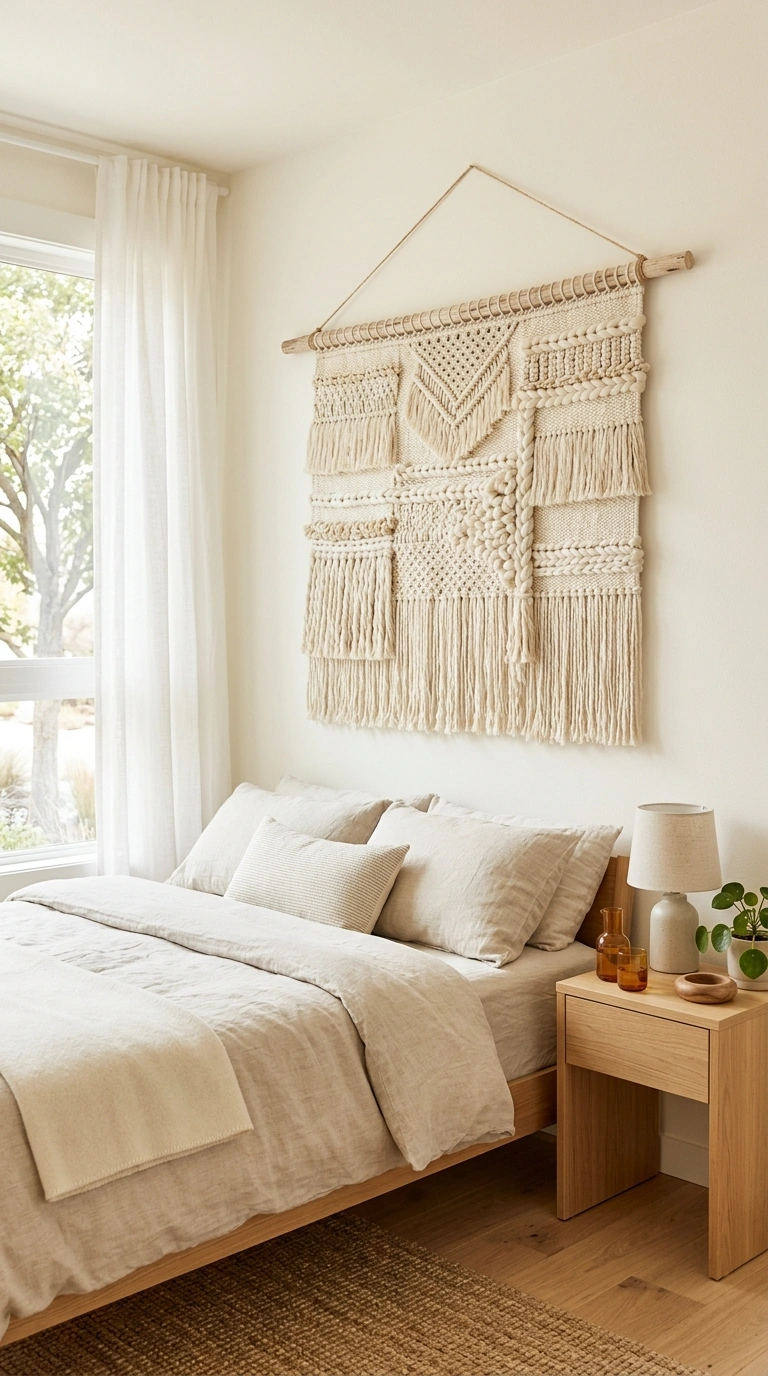
A large woven or fabric hanging brings softness to a room and helps absorb sound. Choose one in cotton, wool, or linen, in cream, oatmeal, or a muted earthy color. Hang it from a wooden dowel with a cord and a pair of small hooks, and place it above a bed, a sofa, or a desk. A hanging about 30 to 40 inches wide works well over a queen bed, while a smaller one fits above a console. If you enjoy crafts, make your own by weaving on a simple frame loom, or by dyeing a piece of plain linen. A vintage rug or a quilt works too. Hang it so the bottom sits 8 to 10 inches above the furniture. Brush it lightly to remove dust, and if the fabric is machine washable, rinse it every few months. Keep the rest of the room simple so the hanging is the main texture. In a rental, use removable hooks made for light weights.
12. Wall Of Plates
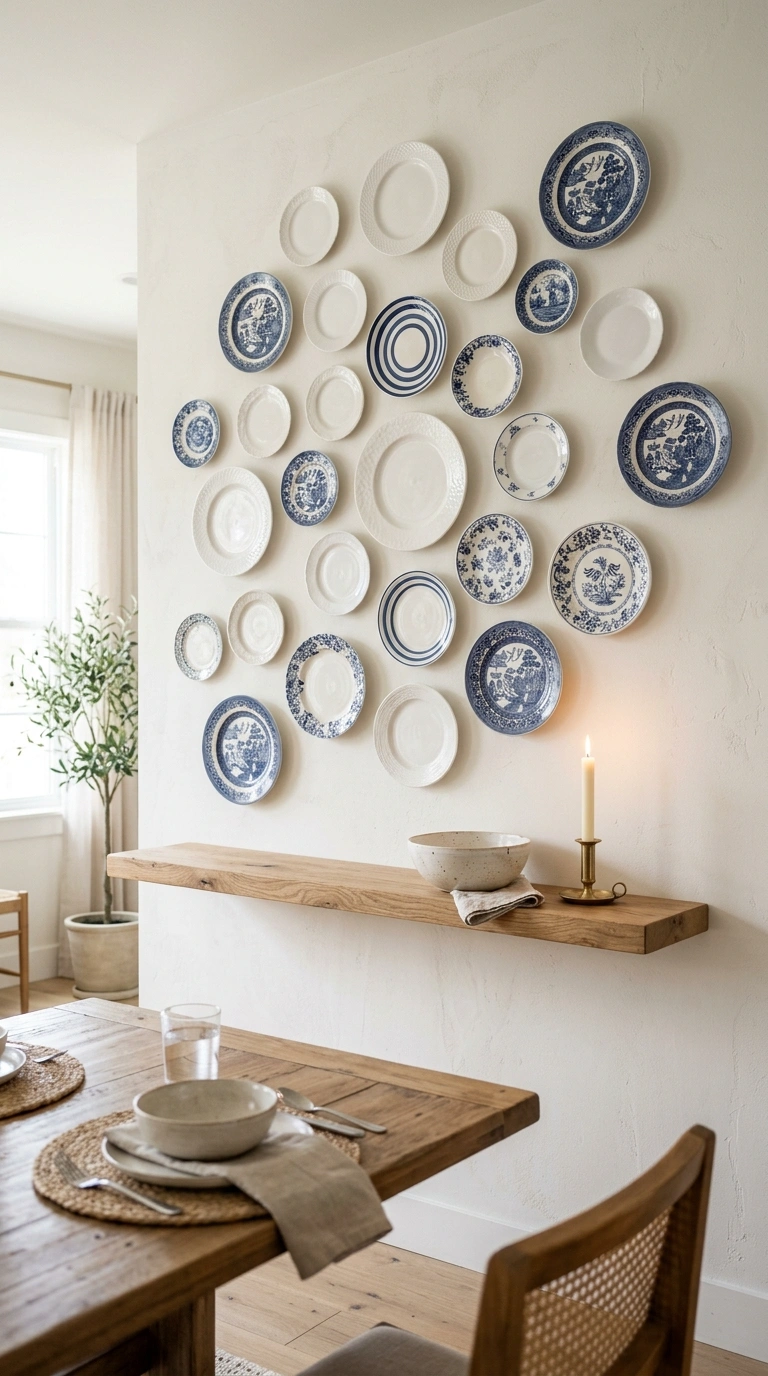
A wall of plates is a friendly way to use dishes you already own. Pick plates in white and cream, or in blue and white, with different patterns and sizes. Use plate hangers with adhesive, or wire hangers that clip around the rim. Lay the plates on the floor first in a circle or a loose grid, then trace each on paper and tape the paper to the wall. Hang the plates about 2 inches apart, starting with the center. A dining room or kitchen wall works well, and so does a hallway. Thrift stores and yard sales are good places to find cheap plates. Skip plates you eat from often, since hanging plates gather dust. Use small felt or rubber dots on the back edge to keep them from tilting. Add a small shelf below for a bowl or a candle. Use strong anchors when hanging heavy ceramic on drywall, and wipe the plates with a damp cloth twice a year.
13. Oversized Art Piece
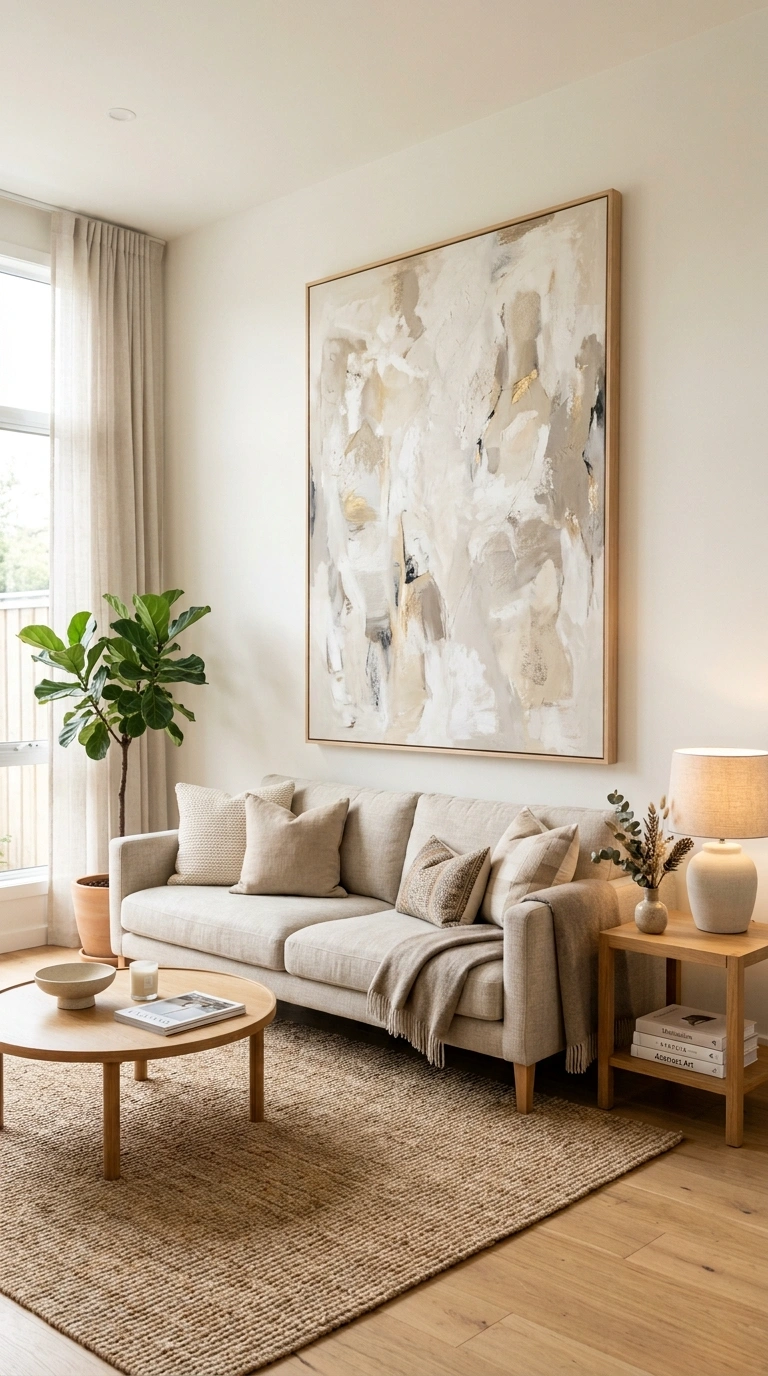
A single big piece of art can fill a wall and make a room look finished. Pick a canvas or framed print that is about two thirds the width of the furniture below it. For a sofa that is 84 inches wide, that means a piece around 56 inches wide. A large abstract in soft neutrals or a big landscape print works well. Hang the center of the art at about 57 inches from the floor, and keep it 6 to 8 inches above the sofa. If a large print costs too much, order a poster online and frame it, or make your own with a big canvas and acrylic paint in a few soft shades. Choose a simple frame in black or wood. Set a lamp on a side table so the light falls on the art. Do not hang the art too high, since that makes it look lost. For wide pieces, use two hooks to keep it level and steady.
14. Floating Shelf Wall
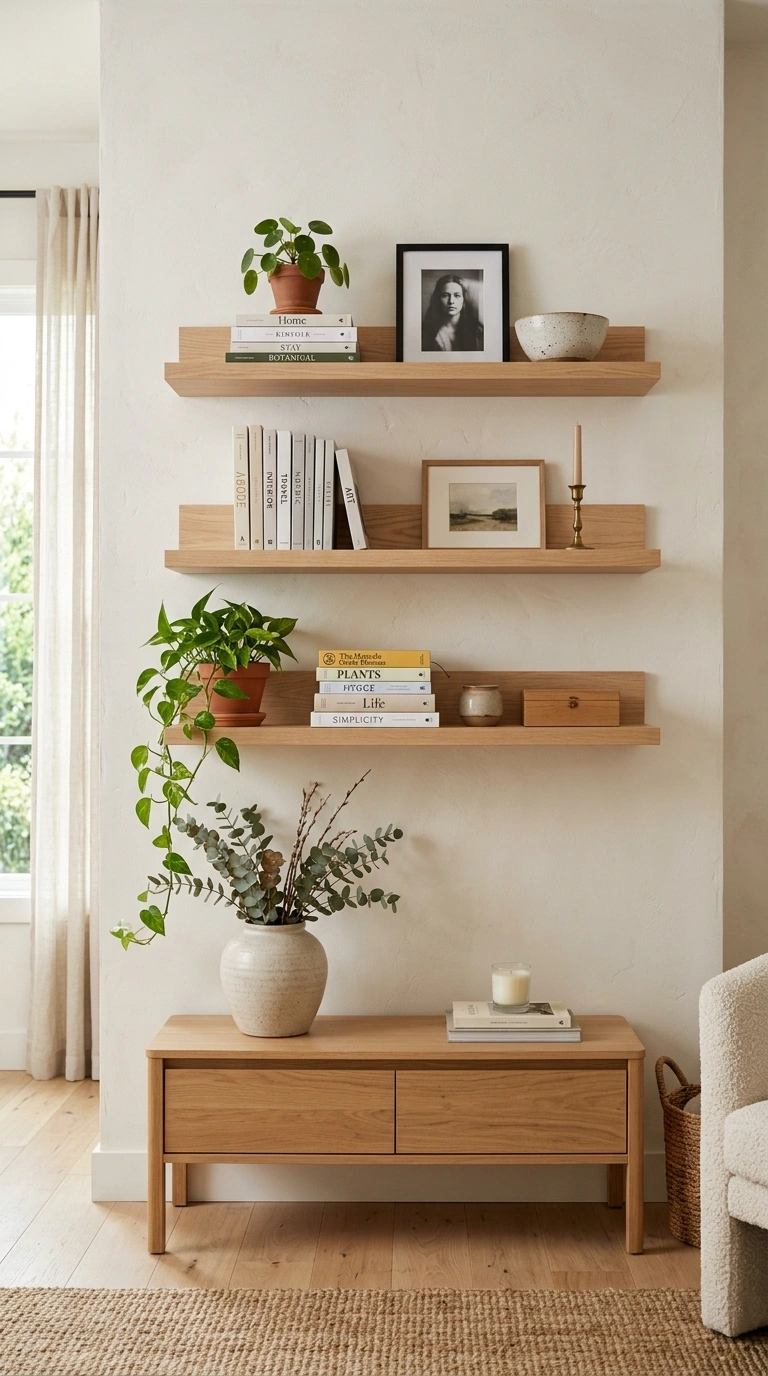
Floating shelves turn a plain wall into a display, and they hold things you use every day. Use two or three shelves in a wood finish that matches your furniture, about 8 to 10 inches deep and 36 to 48 inches long. Stagger them in height, or line them up evenly, depending on the look you want. Hang them into studs or use heavy duty anchors, because books and pots are heavy. Fill them with a mix of books, ceramic bowls, small plants, and framed photos, and leave about a third of each shelf empty. Put taller items at the ends and small items in the middle, and vary the height of the objects so the shelf looks natural. This idea works in a living room, kitchen, or bedroom. Use a level to hang each shelf, and check the spot with a stud finder first. Dust once a week, and rearrange the items each season. Keep the colors in a small palette for a calm look.
15. Limewash Paint Finish
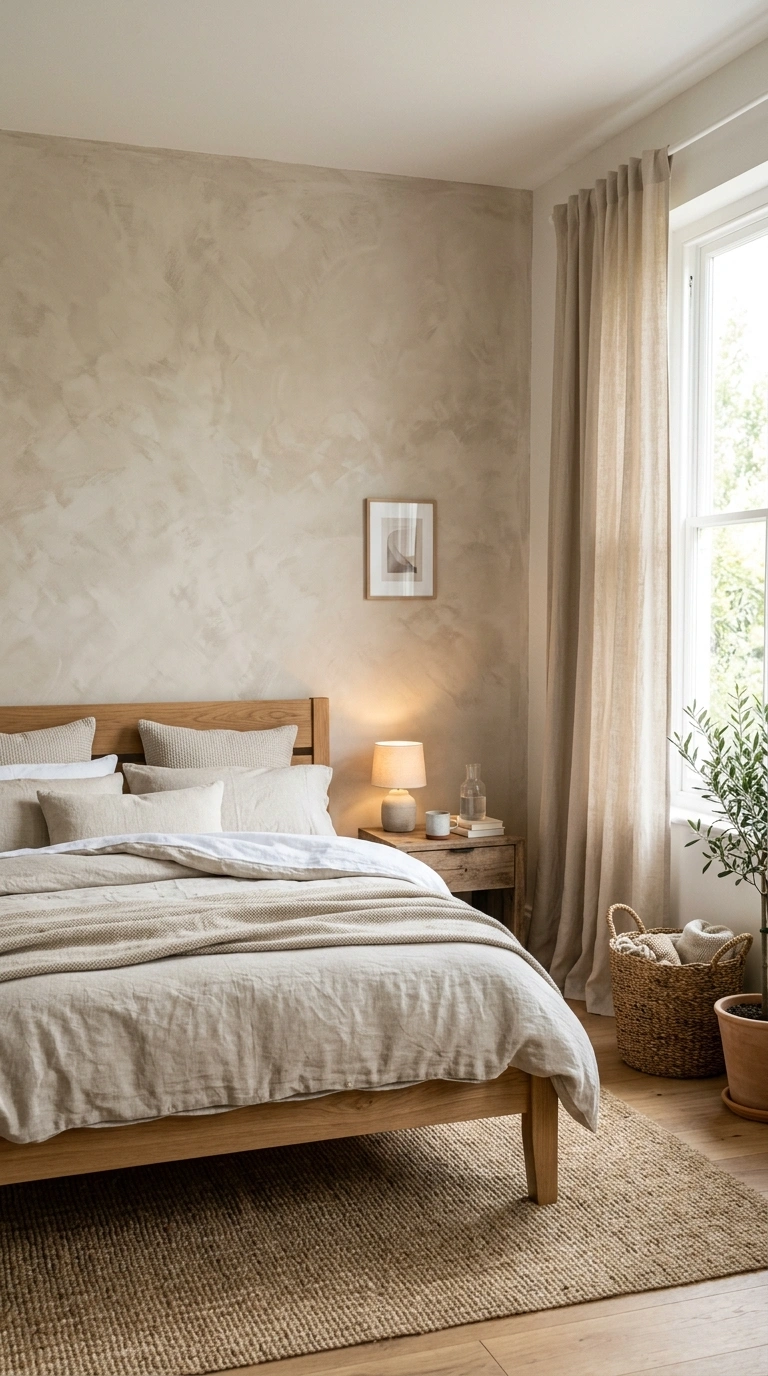
Limewash paint gives a wall a soft, cloudy look that plain paint cannot copy. It is made from lime and pigment, and it comes in warm whites, sand, clay, and muted greens. Apply it with a wide brush in criss cross strokes and let the brush marks show, since that creates the gentle movement. Use two coats, letting each dry fully. Prime the wall first if it has glossy paint or a dark color. This finish looks great in a bedroom, a dining room, or a living room. It pairs well with wood furniture, linen curtains, and woven baskets. Test a sample on a small board first, since limewash dries lighter than it looks when wet. Wear old clothes and safety glasses, since lime can irritate skin and eyes. If you want a more forgiving option, look for a limewash effect paint that rolls on and looks close to the real thing. Dust the wall with a dry cloth and spot clean gently.
16. Full Wall Curtains
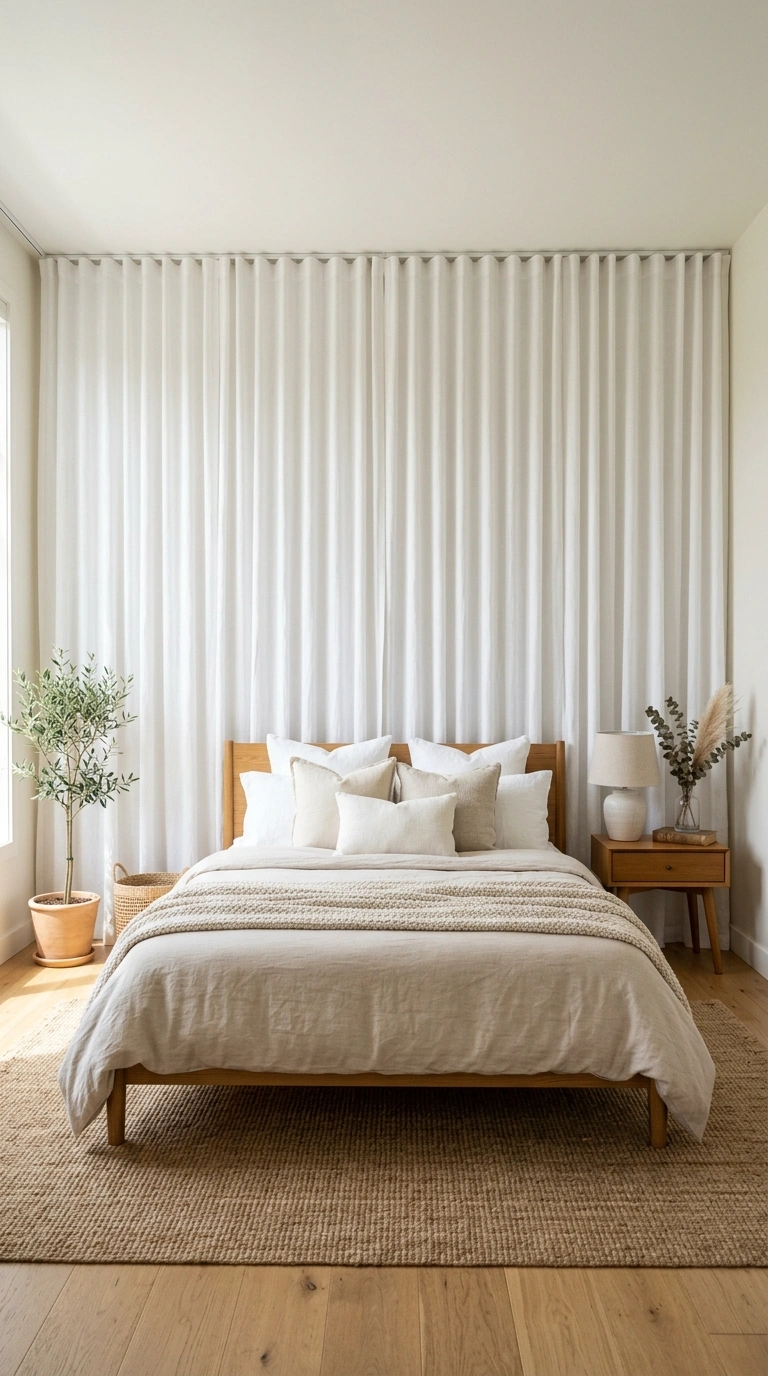
Hanging curtains across a whole wall softens a room and can hide a window, a door, or a bare spot. Use a long rod that reaches from corner to corner, and mount it close to the ceiling. Choose a light fabric like linen or cotton in white, oatmeal, or pale gray, and make the panels about one and a half times as wide as the wall so they fall in gentle folds. Let them just touch the floor. This works well in a bedroom behind a bed, in a studio to divide a space, or in a living room. A ceiling mounted track gives a clean look, and clip rings make it easy to slide the curtains open. Pair the curtains with simple furniture and a jute rug. Wash the fabric before hanging so it does not shrink later. Steam the folds to relax them, and tie the curtains back during the day for a lighter feel.
17. Pegboard Wall Display
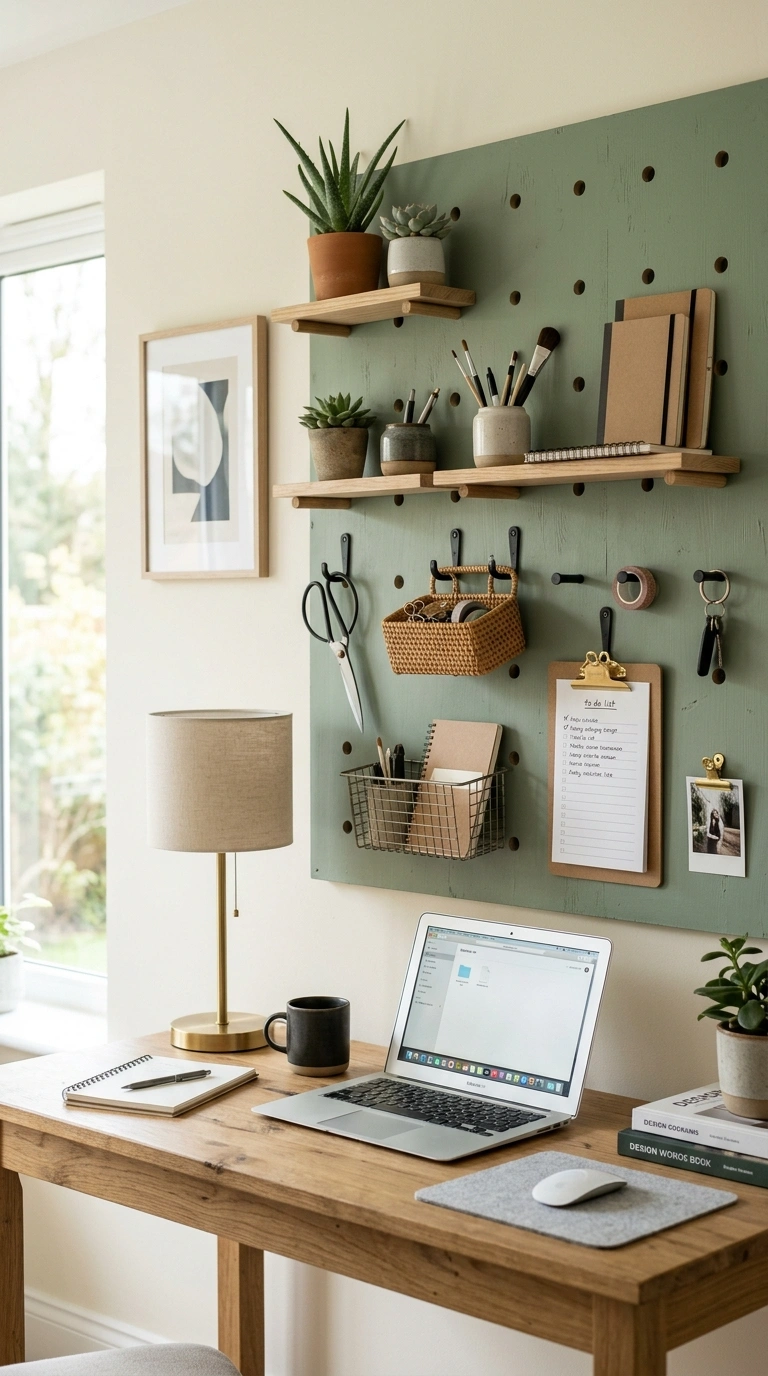
A painted pegboard wall helps you store things and decorate at once. Buy a sheet of wood or metal pegboard, cut it to size, and paint it in a soft color such as sage, cream, or navy. Mount it on the wall with spacers behind it so the pegs can slide in. Add hooks, small shelves, baskets, and clips to hold your items. This works in a home office for tools, a craft room for supplies, a kitchen for pans, or a child’s room for toys. Arrange items by size and color, and leave some empty holes so you can change things later. Hang lightweight items near the top and heavy ones near the bottom. Use small wooden pegs and simple containers to match the look. Wipe the board with a damp cloth when it gets dusty. If you rent, hang a small board on a rail with removable hooks. Rearrange the pieces each month to keep it fresh.
18. Painted Stripe Wall
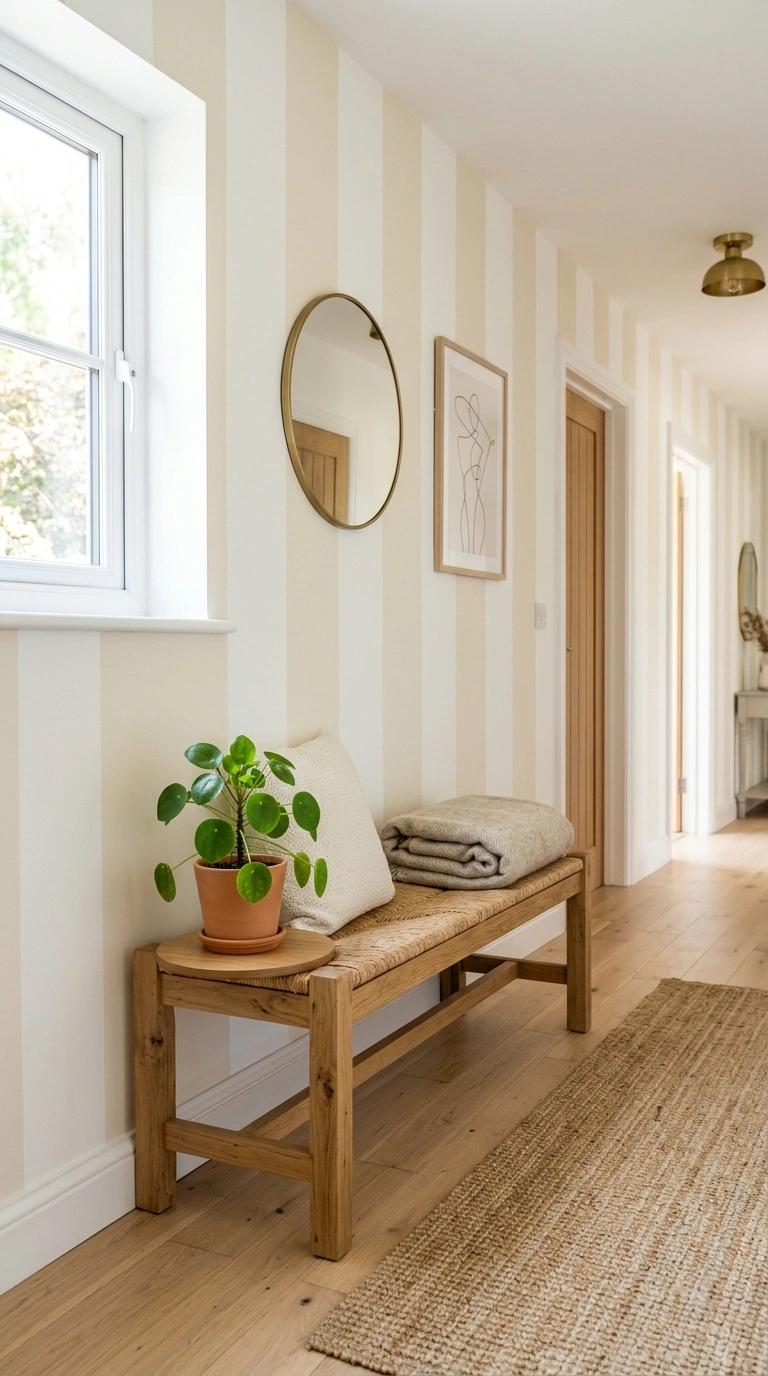
Painted stripes give a wall a fresh, playful look with only paint and tape. Pick two colors that sit close together, like warm white and soft cream, or a bolder pair like sage and white. Wide stripes about 8 to 10 inches look modern, and thin stripes about 2 inches look classic. Start by painting the whole wall in the lighter color and let it dry for a day. Use a level and a pencil to mark vertical lines, and place painter’s tape on the outside edges of each stripe. Press the tape down and seal the edge with a thin coat of the base color, which stops the second color from bleeding under. Then paint the stripes and remove the tape when the paint is barely dry. Stripes look great in a hallway, a bedroom, and a nursery. Vertical stripes make the ceiling look taller, and horizontal stripes make a narrow room look wider.
19. Starched Fabric Wall
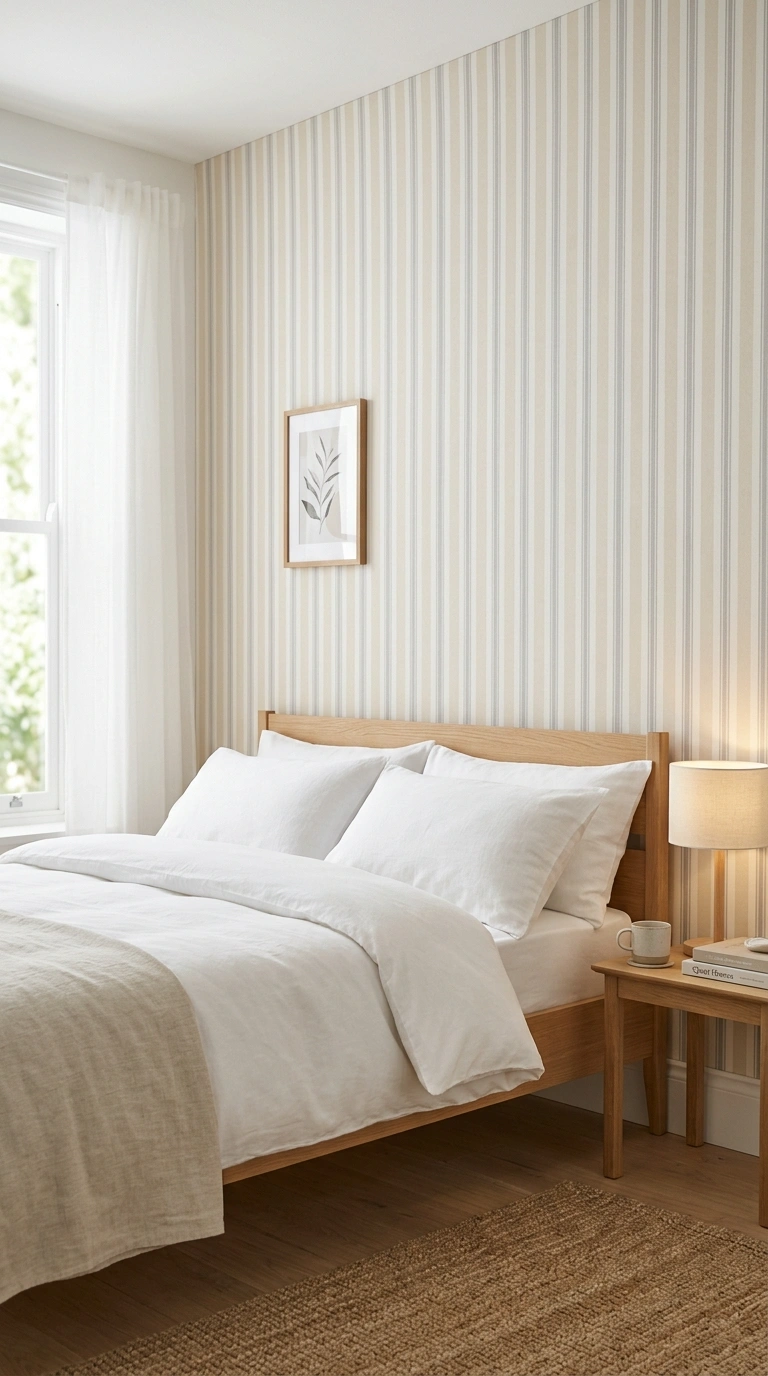
You can cover a wall in fabric with liquid starch, and it peels off later without damage. Choose a lightweight cotton or linen in a soft pattern, like stripes, small florals, or a solid muted color. Cut panels a few inches longer than the wall, brush liquid starch onto the wall, press the fabric into place, and brush more starch over the top. Smooth out bubbles with a wide brush. Trim the extra fabric at the ceiling and baseboard with a blade. This works in a rented bedroom, a dorm, or a child’s room. It gives a soft, quiet look and helps absorb some noise. Let it dry overnight and check for wrinkles in the morning. When you want to remove it, peel the fabric off and wash the wall with warm water. Test a small hidden spot first, since some paints can be stained by the starch. Choose a fabric with a tight weave so the wall color does not show through.
A Small Place To Start
You do not need to do all of these. One wall, one afternoon, and one idea from the list is enough to make a room feel different. Start with the wall you look at the most. If you like the result, move on to the next one when you are ready.
Frequently Asked Questions
How can I change my walls on a small budget?
Paint is the cheapest option, and one accent wall costs very little. Picture ledges, gallery walls, and hanging baskets can use things you already own. A roll of peel and stick wallpaper covers a small wall for a low price.
What is the best wall idea for renters?
Peel and stick wallpaper, adhesive hooks, picture ledges, and fabric hung with liquid starch can all come off later. Check your lease first and test a small hidden spot. Use hooks rated for the weight you plan to hang.
How high should I hang art on a wall?
Hang the center of the art about 57 inches from the floor, which is around eye level. Above a sofa or console, leave 6 to 8 inches between the furniture and the frame. For a group of frames, treat the whole set like one big piece.
Which wall should be the accent wall?
Pick the wall you see first when you come in, or the one behind the bed, sofa, or dining table. Avoid a wall with lots of windows or doors, since they break up the color. Choose only one wall so it stays special.
Will a dark wall make a small room look smaller?
Not always. A deep color can make the corners fade, so the room feels cozy instead of tight. Good lighting and lighter furniture help a lot. Test the color at different times of day before you paint the whole wall.