19 Smart Studio Apartment Kitchenette Ideas for Tiny Spaces
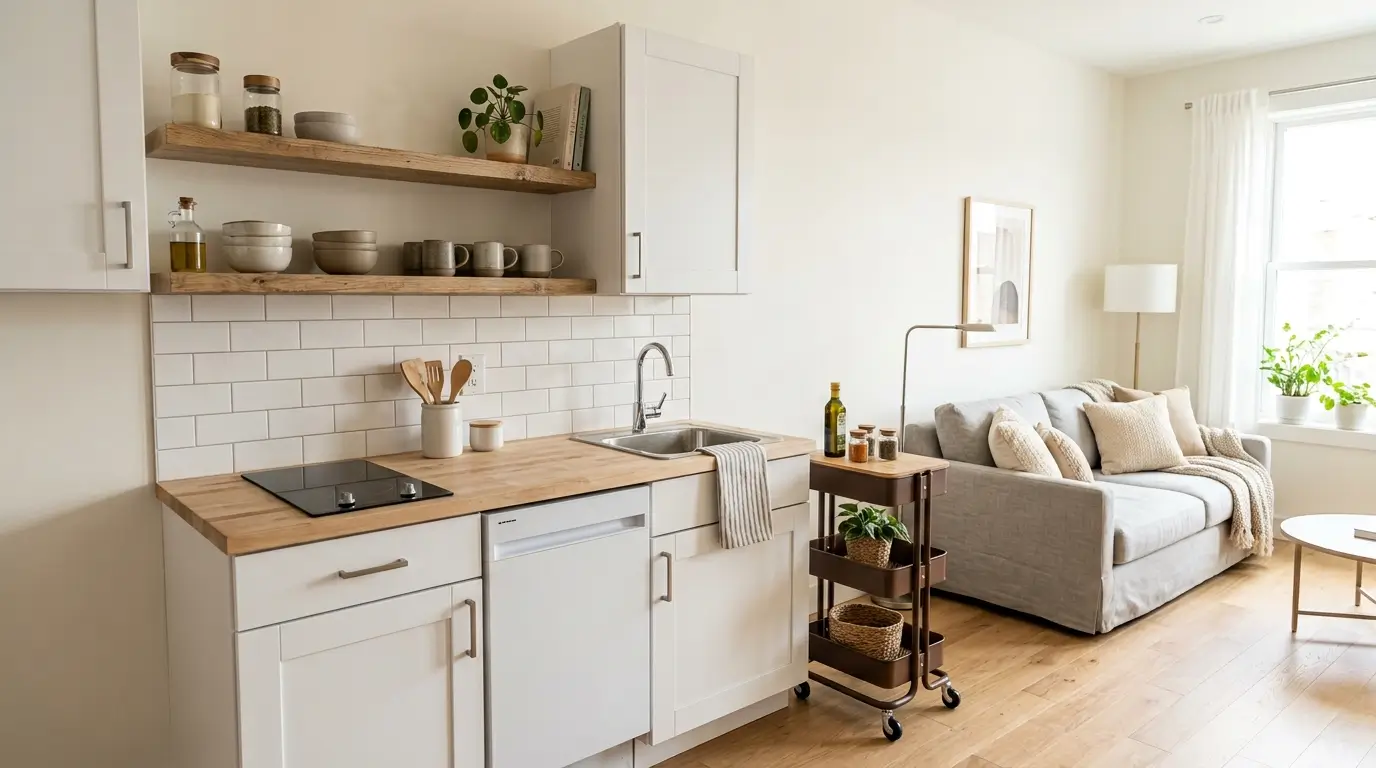
Have you ever stood in your studio kitchen and realized you can touch the fridge and the stove without moving your feet? That was me in my first apartment. I owned one pan, two mugs, and a lot of frustration. Over time I learned that a tiny kitchen does not need fewer things. It needs a better plan. The right shelf, the right cart, or one clever fold-down table can make cooking feel calm instead of crowded. In this list, I collected 19 kitchenette ideas that work in real studio apartments, including rentals where you cannot knock down a wall or swap the cabinets. Most of them use simple materials you can find at a hardware store or a big box shop. Pick a few that fit your corner and try them this weekend.
1. Compact Two-Burner Setup
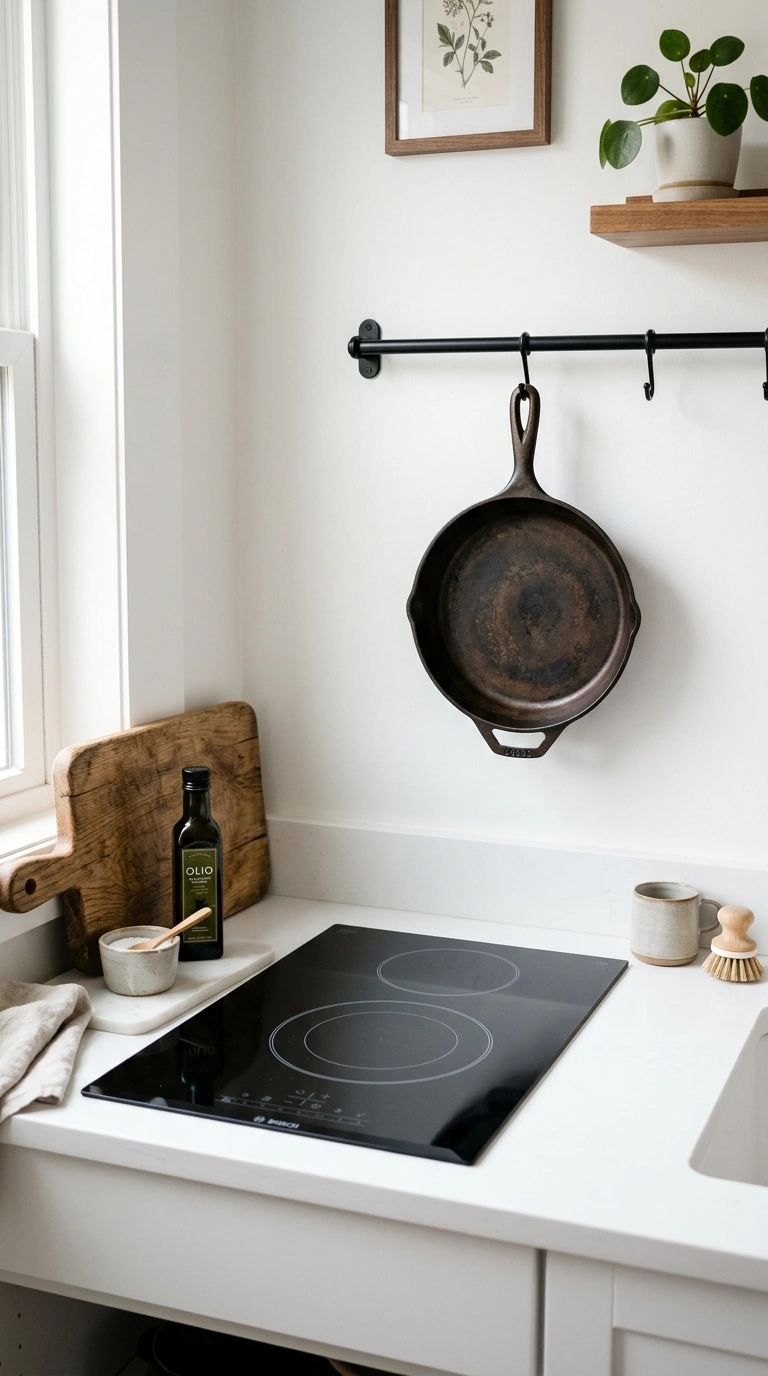
A two-burner cooktop is enough for most daily meals, and it frees up a surprising amount of counter space. If your studio has an old full-size stove that eats the whole wall, consider swapping it for a slim electric or induction unit built into a short run of counter. Even if you cannot replace the stove, a portable two-burner plate on a sturdy counter works well for renters. Choose a matte black or white finish so it blends in with the rest of the kitchenette instead of standing out.
Style the area with a small wooden cutting board that sits over the burners when you are not cooking. That gives you an instant extra prep surface. Hang a single pan and a wooden spoon on a wall rail nearby so you can grab them without opening a cabinet. Keep the wall behind the burners clean and light, and wipe it after each meal. A calm, simple cooking zone makes the whole studio feel bigger.
2. Fold-Down Wall Table
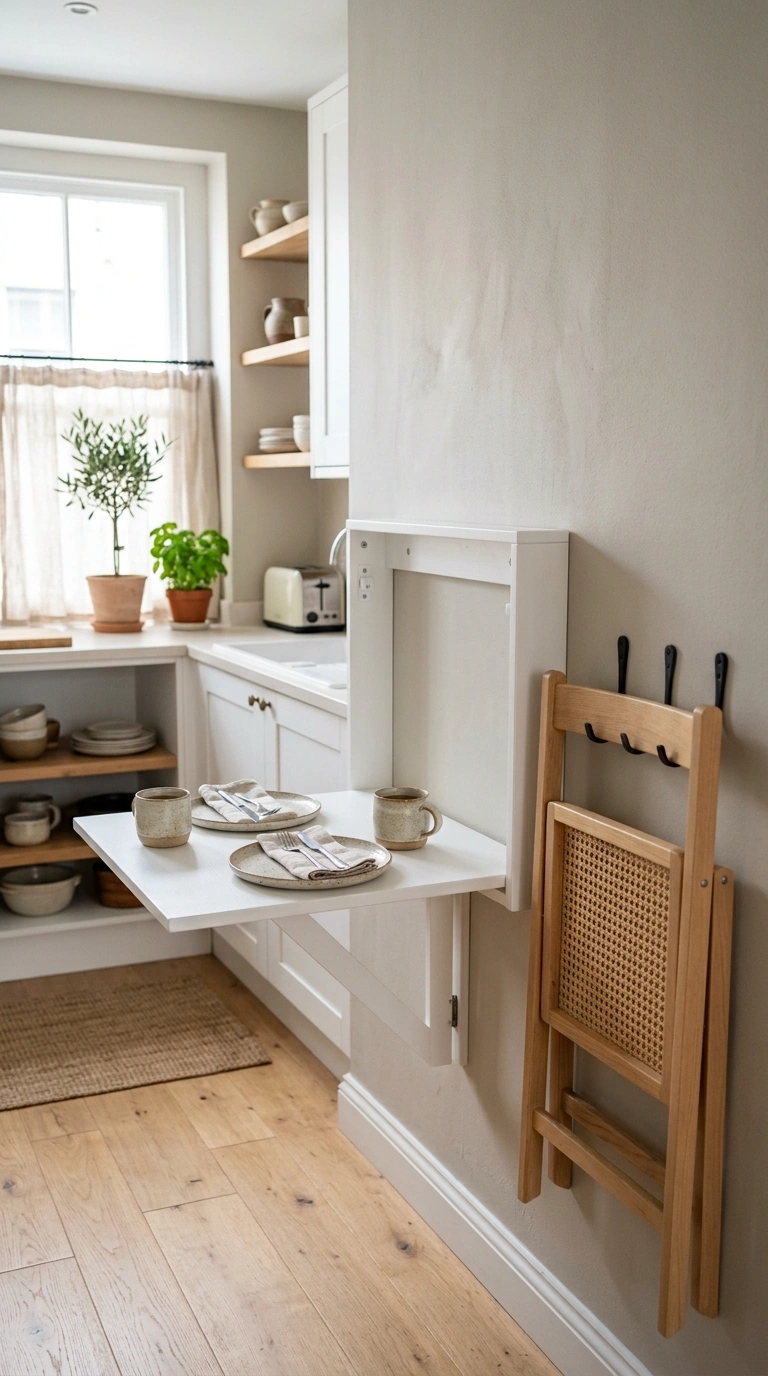
A fold-down table is one of the best tricks for a studio where the kitchen and living area share the same space. Mount a wall-hinged wooden panel about 30 inches high, and let it drop down when you need to eat or chop vegetables. When you are done, lift it up and it takes almost no room. Solid birch plywood painted white or left natural looks clean and holds up well to daily use.
Place it on the wall closest to the kitchenette so you can step from stove to table in one move. Add two slim folding chairs that hang on hooks nearby. Screw the hinges into wall studs, not just drywall, because a table full of dinner plates is heavier than it looks. If you rent, ask your landlord first, or choose a version that hooks over a door instead. A little basket of cloth napkins next to it makes it feel like a real dining spot.
3. Open Shelf Pantry
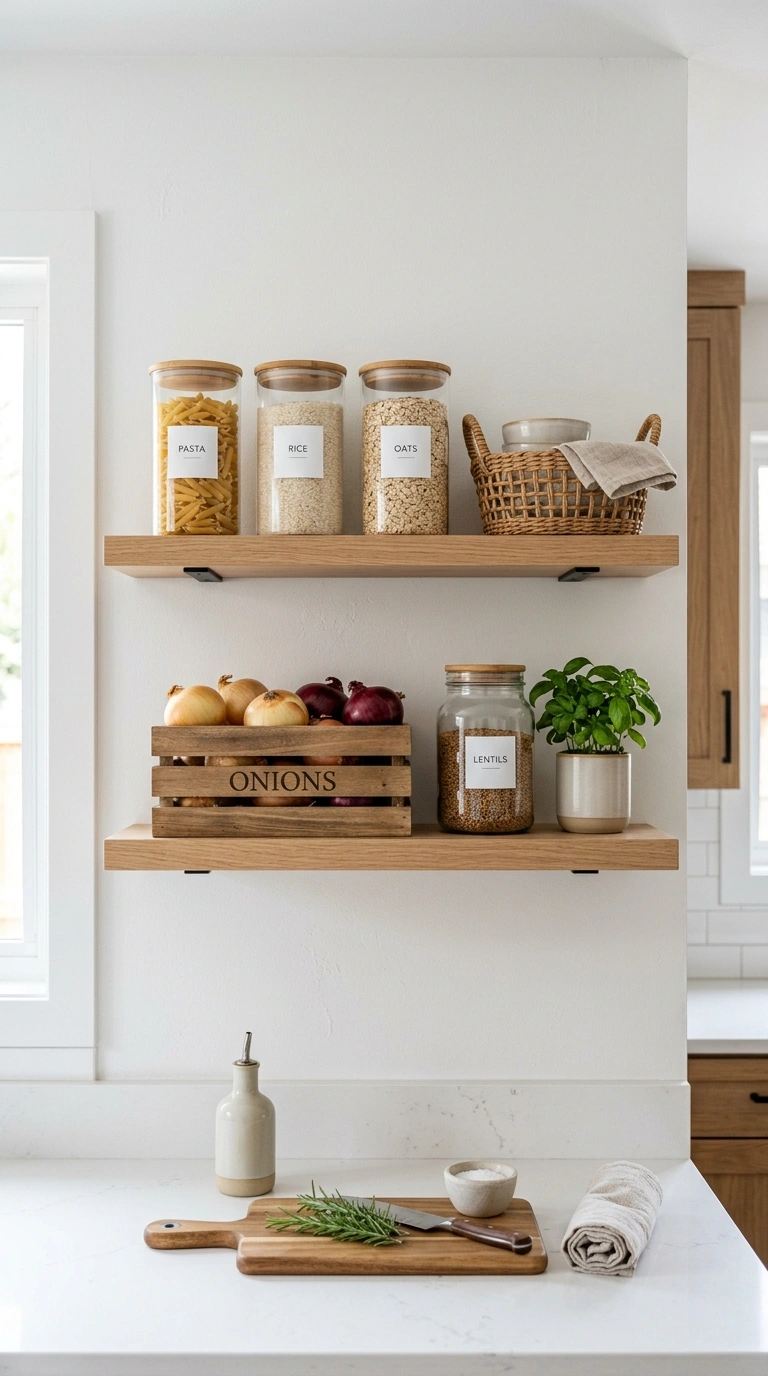
Closed cabinets in a studio kitchenette are often too few and too deep, so things get lost in the back. Open shelves fix that problem because you can see everything at a glance. Install two or three sturdy wood shelves on the wall beside the counter, and line them with matching glass jars for pasta, rice, oats, and flour. Uniform jars make the shelf look tidy even when you are busy.
Keep the heaviest items on the lowest shelf and lighter things like tea boxes on top. Add a small wooden crate for potatoes and onions, and a woven basket for snacks. Label the jar lids with chalk pens or plain stickers so guests know what is inside. If you have a wall that is only four feet wide, this idea still works because shelves use height instead of floor space. Wipe the shelves every week so dust does not build up.
4. Rolling Kitchen Cart
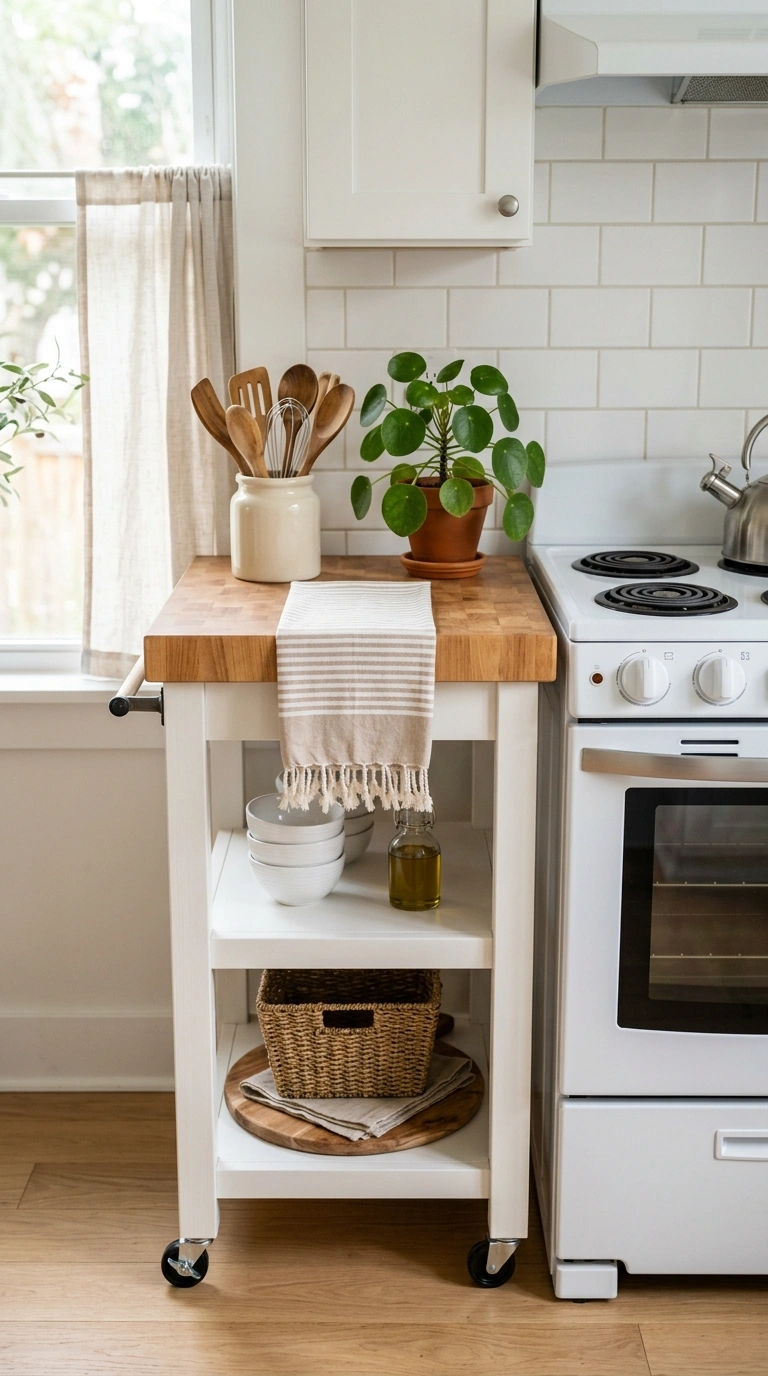
A rolling cart gives you counter space exactly when you need it and gets out of the way when you do not. Pick a cart with a butcher block or stainless top, two open shelves, and locking wheels. Park it next to the stove while you cook, then roll it beside the sofa as a side table or coffee station later. The top shelf holds everyday items, and the bottom shelf can store pots or a small mixer.
Choose a cart that is about 15 to 18 inches deep so it slides through narrow studio walkways. Add a small hook on the side for a towel and a bucket underneath for compost scraps. If the wood looks bare, rub it with food-safe mineral oil to bring out the grain. Keep the styling simple, with one plant on top and a jar of wooden spoons. Too many objects will make it feel crowded and hard to move.
5. Peel-and-Stick Backsplash
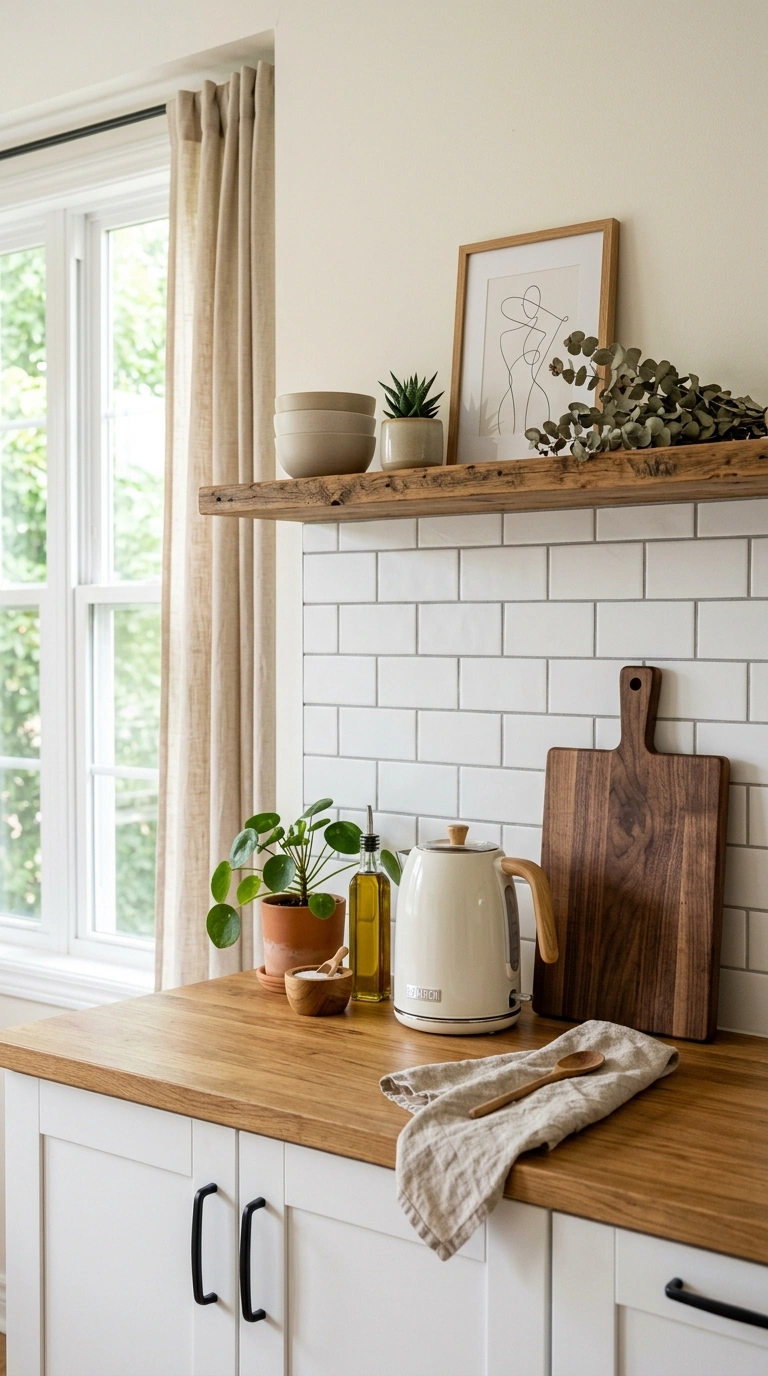
A backsplash protects your wall from splashes and gives a plain kitchenette real character. Peel-and-stick tiles are perfect for renters because they go up in an afternoon and come off cleanly. Look for subway tile in white, soft green, or warm beige, since these colors make small spaces feel open. Measure the wall space between your counter and your shelf, then buy about ten percent more tiles than you need for cuts.
Clean the wall with mild soap first and let it dry completely. Start from the bottom center and work outward, pressing each tile flat with a soft cloth. Use scissors or a craft knife to trim around outlets after turning off the power. Finish the top edge with a thin strip of painted wood for a neat look. Even a backsplash only 18 inches tall changes the mood of the whole corner and makes the counter look more finished.
6. Hanging Rail Storage
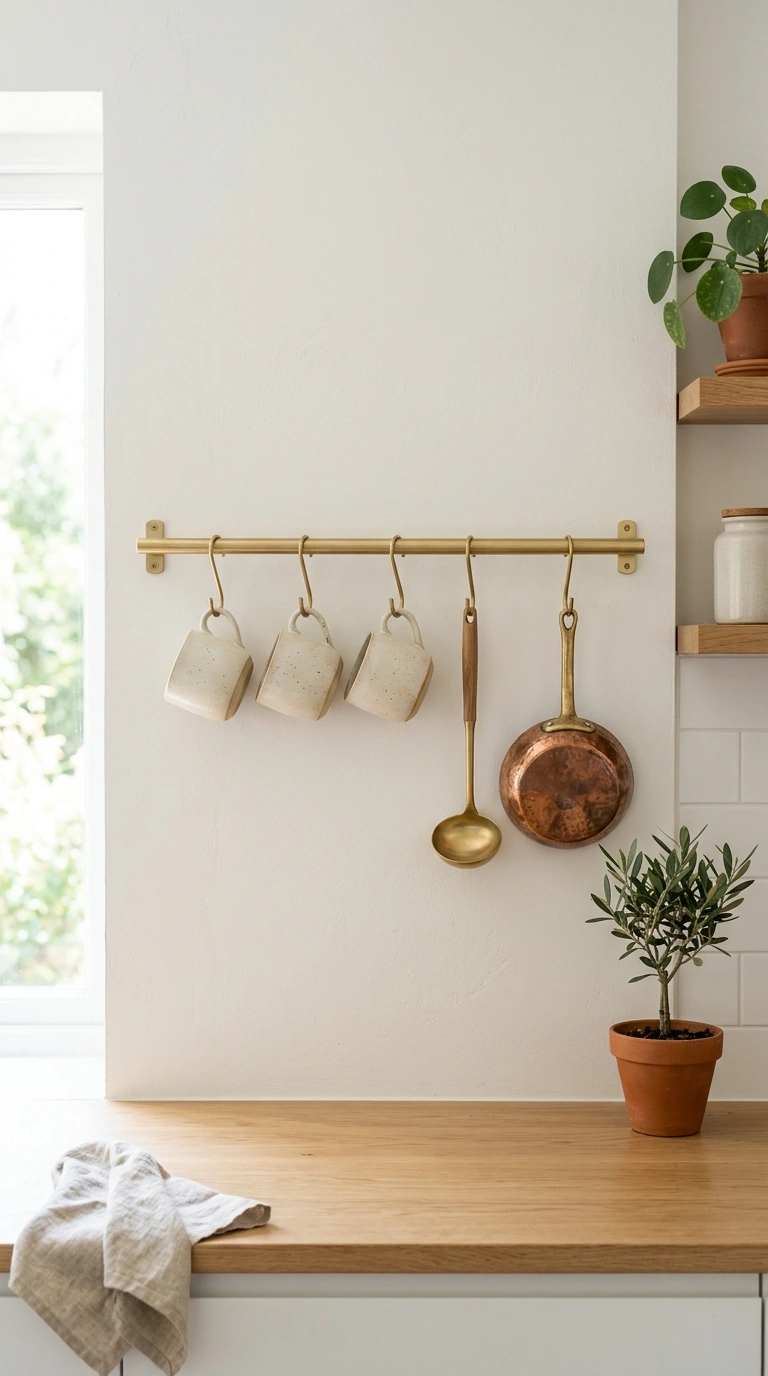
Wall rails are cheap, simple, and very useful when your drawer space is tiny. Mount a steel or wooden rail along the wall above your counter and use S-hooks to hang mugs, ladles, small pans, and even a colander. Everything stays within reach, and your counter stays free. Brushed brass or matte black rails look modern, while a plain wooden dowel gives a warm farmhouse feel.
Keep the items you hang matching in color if you can, such as all black tools or all copper. That keeps the rail from looking messy. Place heavier items closer to the wall ends where the screws are strongest. A small hanging shelf clipped to the rail can hold spice jars or a tiny plant. Try to leave a little gap between the hooks so you can grab things easily. If you rent, use strong adhesive rails rated for the weight you plan to hang.
7. Slim Pull-Out Pantry
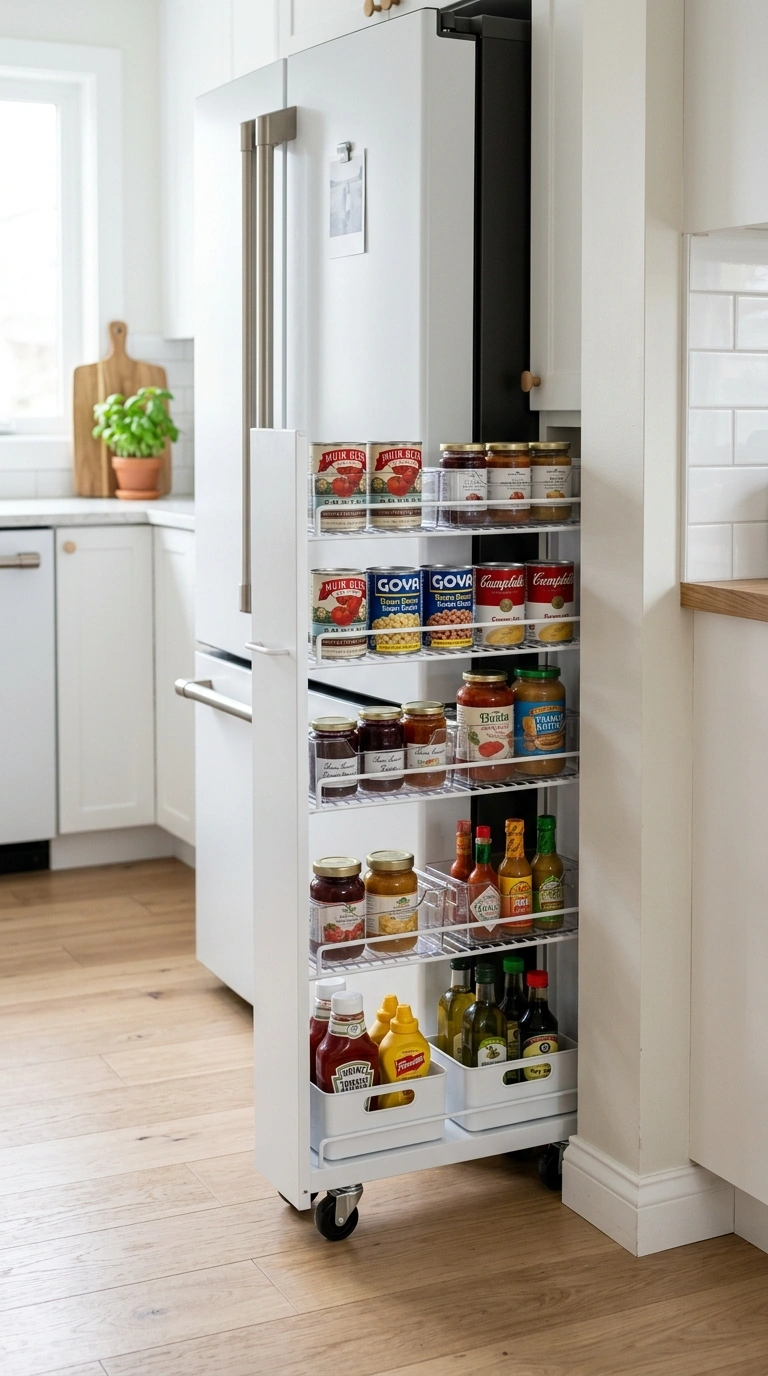
Between the fridge and the wall, many studios have a gap only six or eight inches wide. That narrow space is perfect for a rolling pantry tower. These slim carts have three or four shelves on wheels and slide out like a drawer. They can hold canned goods, sauces, spices, and snacks that would otherwise fill up your cabinets.
Choose a white or black metal version for a clean look, or build your own from plywood and casters. Measure the gap carefully, and leave about half an inch on each side so the cart rolls smoothly. Put tall bottles on the bottom, cans in the middle, and small jars on top. Add small bins to stop things from tipping when you pull it out. This idea gives you the storage of a full pantry without any construction, and you can take it with you when you move. Label each shelf with a small tag so anyone in the house can put things back where they belong. Once a month, pull the cart out and wipe the wheels and the floor behind it.
8. Mini Fridge Cabinet Nook
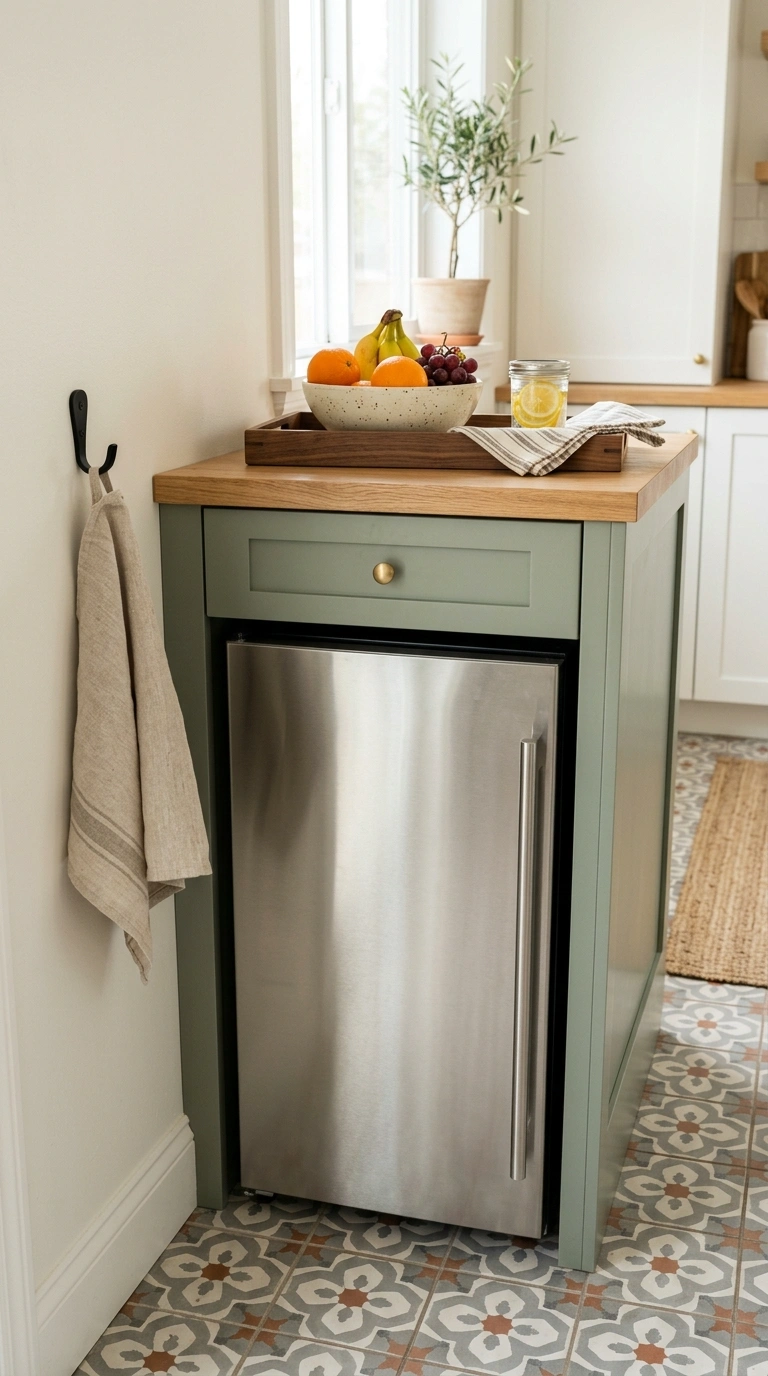
In a tiny kitchenette, a mini fridge can sit inside a cabinet nook so it blends into the cabinetry. If you have a lower cabinet with a removable shelf, take that shelf out and slide a compact fridge inside. Leave a couple of inches around the back for air flow so it does not overheat. Paint the cabinet door the same color as the rest of the kitchenette to keep things looking calm and matching.
Place a small wooden tray on top of the fridge for daily items like a fruit bowl or a coffee tin. Add a hanging towel hook on the side so the area stays useful. If your cabinet has a door, you can cut a vent hole or leave the door off entirely. A basket of reusable bags on the floor next to it keeps the whole corner neat and easy to use. Check the fridge size against the opening before you buy it, and measure the door swing too. A small piece of felt under the fridge feet stops it from scratching the cabinet floor.
9. Floating Counter Extension
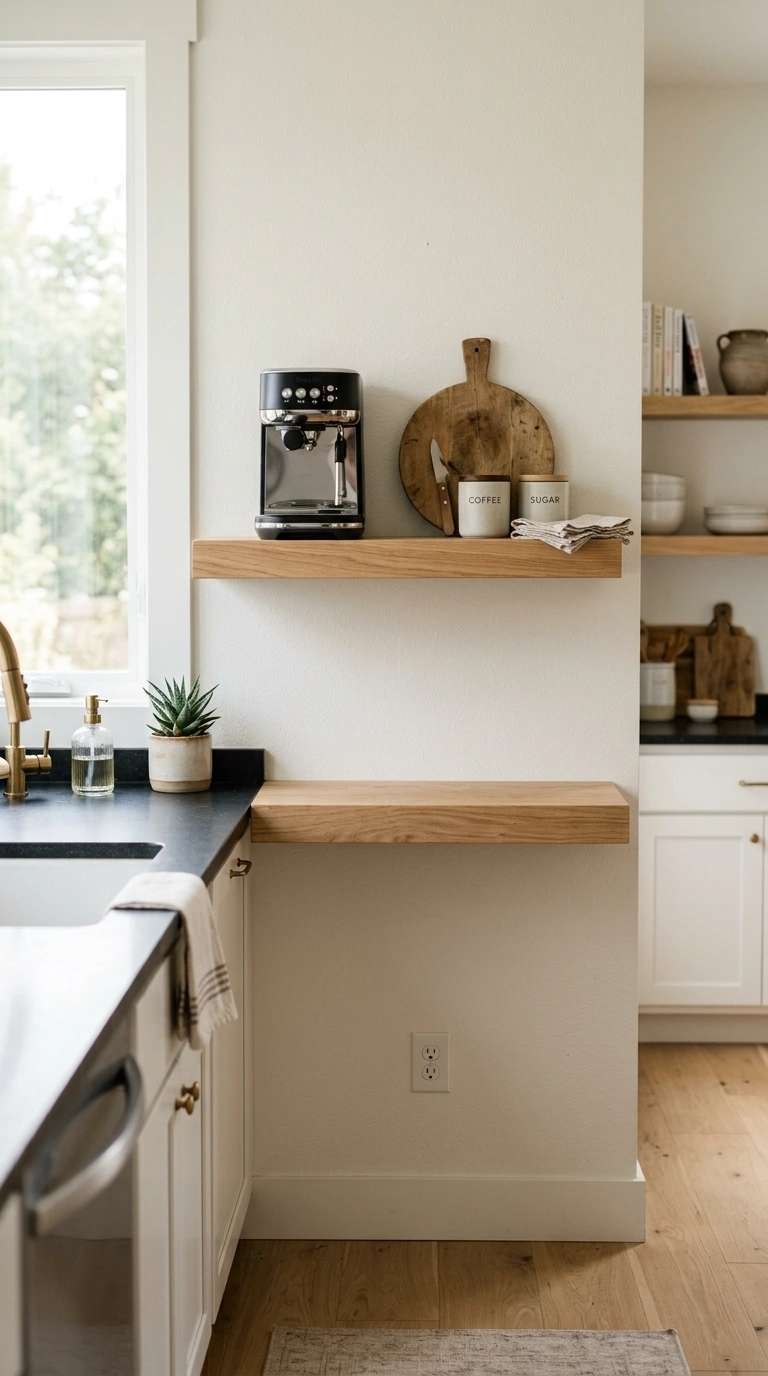
If your countertop is only three or four feet long, a floating extension can double your prep space. Attach a sturdy wooden board to the wall next to the counter with heavy-duty brackets, at the same height as the counter itself. A piece of butcher block or a painted plank about 12 inches deep works well and feels like part of the original design.
Use it for cutting vegetables, setting down groceries, or holding a coffee maker. Add small hooks under the shelf for mugs and utensils. Sand the edges smooth, and finish the wood with a food-safe oil so it resists stains. If the board needs to move, use a fold-up bracket that swings down against the wall when not in use. This small addition often makes the difference between a kitchenette that feels awkward and one that feels truly functional for daily cooking. Test the board by pressing down firmly before you cut anything on it. If it wobbles, add a second bracket in the middle. A little wood glue under the brackets can help too.
10. Wall-Mounted Spice Rack
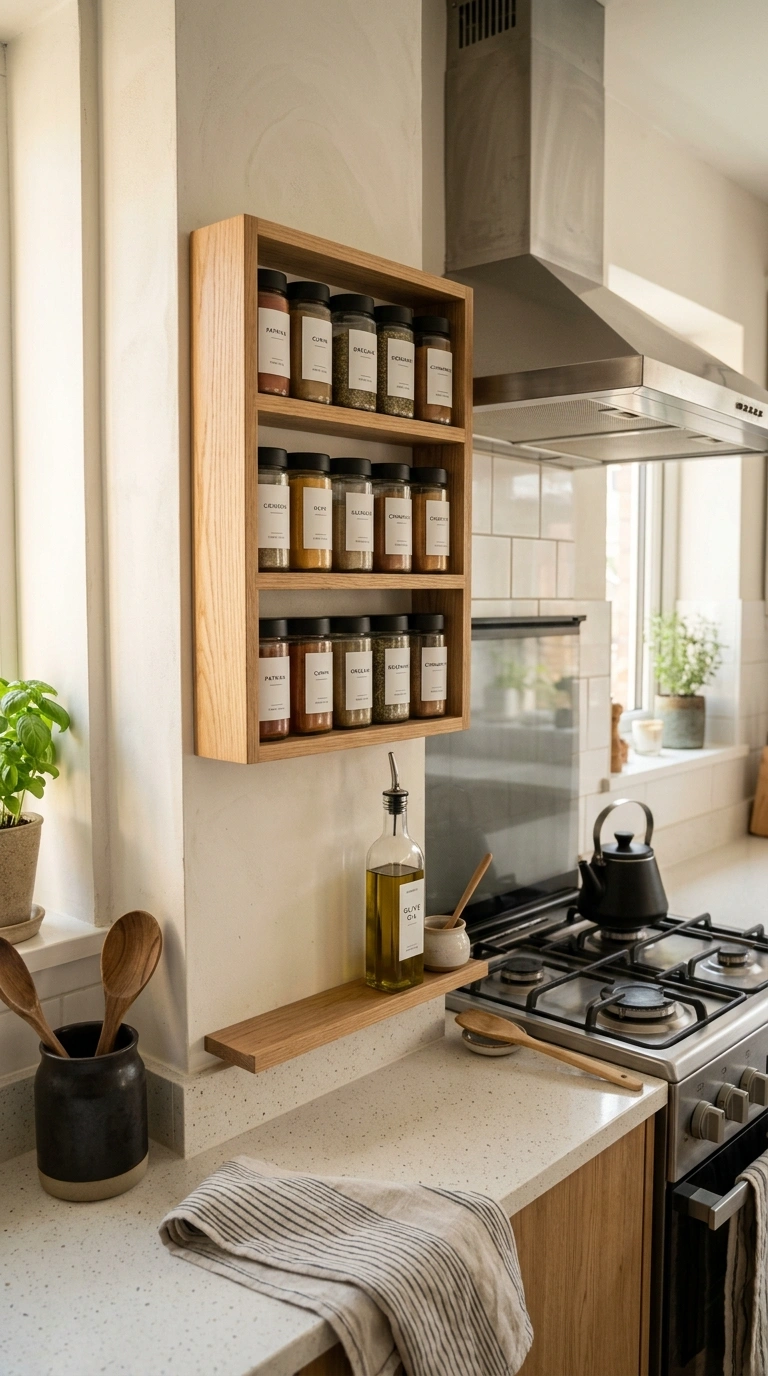
Spice jars take over counters fast, especially in a small kitchenette. A wall-mounted rack keeps them off the surface and easy to see. Choose a narrow wooden or metal rack about four inches deep, and mount it near the stove so you can reach the jars while cooking. Matching jars in clear glass with black lids look tidy and let you see how much is left.
Arrange the spices in alphabetical order or by how often you use them. Put the ones you grab daily, like salt, pepper, and garlic powder, at eye level. Keep the rack away from direct heat, because steam can dull the flavors. Add a small strip of wood or a thin ledge below to hold a bottle of olive oil. This simple change can free up four or five inches of counter, which feels huge when you are working with a very small workspace. Use a label maker or plain white stickers on the lids so you always grab the right jar. Refill the jars once a month and toss any spices that are older than a year.
11. Overhead Pot Rack
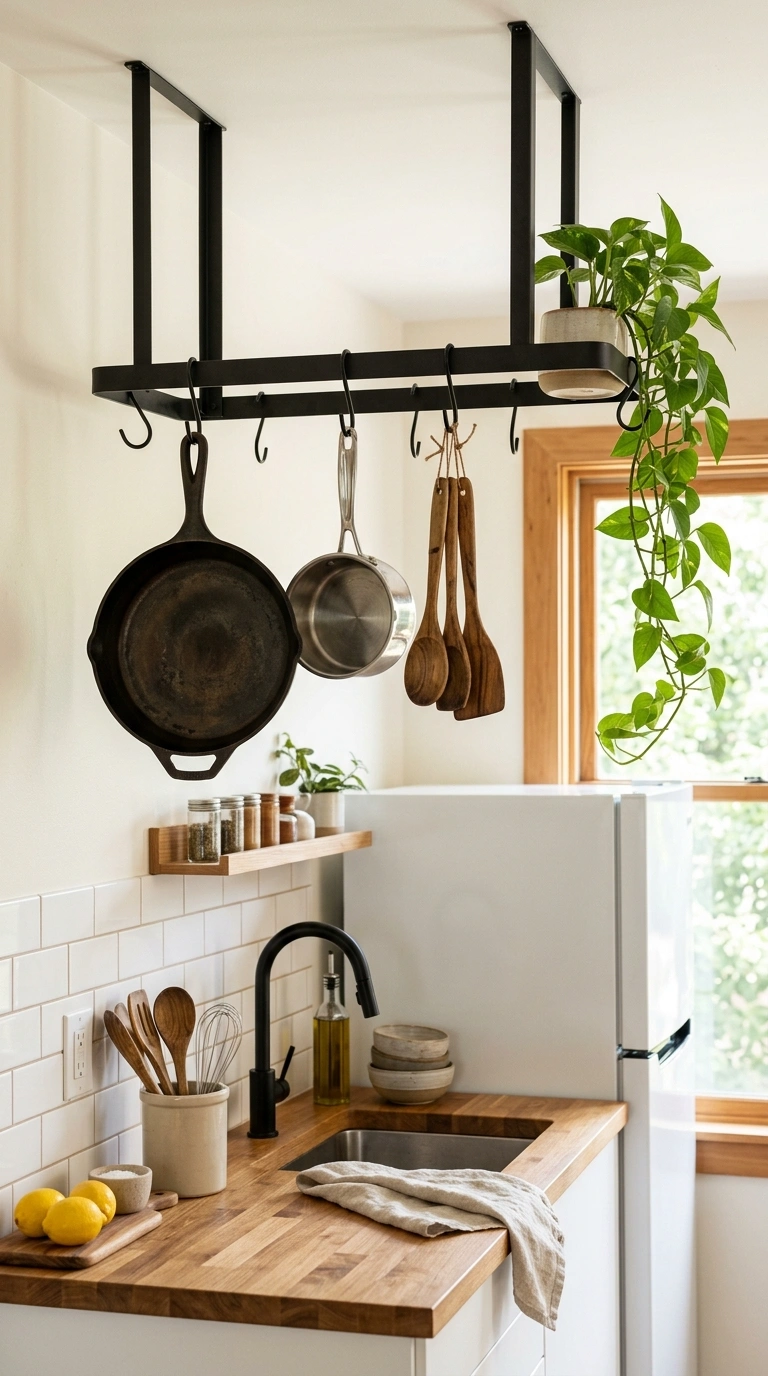
When cabinet space runs out, look up. A ceiling-mounted or wall-mounted pot rack uses air space you were not using anyway. Choose a rack in matte black or brushed iron and install it above the counter or over a small island. Hang your favorite skillets, a saucepan, and a few wooden spoons so they are always ready to use.
Make sure the rack is anchored into a ceiling joist or wall stud, because pans get heavy quickly. Keep the lowest pan at least 6 inches above your head so you do not bump into it. Choose pans with a nice finish, such as copper or black cast iron, since they will be on display. Add a small hanging plant at one end of the rack to soften the metal. This idea gives a studio kitchenette a warm, cafe-like feel without needing extra floor space. Wipe the pans before you hang them so grease does not drip onto your counter. Rotate which pans hang up every few months so the display stays fresh and useful.
12. Bookshelf Room Divider
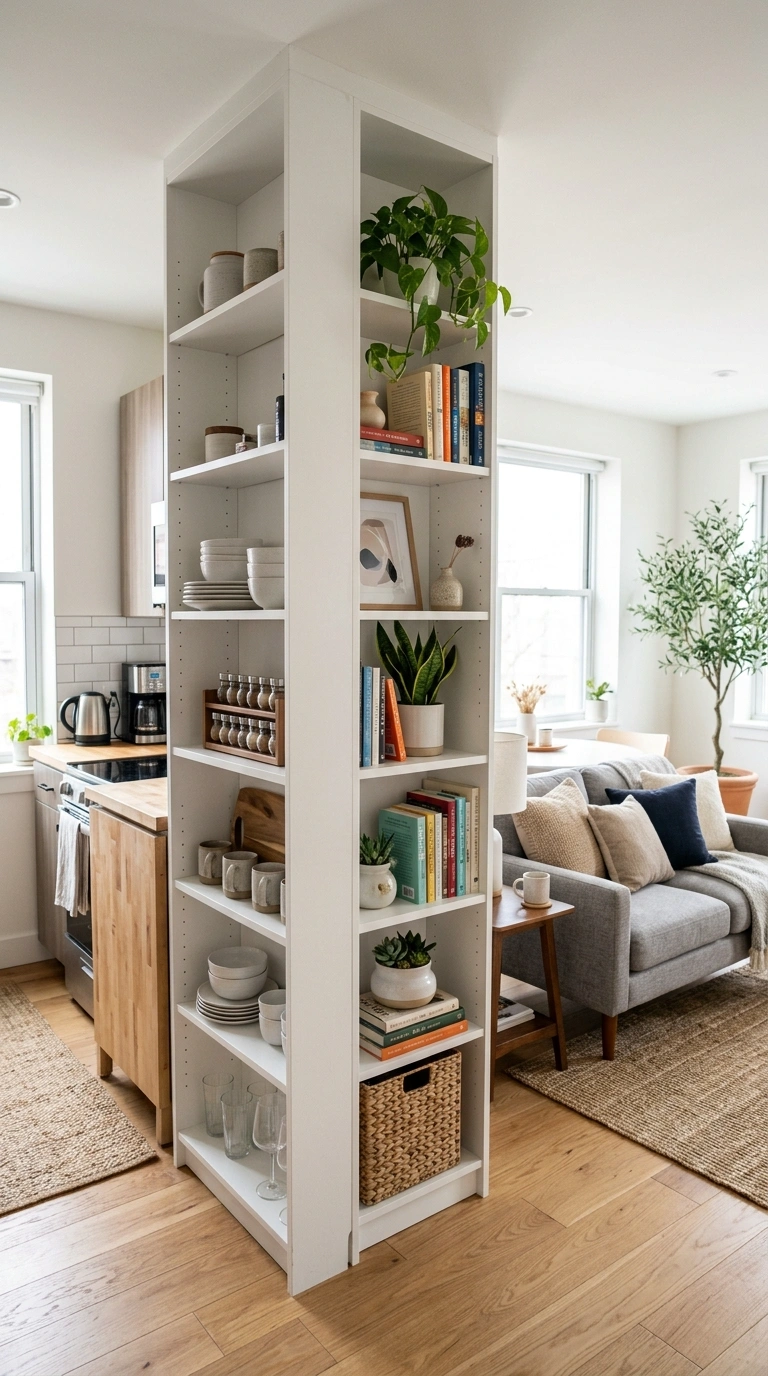
In a studio, the kitchenette often sits right beside the living area. A tall open bookshelf placed at the edge of the kitchen creates a soft divider without blocking light. Pick a shelf that is open on both sides so it does not look heavy, and about 5 feet tall so you can still see over it. Wood or white metal works well in most homes.
Fill the shelf with a mix of cookbooks, baskets, plants, and dishes you like to display. Keep the kitchen side practical, with plates and bowls, and the living room side pretty, with books and small decor. Anchor the shelf to the wall or floor so it stays steady. The divider also hides small kitchen clutter from view while you relax on the sofa. It is one of the easiest ways to make a studio feel like it has two separate rooms. Add a few felt pads under the shelf feet to protect the floor, and leave a small gap at the back so cords can pass through easily for a lamp or a phone charger.
13. Closet Kitchenette Conversion
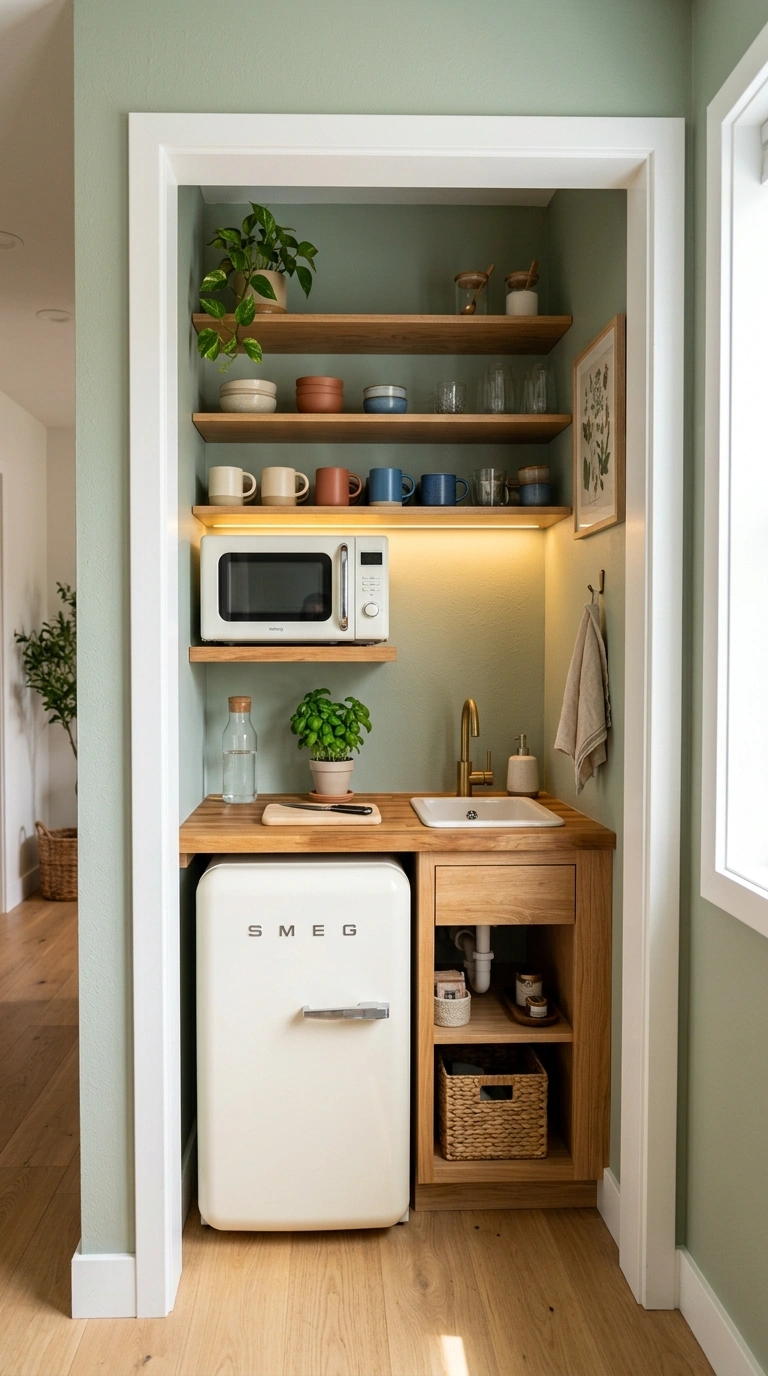
A shallow closet can become a full kitchenette with a little planning. Remove the doors or fold them back, then add a narrow counter, a mini fridge, a microwave shelf, and a few open shelves above. Paint the inside a fresh color, like sage green or warm white, to make it feel like an intentional nook and not a storage space.
Use a small under-cabinet light strip so the counter is bright even when the door is closed. Hang a curtain or install folding doors so you can hide the whole kitchen at night. Keep only the tools you use daily, and store the rest in baskets under the counter. Check that there is a nearby outlet for your appliances, and never run extension cords under rugs. This idea works best in a studio where the original kitchen is missing or too small. Take a photo of the closet before you begin so you can plan each shelf height. A tape measure and a level are the only tools you really need for this project.
14. Two-Tone Cabinet Colors
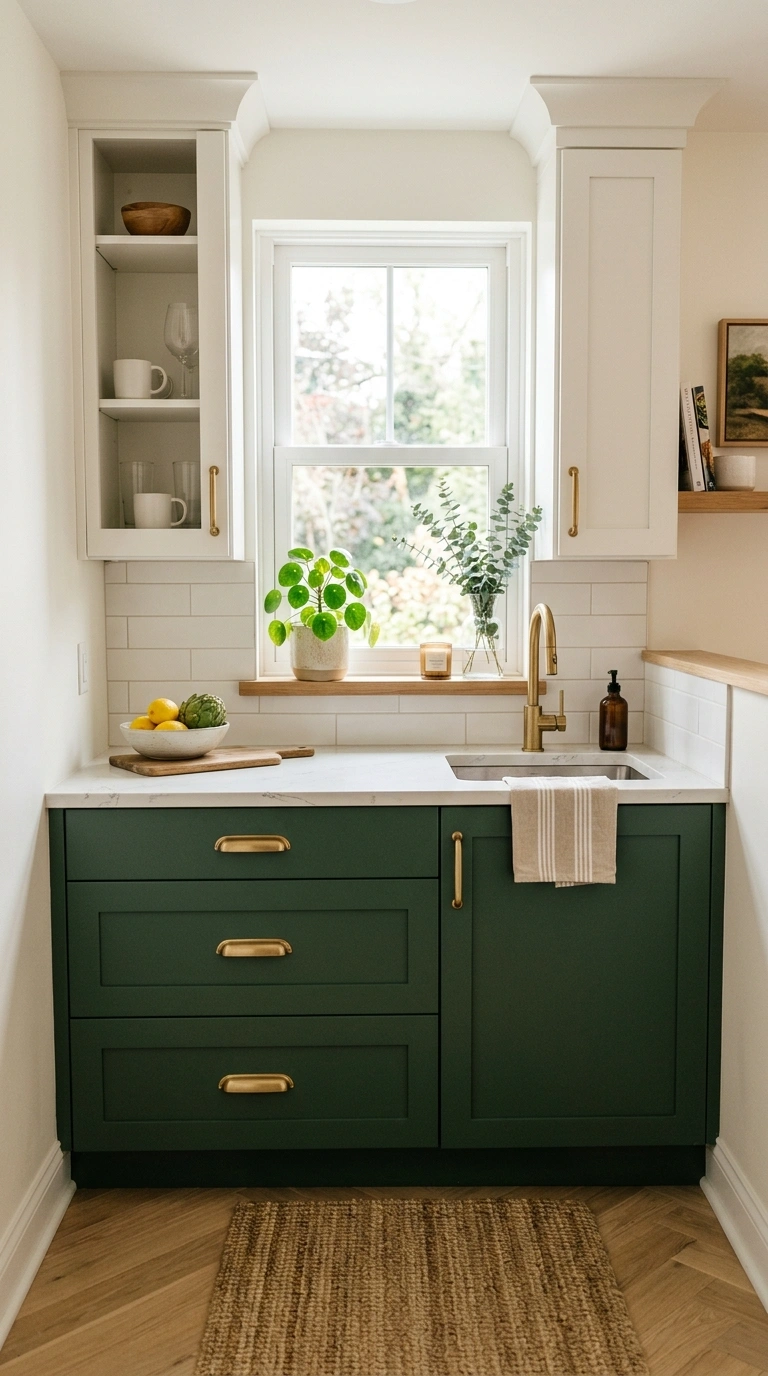
If your kitchenette cabinets feel dull, paint them in two colors. Try soft white on the top cabinets and a deep green, navy, or warm gray on the bottom ones. The darker color grounds the space, and the lighter color keeps the eye moving upward, which makes the ceiling feel higher.
Use cabinet paint that is made for wood or laminate, and sand lightly before painting. Remove the doors and paint them flat on a table so the color goes on smoothly. Swap the old handles for simple brass or black pulls to make the update feel complete. If you rent, ask if painting is allowed, or use removable cabinet wraps instead. Two coats and a full day of drying time is usually enough. This is one of the cheapest ways to make a small kitchenette feel custom and well designed. Pick one weekend for the whole project so the doors do not sit half painted. Label each door with painter’s tape so they go back on the right hinges when you finish.
15. Coffee Bar Corner
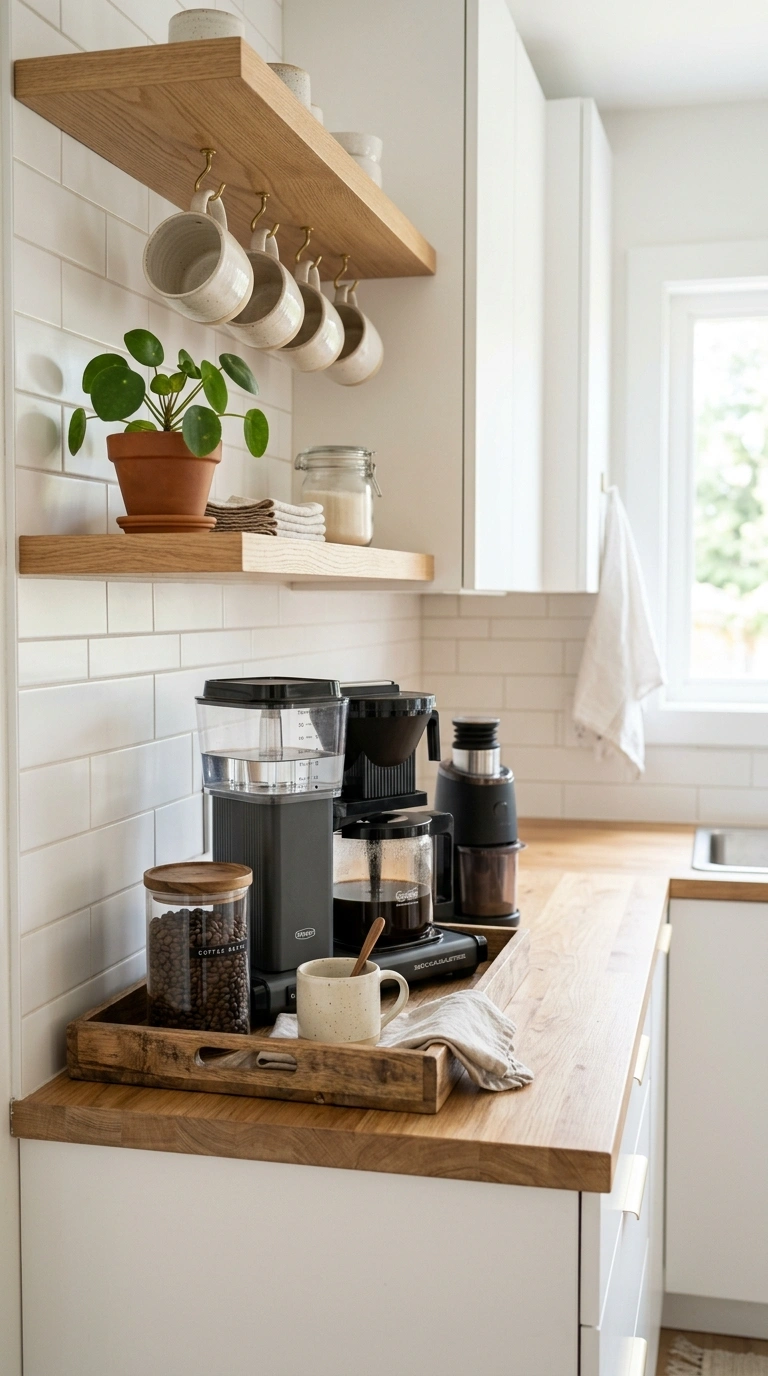
A little coffee corner can make a studio kitchenette feel special. Pick the end of your counter and set up a small tray with your coffee maker, a jar of beans, and a few mugs. Add a short shelf above with cups and a small plant. Everything you need in the morning lives in one spot, so the rest of the counter stays clear.
Choose a tray in wood or marble to keep spills contained. Use matching mugs so the corner looks tidy. A small chalkboard or a framed print behind the coffee area adds personality without taking space. If your kitchenette has no room, a slim bar cart on wheels works too. Store sugar and tea in glass jars with lids, and keep a small cloth nearby for wiping up drips. A neat coffee corner is a small detail that makes daily life feel calmer. Keep a small trash bin or bag under the counter for used filters and pods. Wipe the tray each night so the corner looks fresh when you walk in the next morning.
16. Peninsula Counter Seating
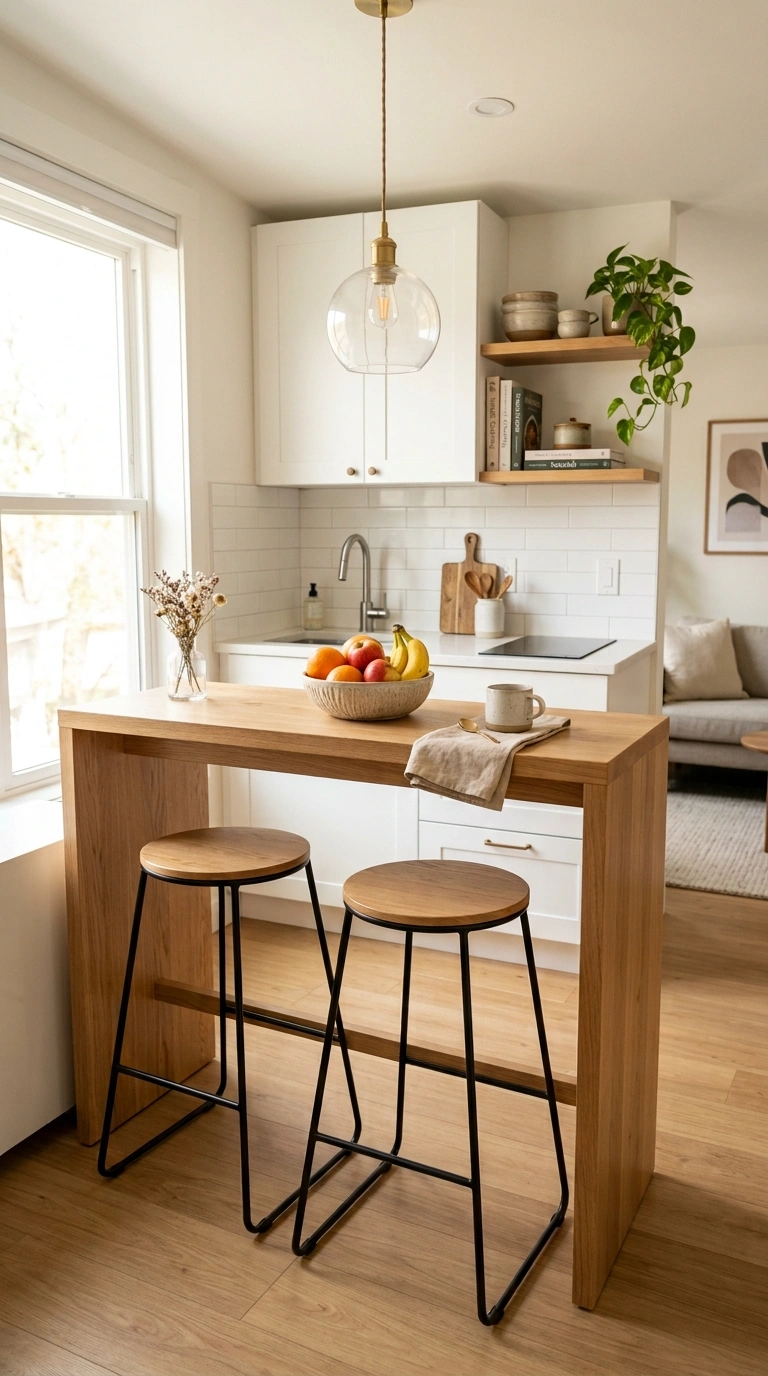
When the kitchenette is along one wall, a short peninsula can act as a table and a divider at the same time. It can be a narrow counter, about 18 inches deep, attached to the end of the existing counter and jutting into the room. Add two slim stools underneath so you can eat, work, or have coffee with a friend.
Choose stools that tuck fully under the counter so they do not block walking space. A light wood top and white base keep it looking open. Add a small pendant light above for a warm glow at night. If you cannot build one, a narrow console table pushed against the counter end gives a similar effect. Keep the peninsula clear of clutter, with maybe a bowl of fruit and a small lamp. It makes the studio feel more like a real home with a proper eating spot. Measure the walkway before you build, and keep at least 30 inches of clear floor beside it. Sand the edge round so nobody bumps a hip on a sharp corner.
17. Under-Cabinet Lighting
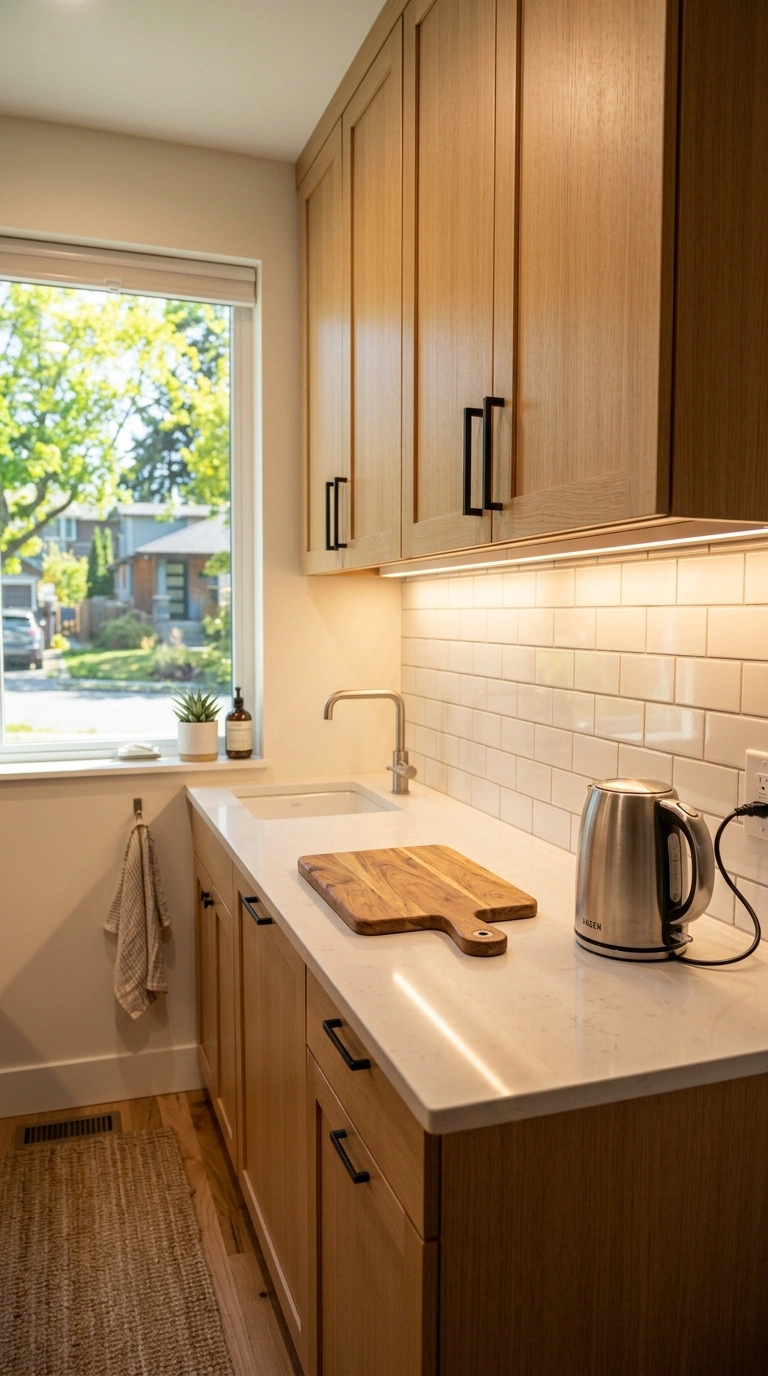
Dark counters make a kitchenette feel smaller and harder to use. Stick-on LED strips under the upper cabinets or shelves light the workspace and make the whole corner glow. Choose warm white light, around 2700K to 3000K, because it feels soft and does not look harsh. Battery or plug-in strips work well in rentals.
Clean the underside of the cabinet, peel off the backing, and press the strip in place. Hide the wire with a small cord clip or a thin piece of trim. Add a switch or a remote so you can turn it on easily. The light also shows off your backsplash and makes cooking safer. In the evening, you can keep only the under-cabinet lights on for a cozy mood while you relax nearby. This is a low-cost upgrade that people notice right away. Buy a strip that is a little longer than your cabinet so you can trim it to fit. Always test the light for a day before you stick it permanently in place.
18. Herb Shelf Window
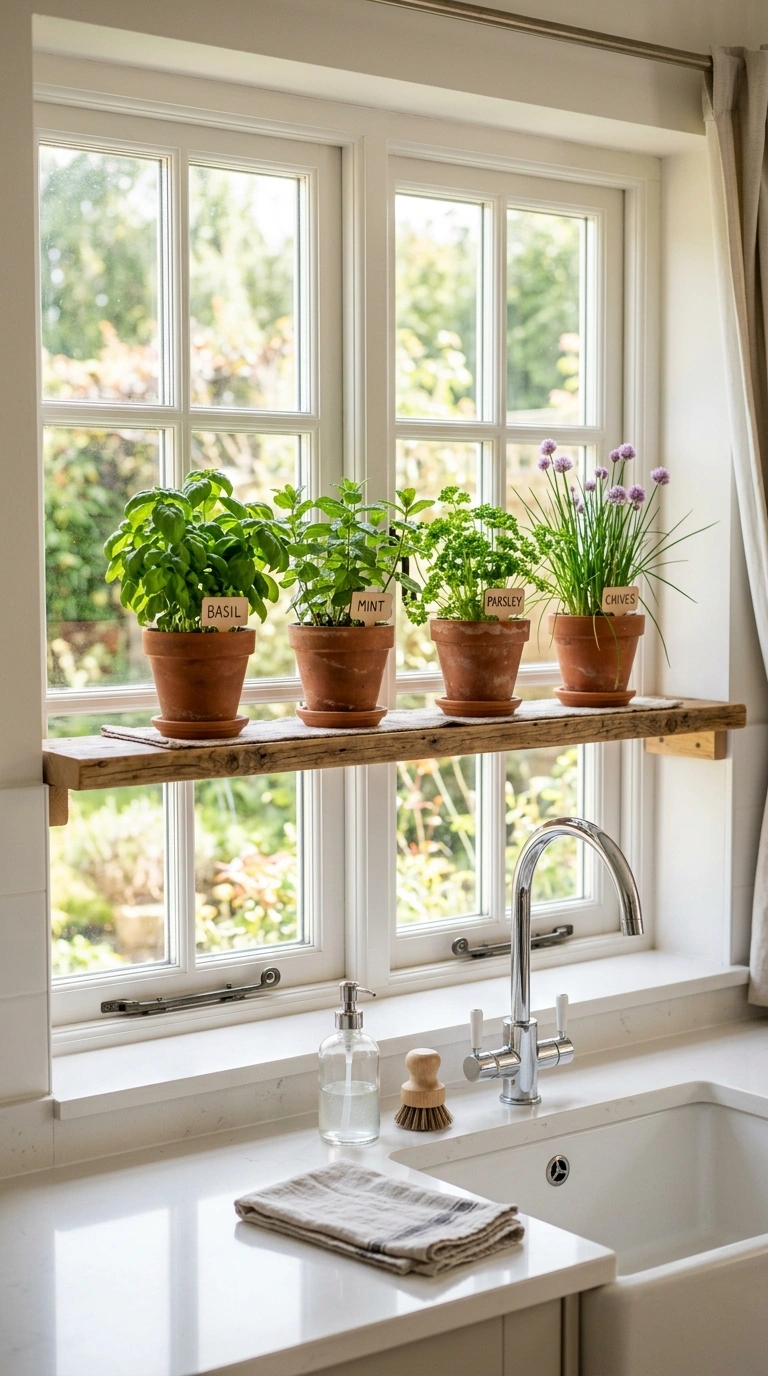
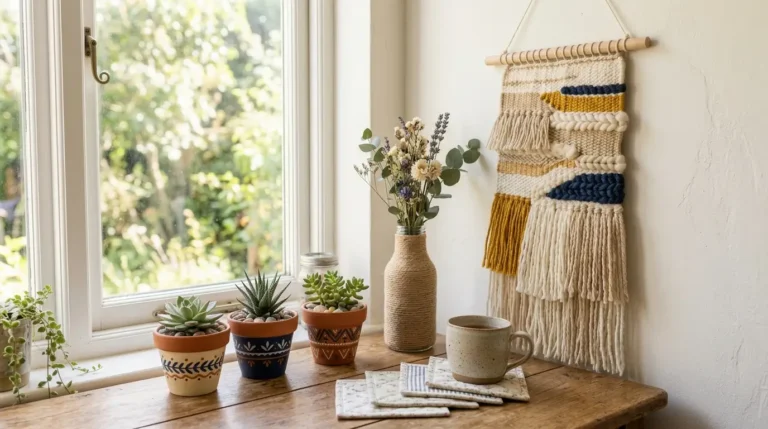
If your kitchenette has a window, use it for a small herb garden. Install a narrow shelf across the window or set a long tray on the sill. Fill it with small pots of basil, mint, parsley, and chives. Fresh herbs add flavor and bring life and color to a small space.
Choose pots in matching terracotta or white ceramic so the shelf looks neat. Make sure each pot has a drainage hole and a saucer to protect the sill. Water the herbs in the morning, and rotate them every week so they grow evenly. If the window gets little sun, clip a small grow light to the shelf. Snip the herbs often, which helps them grow fuller. A kitchenette with green plants looks fresh, and cooking feels a bit more fun when the ingredients are right there. Pick herbs you actually cook with, so nothing goes to waste. Basil loves warmth, while mint and chives handle cooler windows better, so place each one where it will do well.
19. Fabric Cabinet Skirt
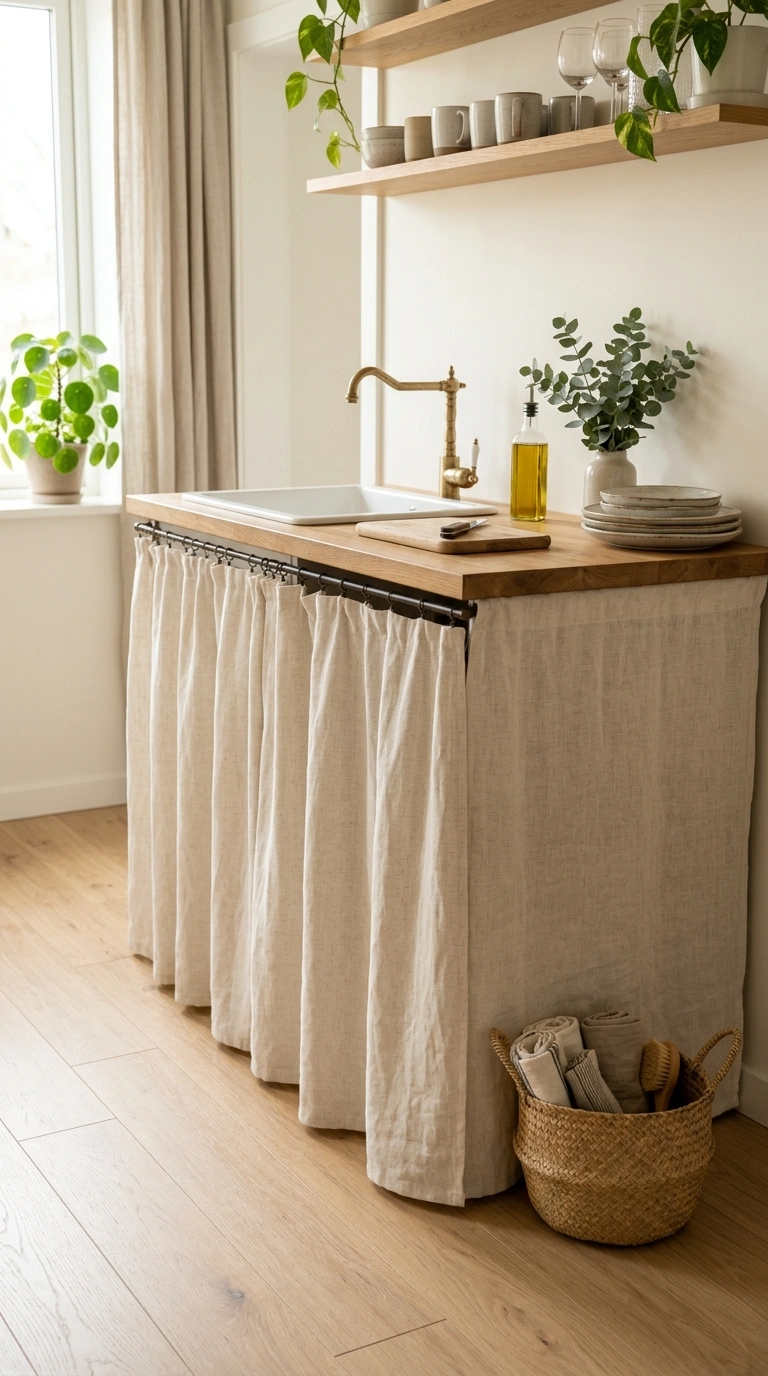
A fabric skirt is a quick way to hide messy storage under a small counter or sink. Choose a sturdy cotton or linen fabric in a soft color like cream, sage, or light blue. Attach it along the front edge of the counter with a tension rod, a strip of velcro, or a thin curtain rod.
Cut the fabric so it reaches about half an inch above the floor. Add a slight gather for a relaxed look, and iron it before hanging. Behind it, keep baskets, cleaning supplies, and bulk food that you do not want to see. The skirt softens the hard lines of the kitchenette and adds a cozy, cottage feel. It is also easy to wash, so you can change the fabric with the seasons. This is a great option for renters who cannot change the cabinets but still want a fresh look. Sew a simple hem, or use iron-on tape if you do not sew. Hang the skirt slightly to the side of any pipes so you can still reach the shutoff valves easily.
Final Thoughts
A studio kitchenette does not have to be a source of stress. With a few smart storage tricks and small styling changes, even a tiny corner can feel comfortable and easy to cook in. Start with one or two ideas that fit your space and budget, and add more as you go. Your kitchen will slowly start to work better for the way you actually live.