22 Gift Wrapping Station Ideas for Small Corners
The scissors are in the kitchen drawer, the tape is somewhere in the hall, and the wrapping paper is leaning behind a bedroom door, already bent at the corner.
That ten minute hunt is how most gift wrapping starts in a small home. The gift itself takes five minutes to wrap on the bed or the floor, but the supplies never live in one place, so paper tears, ribbon tangles, and tags get lost under other things.
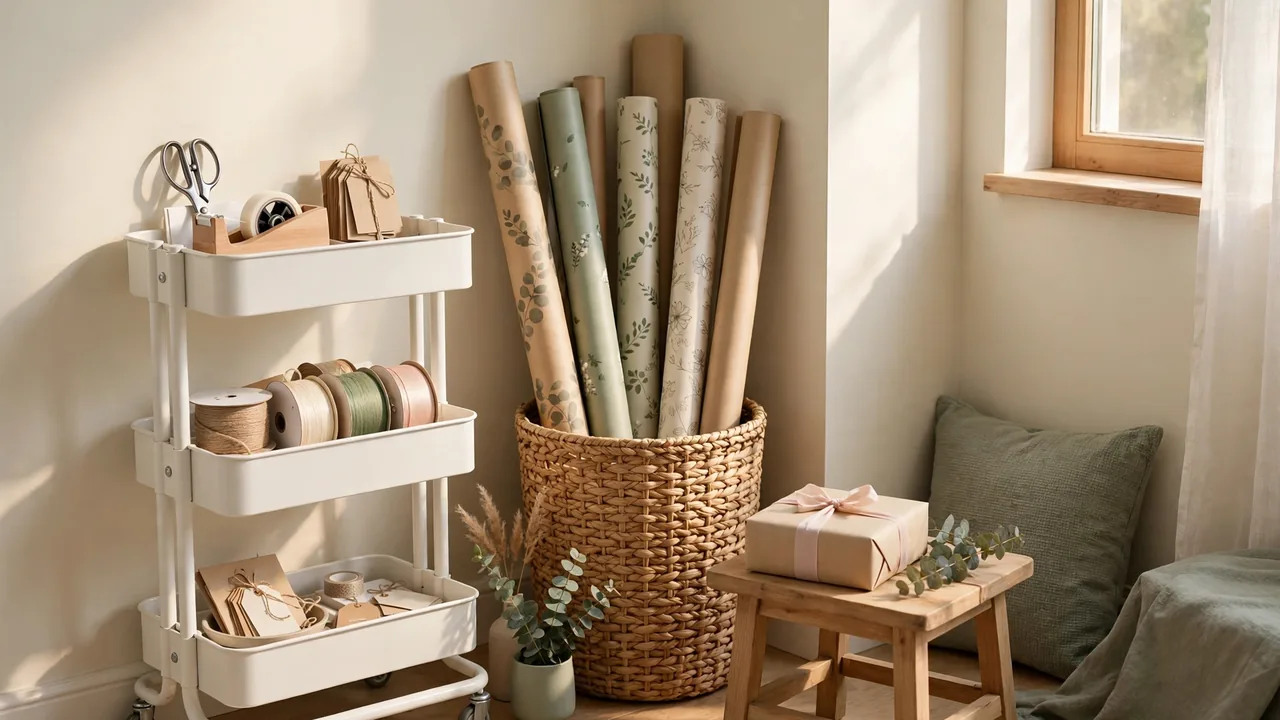
A small corner solves that if it is set up like a real work spot, not a storage pile. These gift wrapping station ideas use carts, closet shelves, wall panels, and other compact setups that hold rolls, ribbon, scissors, tape, bags, and tags within reach.
You do not need a craft room or a spare table that stays out all year. You need one clear surface, upright storage for rolls, and a fixed home for the small tools that wander off. Pick the setup that matches the corner you actually have, and wrapping stops feeling like a search.
1. Three Tier Rolling Cart That Parks in a Bedroom Corner
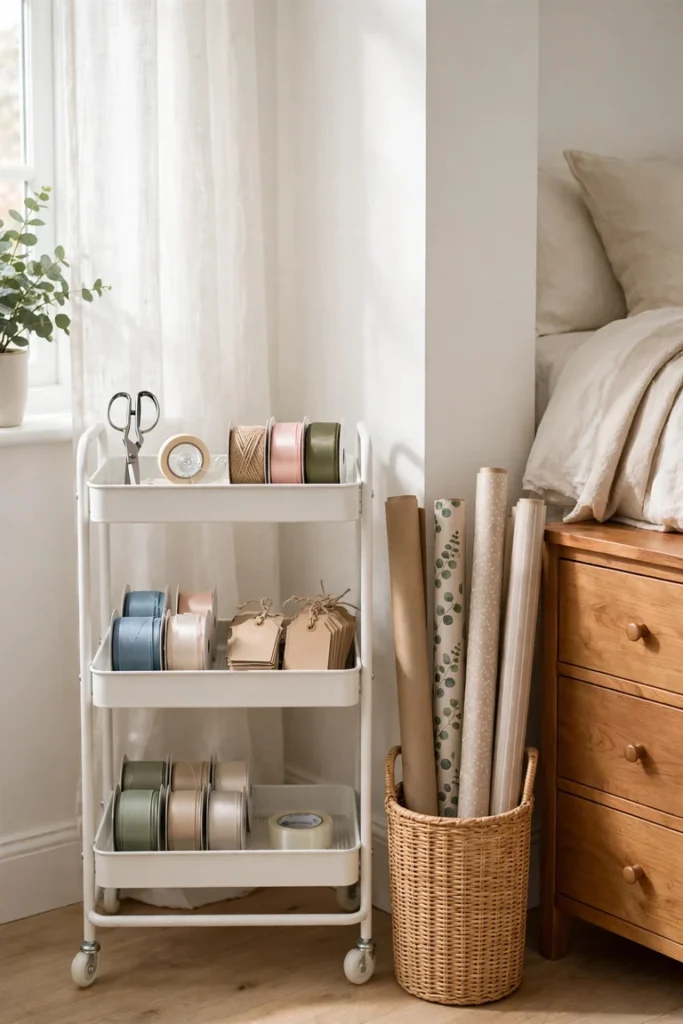
A cart works because it comes to you.
Park it in the corner by a dresser or in the gap between a wardrobe and the wall. Roll it to the bed, a desk, or the dining table when you wrap, then push it back when you are done. Rolls are too tall for the tiers, so stand them upright in a narrow basket in that same corner, right beside the cart.
- Top tier: scissors, tape, pens, and a small tray for tags and cards
- Middle tier: ribbon spools, bows, and tissue paper folded flat
- Bottom tier: gift bags, flat boxes, and spare paper sheets
2. Pegboard Wall Panel Over a Slim Console Table
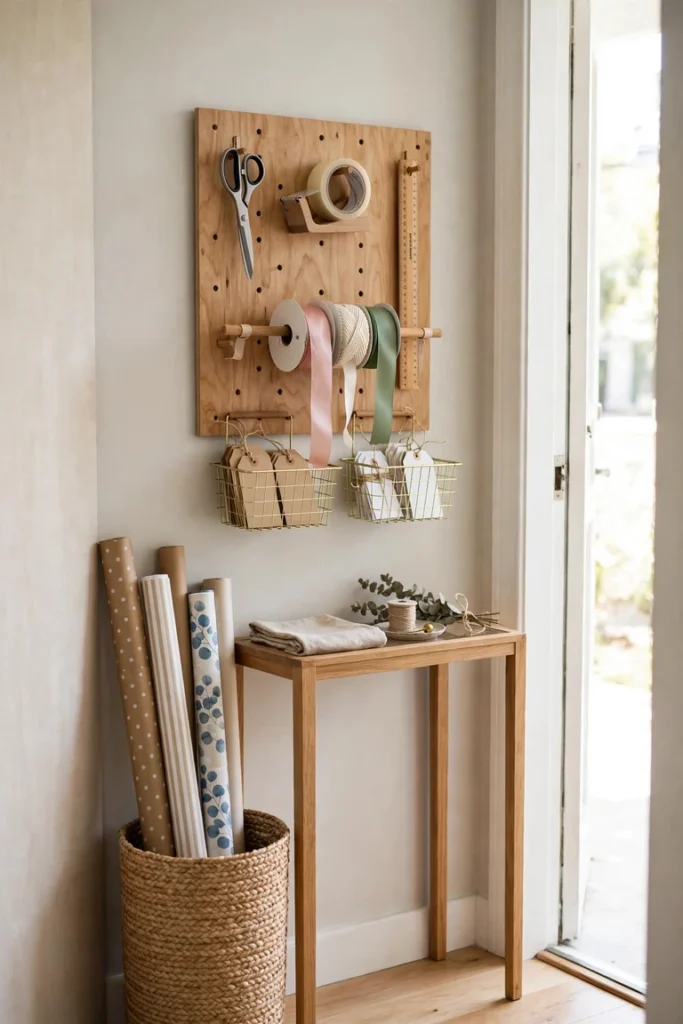
The wall does the storage work here, so the table can stay empty.
Hang a pegboard above a narrow console in a hall corner or spare room. The flat table top is your wrapping surface, and everything else lives on the board above it, off the surface and easy to see.
- Fix the board at arm height above the table, leaving clear space below for a gift box.
- Hang scissors, tape, and a ruler on hooks on one side, at the height your hand naturally reaches.
- Add two small baskets for tags, pens, and ribbon scraps, and slide ribbon spools onto a short dowel.
- Stand rolls in a tall bin on the floor at one end of the console.
What to grab first
3. Closet Nook With a Fold Down Wrapping Shelf
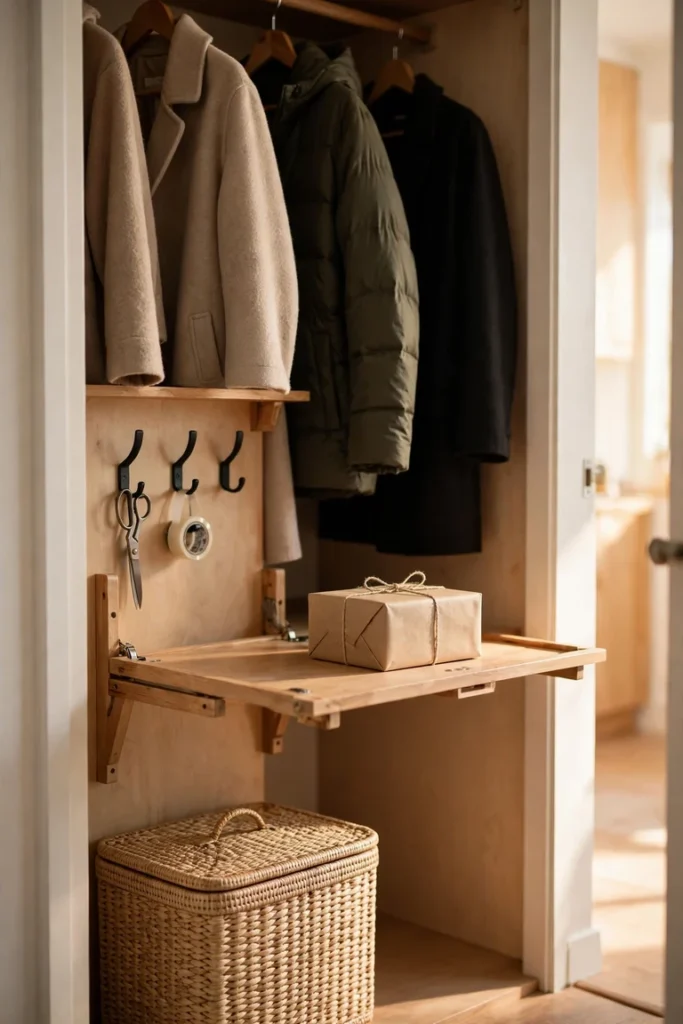
A closet station does not need a whole closet.
One shallow hall or bedroom closet is enough. Clear the lower half, then fit a fold down shelf at waist height on the back wall. It drops down when you wrap and folds flat when the door closes, so the closet still holds coats or bedding above it.
Top shelf. Flat boxes, tissue, and bags you use most. Side wall. Two hooks for scissors and tape, plus a clip for your gift list. Floor. One lidded bin for spare bags and boxes, kept under the folded shelf.
Leave the middle empty. That empty space is the point.
One shelf stacked with random boxes, rolls on the floor, and no flat space to wrap on.
Shelf folds down to wrap, folds flat to close. Tools hang on the side wall, rolls stand in one bin.
4. Over the Door Organizer on a Spare Room Door
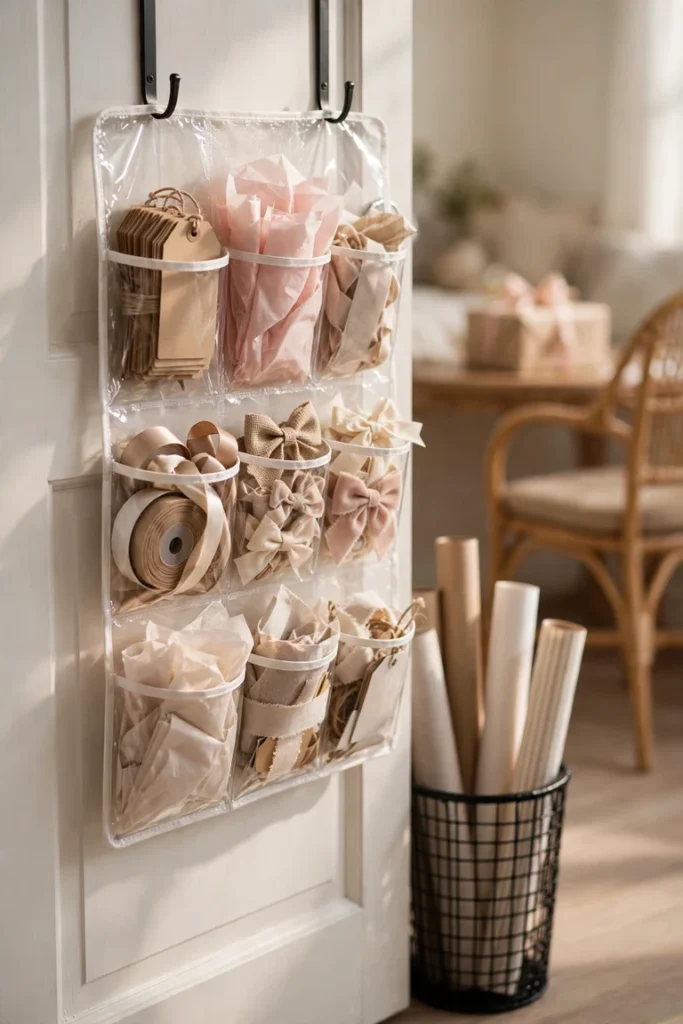
The back of a spare room door is usually blank, and it is free storage.
Hang a clear pocket organizer over the door and treat each row like a drawer you can see into. You wrap at the nearest table, then put every small item straight back in its pocket instead of in a junk drawer.
- Top pockets: gift tags, pens, and small folded cards
- Middle pockets: ribbon, bows, tape, and scissors kept in a small pouch
- Bottom pockets: tissue paper, flat bags, and spare ribbon scraps
Shut the door and the whole station is out of sight. Guests never see it.
💡 Quick Tip
Keep rolls off the door itself. They are long and can strain the hinges. Stand them upright in a slim bin on the floor behind the open door instead.
5. Leaning Ladder Shelf in a Living Room Corner
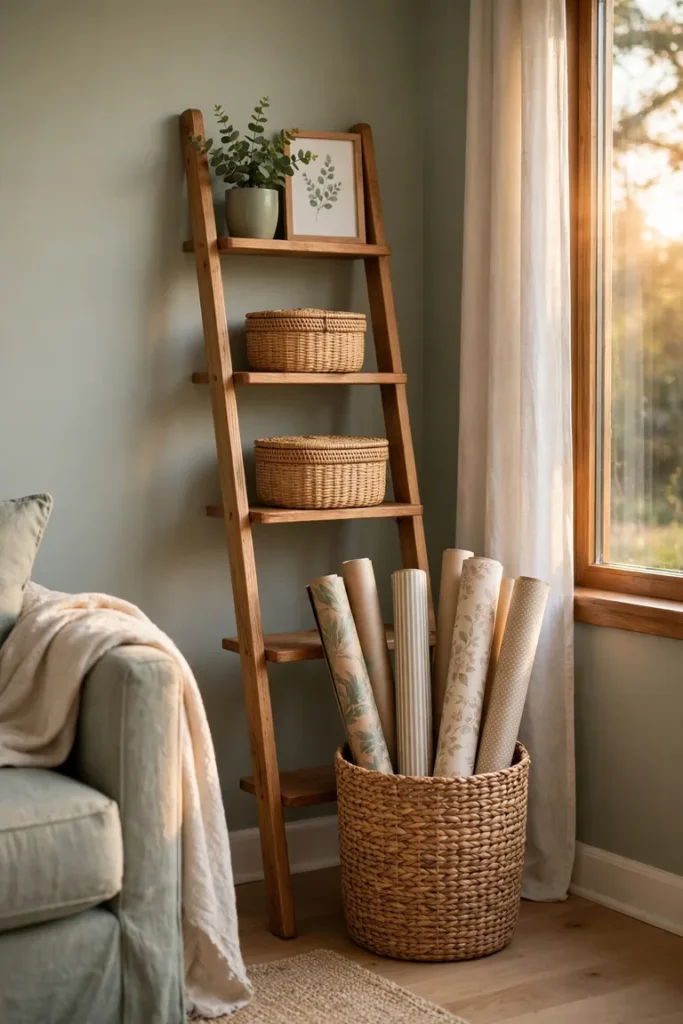
A ladder shelf is narrower at the top than at the base, and that shape suits a living room corner better than a square bookcase does.
The wide bottom shelf leaves a tall gap beside it for a basket of rolls standing upright. The middle steps hold lidded baskets for ribbon, tape, scissors, and tags, sorted by job rather than by size. Nothing sits loose, so the shelf reads as furniture, not as a craft zone.
Keep the top two steps clear of supplies. A small plant, a framed print, or a stack of coffee table books up there is what makes the corner blend with the rest of the room.
One rule keeps it tidy: if a basket lid will not close, that basket is full.
6. Small Dresser Turned Into a Wrapping Chest
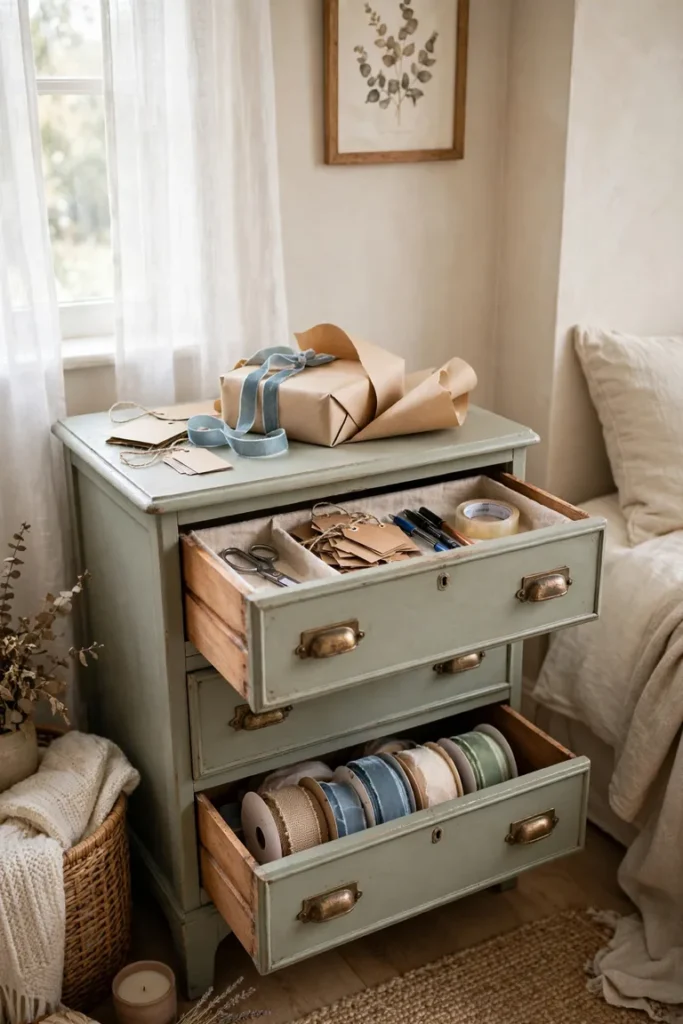
An old dresser already has the one thing wrapping supplies need most, drawers that close.
Set a small dresser in a bedroom or hall corner and wrap on its flat top. Everything else goes in the drawers, sorted by depth rather than by type, so nothing gets crushed at the bottom of a deep drawer.
- Shallow top drawer: scissors, tape, pens, tags, and a small ruler in a tray
- Middle drawer: ribbon spools standing in rows, tissue paper, and folded bags
- Deep bottom drawer: flat boxes, spare paper sheets, and larger gift bags
Clear the top each time you finish. A dresser that stays clear is ready the moment you need it.
| Shallow drawers | Deep drawers |
|---|---|
| Best for small tools you grab often and need to see at a glance. | Best for flat boxes, bags, and paper sheets that can lie flat. |
| Watch out for loose tags and bows, which vanish without a tray. | Watch out for heavy stacking, which bends boxes at the bottom. |
7. Wall Mounted Drop Leaf Table in the Laundry Room
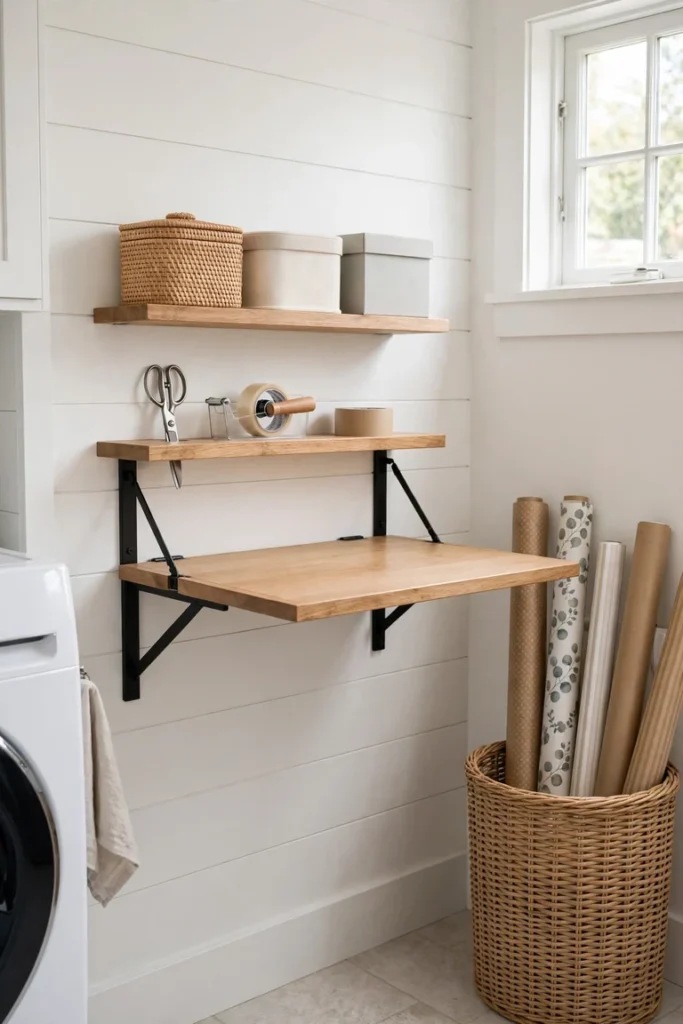
Most people set this table up and then leave the leaf open for weeks, which defeats the whole idea.
Fit a wall mounted drop leaf table on a short laundry room wall, close to a plug free stretch of counter if you have one. Open the leaf, wrap on it, then drop it flat before you leave the room. The wall holds two narrow shelves above it for tape, scissors, and tags, and rolls stand in a tall bin in the corner below.
Laundry rooms get damp, so keep paper and ribbon in lidded boxes on those shelves, never in an open basket under the table.
Fold it down the same day. That habit is the station.
Store paper goods in lidded boxes, up on the shelves and away from steam.
Drop the leaf flat as soon as you finish wrapping, every single time.
Do not leave the open leaf as a folding surface for laundry. It will never be free.
Do not store rolls on the floor near a sink or washer hookup.
8. Tall Roll Basket With a Tiny Side Table Beside It
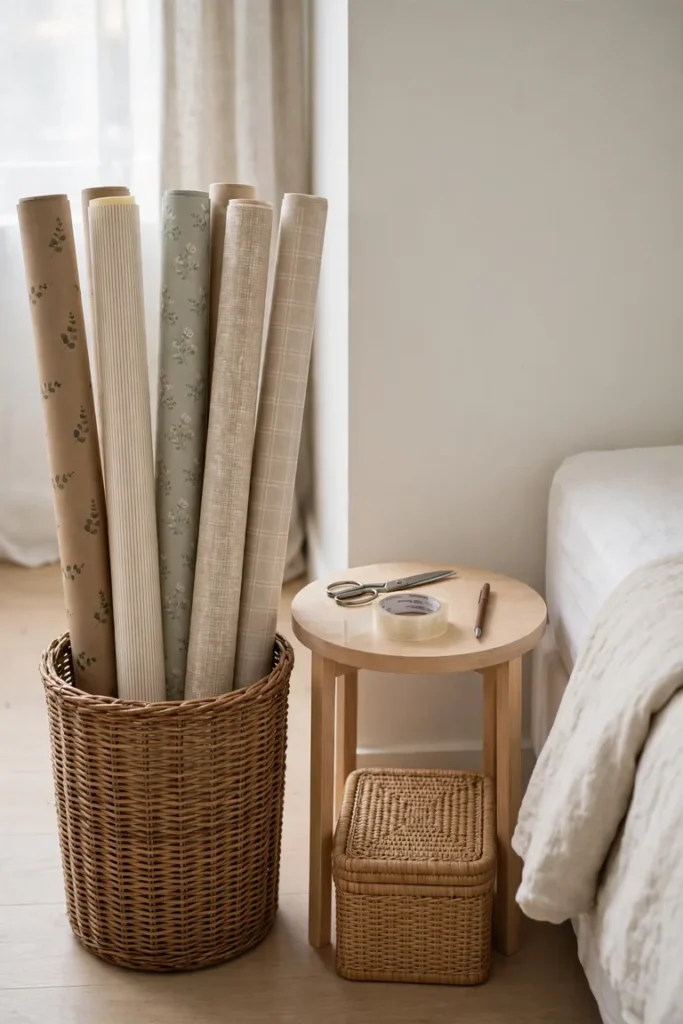
This is the smallest real station on the list, and it works in a corner that fits almost nothing else.
Stand your rolls upright in a tall basket or an umbrella stand, handles and rims up, so you can read the patterns at a glance. Beside it, set one tiny side table, just wide enough for scissors, tape, a pen, and the gift you are wrapping parts of on your lap or on a nearby bed.
Keep only the tools on that table. Bags, tags, and ribbon live in one lidded box under it, and spare rolls stay in the basket rather than leaning on the wall, where their edges bend and tear.
Two pieces, one corner, nothing fixed to a wall.
Place the tall basket in the corner first, then slide the side table in beside it.
Load rolls upright with the pattern facing out, tallest at the back.
Put tools on the table, the lidded box under it, and leave the table top half empty.
9. Corner Floating Shelves With a Pull Out Bin Underneath
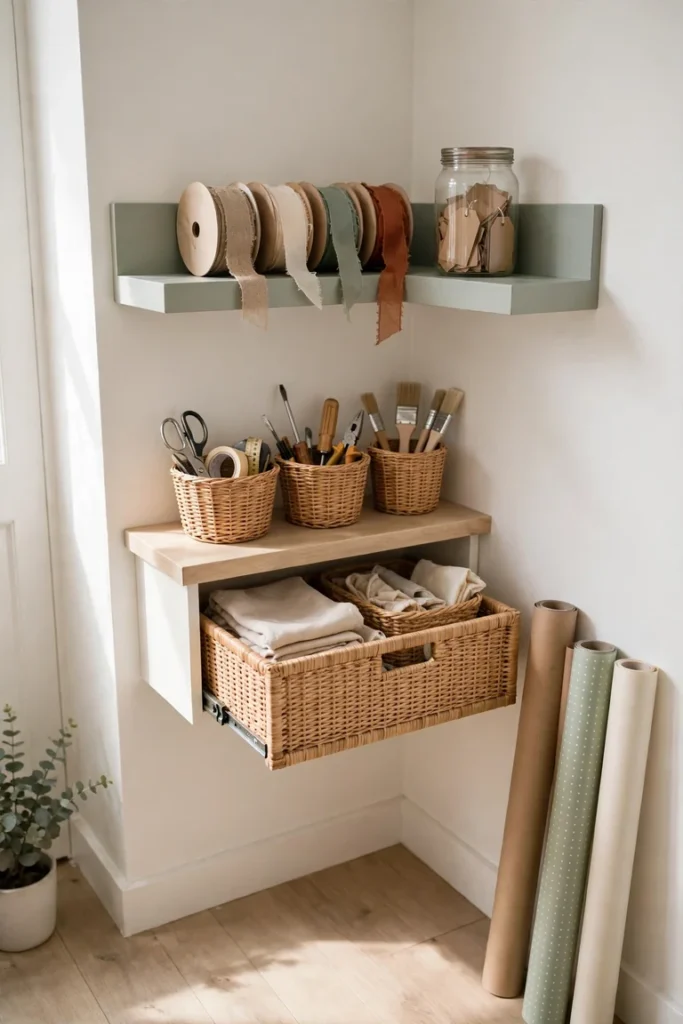
Use the corner itself as the frame, not a piece of furniture pushed into it.
Fit two or three floating shelves across the corner, one on each wall or one long shelf cut to sit in the angle. Work on a tray or board at a nearby table, and treat the shelves as the supply wall you pull from. The high shelf stays light, the low shelf takes the weight.
- Top shelf: ribbon spools in a row, plus tags in a small jar
- Middle shelf: scissors, tape, pens, and folded tissue in two small baskets
- Floor below: one pull out bin for bags, flat boxes, and spare paper sheets
Rolls stand in the corner angle under the lowest shelf, held by the two walls.
Heavy low, light high. If a shelf holds bags or boxes, it belongs near the floor, not above your head.
10. Styled Bar Cart That Earns Its Place in the Room
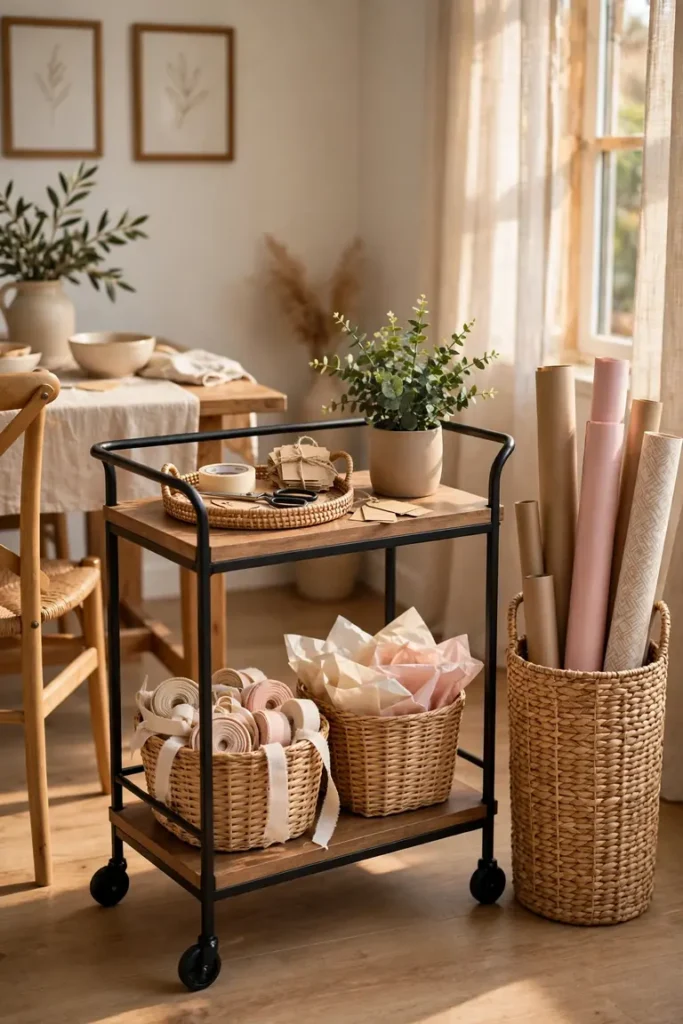
A bar cart only earns this spot if it looks good on the days you are not wrapping anything.
Choose one with two tiers and a finish that already matches the room, wood, black metal, or brass tones you use elsewhere. The top tier holds a small tray with scissors, tape, and tags, plus one plant or candle that stays there all year. The lower tier holds ribbon, tissue, and folded bags in two matching baskets, so the supplies read as storage, not clutter.
Rolls stand in a tall floor basket beside the cart, not on it.
Lock the wheels once it is placed. A cart that drifts is a cart that gets emptied.
- ▸Keep one decor piece on the top tier at all times, so the cart always looks finished.
- ▸Use matching baskets on the lower tier. Mixed boxes make it look like storage on wheels.
- ▸Repeat one color from the room in the ribbon you keep out, and store the rest out of sight.
11. Under the Stairs Nook With Low Stacking Drawers
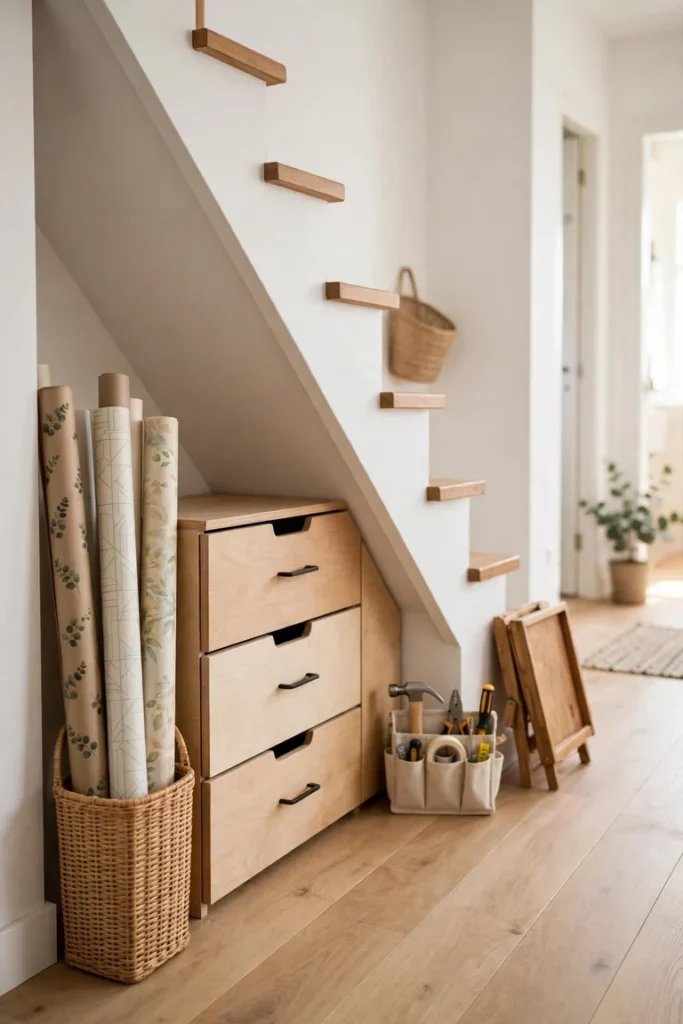
The space under the stairs is often a sloped, awkward triangle that collects shoes and spare boxes.
Low stacking drawers fit that slope in a way tall furniture never will. Set two or three wide, low drawers along the deepest part of the nook and work on a folding tray table or the hall floor cushion beside them. The drawers stay shut, so the nook looks neat even in an open hall.
Tallest end. Rolls standing in a narrow bin where the ceiling is highest. Middle drawers. Bags, flat boxes, and tissue. Lowest end. One small caddy with scissors, tape, and tags that you carry to your wrapping spot.
12. Garment Bag Roll Storage Inside a Coat Closet
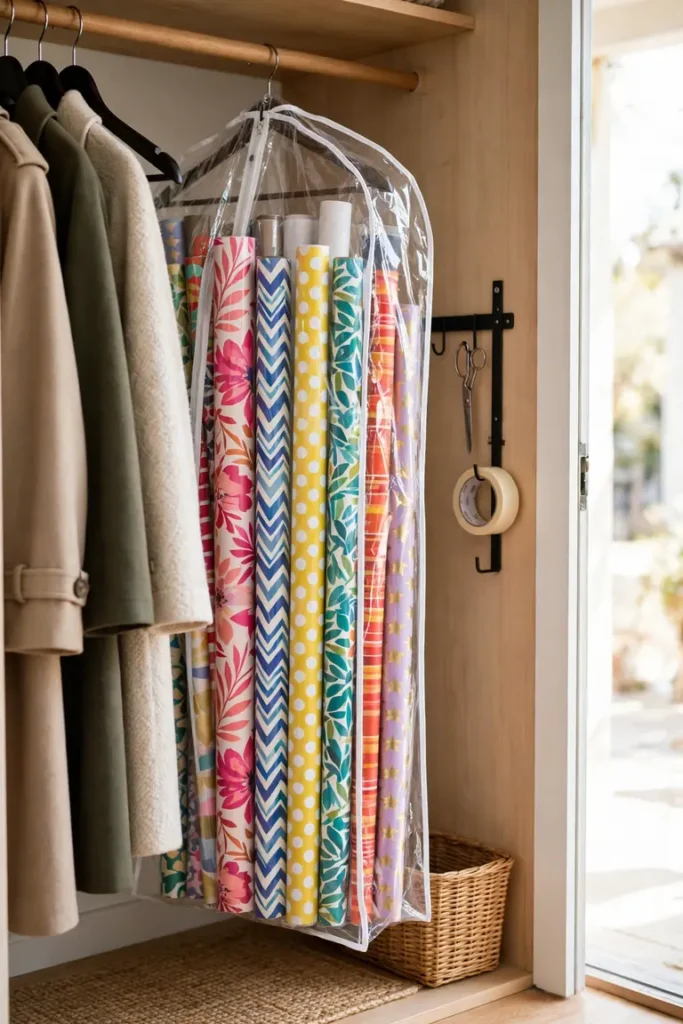
Rolls get bent because they lean. Hanging them stops that.
Slide your wrapping paper rolls into a clear garment bag and hang it from the closet rod in a coat or hall closet. The bag keeps dust off, the clear front lets you see every pattern, and the rolls stay straight because nothing rests on them. Hang a small hook strip on the closet side wall beside the bag for scissors and a tape holder.
Keep one small basket on the closet floor under the bag for ribbon, tags, and bags. That basket plus the hanging bag is the whole station, and you wrap at the nearest table.
One closet, no floor space lost to rolls at all.
What to grab first
13. One Section of a Cube Bookshelf, Nothing More
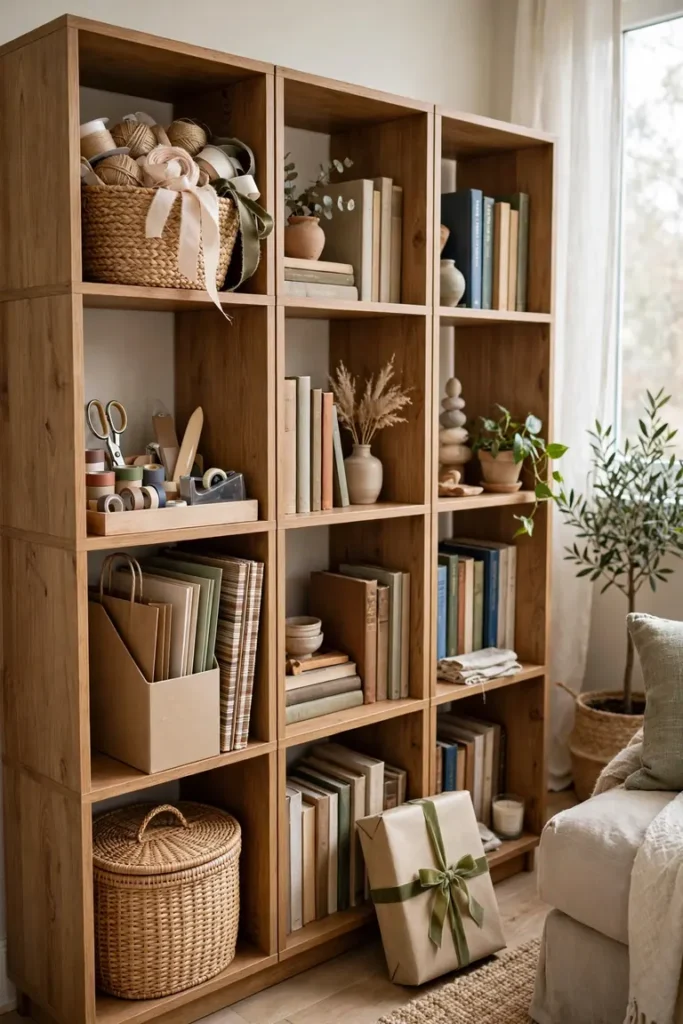
Giving wrapping supplies a whole bookcase is how they spread. One vertical section is enough, and the limit is what keeps it tidy.
Claim four cubes in a column on a bookcase you already own, in a living room or spare room corner. Books and decor stay in the other columns, so the shelf still looks like a shelf, and your supplies have a fixed border they cannot grow past.
- Top cube: ribbon and bows in one open basket
- Second cube: scissors, tape, pens, and tags in a tray
- Third cube: tissue paper and folded bags, standing upright in a file holder
- Bottom cube: flat boxes and spare paper sheets in a lidded bin
14. Entry Bench With Hidden Storage Inside the Seat
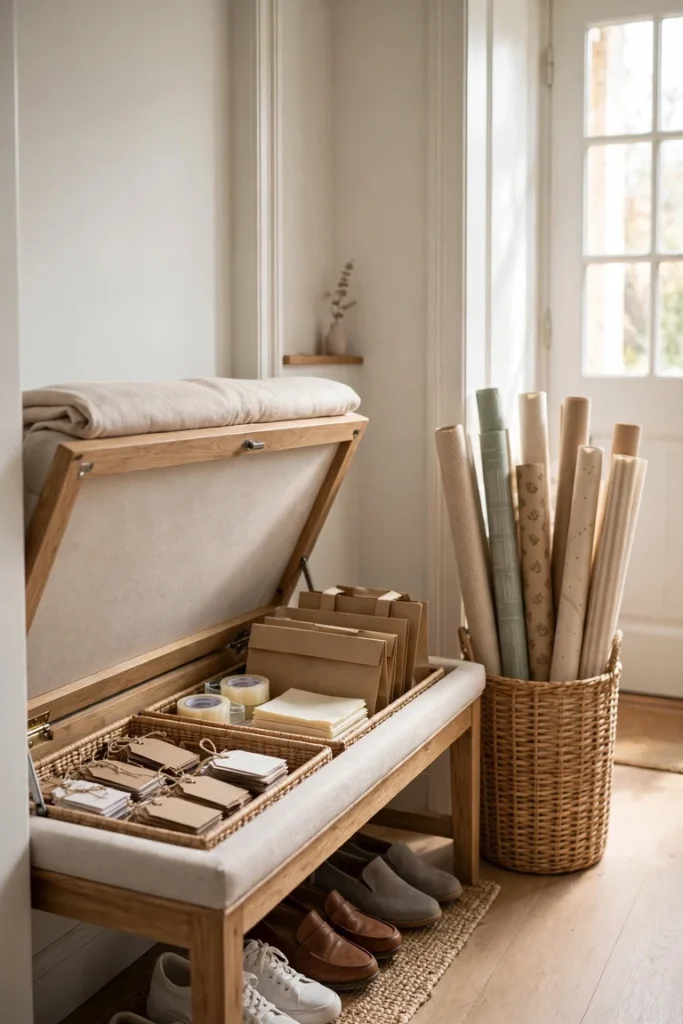
The hall bench by the front door is sat on every day and opened almost never, which makes the space under its seat fair game.
Lift the seat and store flat supplies inside in two shallow trays, one for tags, pens, and tape, one for tissue and folded bags. Scissors go in a pouch clipped inside the lid, so they never sit loose where hands reach in. Rolls are too long for most benches, so they stand in a tall basket in the corner right beside it, and that basket is part of the station.
The bench still works as a bench. Sit, put shoes on, close the lid, and nothing shows.
⚠️ Watch Out
Do not fill the bench to the top. If the lid will not sit flat and take weight, the bench stops being a seat and the storage is not worth it.
15. Narrow Slide Out Cart for the Gap Beside a Cabinet
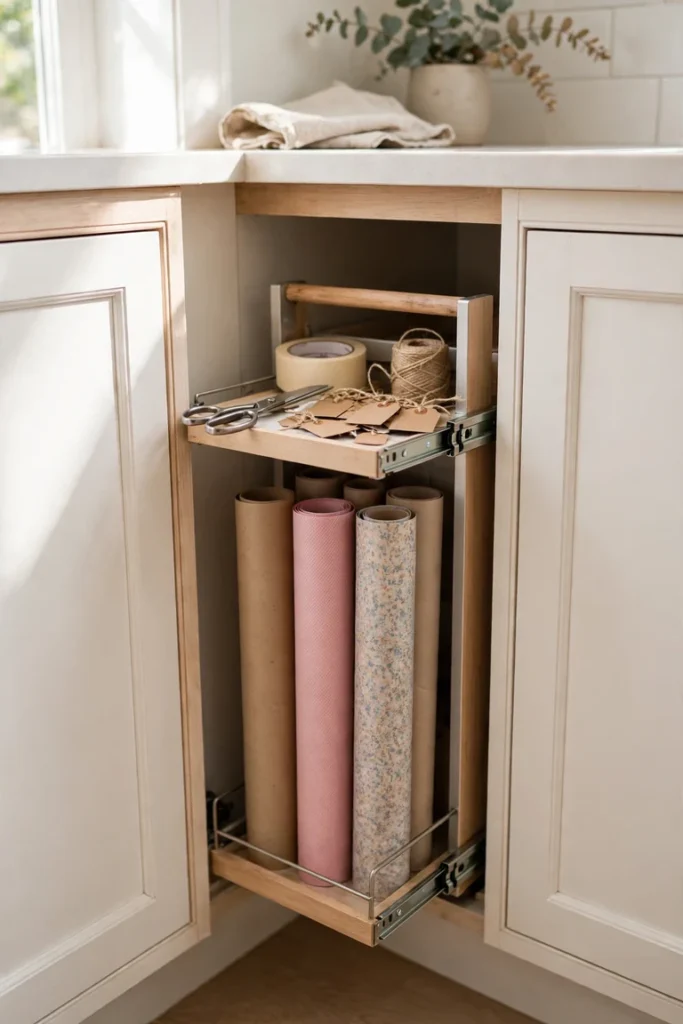
That thin gap beside a kitchen cabinet or a laundry cupboard is dead space, and it is often exactly the width of a slide out cart.
- Measure the gap at its narrowest point, then choose a cart at least an inch slimmer, so it slides without scraping.
- Load it by height. Rolls and tall bottles of spare ribbon stand on the bottom tier, where the cart is steadiest.
- Put scissors, tape, and tags on the top tier, since that is the tier you reach without bending.
- Add bags and flat boxes in the middle, and pull the cart out only when you wrap.
A narrow gap that collects dust, lost lids, and the odd cleaning bottle.
A slim cart that slides out with rolls, tools, and bags, then vanishes back into the gap.
16. Storage Trunk That Doubles as the Wrapping Surface
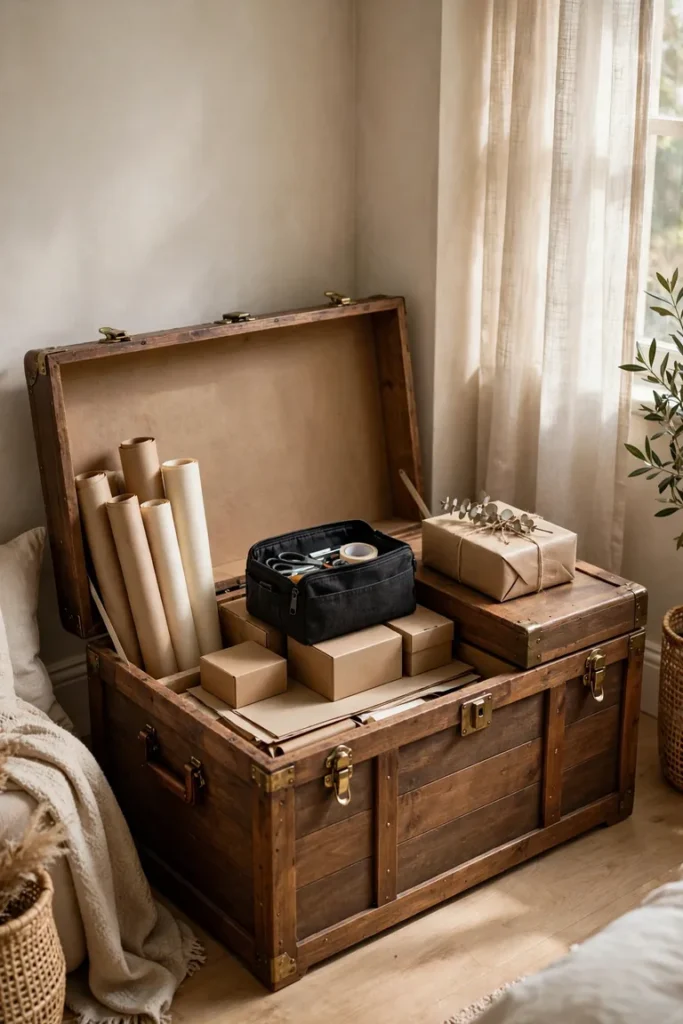
A trunk in a corner earns its floor space twice, once as storage and once as the table you wrap on.
Set a flat topped trunk or a large storage ottoman in a bedroom or living room corner and keep the lid clear. Inside, split the space by size rather than by type, so long and flat things are not crushed by small heavy ones.
One end. Rolls standing upright in a divider or a tall inner bin. Flat layer. Paper sheets, tissue, and boxes lying flat in the middle. Small pouch. Scissors, tape, pens, and tags in a zip pouch that sits on top, so it is the first thing you reach.
Close the lid and the corner is furniture again.
Empty the trunk fully and wipe it out, so you can see the real depth before you load it.
Load flat items first, rolls upright at one end second, and the tool pouch last, on top.
Test the lid. It should close flat with no pressure, or the trunk is too full to wrap on.
17. Tension Rod Roll Rack Inside a Linen Closet
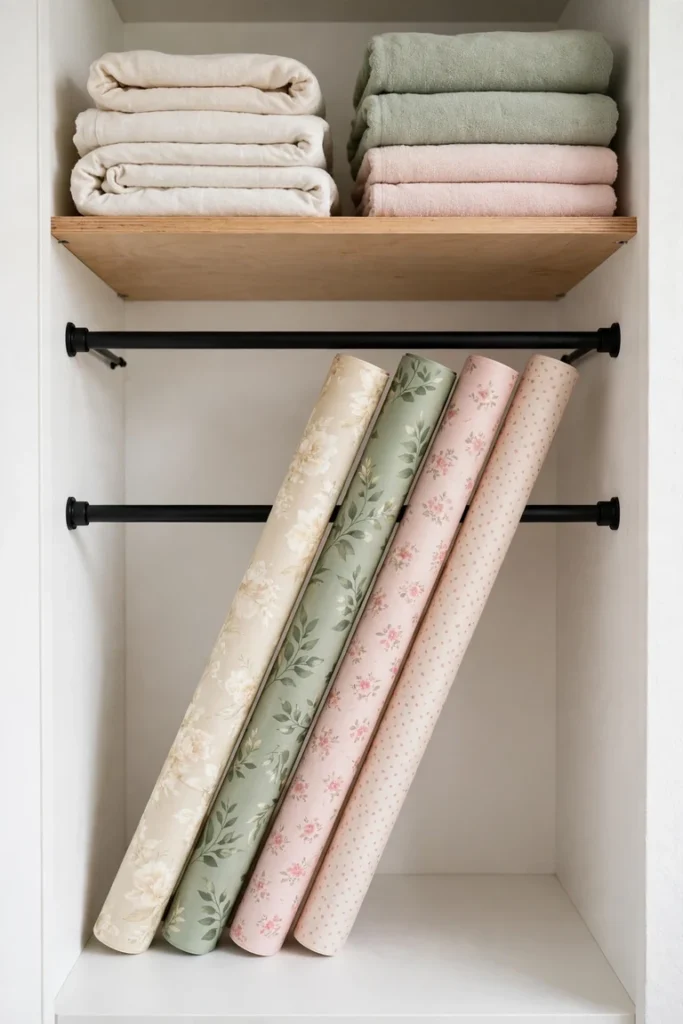
You do not need screws, brackets, or a drill to hold rolls in a closet. Two tension rods do it.
Fit one rod low and one rod higher on the inside of a linen closet, either across the side wall or just inside the door frame. Rest the rolls between the rods at a slight angle, the way fabric bolts sit in a shop, and they stay upright, separate, and easy to pull out one at a time. Towels and bedding keep the shelves above, so the closet still does its main job.
Renters can take the whole rack down in a minute and leave no marks at all.
Space the rods so rolls rest at a gentle angle and cannot slide forward.
Keep the most used paper at the front, where your hand lands first.
Do not wedge rolls in tight. Bent ends and torn edges start exactly there.
Do not rest rods on loose shelf edges. They need two solid walls to grip.
18. One End of a Home Office Desk, Kept Separate
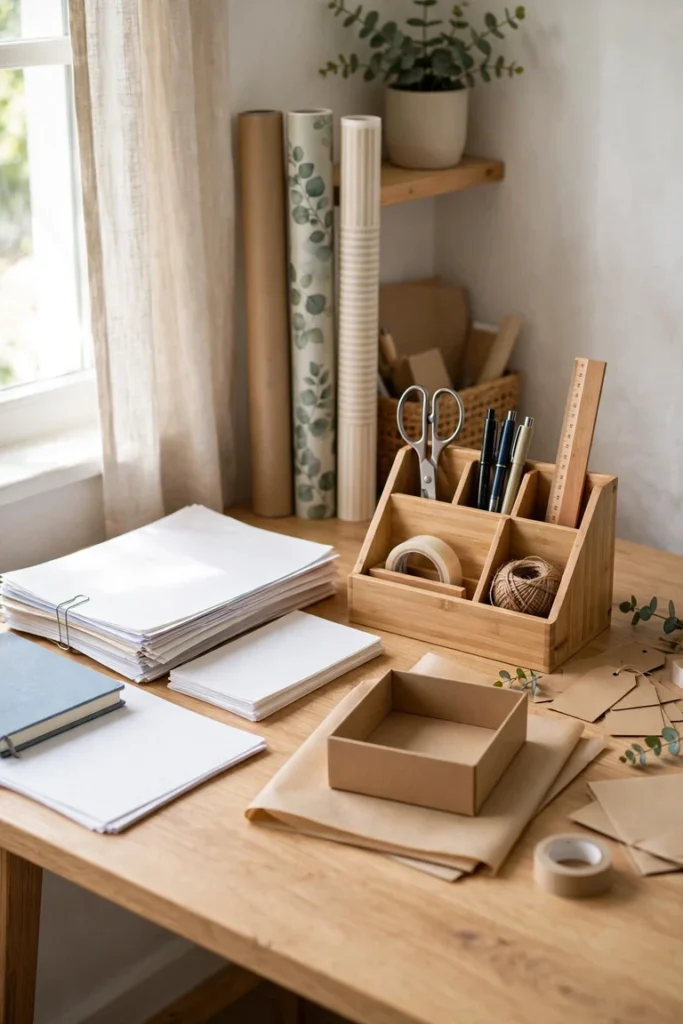
If you already sit at a desk every day, the far end of it is the cheapest station on this list.
Clear a strip at one end, about the width of a tray, and give it a hard border. Work papers stop at that line, wrapping supplies live past it, and the two never mix. Wrap on the desk itself, then slide everything back to its end when you finish.
Keep at the desk end, and nowhere else:
- One desktop organizer with scissors, tape, pens, and a ruler
- A small stack of tags and cards in a desk drawer below it
- Ribbon in one drawer divider, tissue folded in the same drawer
Rolls stand in the corner behind the desk, between the desk edge and the wall.
| Desk end station | Separate corner station |
|---|---|
| Space: a tray width on a desk you already own. Nothing new to buy or place. | Space: a full corner, plus a surface of its own for wrapping. |
| Best for daily wrappers who want supplies where they already sit. | Best for big wrapping sessions you want away from work papers. |
19. Portable Tool Caddy You Carry to the Dining Table
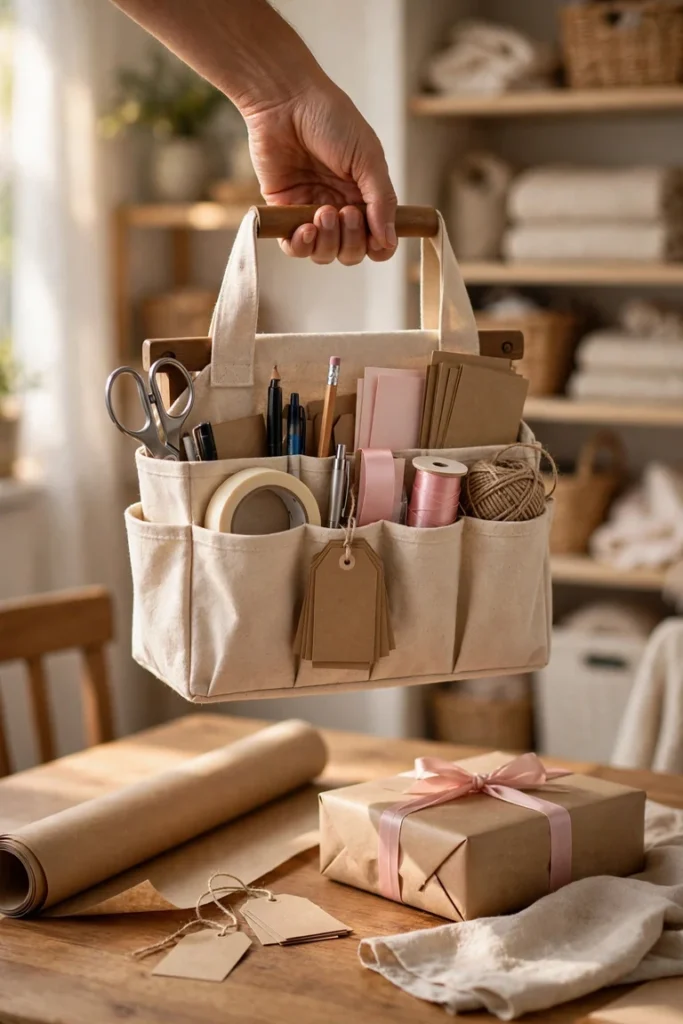
Some homes have no corner to give, and that is fine. The station can live in your hands instead of in a room.
Load one handled caddy with everything small: scissors, two tape rolls, pens, tags, a ruler, and ribbon wound on cards rather than loose spools. Store the caddy on a closet shelf or under a sideboard, carry it to the dining table when a gift needs wrapping, and carry it back when you are done. Rolls and bags live flat in one under bed box or upright in a closet, and you fetch only the one you need.
The rule that makes this work is simple. The caddy goes back the same day, every time.
The station is the caddy, not the room. If it has a handle and a home, you already have a wrapping station.
20. Single Ribbon and Scissors Rail on a Small Wall Strip
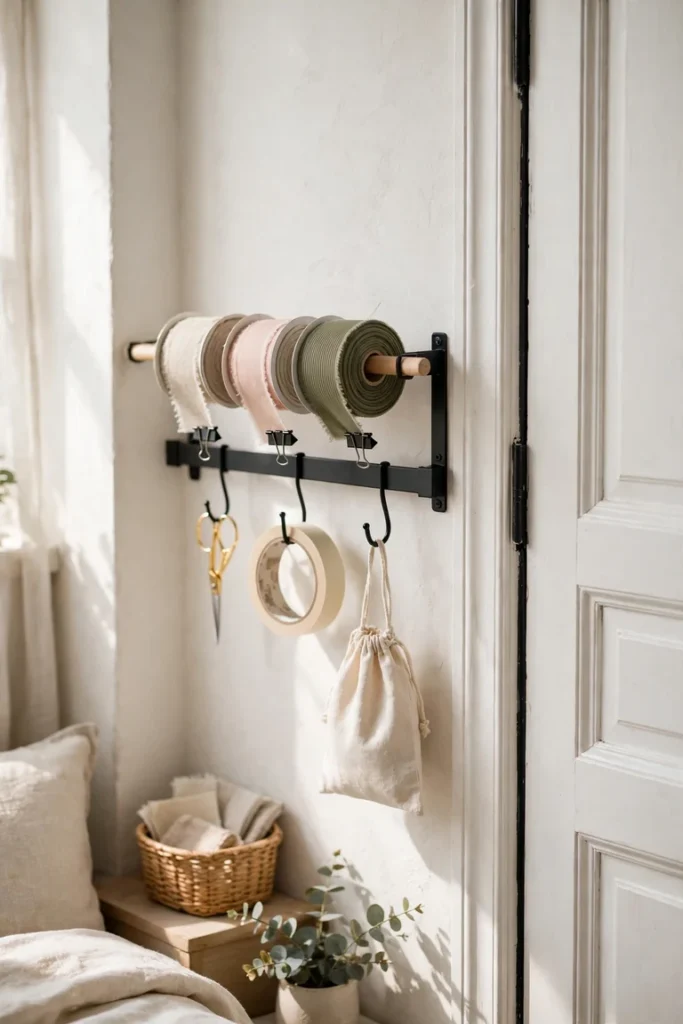
A narrow strip of wall beside a door or above a desk is too small for shelves, but it is wide enough for one rail.
- Fix one horizontal rail at chest height, with hooks that can slide along it.
- Thread ribbon spools onto a short bar or a length of dowel hung from two hooks, so spools spin as you pull.
- Hang scissors, tape, and a small bag for tags from the remaining hooks, in the order you use them.
Stop the spools sliding off with a clip or a knot of ribbon at each end of the bar. Small detail, real difference on a busy wrapping day.
💡 Quick Tip
Order spools by how often you reach for them, not by color. The plain white and kraft ribbon you use weekly should sit in the middle, at the easiest reach.
21. Low Media Console With Open Shelves in a Spare Corner
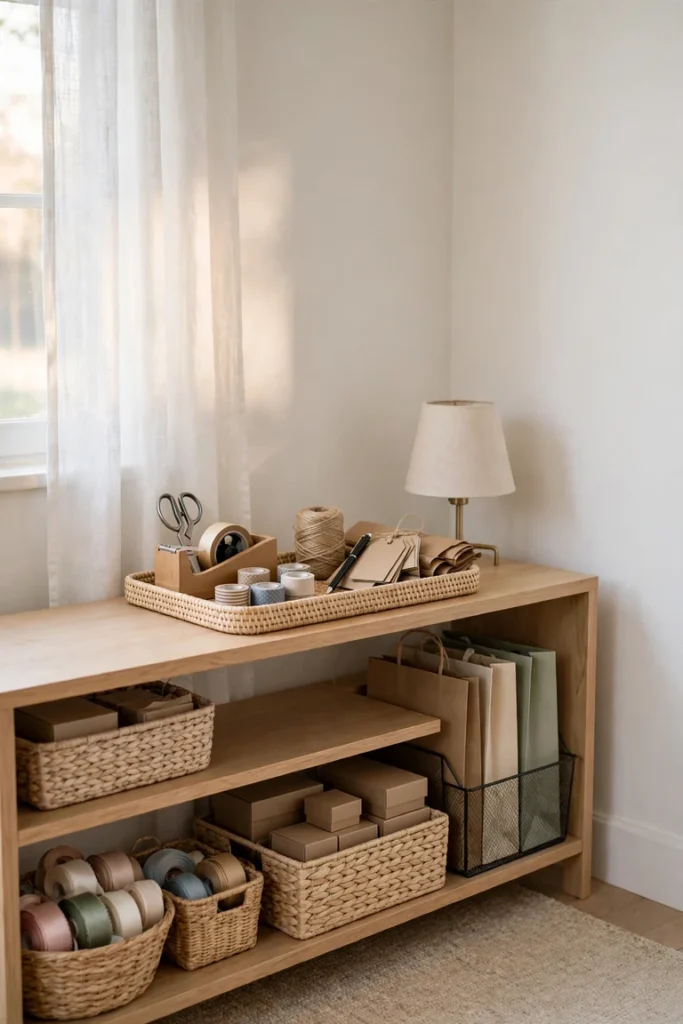
A low media console has a flat top at a good working height and open shelves that were made for boxes, which is most of what a wrapping station stores.
Set one in a spare room or living room corner and wrap on the top, with a tray holding the tools you are using so nothing rolls off. The open shelves below take flat boxes, bags, and tissue in plain sight, and the top stays styled the rest of the time with a lamp or a stack of books at one end.
- Left shelf: flat boxes and spare paper sheets in a low bin
- Middle shelf: gift bags standing upright in a file holder
- Right shelf: ribbon, bows, and tissue in two small baskets
22. Small Round Table in a Window Bay With Baskets Underneath
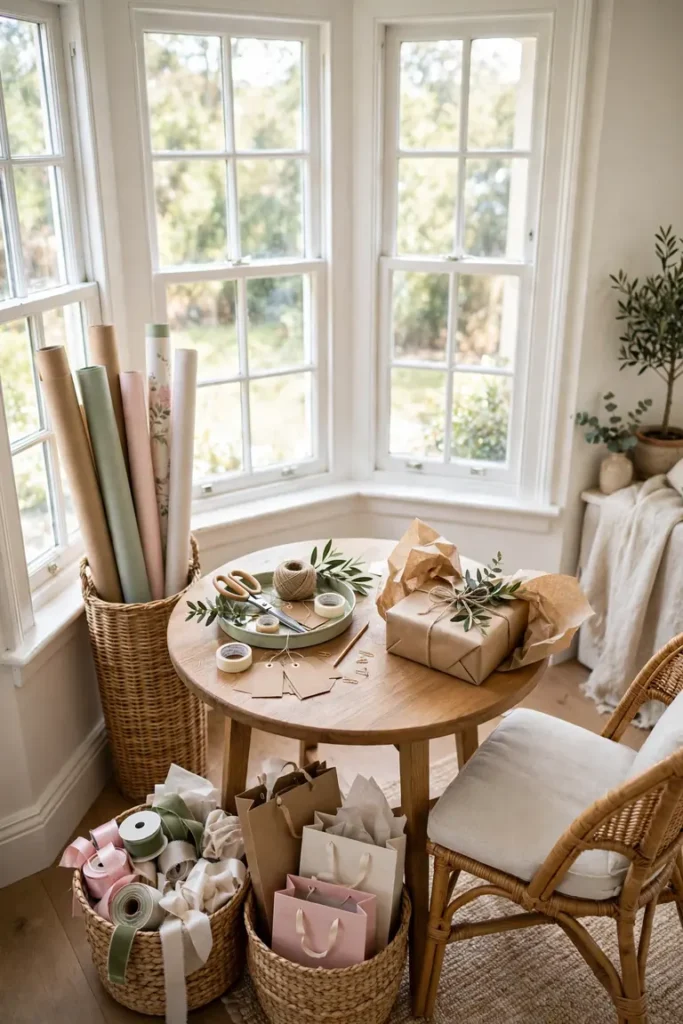
A window bay is often too shallow for a sofa and too bright to waste, and a small round table fits that curve well.
Set the table in the bay and wrap there in daylight, which makes matching paper to ribbon far easier than under a hall bulb. Keep the table top clear apart from one small tray. Two woven baskets sit underneath, one for ribbon, tape, scissors, and tags, one for bags and tissue, and rolls stand in a tall basket tucked against the bay wall where the light shows their true colors.
Pull a chair up only when you wrap. The rest of the time, this corner just looks like a quiet spot by the window.
What to grab first
Final Thoughts
None of these stations needs a spare room, a big budget, or a free weekend. Each one starts with the same three moves: give rolls an upright home, give small tools one fixed spot, and keep one surface clear enough to work on. Start with the corner you already walk past, a closet edge, the end of a desk, the gap beside a cabinet, and build only what that space can hold.
The best of these gift wrapping station ideas is the one that matches how you actually wrap, often or rarely, at a table or on the floor. Save this list to your organizing board, and pick your corner before your next gift comes up.