25 Best Cat Climbing Wall Ideas for Small Homes on a Budget
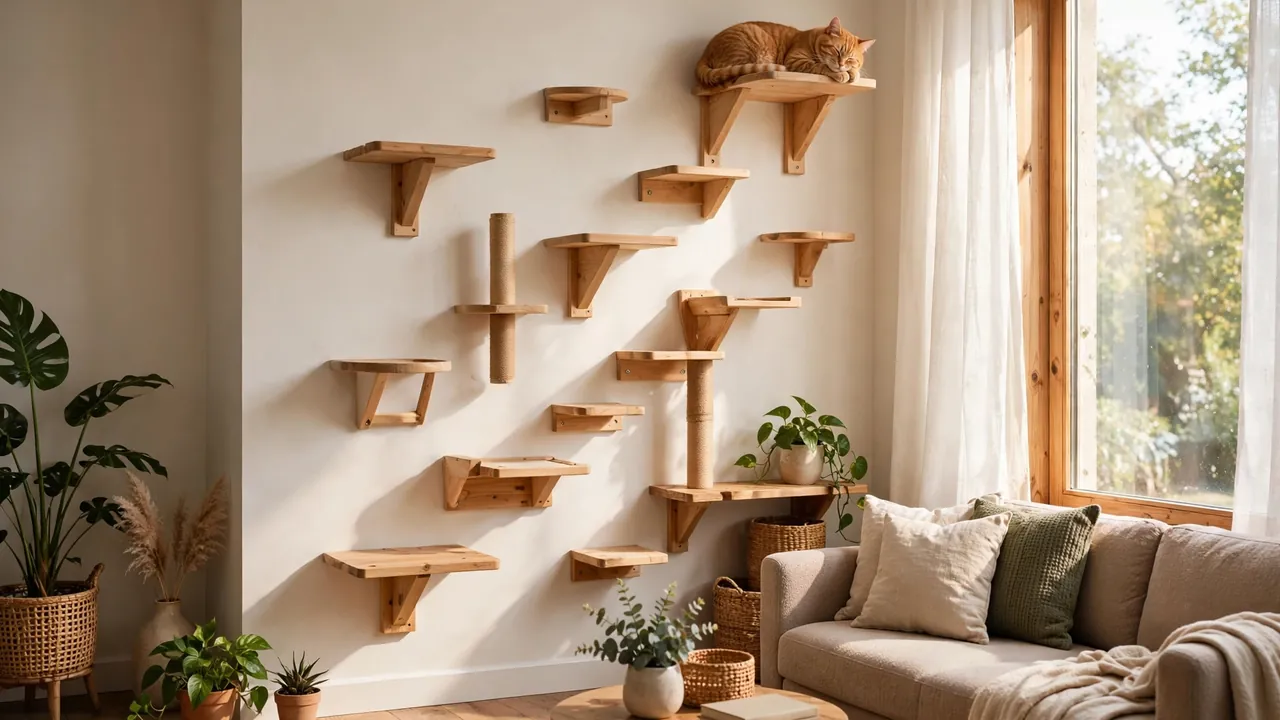
Yes, you can absolutely build a cat climbing wall in a small home without spending a fortune. The secret is thinking vertically instead of horizontally. Your walls are full of unused space, and a few well-placed shelves, perches, and scratching surfaces can turn a blank wall into a playground your cat will use every single day. Cats are natural climbers, and in a small apartment or cozy house, vertical territory matters even more because floor space is limited. A climbing wall gives your cat exercise, mental stimulation, and those high vantage points they instinctively crave, all while keeping your limited square footage free for you.
The best part is that most of these ideas cost very little. We are talking about basic lumber, simple brackets, carpet remnants, and sisal rope, the kind of supplies you can pick up in one hardware store trip. Many of these projects take an afternoon or less, and several are renter-friendly. Below you will find 25 practical, budget-conscious ideas, each one designed for real small homes with real cats. You will also find honest safety notes throughout, because a climbing wall is only fun if it is sturdy. Pick the ideas that fit your space, your cat’s personality, and your budget, and start with just two or three shelves. You can always expand the route later once you see how much your cat loves it.
1. Staggered Floating Shelves by the Window
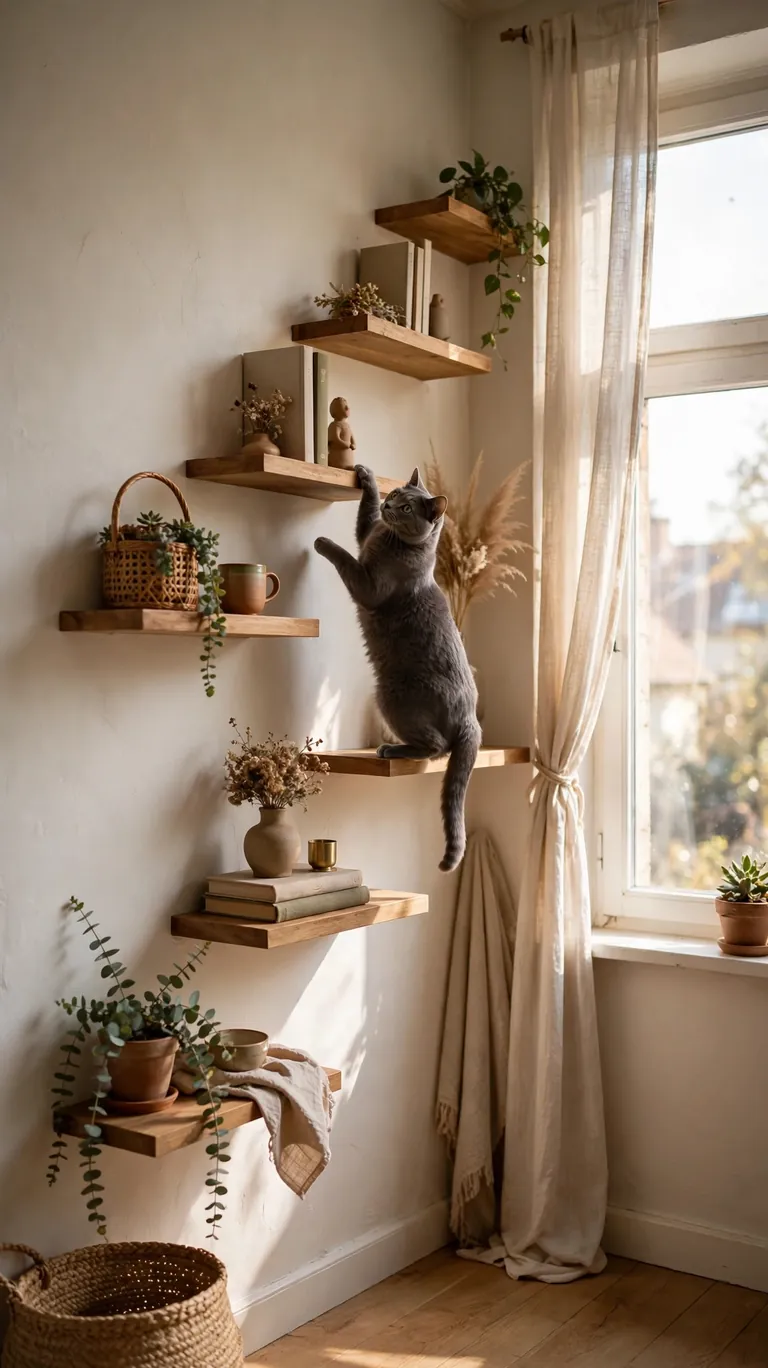
Three or four simple wood shelves mounted in a zigzag pattern up the wall beside a window make the perfect starter climbing wall. Cats love height combined with a view, and a window route gives them both. Stagger the shelves so each jump is short and easy, and use solid wood boards with L-brackets anchored into wall studs. In a small home, this setup uses zero floor space, which is exactly what you want.
Place the lowest shelf at about couch-arm height so your cat can step up without a big leap. Put a soft mat or a carpet remnant on the top shelf to create a dedicated nap spot with a view. Keep breakables off nearby surfaces while your cat learns the route. For the budget win, buy one long board and ask the hardware store to cut it into pieces, which is often free and gives you perfectly matched shelves.
2. Single Corner Column Climbing Wall
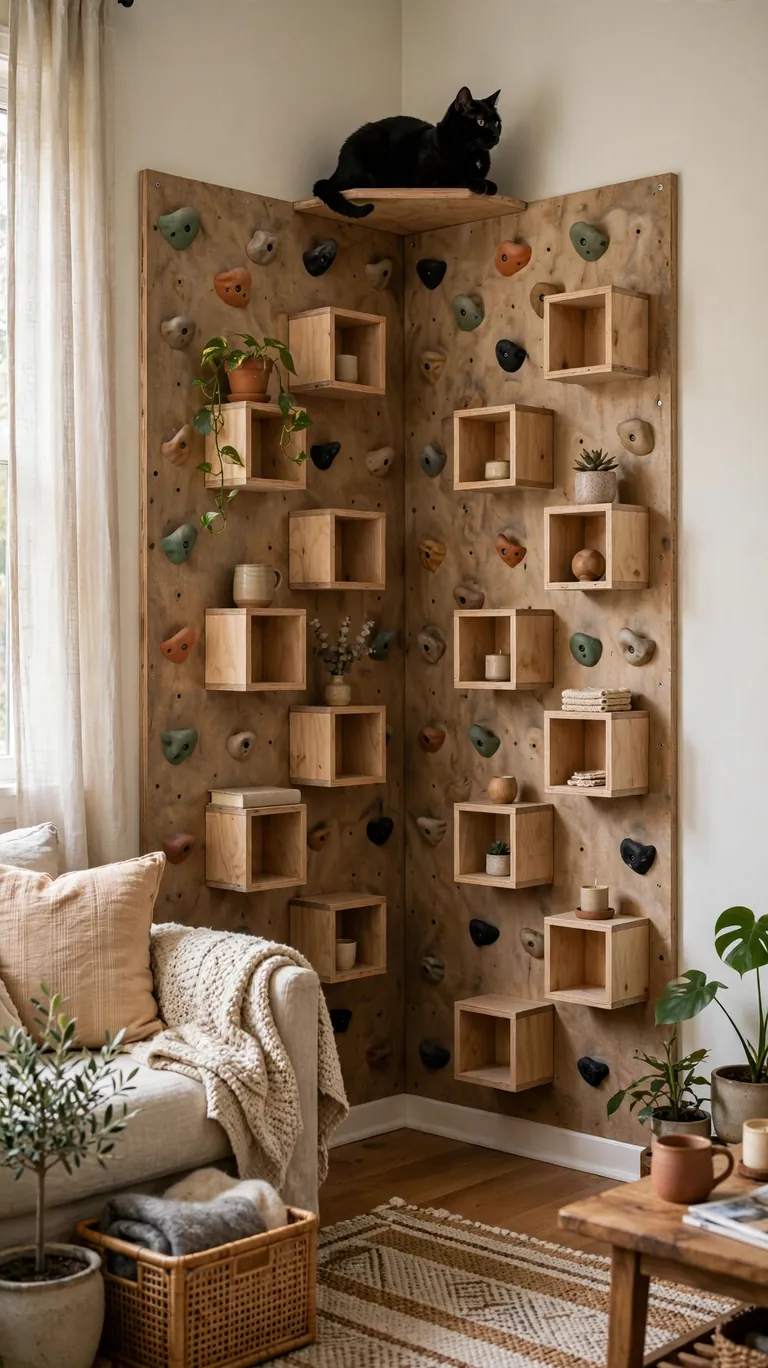
Corners are wasted space in most small homes, which makes them ideal for a vertical cat tower. Mount small square shelves alternating up two adjoining walls in a corner so your cat zigzags upward from one wall to the other. Finish the column with a roomy perch at the top where your cat can survey the whole room like a tiny monarch.
Because the shelves sit in a corner, they feel enclosed and secure, which nervous or newly adopted cats especially appreciate. Anchor every bracket into studs, and corner studs are usually easy to locate with a basic stud finder. Paint the shelves the same color as your walls so the whole column blends into the room instead of looking like an add-on.
3. Carpet-Wrapped Step Shelves
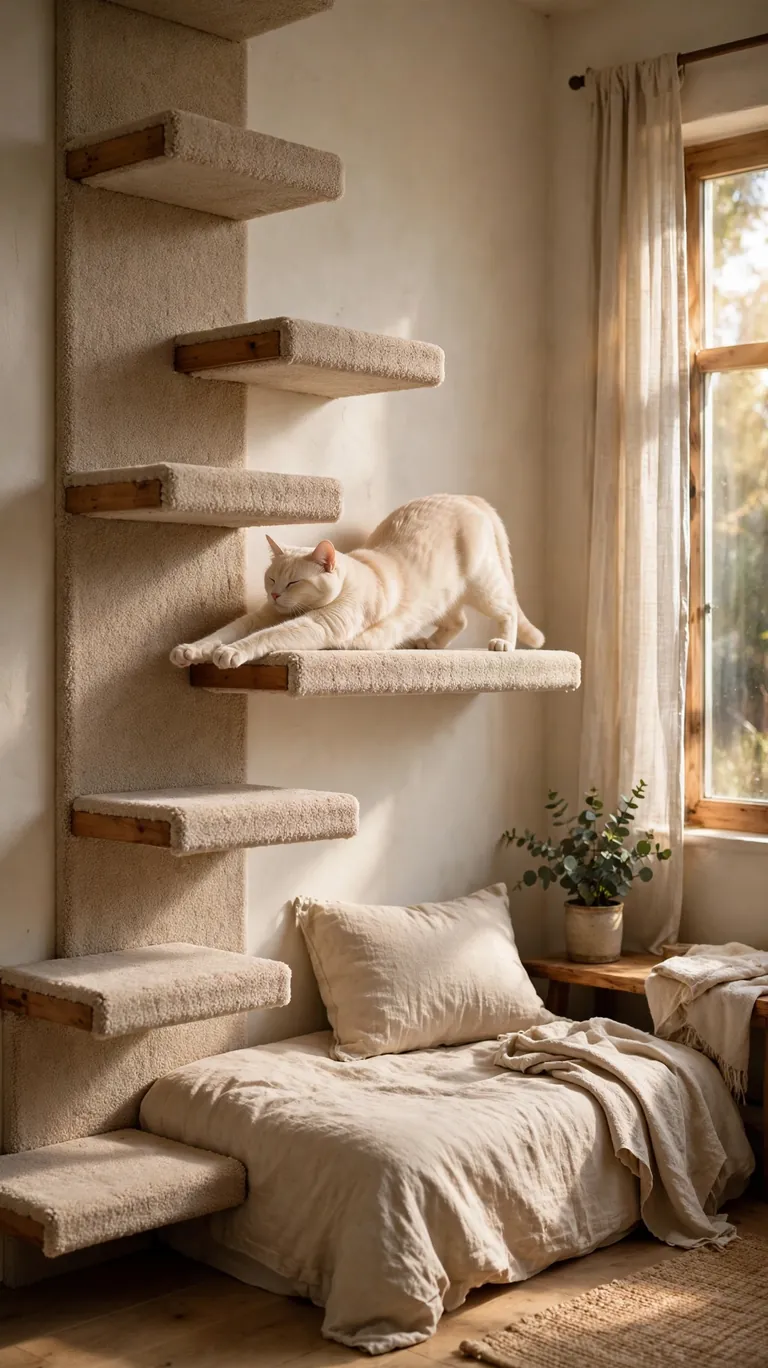
Wrap each shelf in a carpet remnant or a cheap rug runner cut to size, and every step becomes a scratching surface too. The texture gives claws something to grip, which builds your cat’s confidence on the wall. Staple the carpet to the underside of the shelf so no staples are exposed where paws land.
This is the best option for older cats, kittens, or any cat that slips on smooth wood. Choose low-pile carpet so claws do not snag and get stuck. Self-adhesive carpet tiles are another cheap option, and they are easy to peel off and replace individually when one section wears out, so the whole wall stays fresh without a rebuild.
4. Above-the-Desk Bridge Walkway
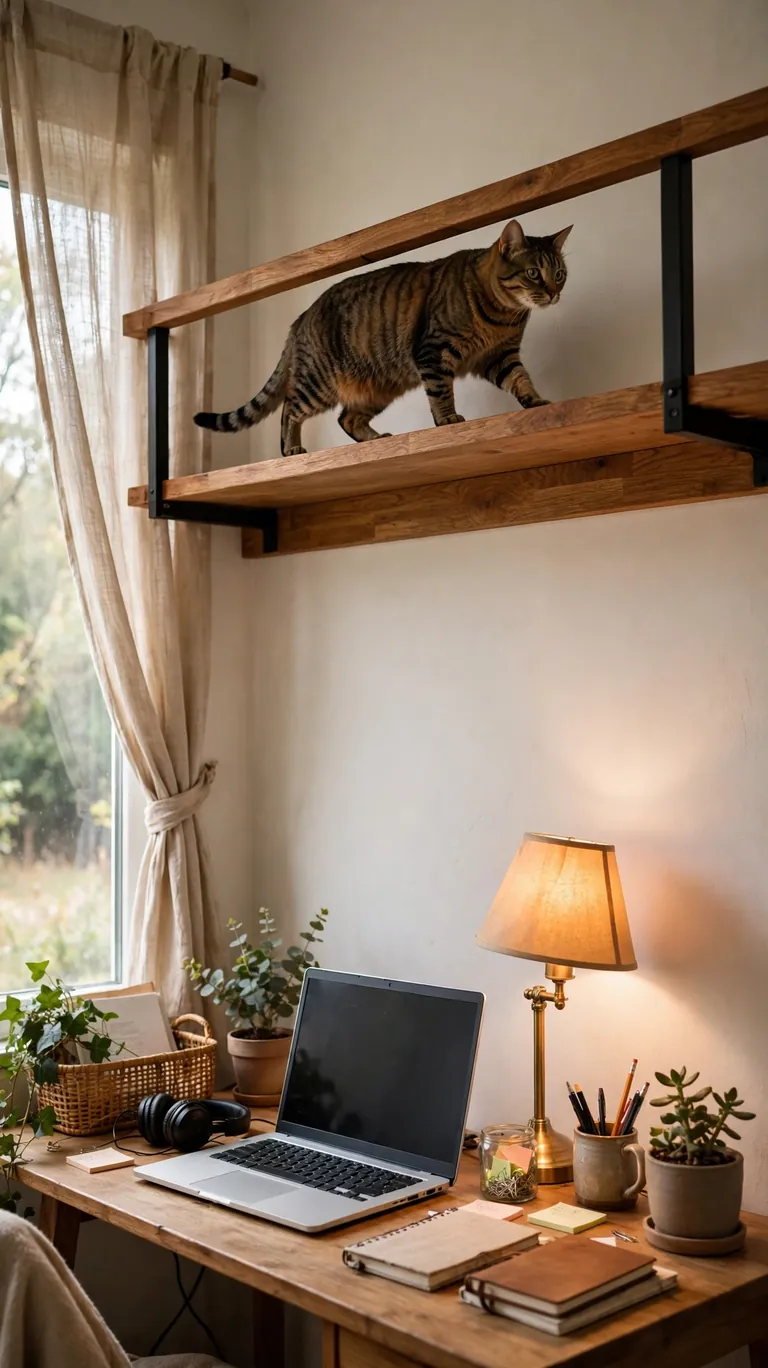
If you work from home in a small space, the wall above your desk is prime cat real estate that is currently doing nothing. Mount a long shelf above the desk at standing height and connect it to a second shelf with a short bridge, giving your cat an elevated walkway right where the action is. Your cat gets to supervise your workday without sitting directly on your keyboard.
Keep the walkway routed away from monitors, hot lamps, and anything spillable. A small folded blanket or a flat cat bed on the far shelf turns the walkway into a nap spot. Make sure each shelf is deep enough for your cat to turn around comfortably, and anchor everything into studs since this shelf will get daily use.
5. Over-the-Door Vertical Run
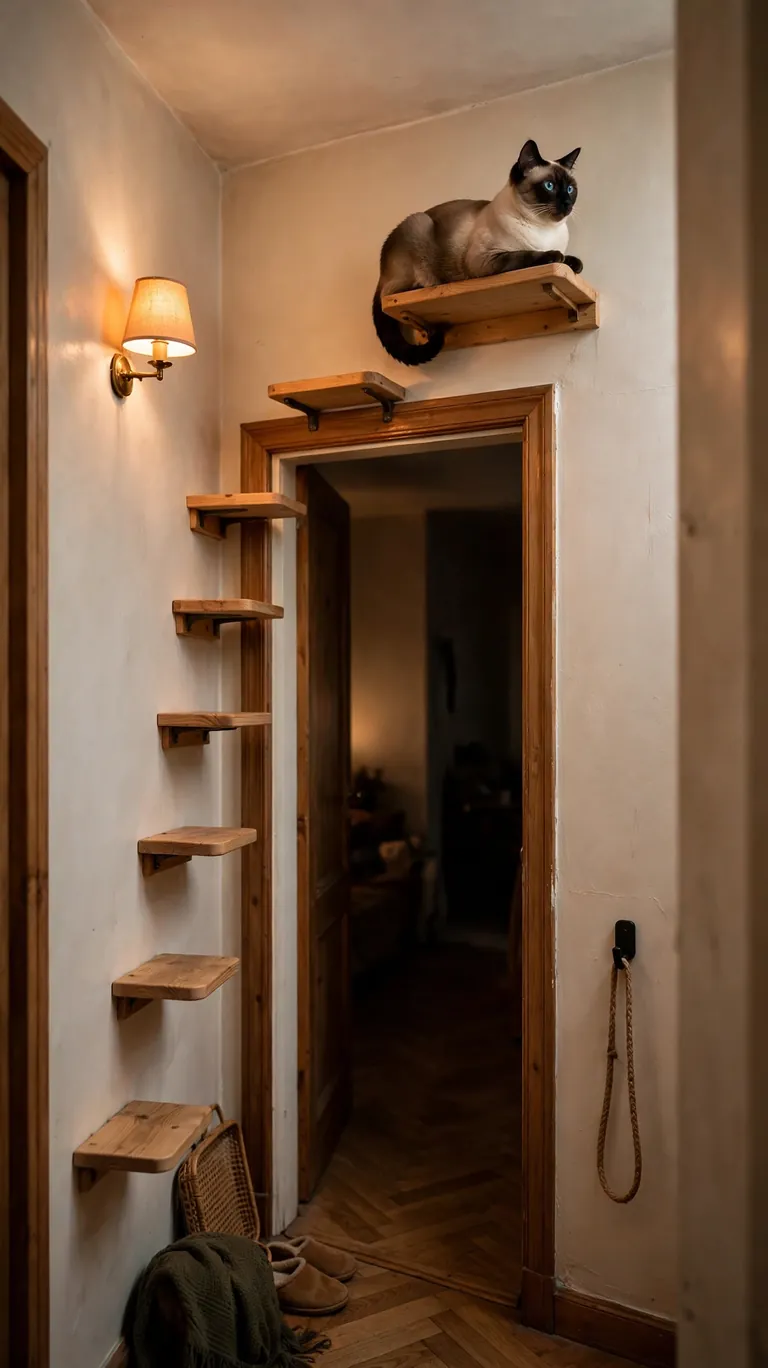
The wall above a doorway is almost always completely empty, which makes it perfect for a high cat loop. Mount two or three small perches climbing the wall beside and above a door frame so your cat can patrol at ceiling height. It is entirely out of your way and uses space that would otherwise just hold dust.
This works beautifully in hallways and small bedrooms where every inch of floor matters. Keep the perches shallow enough that the door still opens fully without clipping them. Anchor into the solid header above the door frame or into nearby studs. Start with one perch and add more once your cat uses the first one confidently.
6. DIY Sisal Scratching Steps
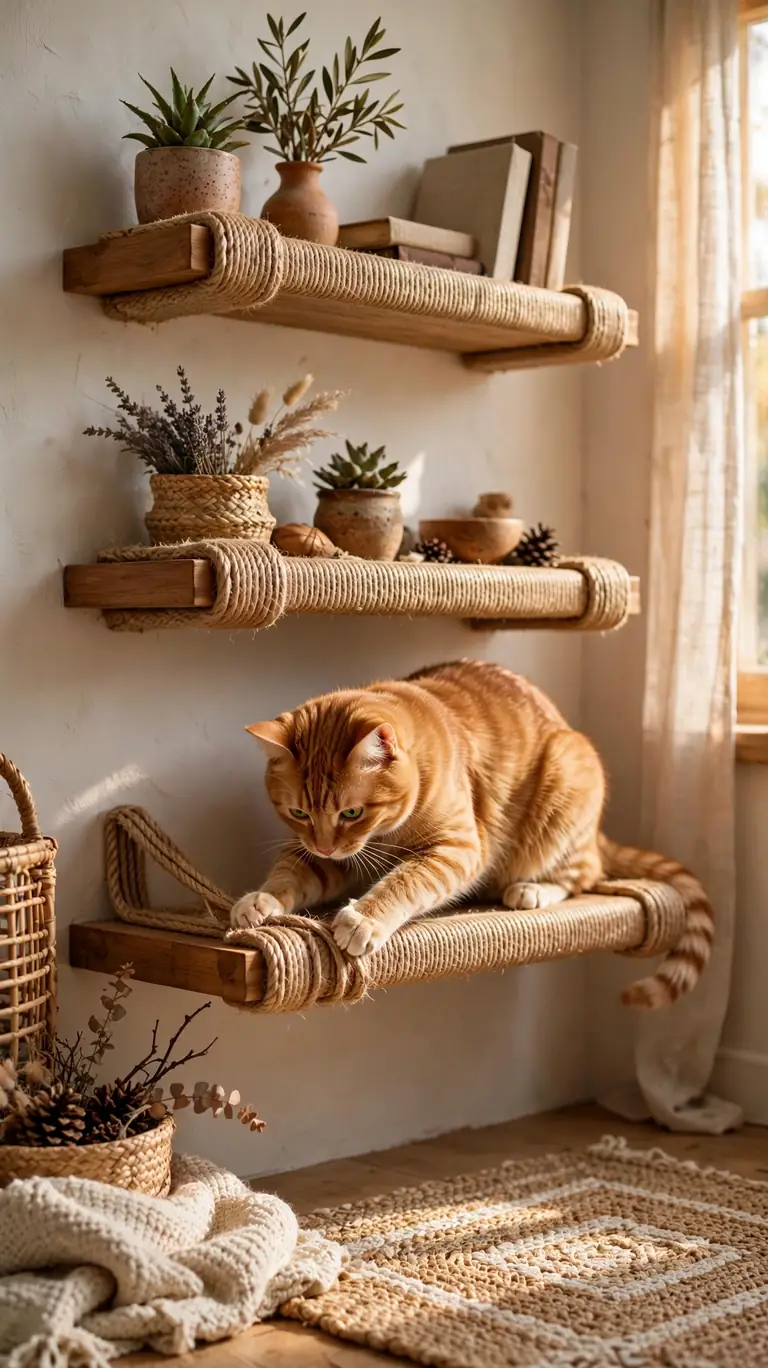
Wrap the front edge of each wall shelf with sisal rope to build scratching directly into the climbing route. Cats naturally want to scratch and stretch after climbing, so putting the scratcher exactly where they already are means they will actually use it instead of your sofa arm. A coil of sisal rope from the hardware store covers several shelf edges for very little money.
Attach the rope with a staple gun on the underside of the shelf edge, keeping all fasteners hidden from paws. Wind it tightly so there are no loose loops. When the rope frays after months of happy scratching, cut it off and rewrap, which takes ten minutes and costs almost nothing. This one detail protects your furniture better than any spray or deterrent.
7. Reclaimed Wood Ledge Route
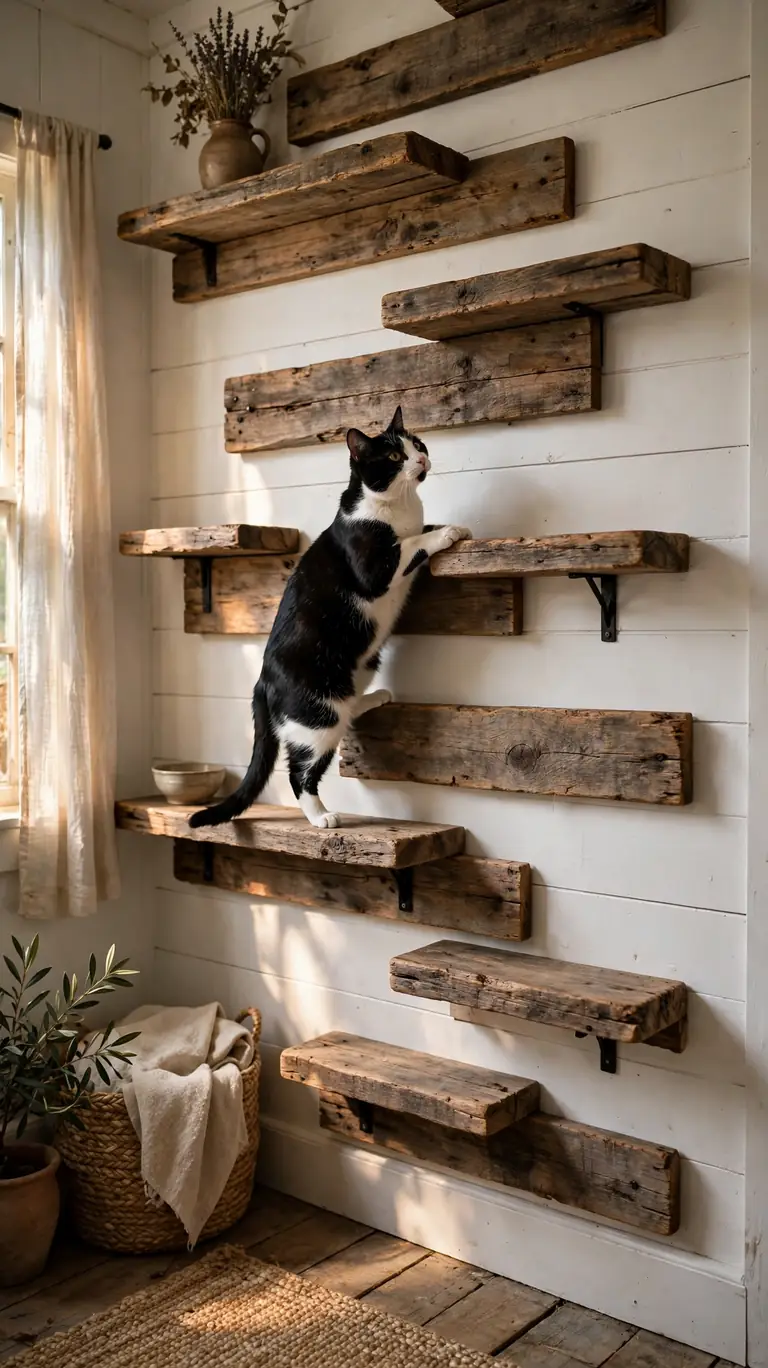
Old fence boards, pallet wood, or offcuts from a lumber yard make characterful cat shelves for next to nothing. Sand them smooth, seal them with a pet-safe finish, and mount them as a climbing route across one wall. The rustic texture looks fantastic in farmhouse, boho, or eclectic rooms, and the price is hard to beat.
Inspect every board carefully for nails, staples, and splinters before bringing it inside, and sand all edges and faces thoroughly. Because the wood itself is free or nearly free, you can afford more shelves and build a longer, more interesting route for the same money. Stagger the boards at slightly different depths for a handmade look that feels intentional.
8. Window Perch Plus Wall Steps
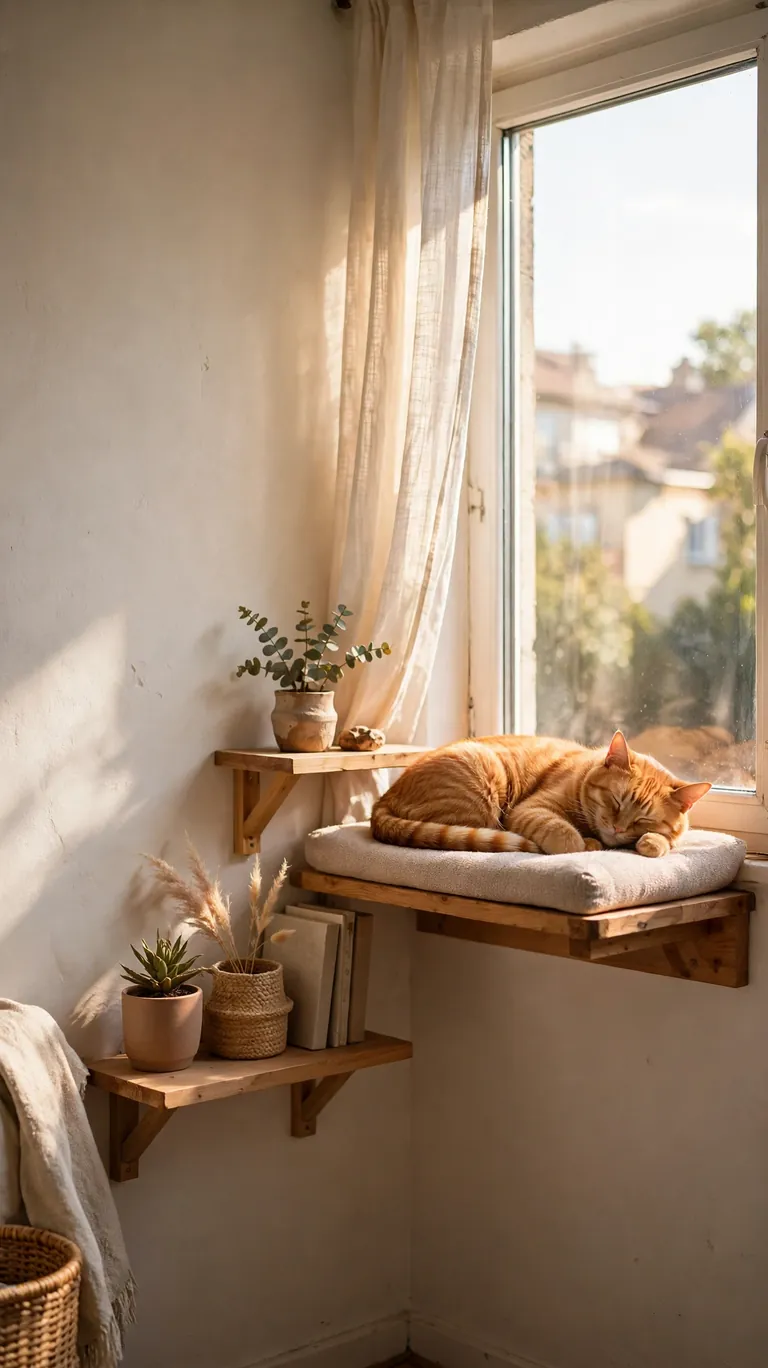
Pair a window perch with two wall shelves leading up to it, and you get the classic combo every cat adores. The shelves act as a staircase, and the sunny perch becomes the destination at the top. Few things make a cat happier than a warm window spot that it had to climb to earn, and in a small home this vertical setup leaves your floor completely clear.
If you use a suction-cup perch, press it onto clean glass and check the cups monthly, since temperature changes can loosen them. For a permanent option, mount a wood perch on brackets beneath the sill. Space the steps so your cat never has to leap across an uncomfortably wide gap, and place a washable pad on the perch for naps.
9. Narrow Hallway Stepping Stones
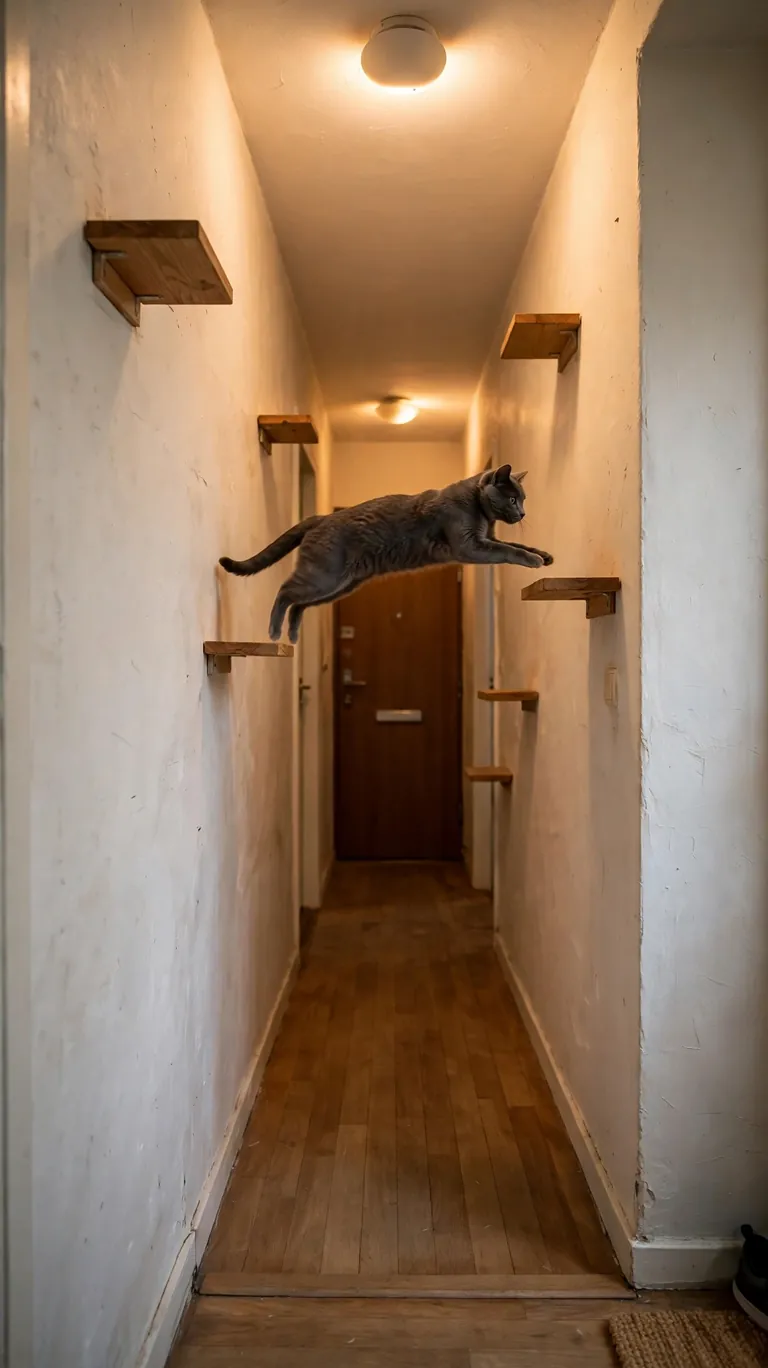
Hallways are dead space your cat already patrols, so put that air to work. Mount small square platforms alternating on opposite walls down the hall so your cat can hop from side to side above head height. You walk underneath on the floor, your cat walks above on its own private highway, and nobody gets in anyone’s way.
Keep each platform modest, roughly the size of a large dinner plate or a bit bigger, and mount them high enough that tall guests will not bump their heads. This turns the most boring part of a small home into a cat playground without sacrificing a single inch of floor space. Space the platforms for easy hops and watch your cat learn the route within days.
10. Cubby Box Wall Tower
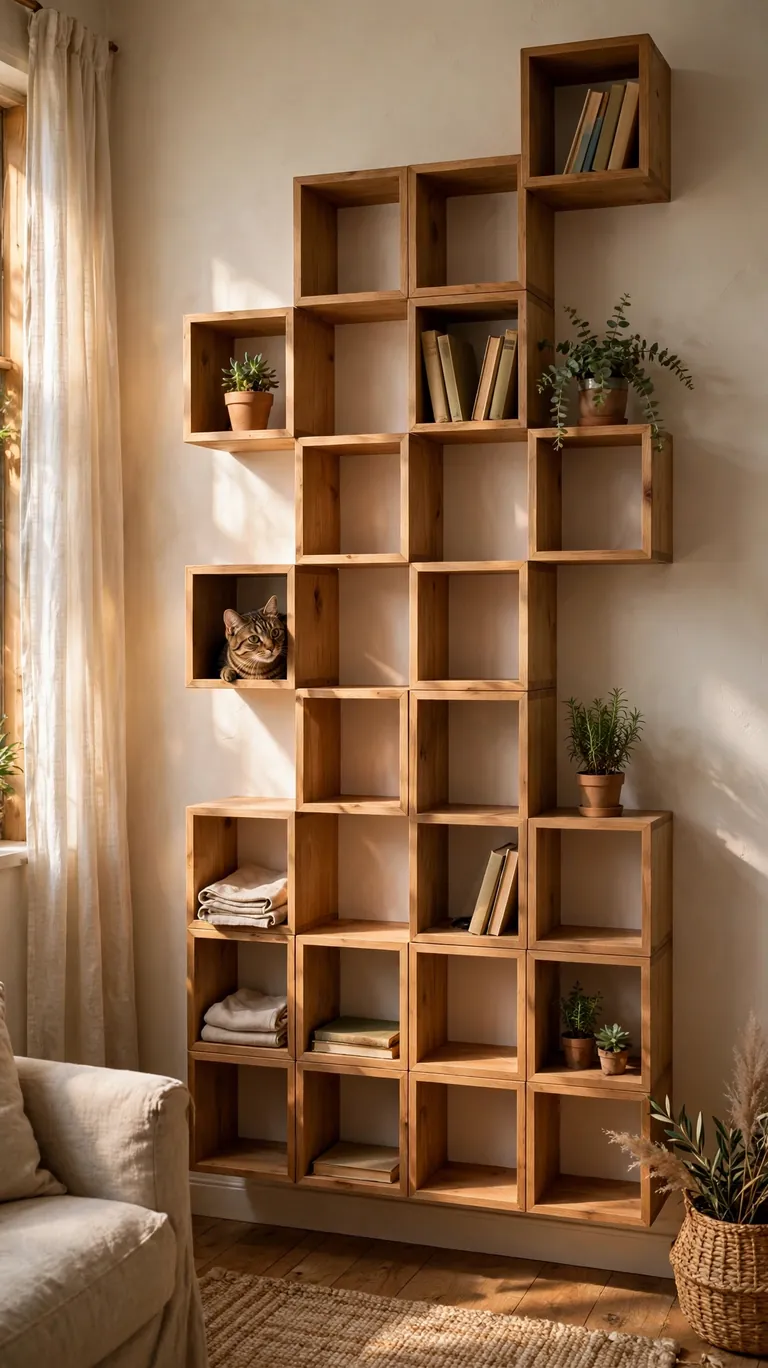
Stack two or three open storage cubes on the wall to create climbing boxes your cat can hop into, through, and on top of. Cubes offer hiding spots, which shy cats love, and they double as display storage for you, so the wall works twice as hard in a small room. Leave at least one cube empty and dedicated to the cat.
Anchor every cube into studs, because a cat plus a cube full of books gets heavy quickly. Cut a hole in the side panel between two adjoining cubes to make a tunnel, sanding the cut edge smooth. Fill your cubes with pet-safe plants or books, and keep the cat’s cube lined with a soft, washable pad.
11. Wall-Mounted Hammock Between Shelves
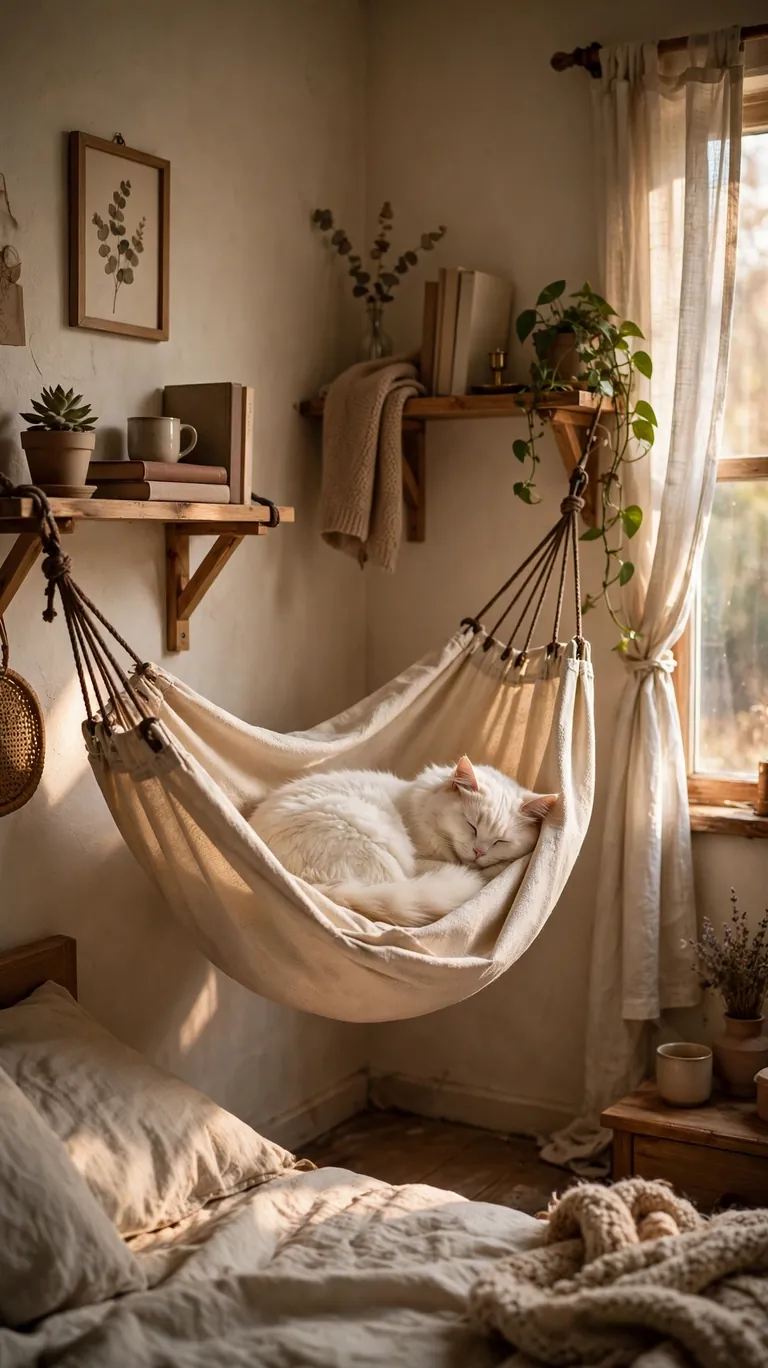
Stretch a piece of sturdy canvas or a folded old pillowcase between two closely spaced shelves to make a hammock your cat will claim immediately. Cats love the gentle sway and the cocoon feeling, and a hammock adds zero extra wall footprint beyond the shelves you already mounted. It is one of the coziest upgrades you can make for almost no money.
Hem the fabric edges and screw through them into the underside of each shelf with wide washers so the fabric cannot pull free under weight. Hang it with a slight sag rather than drum tight, since cats prefer a little give. Wash the fabric regularly, because hammocks collect fur faster than any other spot on the wall.
12. Rope Bridge Between Two Perches
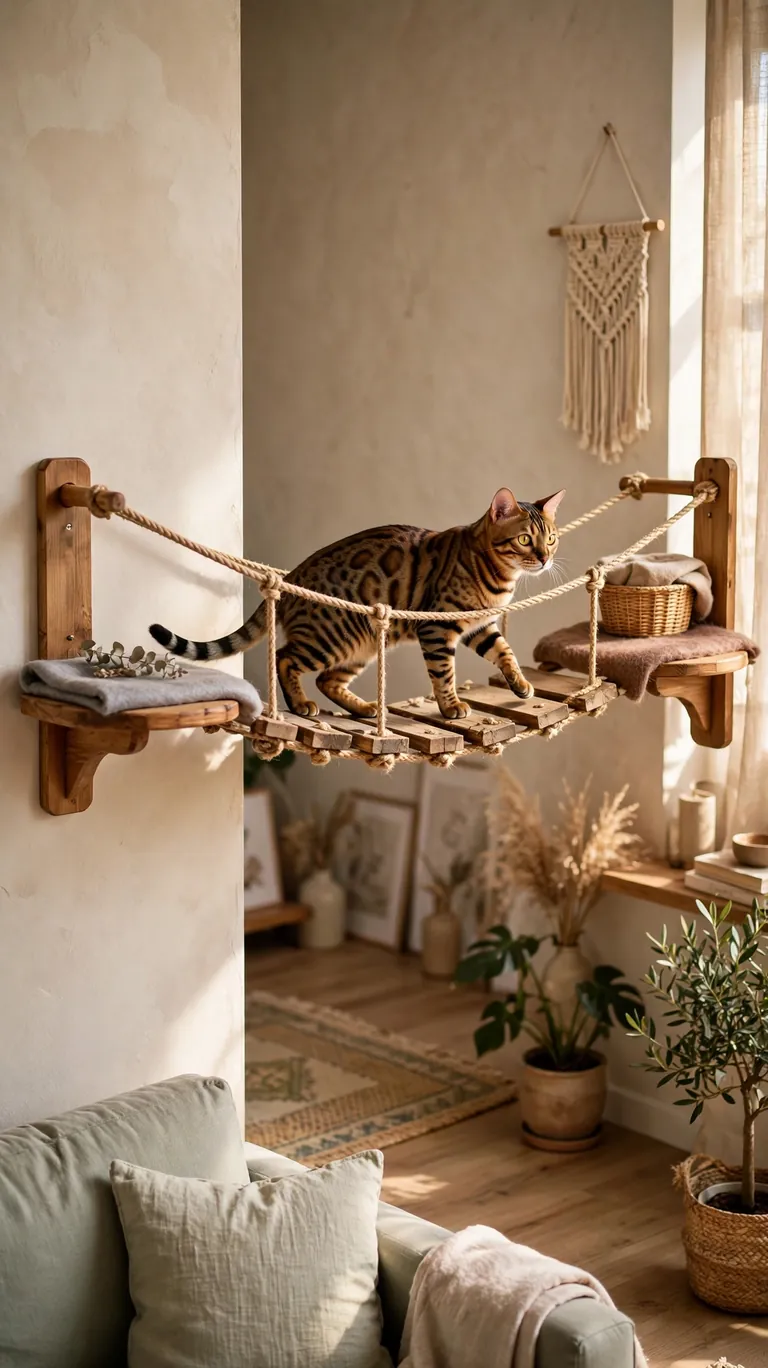
Connect two wall perches with a short rope-and-plank bridge for a playful obstacle that turns a simple route into an adventure. Lay a narrow plank across two thick ropes and secure the ropes to eye hooks screwed into the underside of each perch. The slight wobble makes it exciting without being scary for most cats.
Keep the bridge short, a foot or two at most, so it stays stable. Test it with firm hand pressure before your cat tries it, and watch the first crossing to make sure it feels secure. Confident cats take to bridges within a day, while cautious cats may prefer solid shelves, so let your cat’s comfort guide whether the bridge stays or goes.
13. Fold-Down Perches for Tiny Rooms
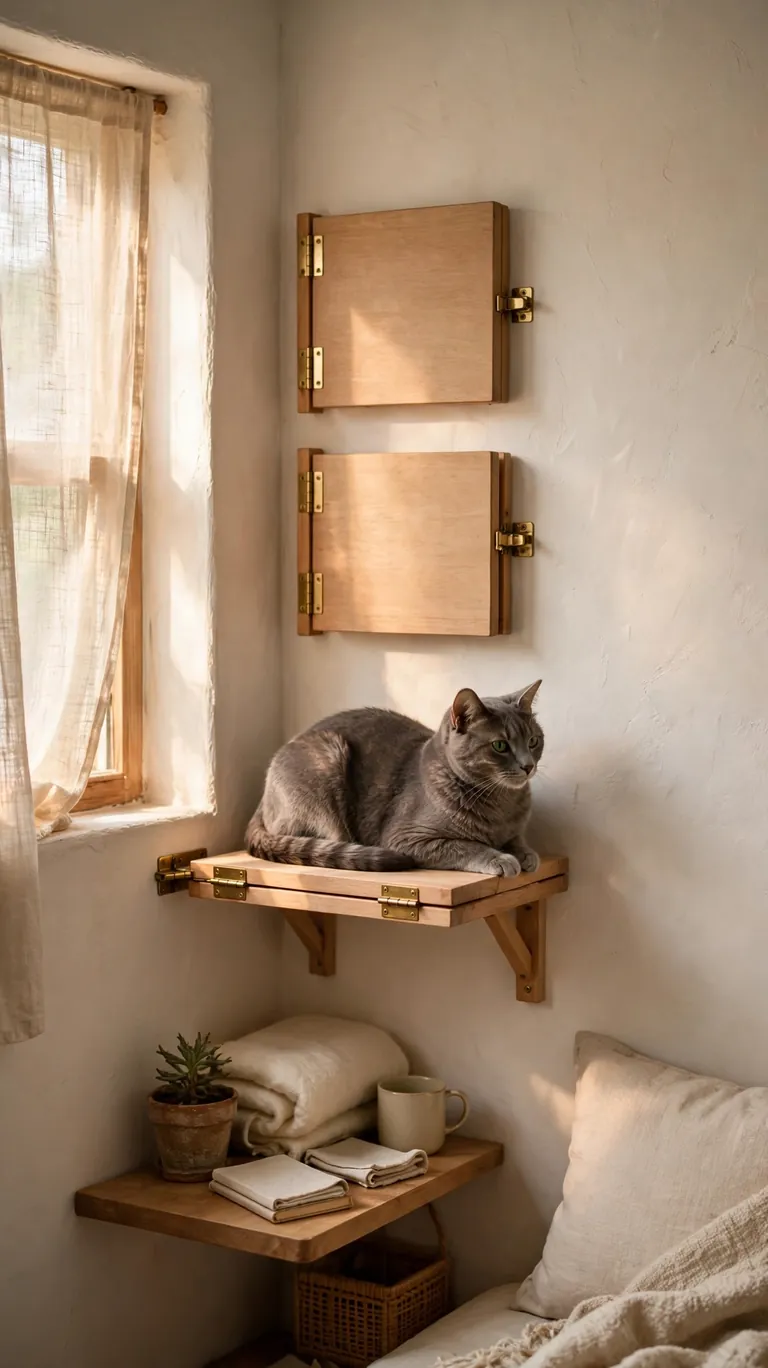
Hinge small perches to the wall so they fold flat when not in use. In a truly tiny room, like a studio sleeping nook or a narrow office corner, this gives your cat climbing options without permanently narrowing the walkway. Fold them up when guests come over, fold them down for daily cat use.
Use sturdy hinges paired with locking folding brackets that hold the perch rigid when open. Show everyone in the household how the lock works so nobody leans on a perch that is not secured. This is a smart compromise for renters too, since a few small hinge plates leave minimal marks compared to a full wall of shelves.
14. Under-Stair Wall Gym
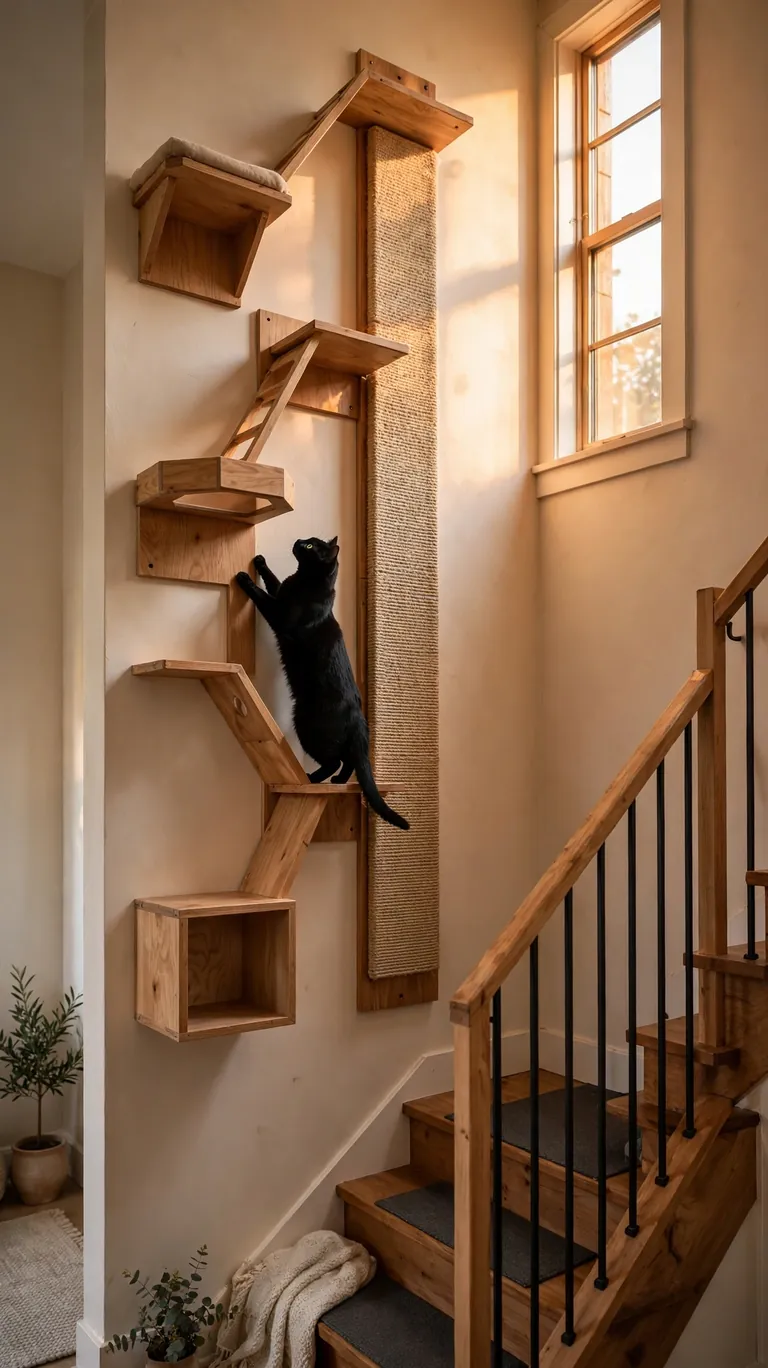
If your small home has stairs or a loft, the tall wall running alongside them is wasted vertical space begging for a purpose. Mount shelves and a scratching panel up the stair wall so your cat climbs beside you as you go up and down. The natural height of a stairwell lets you build a dramatic multi-level route with surprisingly few shelves.
Keep the lowest shelf high enough that it never becomes a head-bump hazard on the steps. Add a wide, comfortable perch at the landing where your cat can watch household traffic go by. Because stair walls are often plain, a climbing route here doubles as decoration and gives the whole stairwell more personality.
15. Bookshelf Top Walkway
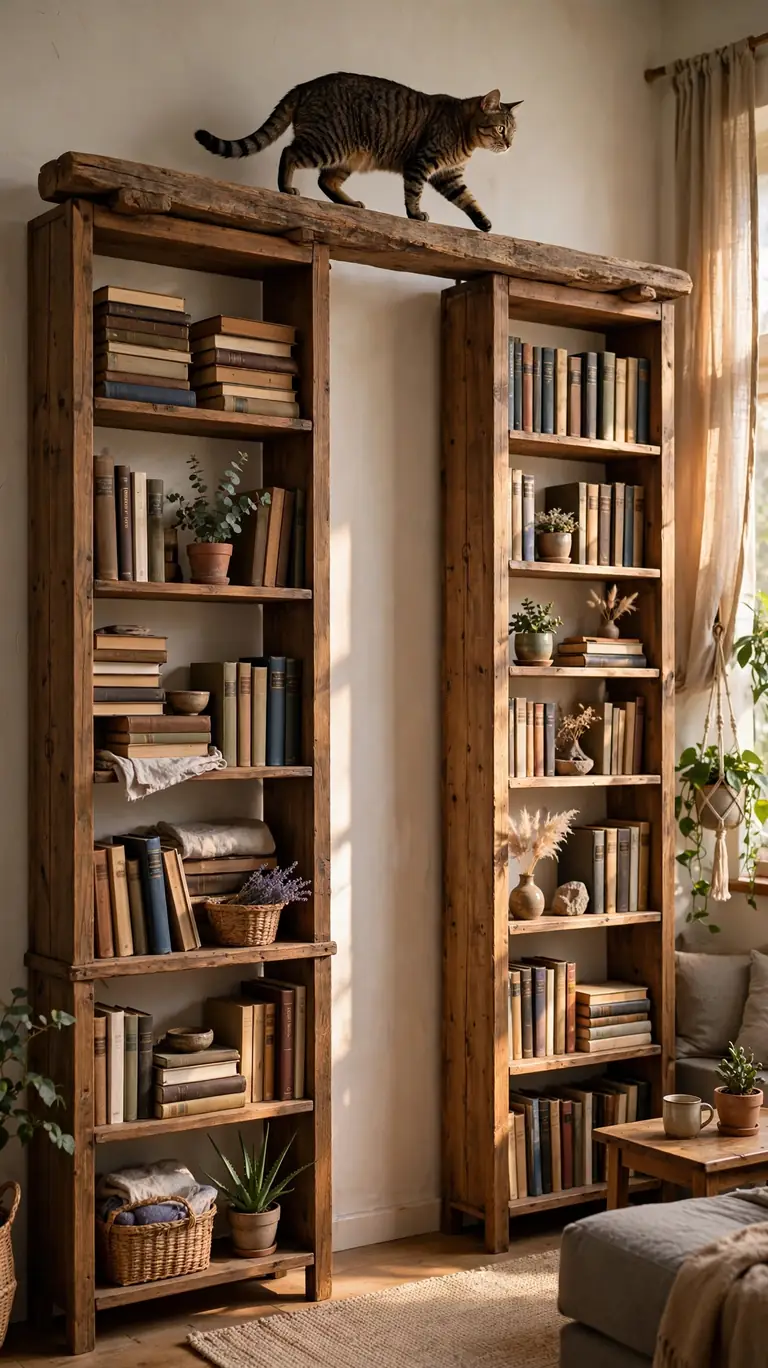
The tops of tall bookshelves are already cat magnets, so make them official instead of fighting it. Clear a path across the tops of two bookcases and bridge the gap between them with a wide, sturdy plank to create an elevated walkway. Your cat gets a highway, and you stop finding paw prints on your novels.
Anchor tall bookcases firmly to the wall so they cannot tip, which is essential once a cat starts launching off the tops. Move anything fragile off the route before the first climb. Lay a non-slip mat on the bridging plank to keep landings quiet and secure, especially for nighttime zoomies.
16. Pegboard Climbing Panel
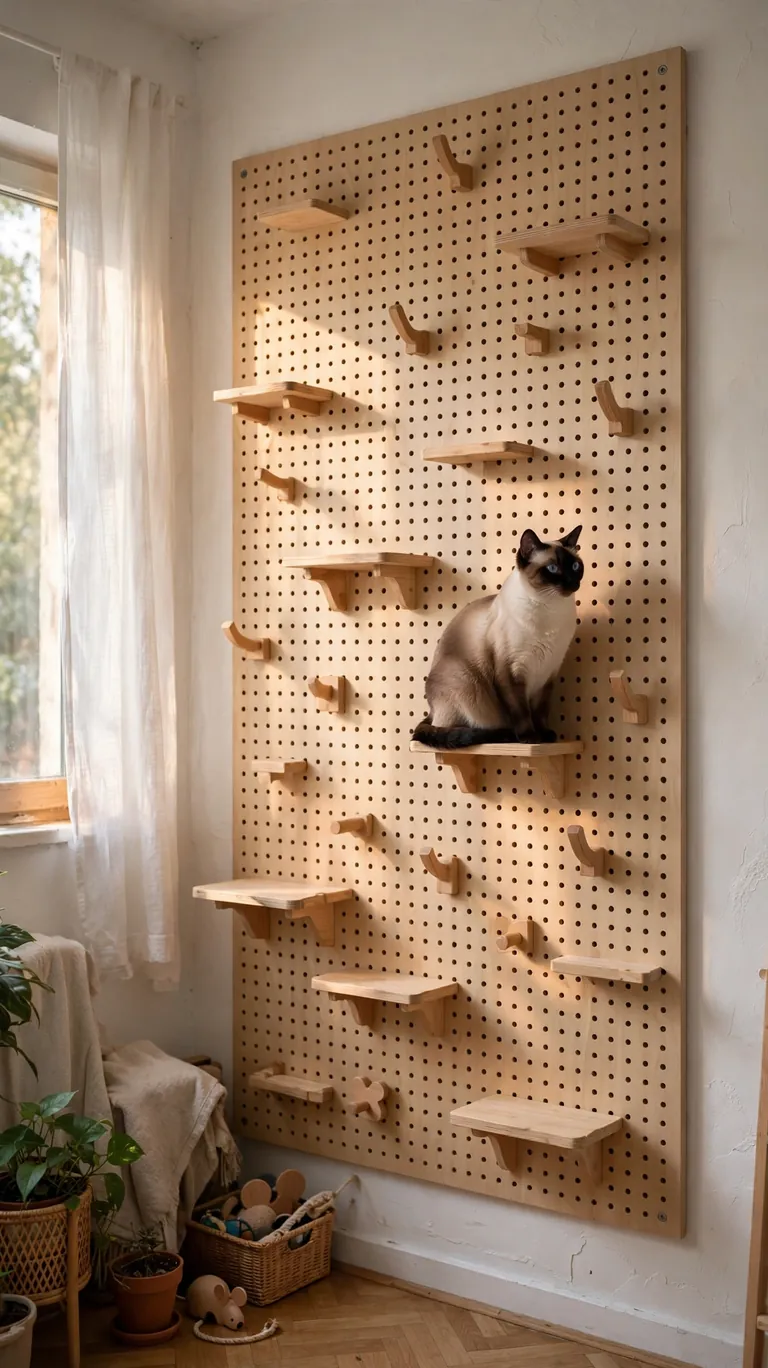
A large pegboard panel gives you a fully rearrangeable climbing wall, which is perfect if you are not sure what layout your cat will like. Mount the board securely into studs, then add small shelves, perches, and hooks through the holes. As you learn your cat’s favorite spots, just move the pieces around, no new holes required.
This is a genuinely renter-friendly option, since you can fill the screw holes and touch up the paint when you move out. Choose thick pegboard and sturdy metal hooks rather than flimsy accessories. Start with a simple vertical line of perches and let the layout grow into branches and loops over time as your confidence builds.
17. Plywood Ledges with Carpet Tiles
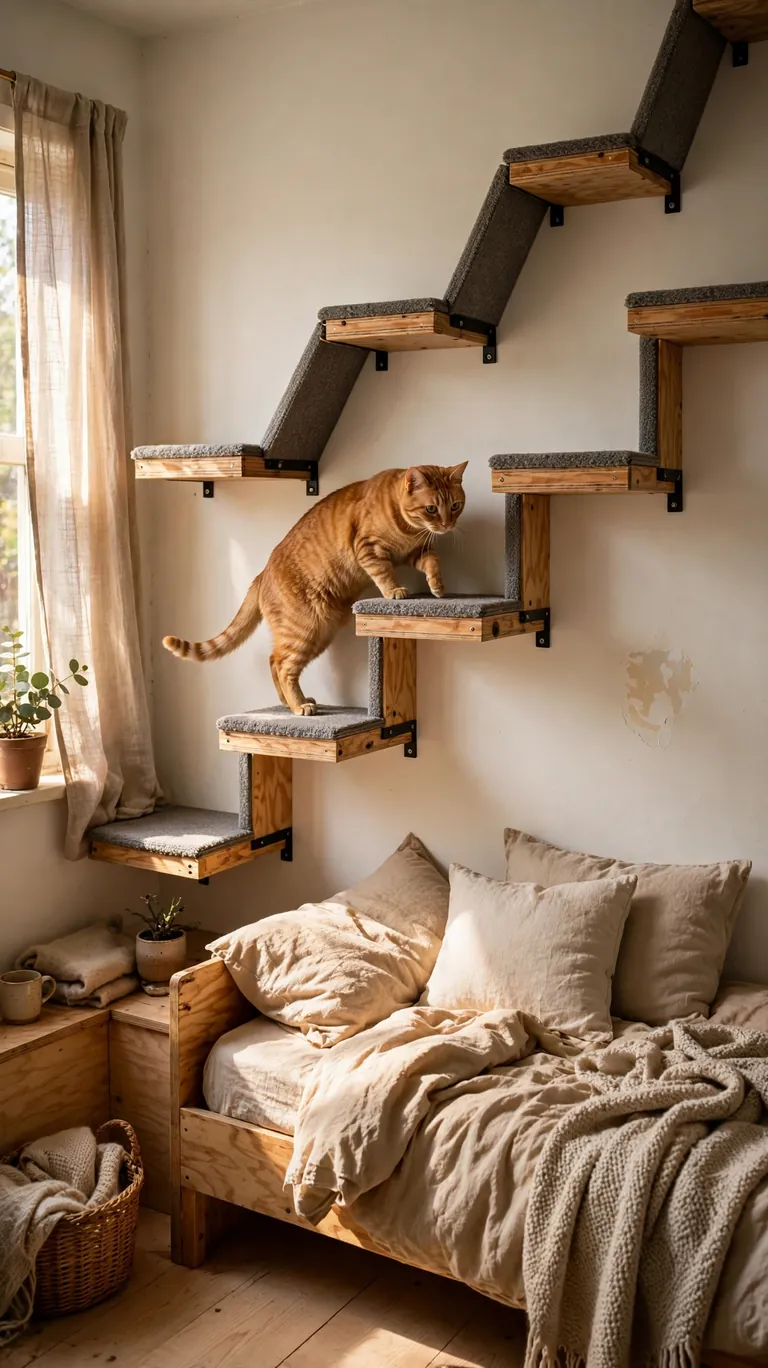
Cut plywood into ledges, press self-adhesive carpet tiles on top, and mount them in a climbing pattern up the wall. Carpet tiles are inexpensive, come in colors that can match your decor, and peel off individually for replacement when one section gets scratched up. The whole wall stays looking fresh without ever rebuilding it.
Round the front corners of the plywood with sandpaper so there are no sharp edges anywhere paws might land. Buy a few extra tiles and store them, so replacements are always on hand. This is one of the absolute cheapest ways to build a complete wall route, and it looks surprisingly polished when the tiles match your rug.
18. Laundry Room Wall Gym
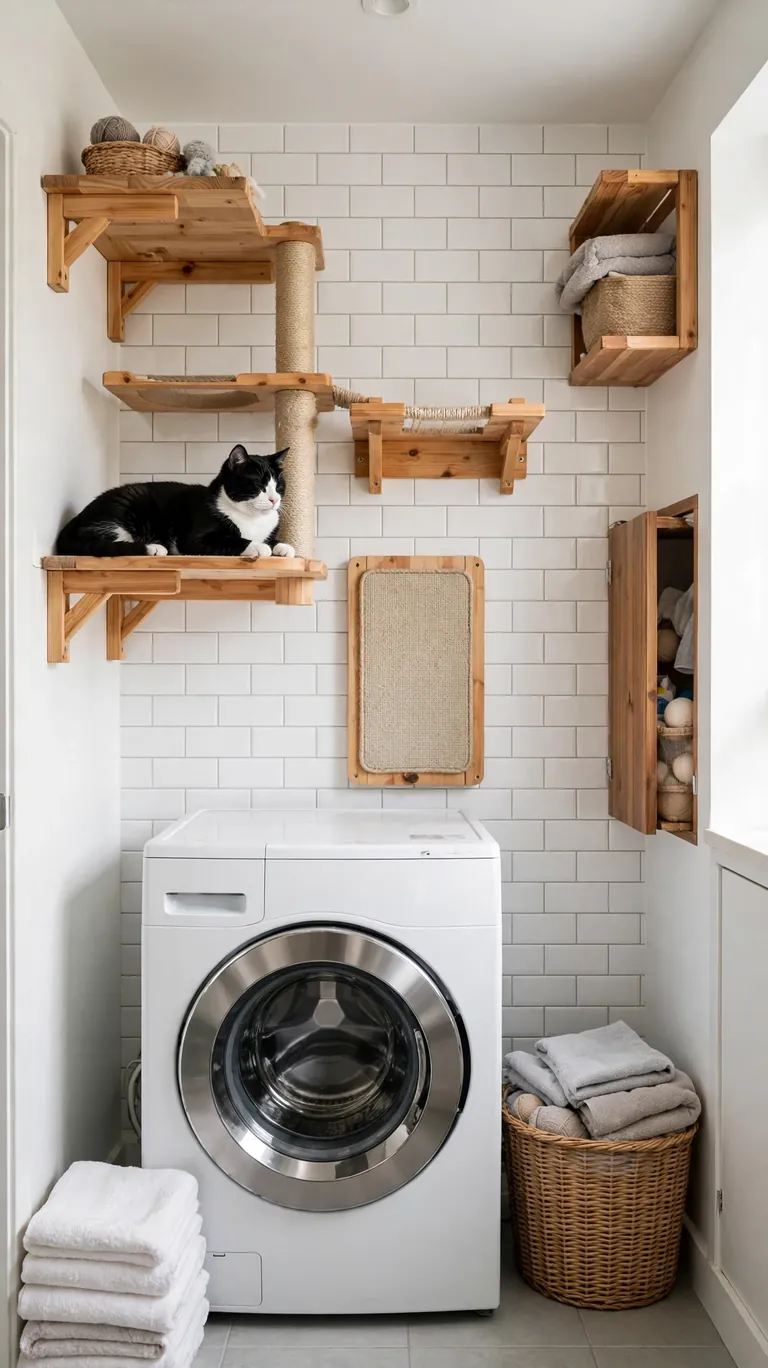
Small laundry rooms have big, empty walls above the machines that are perfect for a private cat gym. Mount a set of shelves and a scratching pad up there to give your cat its own territory away from the main living areas. Many cats find the low hum of the dryer soothing, so do not be surprised if the laundry room becomes a favorite nap zone.
Keep all detergents and cleaning chemicals in closed cabinets, never on open shelves anywhere near the cat route. Make sure the shelves do not block your access to the machines or the folding area. A small perch facing into the room lets your cat keep you company on laundry day, which is a chore upgrade for both of you.
19. Entryway Vertical Playground
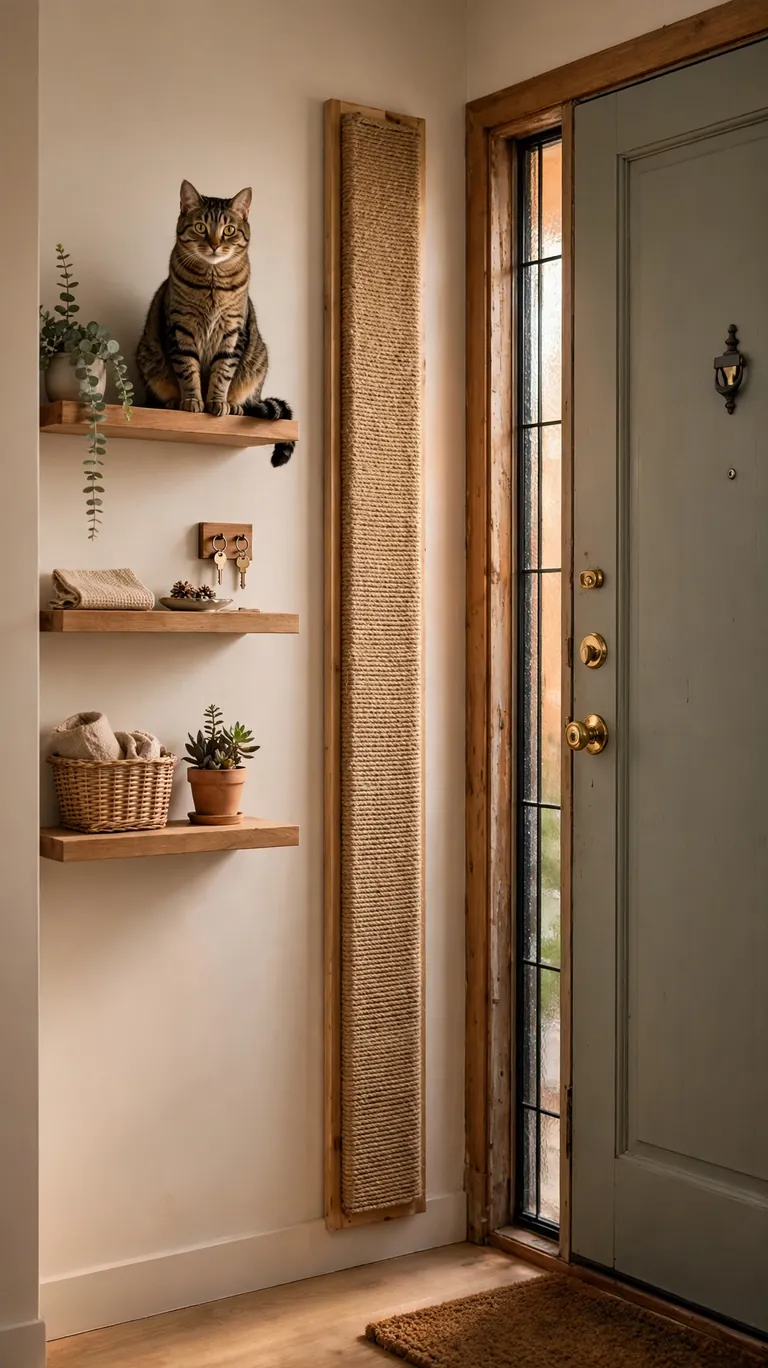
The wall beside your front door is usually completely bare, so turn it into a compact climbing wall with three staggered shelves and a tall scratching panel. Your cat gets to greet you at eye level when you come home, which is far more charming than being greeted at ankle level while you trip over a cat tree.
This placement can even reduce door-dashing, because the most exciting spot is right beside the door instead of past your legs. Keep the shelves clear of coats, keys, and bags so the route stays usable. A small basket lined with a soft pad on the top shelf makes the perfect hello perch.
20. Cat Tree Topper Extension
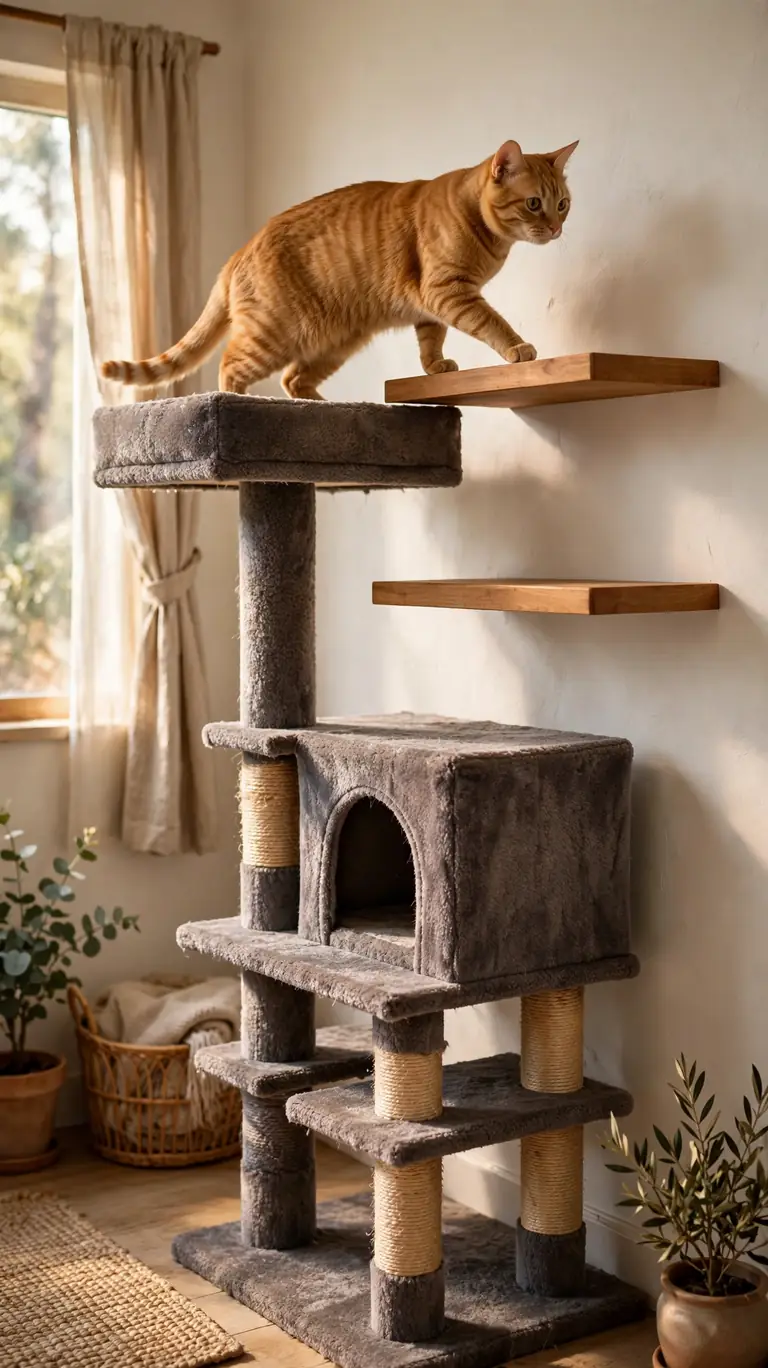
If you already own a cat tree, extend it onto the wall instead of buying a bigger one. Mount one or two shelves at the height of the tree’s top platform so your cat can step from the tree directly onto the wall route. You instantly double your cat’s territory for the cost of a shelf or two.
Position the first wall shelf close enough for an easy step rather than a leap, especially for senior cats. Make sure the cat tree itself is stable and will not wobble or tip when your cat launches from it, anchoring it to the wall if needed. This is the cheapest upgrade on the list because you are building on furniture you already own.
21. Woven Basket Wall Nooks
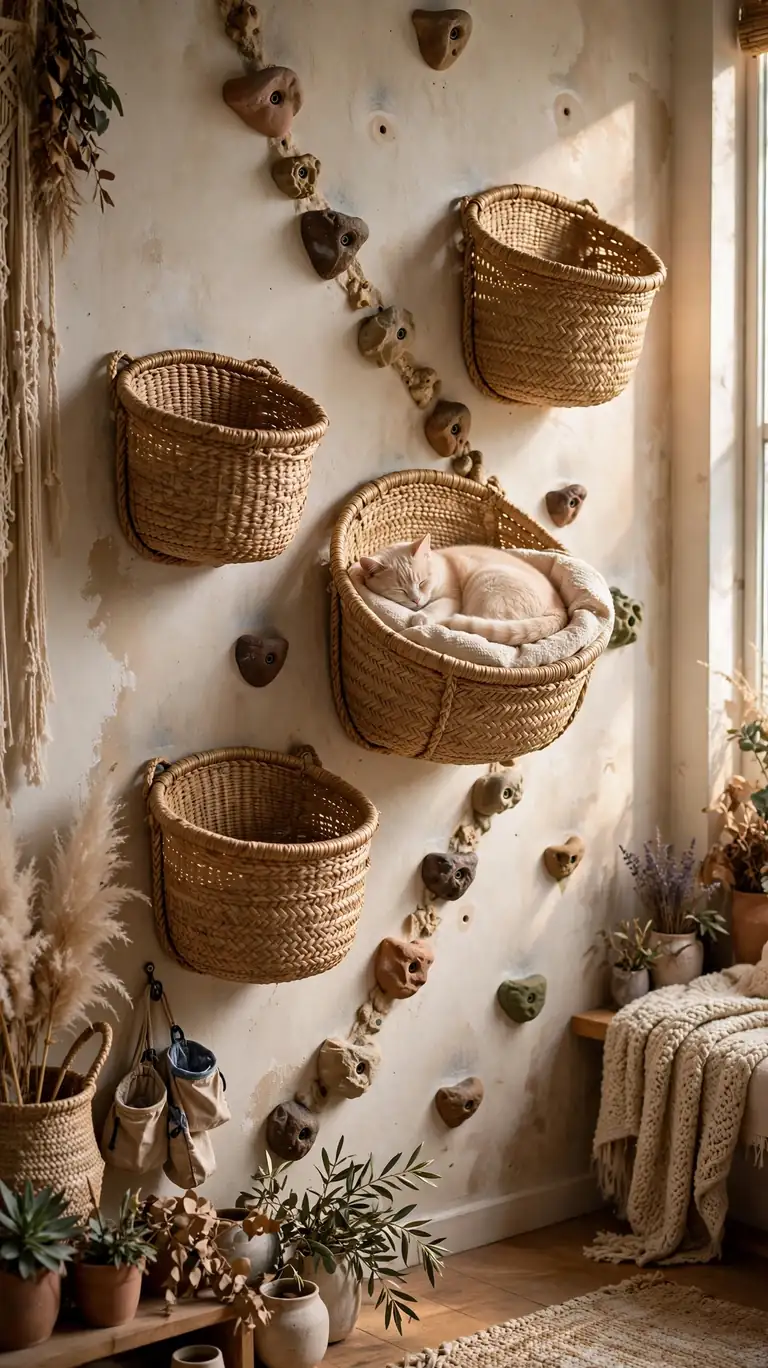
Mount sturdy woven baskets or small wooden crates sideways on the wall to create cozy nooks along the climbing route. Cats adore curling into enclosed spaces, and baskets add warm, natural texture that makes the whole wall look like intentional decor rather than pet equipment. Thrift stores are full of suitable baskets for a few dollars.
Choose baskets with a wide, flat base and screw through the base directly into studs, since a basket plus a cat is heavier than it looks. Line each basket with a washable pad for comfort and easy cleaning. If a basket feels flimsy in your hands at the store, skip it, because it will not hold up to daily cat use on the wall.
22. Scratching Wall Panel Behind the Route
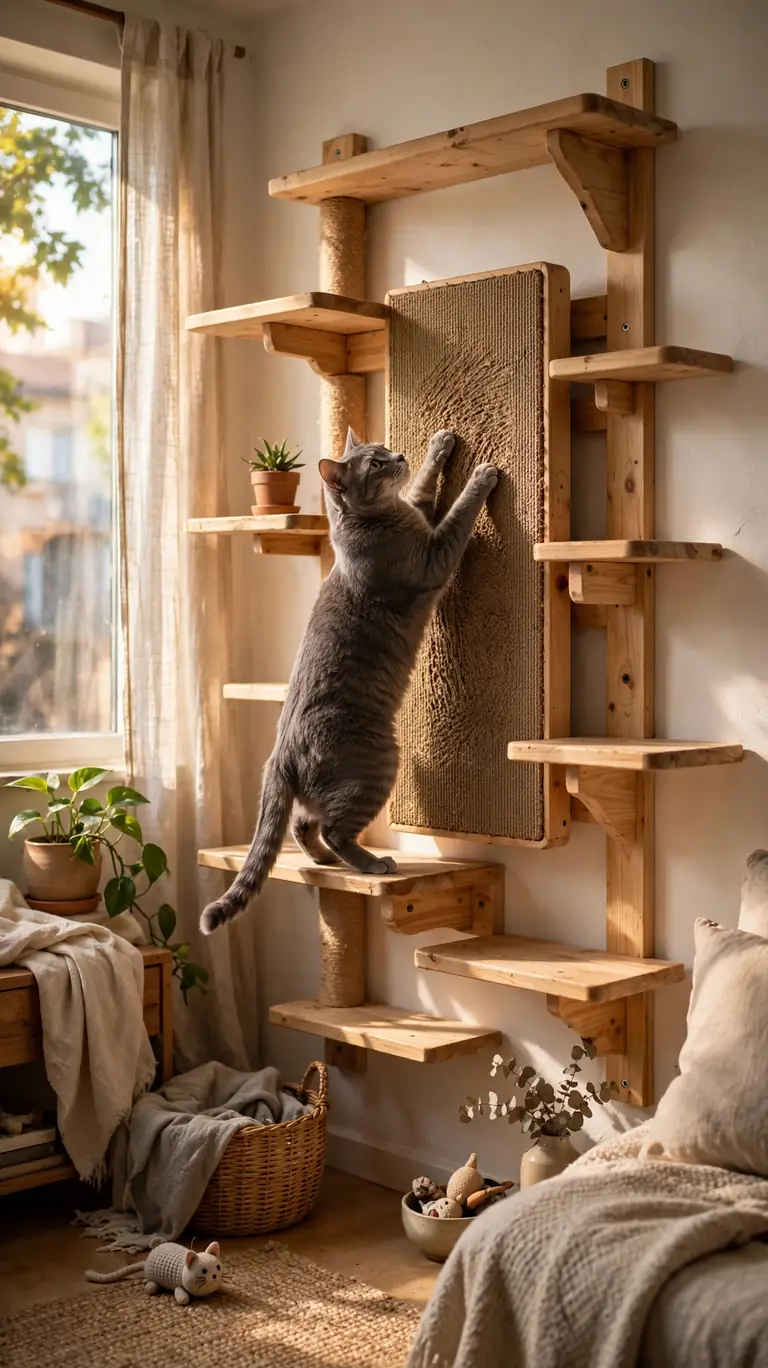
Cover a section of wall behind your shelves with a sisal mat or a carpet panel so your cat can scratch vertically mid-climb. A dedicated scratching panel saves your door frames and furniture, and it gives the climbing wall a finished, built-in look that ties all the separate shelves together visually.
Attach the panel with screws into studs rather than adhesive alone, because enthusiastic scratching pulls hard enough to peel weak mounts off the wall. Run the panel from the floor up to the first shelf so your cat can do a full body stretch. When the fibers wear thin after a year or so, unscrew it and replace it in minutes.
23. Bedroom Headboard Climbing Wall
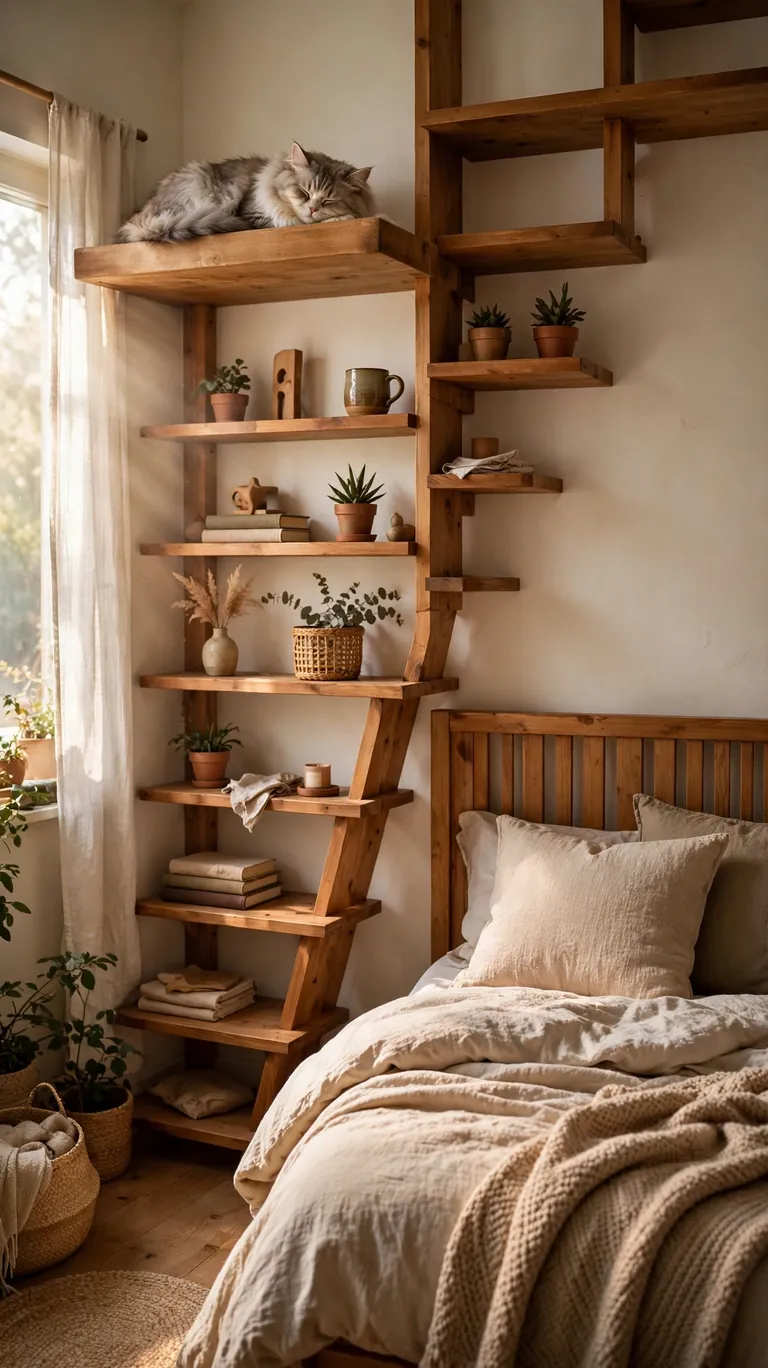
The wall above and beside your headboard is empty air your cat would love to claim. Mount two or three shelves climbing the wall next to the bed, ending in a wide perch where your cat can sleep near you without camping out on your pillow. It is a lovely compromise for cats that want closeness at night.
This setup is wonderful for cats that cry at the bedroom door, because they get togetherness on their own terms. Keep the shelves routed away from lamps, cords, and alarm clocks. Put a washable blanket on the top perch, since it will collect fur, and choose a perch wide enough for a full sprawl.
24. Rental-Friendly No-Drill Ledges
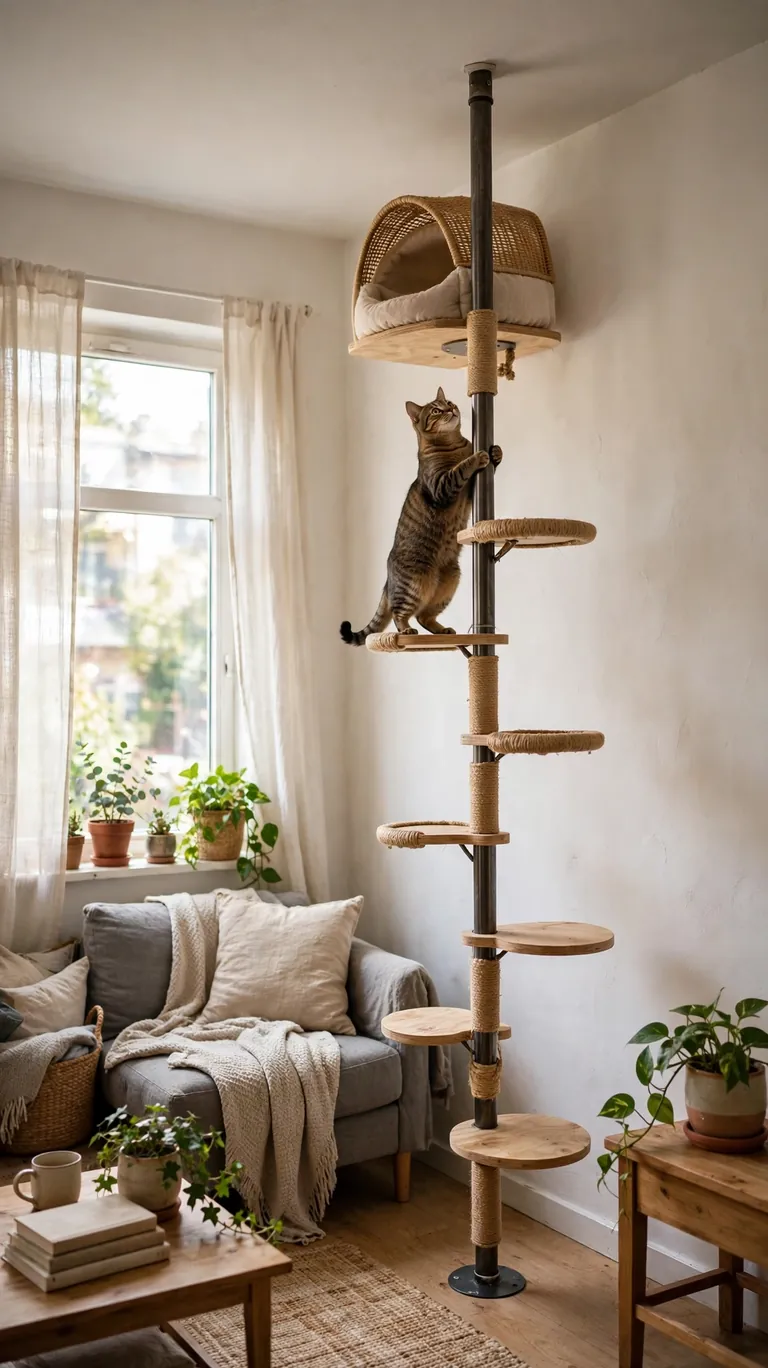
If your lease forbids drilling, you still have options. Floor-to-ceiling tension poles with attached platforms wedge between floor and ceiling with no screws at all and create an instant climbing tower. For lighter perches, heavy-duty adhesive mounting strips can work on smooth walls, though they suit small shelves and lighter cats only.
Always check the product’s weight guidance and test stability with gentle pressure before your cat uses anything. Tension poles need a truly flat ceiling and floor to grip safely, so avoid them on uneven surfaces. When you move, the whole setup comes down with zero wall damage and no spackle required.
25. Budget Full-Wall Route from Basic Lumber
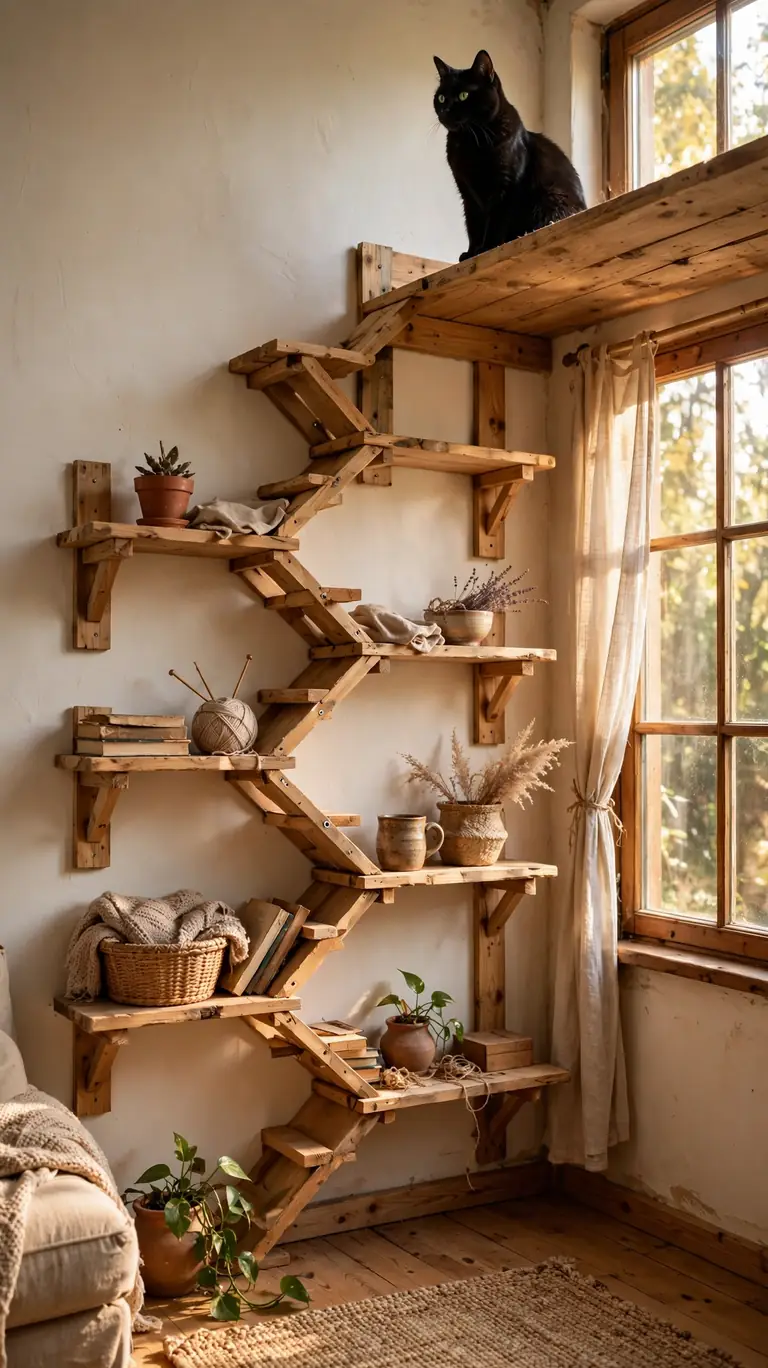
You can build an impressive full-wall route from a couple of pine boards, a multi-pack of brackets, and a box of screws. Sketch the route on paper first: five or six shelves zigzagging up one wall, ending at a wide top perch near a window or bookcase. A simple plan keeps the project to a single afternoon.
Buy brackets in multi-packs to bring the per-shelf cost down, and have the store cut your boards to length. Sand everything smooth and apply a clear pet-safe sealer so the wood looks intentional rather than scrapyard. Anchor into studs wherever possible and test each shelf with firm hand pressure before your cat’s first climb.
Frequently Asked Questions
How much weight should cat wall shelves hold?
Choose shelves and brackets that can comfortably hold your cat with plenty of margin to spare, remembering that cats land with force when they jump. Solid wood boards with metal L-brackets anchored into wall studs are the safest DIY combination. Avoid hollow-core shelves and drywall anchors alone for anything your cat will climb on. If you are unsure about your wall structure, especially in older homes or apartments with metal studs, ask a knowledgeable handyperson before you mount anything.
Can I build a cat climbing wall in a rental apartment?
Yes, and you have several good options. A pegboard panel needs only a few screw holes that are easy to fill and touch up when you leave. Floor-to-ceiling tension poles with platforms require no drilling at all. You can also mount a small number of shelves into studs and plan to spackle the holes at move-out, which most landlords consider normal wear. Always check your lease first, and photograph the walls before you start so you can restore them properly later.
How far apart should I space the shelves?
Space shelves for short, comfortable hops rather than dramatic leaps. A good rule of thumb is to watch your cat jump onto furniture and match that effort level, keeping in mind that kittens, seniors, and heavier cats need closer spacing than young athletes. Stagger the shelves in a zigzag so each jump is slightly sideways as well as up, which feels more natural to cats. You can always start with closer spacing and move shelves farther apart as your cat learns the route.
What materials are safe for DIY cat shelves?
Solid wood, plywood, sisal rope, and low-pile carpet are all excellent choices. Sand every surface smooth, round off sharp corners, and use a pet-safe finish or leave the wood natural. Avoid exposed staples, nails, or rough hardware where paws land, and skip materials with strong chemical smells or flaking coatings. If you use reclaimed wood, inspect it thoroughly for old nails and splinters before bringing it inside.
How do I get my cat to actually use the climbing wall?
Lure, do not force. Place treats along the route, dab a little catnip on the new shelves, and use a wand toy to lead your cat up the path step by step. Position at least part of the route near a window, since a view is the best motivator there is. Most cats start using a wall within a few days, but timid cats may take a couple of weeks. Never place your cat on a high shelf directly, because a scared first experience can put them off the whole wall.
Conclusion
A cat climbing wall is one of those rare projects that makes life better for both you and your cat at the same time. Your cat gets the vertical territory, exercise, and high lookout posts that its instincts demand, which often means less furniture scratching, fewer midnight zoomies across your pillow, and a calmer, happier animal overall. You get to reclaim your floor space, because every shelf and perch on the wall is square footage you do not have to give up in a small home. And since most of these ideas are built from basic lumber, simple brackets, and remnant materials, the whole project can cost less than a single store-bought cat tree while giving your cat far more room to roam.
Start small and build up, because that is the real secret to staying on budget and ending up with a wall your cat genuinely loves. Two or three well-placed shelves near a window will teach you more about your cat’s climbing style than any amount of planning. Watch which routes get used, which perches become nap favorites, and where your cat hesitates, then expand the wall to match. Keep safety at the center of every addition by anchoring into studs, testing each shelf before use, and choosing materials that can handle real cat landings. Do that, and you will end up with a climbing wall that looks like it belongs in your home and a cat that treats it like the best thing you ever built. Happy building, and enjoy watching your cat rule its new vertical kingdom.