19 Creative Bunk Bed Makeover Ideas for a Fresh New Look
If your bunk beds are looking tired, scratched, or stuck in a theme your kids outgrew years ago, you don’t need to buy a new set. A bunk bed makeover with fresh paint, cozy curtains, better lighting, and smart storage can give those bunks a completely new look, often in a single weekend. Whether you’re refreshing a kids’ room, setting up a guest room, or making a small bedroom work harder, these bunk bed makeover ideas show you exactly how to turn ordinary bunks into a space everyone actually wants to sleep in.
The best part is that most of these makeovers are budget friendly and beginner friendly, since paint and textiles do most of the heavy lifting. You’ll find ideas for little kids, teens, and even adult guests, plus clever ways to add storage and light where bunks usually feel dark and cramped. Pick the two or three ideas that solve your biggest frustration, whether that’s a dated finish, zero privacy, or a ladder everyone complains about, and start there. By the end of the weekend, those old bunks will feel brand new.
1. Give the Frame a Fresh Coat of White Paint
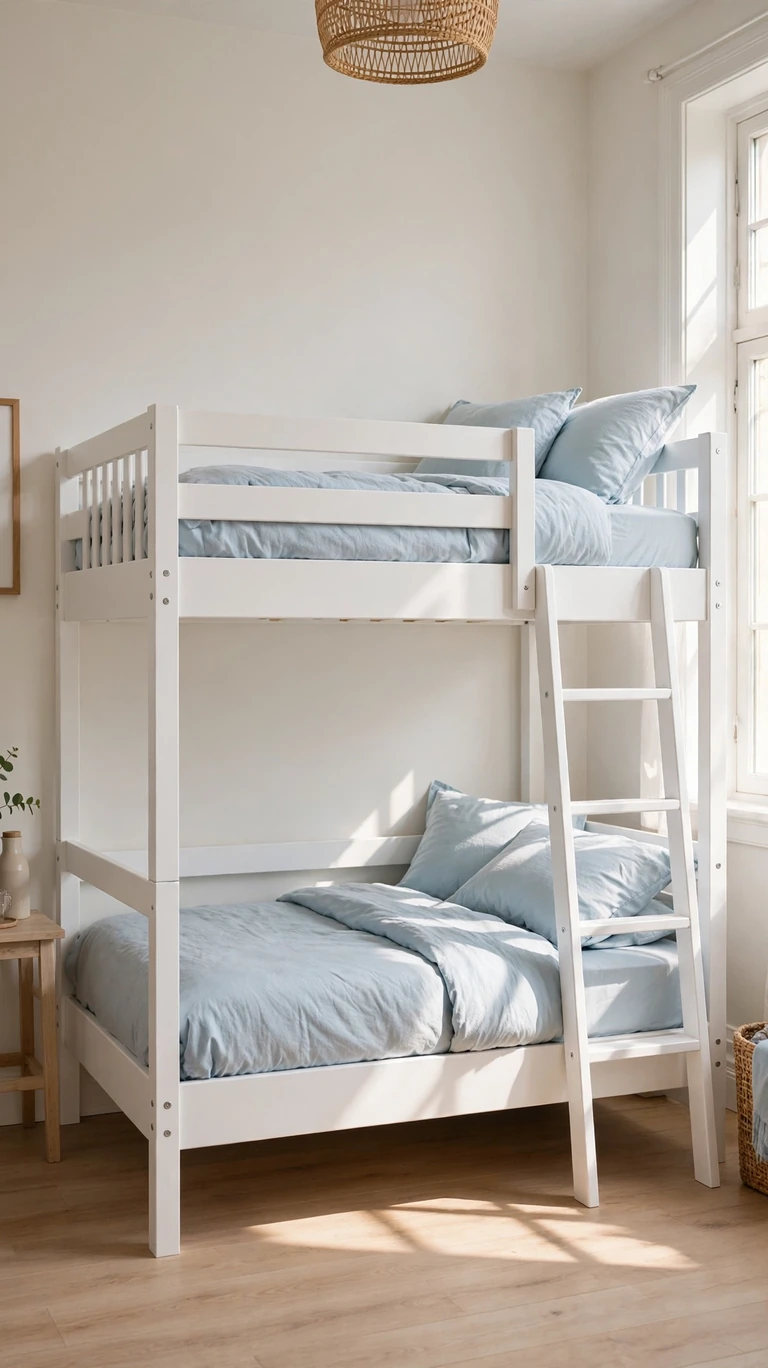
Nothing refreshes a bunk bed faster than white paint. It hides years of scratches and dings, brightens the whole room, and works with any bedding or wall color you choose later. Start by cleaning the frame well, then give it a light sanding so the paint has something to grip. A coat of primer followed by two coats of interior paint made for furniture will give you a smooth, durable finish that stands up to daily kid use.
Choose a satin or semi gloss sheen rather than flat paint, because it wipes clean easily and resists scuffs. Let each coat dry fully before adding the next, and give the bed a full day or two to cure before anyone sleeps in it so the finish hardens properly. If you want a little more character, paint the inside of the headboard slats a soft contrasting color while keeping the rest of the frame white. It reads as custom without any extra cost.
2. Go Bold With a Deep Navy Frame
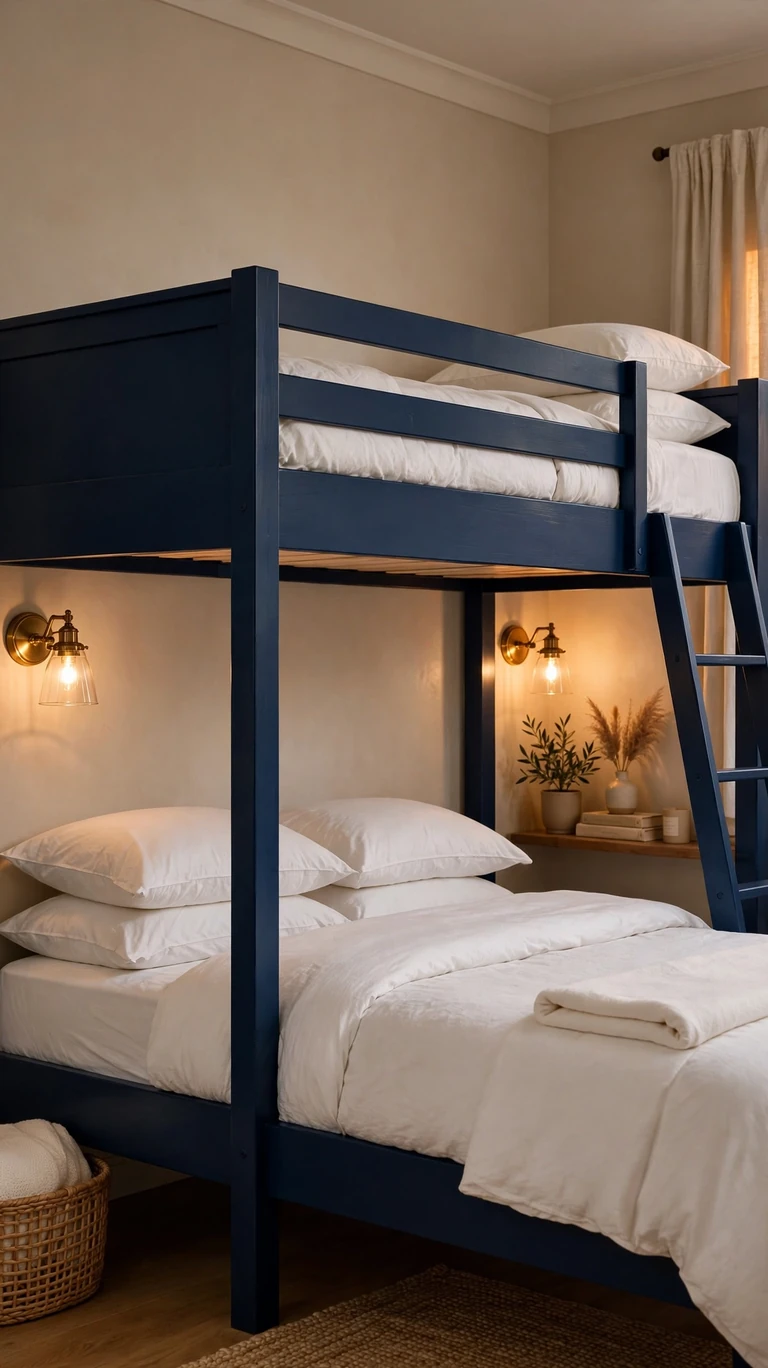
If white feels too safe, a deep navy frame makes bunks look rich and intentional. Navy reads as sophisticated rather than childish, which makes it perfect for shared rooms where one kid is older, or for guest rooms that need to feel grown up. It also hides scuffs and fingerprints better than white, which is a quiet practical win in a busy bedroom.
Pair the navy with crisp white or cream bedding so the dark frame pops instead of feeling heavy. Brass or warm wood accents, like a small wall sconce or a wooden stool used as a nightstand, look beautiful against navy. Keep the walls light if the room is small, since dark furniture plus dark walls can close a space in fast. This one color change can take bunks from playground to polished in a single afternoon of painting.
3. Add Privacy Curtains to Each Bunk
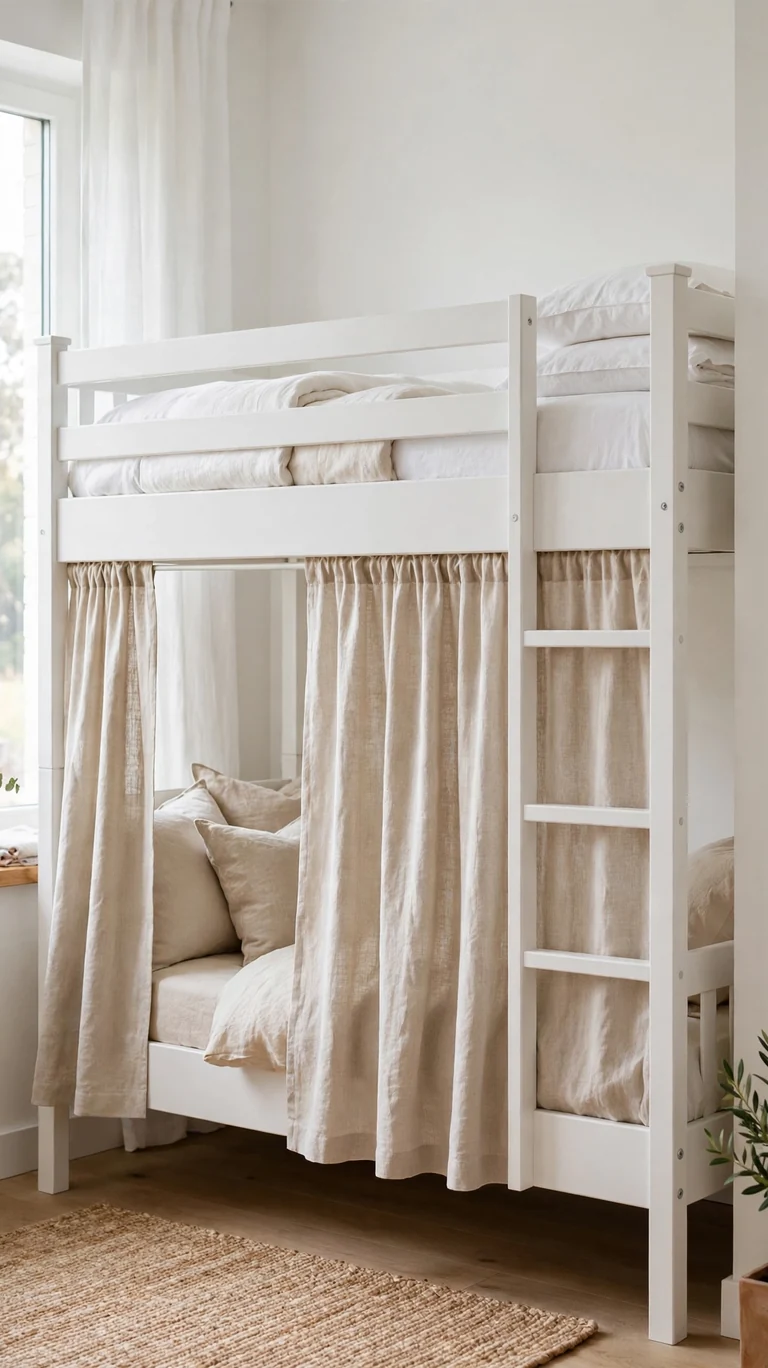
Shared bunk rooms get dramatically more peaceful when each sleeper gets their own curtain. Hang a ceiling track or a simple tension rod along the open side of each bunk, and choose curtain panels that each person can open and close on their own. Lightweight cotton or linen keeps the bunks feeling airy, while a blackout panel on the lower bunk helps light sleepers rest during the day.
Let each person pick their own curtain color or pattern so the bunks feel personal instead of institutional. Make sure curtains can be tied back fully during the day so the room still gets light and airflow. Keep the fabric clear of any lamps or chargers, and choose panels that are easy to remove and wash, because bunk curtains collect dust faster than window curtains. This small addition ends most sibling bedtime arguments about light and privacy.
4. String Up Warm Fairy Lights
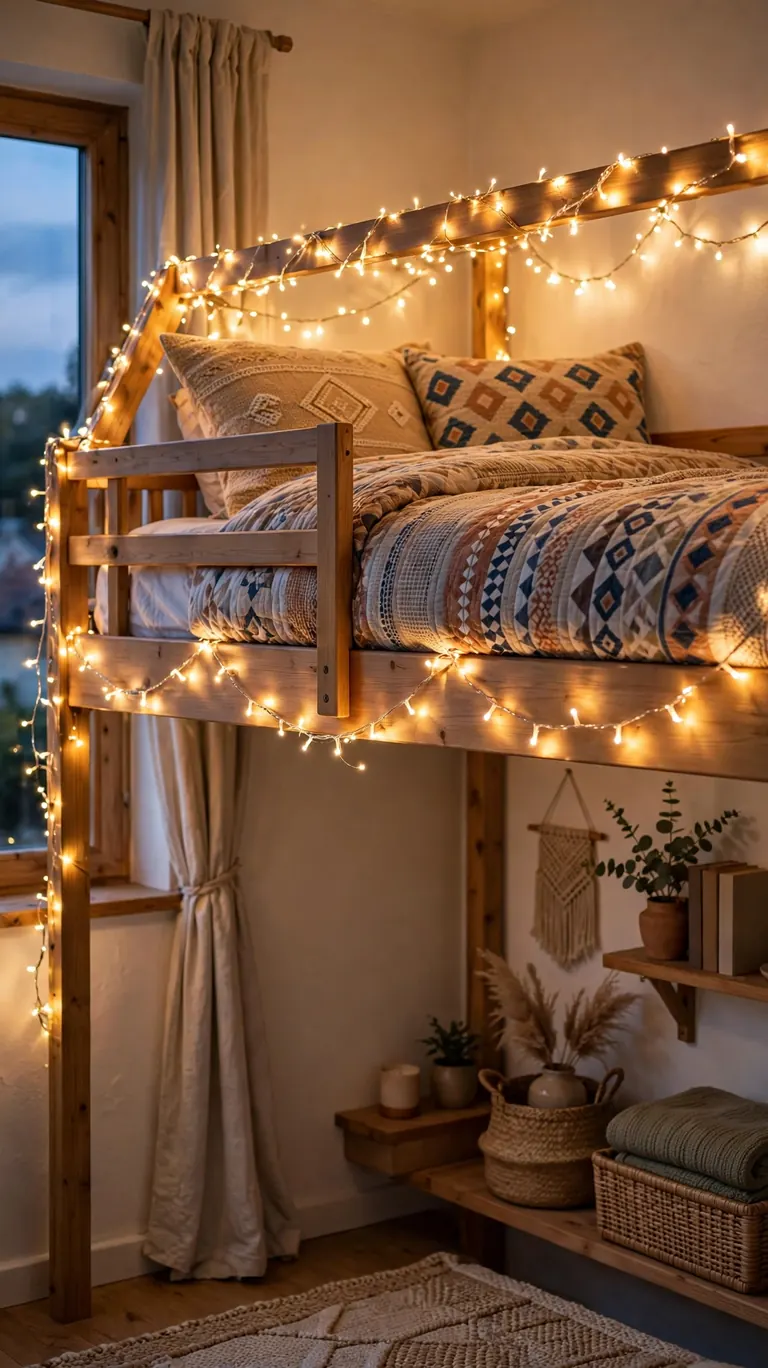
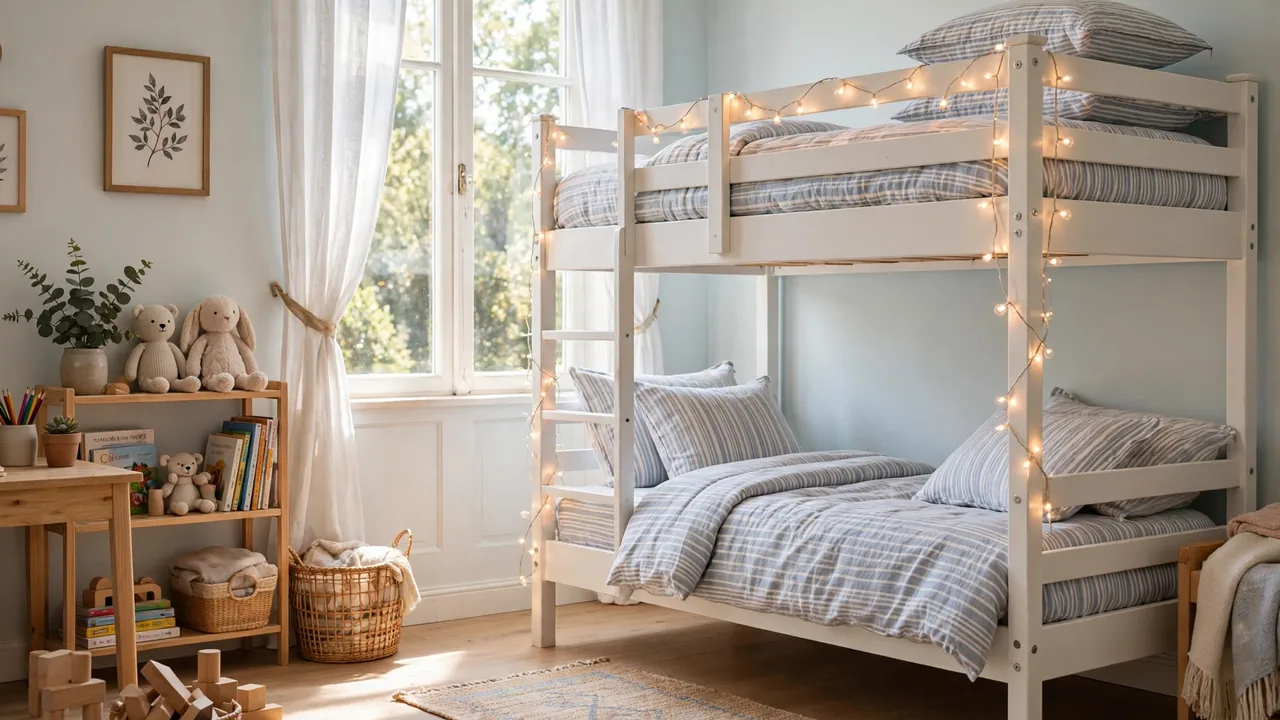
Fairy lights turn a plain bunk into a cozy hideaway, and kids and teens both love them. Drape a warm white strand along the underside of the top bunk so the lower bunk gets a soft glow, or weave one around the top bunk’s headboard for a starry effect. Battery operated strands with a timer are the easiest option, since they turn themselves on at bedtime and off after everyone is asleep.
Keep cords tidy and tucked behind the frame so little hands can’t pull them down, and choose LED strands that stay cool to the touch. Warm white light around 2700K feels cozy, while cool white can feel harsh in a small sleeping space. One strand per bunk is plenty, and you can layer them with a small clip on reading light for homework or bedtime stories. It is the cheapest way to make bunks feel magical.
5. Swap in New Bedding for an Instant Refresh
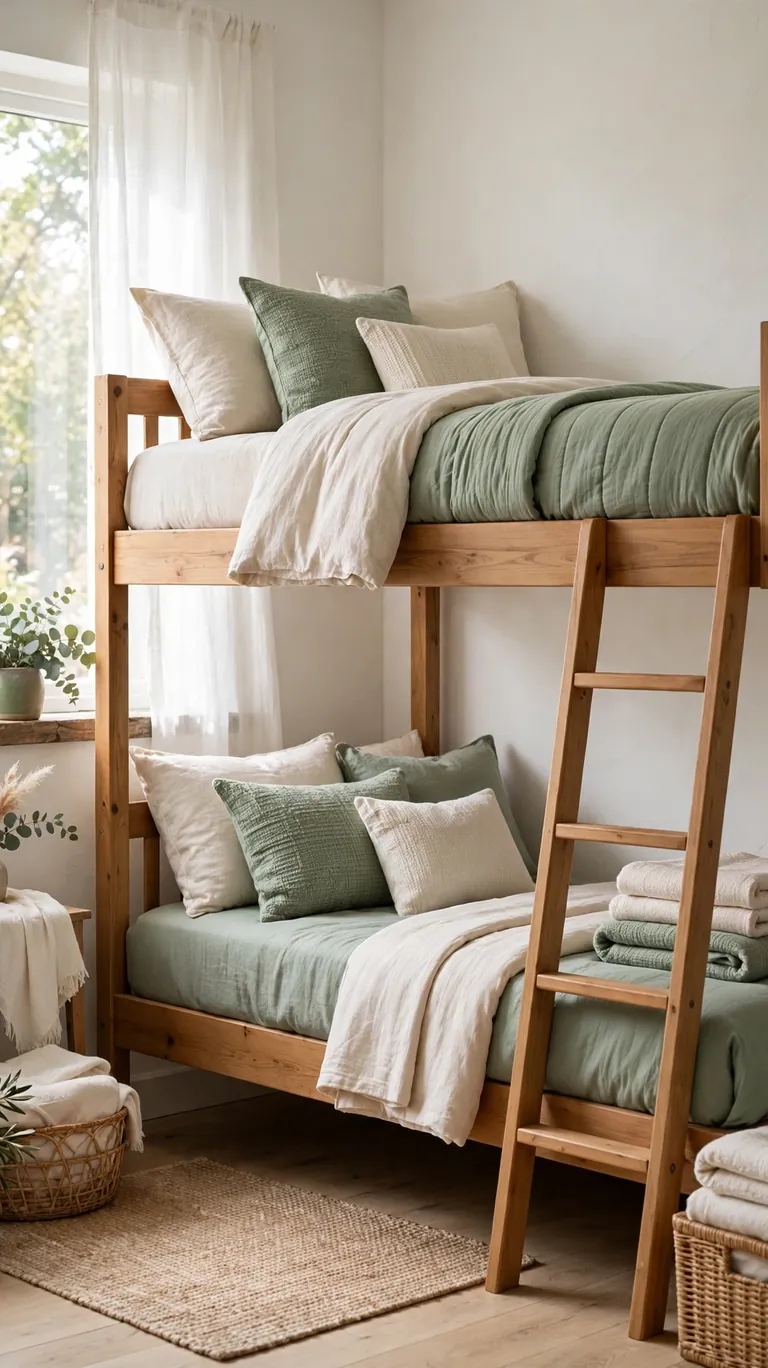
If you only do one thing on this list, change the bedding. Old, faded sheets and a lumpy comforter make even a freshly painted bunk look tired, while new duvet covers and pillow shams make the whole bed look new. Pick a simple color palette you won’t get sick of, then let each sleeper choose one accent pillow or throw in their favorite color so both bunks feel personal.
Mixing patterns is easier than it looks. Keep the big pieces solid, then add one striped or geometric pillow per bunk for energy. Washable bedding is non negotiable for kids’ bunks, so check the care labels before you fall in love with a set. A folded throw blanket at the foot of each bunk adds a finished, styled look and gives sleepers an extra layer on cold nights. Bedding is the fastest makeover of all.
6. Turn the Lower Bunk Into a Reading Nook
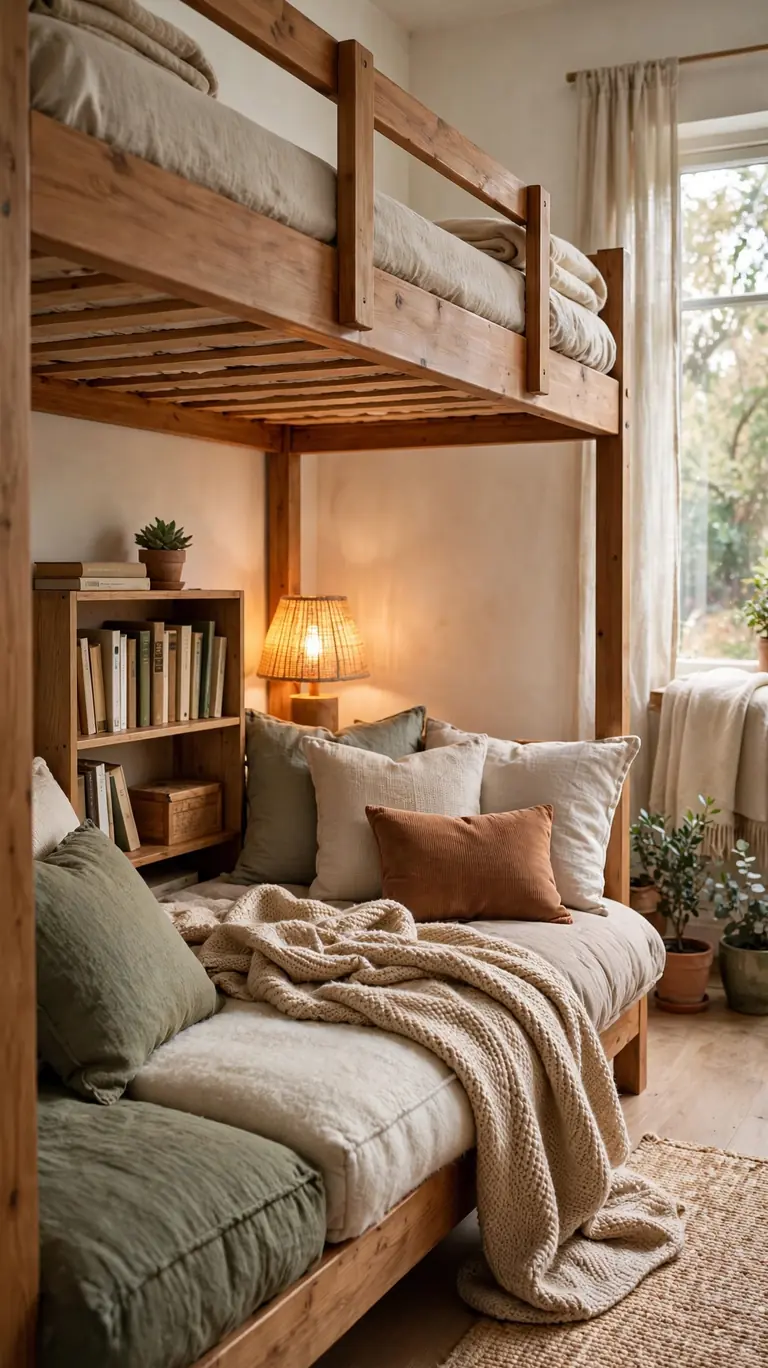
If the lower bunk barely gets slept in, turn it into a reading nook instead. Pile it with floor cushions and throw pillows, add a small bookshelf or a wall mounted book ledge nearby, and hang a warm reading light at one end. Suddenly the “less desirable” bunk becomes the most popular seat in the room, and the top bunk gets used for actual sleeping.
Keep the bedding simple here since it functions more like a daybed, with a washable cover that handles daily sitting. A small tray for drinks and a basket for current books keep the nook tidy and inviting. This works especially well when one child prefers the top bunk anyway, or in a guest room where the lower bunk doubles as daytime seating. You get more use out of the same square footage without changing the furniture.
7. Create a Study Loft With a Desk Underneath
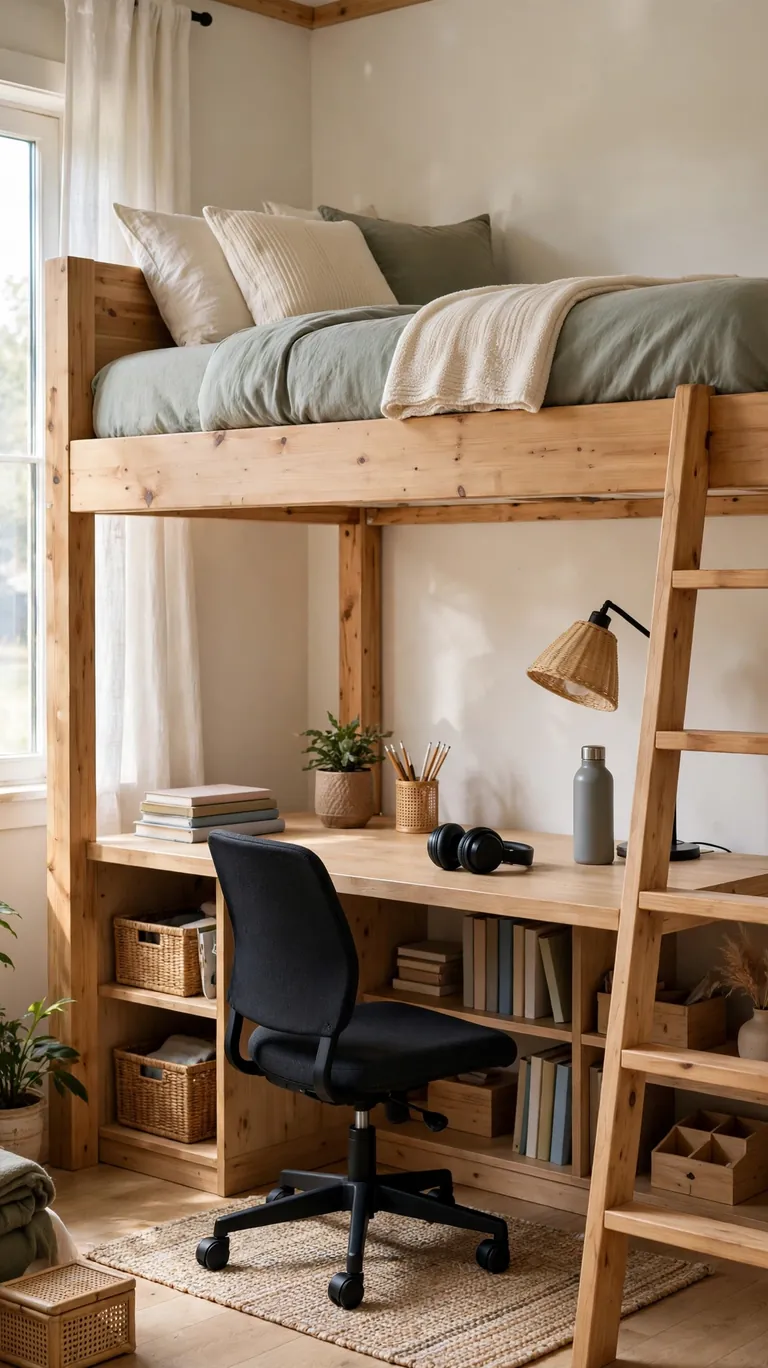
For school age kids and teens, the space under a lofted top bunk is prime real estate for a study zone. Slide a desk underneath, add a comfortable chair, and mount a task lamp on the wall or desk so homework has proper light. A small set of shelves or a rolling cart beside the desk keeps supplies within reach without eating up the work surface.
Cable management matters here, so use adhesive cord clips to run charger cables neatly along the bed frame and add a small power strip with a switch. A bulletin board or a simple calendar on the wall above the desk gives the zone a real office feel. Make sure the desk chair can tuck fully under the desk so the area stays walkable, and keep the floor under the loft clear of clutter so getting in and out feels easy, not cramped.
8. Upgrade the Ladder to Storage Stairs
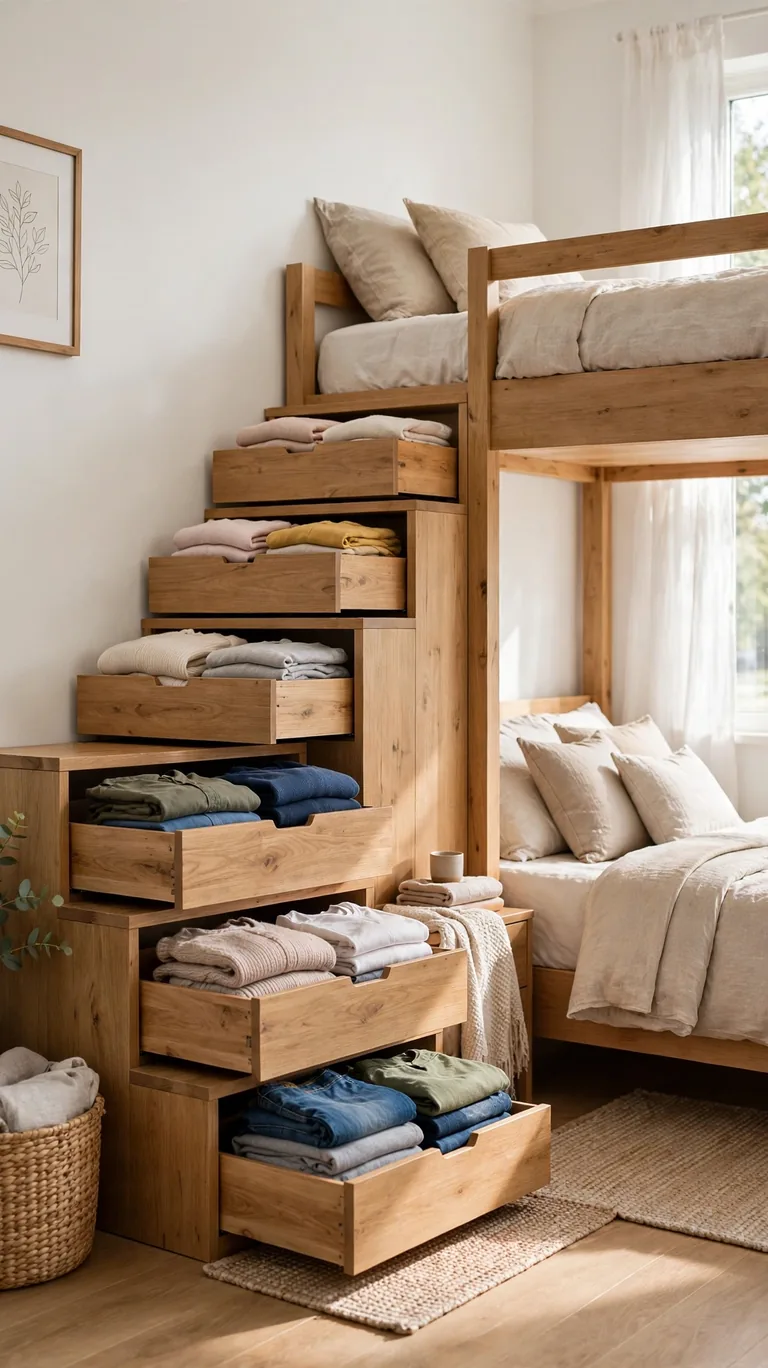
A steep ladder is the number one complaint about bunk beds, and storage stairs solve it beautifully. Each step is a deep drawer, so you gain serious storage for clothes, toys, or bedding while getting stairs that are far easier and safer to climb than a vertical ladder. Many bunk manufacturers sell matching stair units, or a handy person can build a simple version to fit the bed’s height.
Measure carefully before you buy or build, since the stairs need to match your bunk’s exact height and the room needs enough floor space for them to extend out. Put everyday items in the bottom drawers where kids can reach them easily, and seasonal stuff up top. Add a small handrail on the wall side if your unit doesn’t include one. This upgrade changes how the whole bunk feels to use every single day.
9. Add Rolling Under Bed Drawers
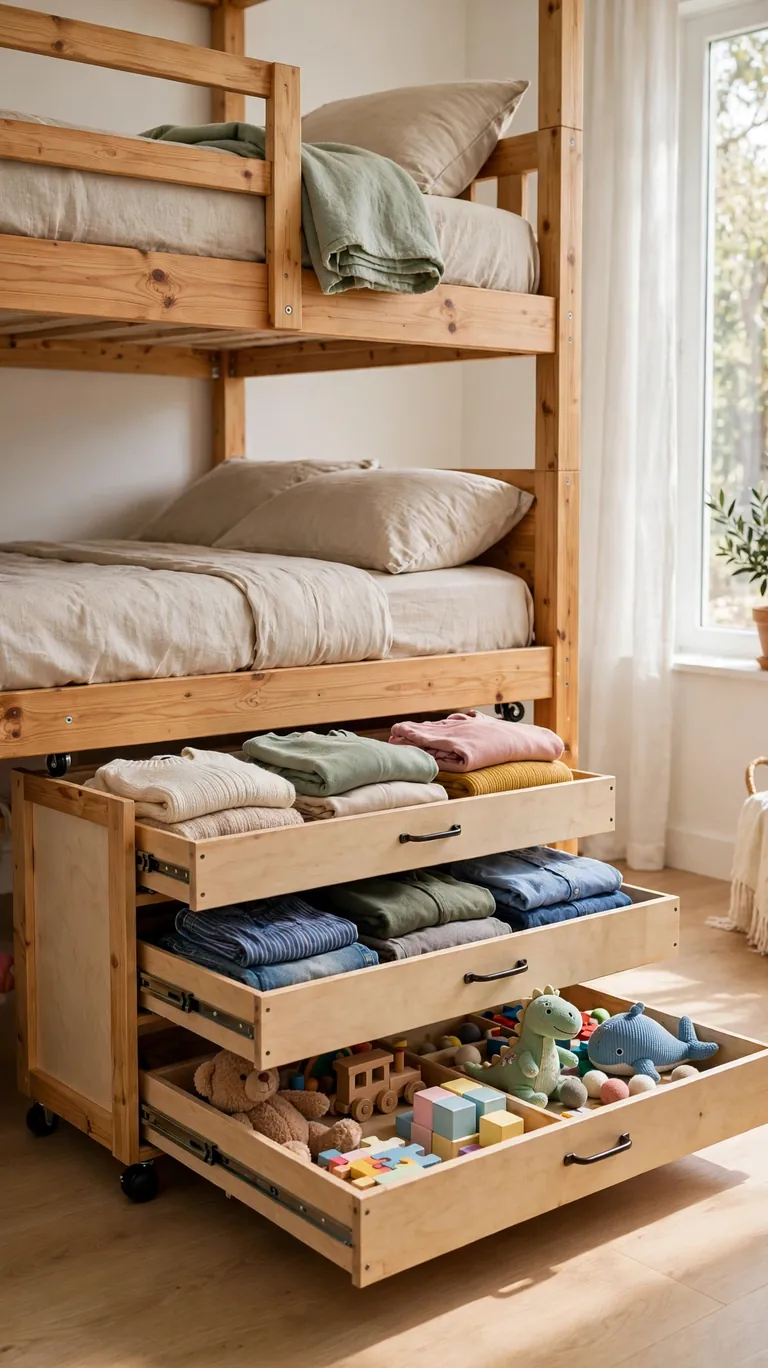
The space under the lower bunk is usually wasted, but rolling drawers turn it into hidden storage. Measure the clearance under the bed, then buy or build shallow drawers on casters that roll in and out smoothly. They are perfect for out of season clothes, extra bedding, board games, or the toy collection that keeps migrating around the room.
Label each drawer so kids can find things and, more importantly, put them back. Low, wide drawers work better than tall ones here, since you are working with limited height. If the floor is carpeted, choose larger wheels that roll easily over the pile. This is one of those changes you will wonder why you didn’t make years ago, because it quietly absorbs a huge amount of clutter.
10. Wallpaper the Wall Behind the Bunks
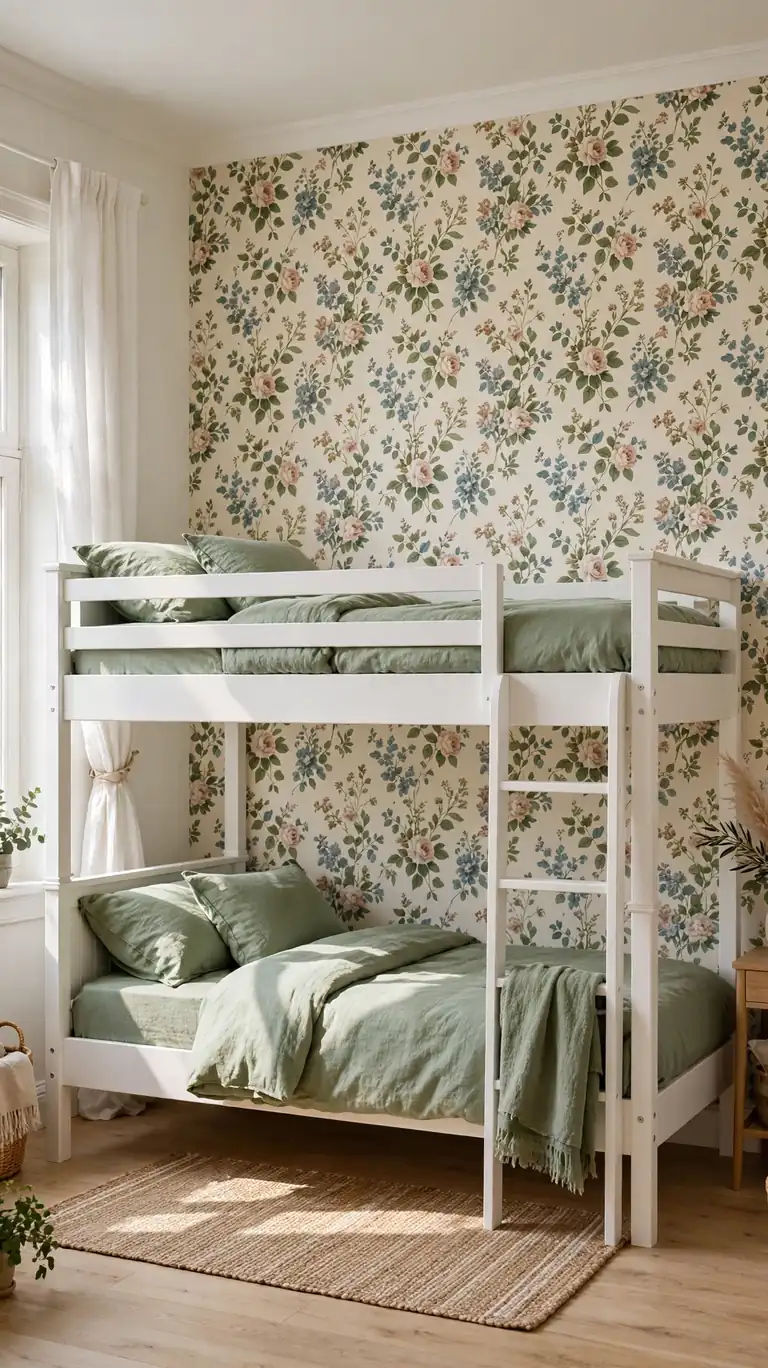
A wallpapered accent wall behind the bunks makes the whole setup look designed instead of assembled. Peel and stick wallpaper is ideal for this, since it goes up without paste and comes down cleanly when tastes change. Choose a pattern with a medium scale, since tiny prints can look busy behind bed frames and huge prints can overwhelm a small wall.
Pick up one color from the wallpaper for the bedding or curtains to tie the look together. If you are nervous about committing, wallpaper just the section of wall visible between and above the bunks rather than the entire wall. Make sure the wall is clean and smooth before you start, and work with a helper so the long strips go up straight. This single wall does more visual work than almost any other change on the list.
11. Try a Two Tone Paint Treatment
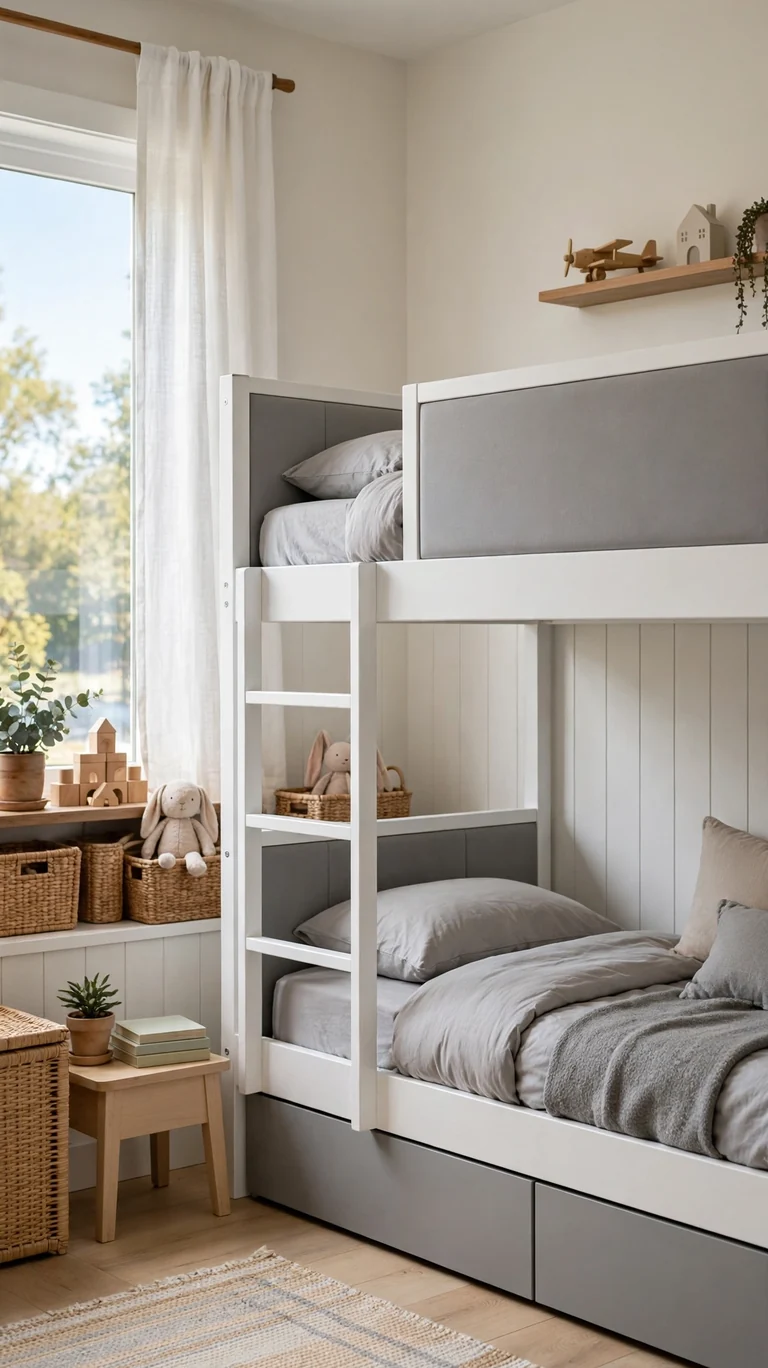
Two tone paint gives bunks a custom, furniture store look with just a little extra taping. Paint the main frame one color and the headboard slats, rails, or ladder a second color. Classic combos include white with soft gray, navy with natural wood, or sage green with cream. The contrast adds depth and makes the bed look far more expensive than it is.
Take your time with painter’s tape for crisp lines, and paint the lighter color first so any bleed through is easy to cover. Let the first color cure for a day before taping over it, or the tape can pull the fresh paint right off. Step back and check the balance as you go, since too much of the accent color can feel chaotic. This technique works on any bunk style, from simple pine frames to ornate metal ones.
12. Drape a Canopy Over the Top Bunk
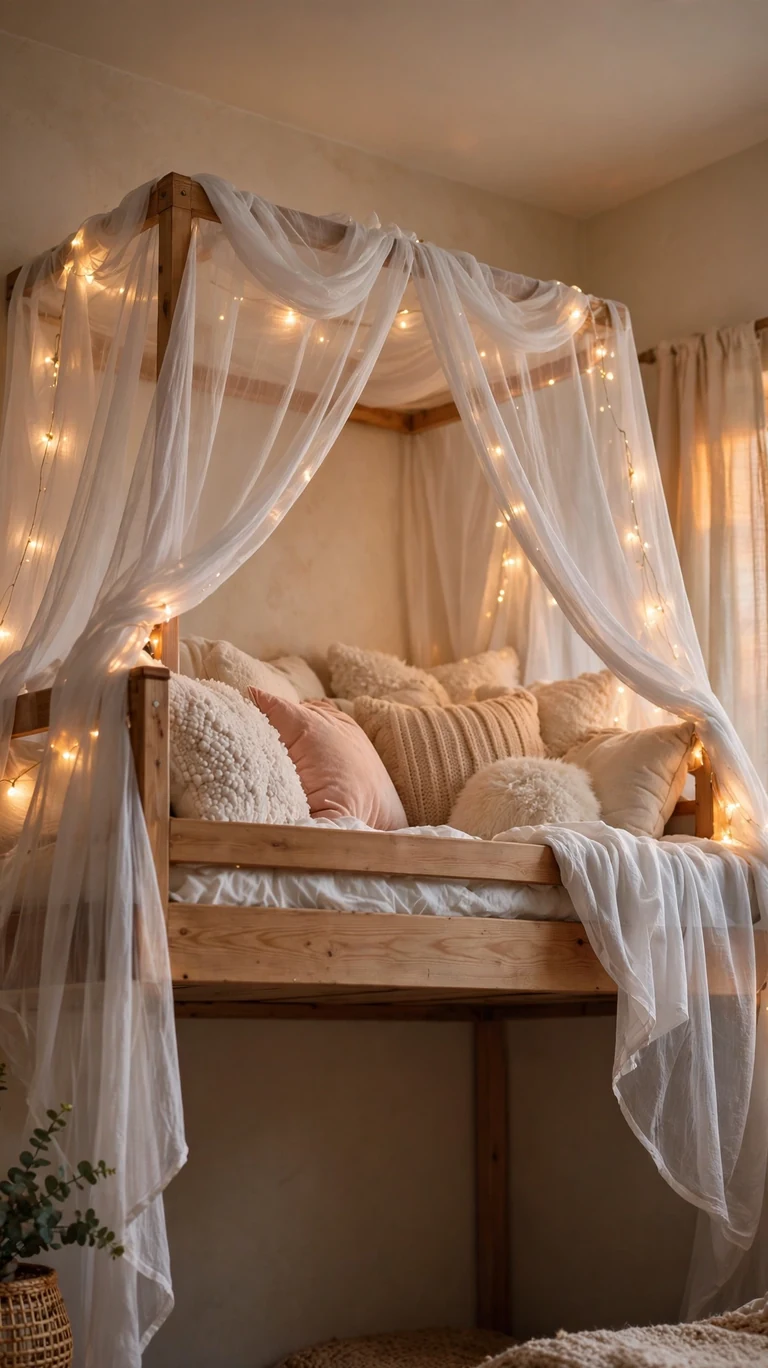
A sheer canopy turns the top bunk into a dreamy retreat, and it is especially loved by kids who want their own private world. Hang lightweight sheer panels from ceiling hooks or a simple canopy frame above the top bunk, letting the fabric drape softly down the sides. White or ivory sheers keep it light and airy, while a soft blush or gray adds a hint of color.
Keep the fabric well away from any lights or heat sources, and choose panels that can be pulled back and tied during the day so the bunk still gets airflow. Washable sheers are worth seeking out since they will collect dust up there. Pair the canopy with the fairy lights from earlier in this list for a truly magical effect at bedtime. It is a simple fabric addition that completely changes the mood of the top bunk.
13. Mount a Reading Sconce on Each Bunk
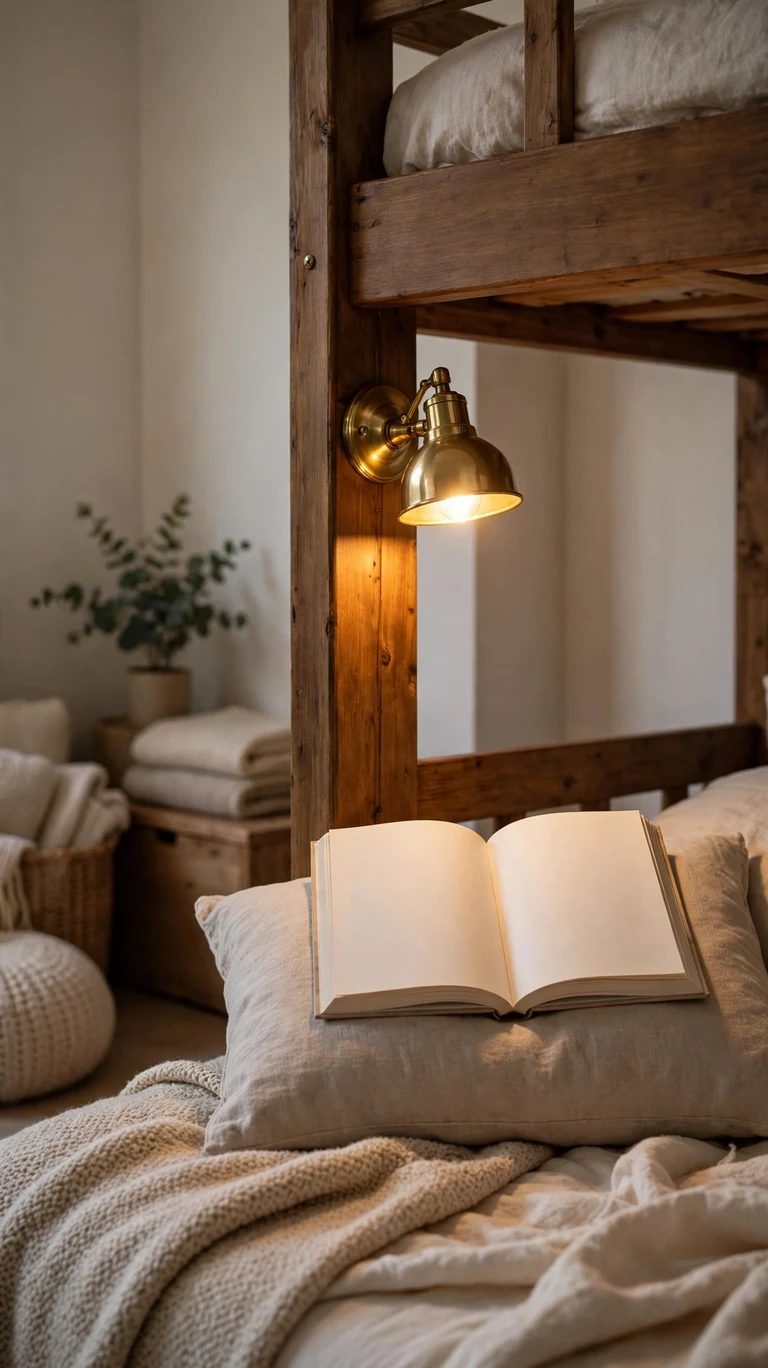
Fighting over the one ceiling light ends when each bunk gets its own reading sconce. Plug in wall sconces are perfect for bunks because they need no electrician, and many come with a simple on off switch right on the cord or fixture. Mount one at head height on the wall or bed post of each bunk so each sleeper controls their own light.
Use adhesive cord covers to run the cords neatly down the bed frame to the outlet, which keeps everything tidy and safe. Choose warm bulbs and a shade that directs light down onto the book rather than into eyes across the room. A dimmable option is worth it if you can find one, since full brightness at bedtime is rarely what anyone wants. Personal lighting makes shared bunks feel much more civilized.
14. Add End Panel Storage Caddies
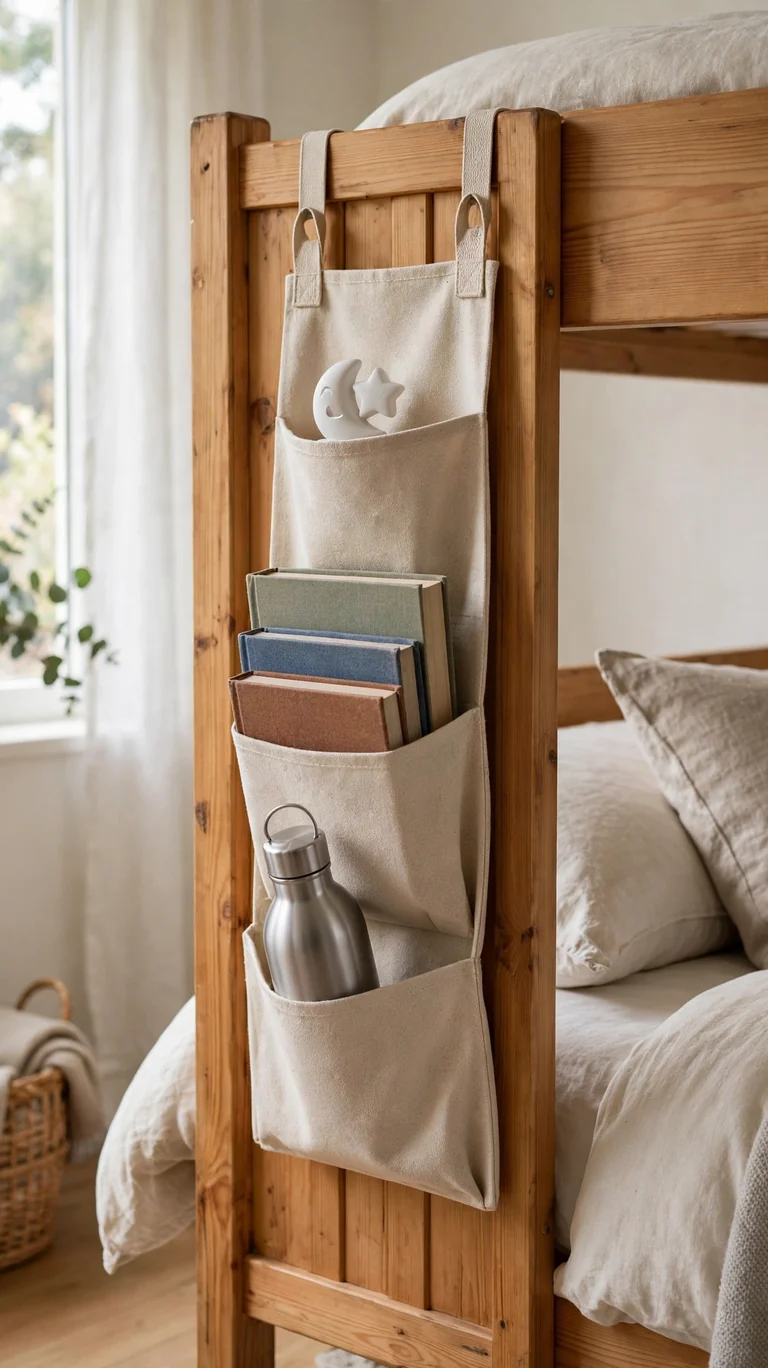
Bunk sleepers never have anywhere to put their stuff, which is why books and water bottles end up lost in the bedding. A hanging fabric caddy on the end panel of each bunk gives every sleeper their own pockets for a book, a water bottle, glasses, and a phone or nightlight. Look for caddies with sturdy hooks or ties that grip the bed frame securely.
Assign one caddy per person and let them organize it their own way, since ownership is what keeps it tidy. Choose a washable fabric because these get grubby fast, and check the weight rating so a heavy water bottle doesn’t drag the whole thing down. This tiny addition solves the nightly “where do I put this” problem and keeps the bunks looking neat instead of cluttered.
15. Style It Like a Guest Suite
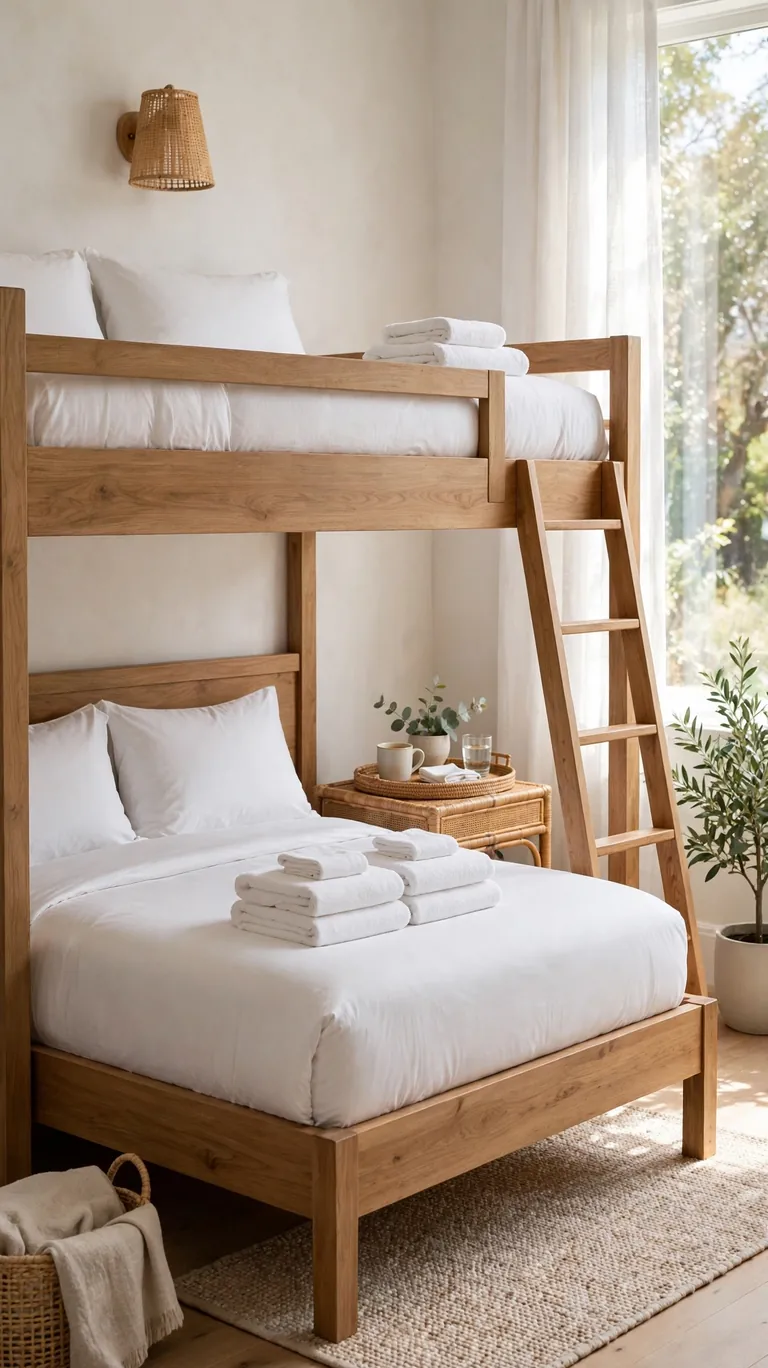
Bunks in a guest room deserve the same care as a master bedroom, and a little styling goes a long way. Start with crisp white or cream bedding on both bunks, then add a folded throw and two sleeping pillows plus one decorative pillow per bunk. A small tray on the lower bunk with a carafe, glasses, and a welcome note makes guests feel genuinely looked after.
Keep a set of matching towels folded at the foot of each bunk so guests don’t have to ask. A small rug beside the bunks and a simple piece of art on the wall complete the boutique feel. The goal is for guests to feel like the room was prepared just for them, not like they got the kids’ hand me down beds. Thoughtful styling turns spare bunks into a room guests actually compliment.
16. Make It Over for a Teen Hangout
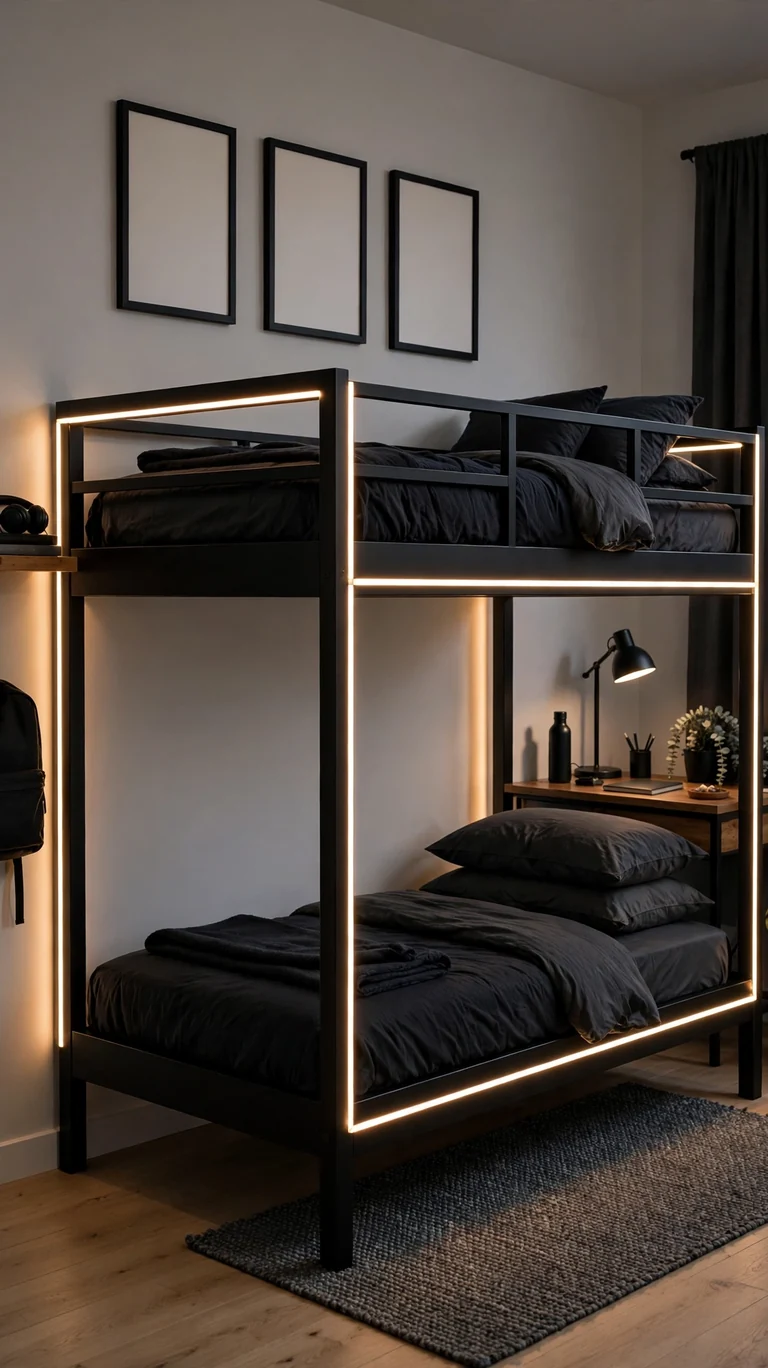
Teens want their room to feel like their own space, not a little kid’s bedroom, and bunks can absolutely make the leap. Start with a more grown up palette like charcoal, forest green, or warm neutrals, and swap cartoonish bedding for textured solids. An LED strip tucked behind the headboard (facing the wall so the diodes aren’t visible) gives the bunks a cool ambient glow for hanging out.
Add a charging station with a small power strip mounted to the bed frame so phones and laptops have a home. Let your teen choose the wall art and one or two decor pieces so the room reflects them. Keep the overall look a bit minimal, since teens accumulate stuff fast and a clean backdrop handles it better. The bunks stay practical for sleepovers while the room finally feels age appropriate.
17. Split the Bunks Into Two Twin Beds
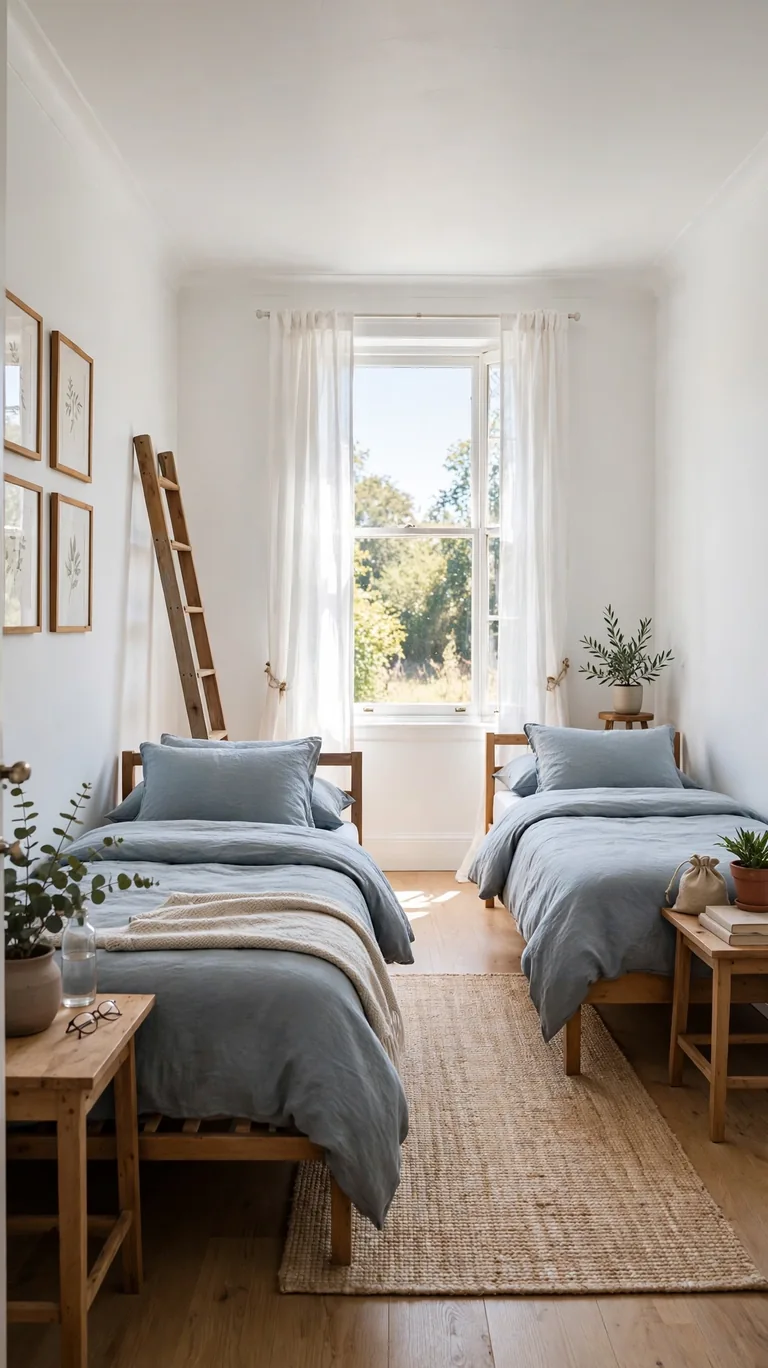
Sometimes the best bunk bed makeover is unstacking them. Many bunk beds are designed to separate into two twin beds, so check your model’s instructions first. Two twins instantly make a shared room feel bigger and more grown up, and each sleeper gets a proper headboard, a nightstand, and their own side of the room.
Arrange the twins on opposite walls or in an L shape depending on the room’s layout, and give each bed its own bedding color within a shared palette so the room still feels cohesive. This is also the perfect moment to repaint, since you can reach every surface easily while the beds are apart. If the kids ever want bunks again, most models stack right back up, so nothing is permanent.
18. Add a Cork or Magnetic Board for Each Sleeper
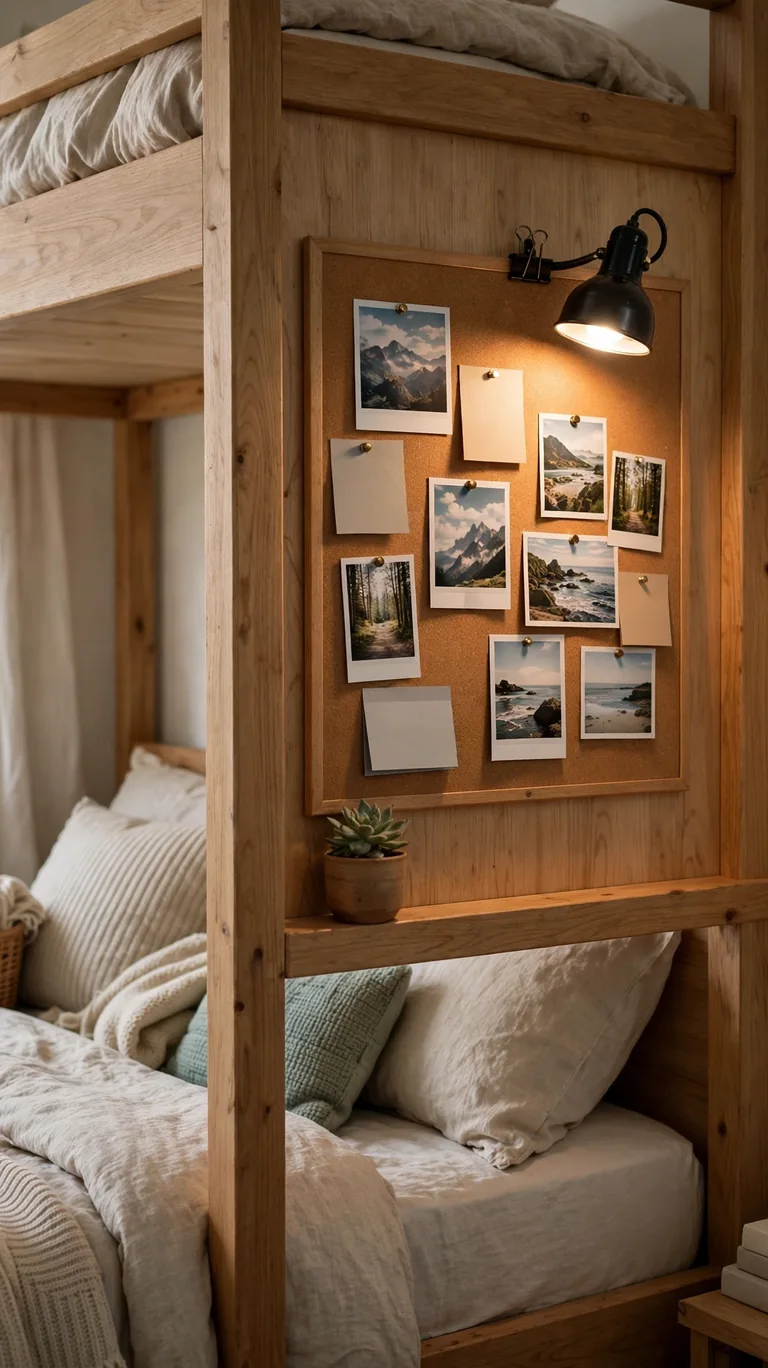
Personal space matters in a shared bunk room, and a small board per sleeper gives everyone a spot that is truly theirs. Mount a cork board or magnetic board on the wall beside each bunk, or on the bed’s end panel if wall space is tight. Kids can pin up photos, art, schedules, and ticket stubs, while teens can use theirs for inspiration boards or reminders.
Use proper wall anchors rated for the board’s weight, and keep pushpins away from very young children. A small clip on lamp aimed at the board makes it usable in the evening and doubles as ambient light for the bunk. Let each person decorate freely, since the whole point is self expression. These boards absorb a lot of the clutter that would otherwise end up taped directly to the walls.
19. Layer Rugs and Textiles for Coziness
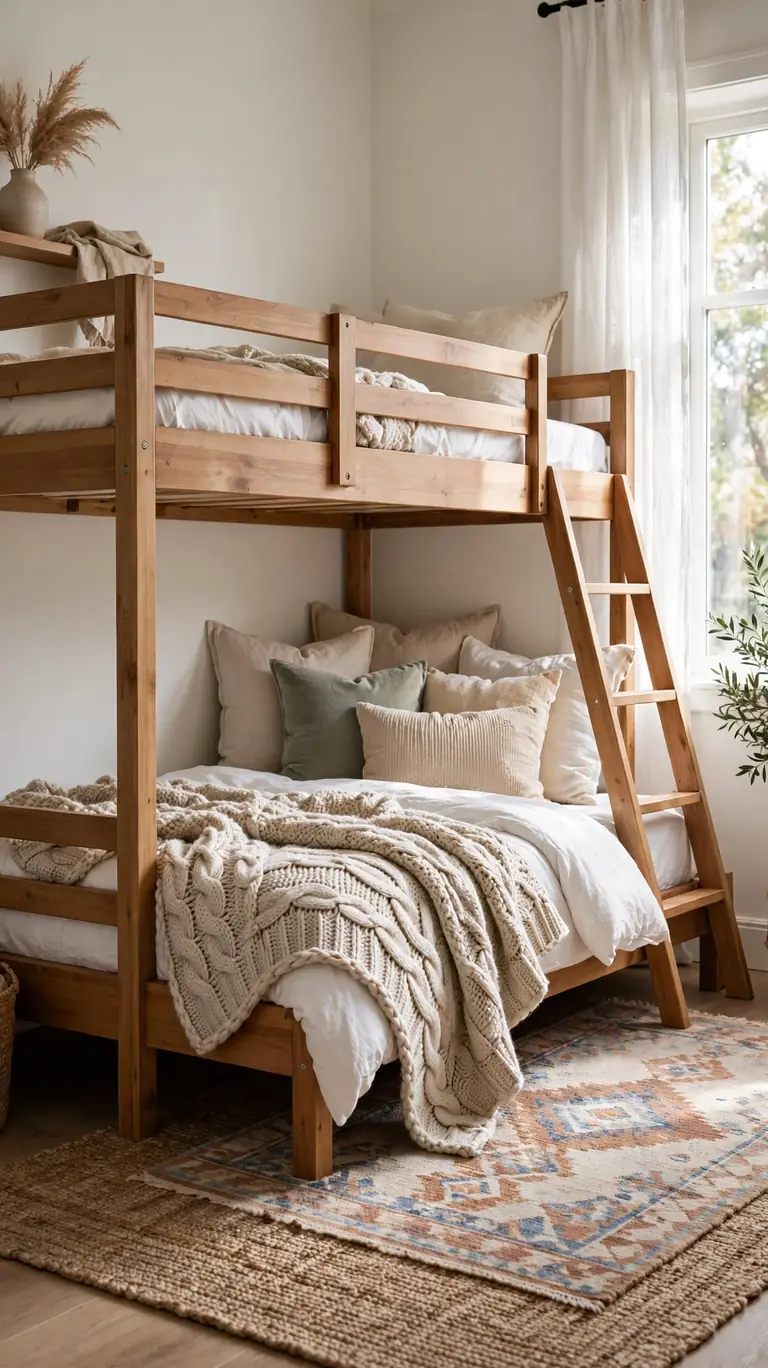
Bare floors and hard bed frames can make a bunk room feel cold and echoey, and textiles fix both. Start with a soft area rug beside or under the bunks to anchor the space and warm up the floor. Then layer in a chunky knit throw on each bunk, a couple of extra pillows, and maybe a washable lumbar cushion on the lower bunk for back support while reading.
Stick to a simple color story so the layers feel cozy rather than chaotic, pulling two or three colors from the bedding and repeating them in the rug and throws. Choose machine washable everything, because bunk room textiles work hard. This final layer is what makes the room feel finished and inviting instead of just functional, and it is the easiest change to refresh seasonally with new throw colors.
Frequently Asked Questions
How much does a bunk bed makeover usually cost?
It depends entirely on the scope you choose. The most affordable refreshes are paint, new bedding, and curtains, which together can transform the look without a big spend. Adding storage stairs, new mattresses, or wallpaper raises the cost, so start with the changes that bother you most and add the bigger upgrades over time. A good rule is to refresh the surfaces first, since paint and textiles deliver the most visible change for the least money.
What kind of paint should I use on a bunk bed?
Use an interior paint made for furniture or trim, which is formulated to resist chips and scuffs. Prep matters more than the paint itself, so clean the frame thoroughly, sand lightly to give the paint grip, and apply a primer before your color coats. A satin or semi gloss sheen is the best choice for bunks because it wipes clean easily. Let the paint cure for a day or two before the bed goes back into daily use so the finish hardens fully.
Is the top bunk safe for my child?
Bunk beds are safe when they are used correctly and match the sleeper’s age and maturity. Check your bed’s manufacturer instructions, which usually include age guidance for the top bunk, and follow it. Keep guardrails on both sides of the top bunk with no large gaps, make sure the mattress sits well below the top of the rail, and use a sturdy ladder or stairs for climbing. Teach kids that the top bunk is for sleeping, not for playing or jumping, and check the bolts and rails for tightness a few times a year.
How do I make a small room with bunk beds feel bigger?
Light colors do the heaviest lifting, so paint the bunks white or a pale tone and keep the walls light as well. Tie curtains back during the day so light and air move freely, and keep the floor as clear as possible with under bed storage instead of piles. A large mirror on the wall opposite the window bounces light around the room. Finally, resist the urge to fill every surface, since visual breathing room makes small bedrooms feel noticeably larger.
Can adults sleep on bunk beds?
Yes, as long as the bed is built for it. Check the manufacturer’s weight limit for your specific bunk and respect it, since not all bunks are rated for adult weight. Look for a solid wood or heavy duty metal frame, full length guardrails on the top bunk, and a comfortable mattress that still sits safely below the rail. Adults generally sleep better on the lower bunk, which avoids the climb and the ceiling clearance issue, but a well built top bunk works fine for occasional guest use.
Conclusion
A bunk bed makeover is one of the most satisfying weekend projects because the before and after is so dramatic. Those scratched, dated bunks that everyone was tired of can become the favorite spot in the house with nothing more than paint, textiles, lighting, and a little creativity. You don’t need carpentry skills or a big budget, just a clear plan and the willingness to spend a weekend transforming the room one idea at a time.
Start with the changes that solve your biggest frustration. If the finish is the problem, paint is your answer. If siblings fight over privacy or light, curtains and personal sconces will change daily life more than any cosmetic upgrade. If storage is the issue, stairs with drawers or rolling under bed bins will absorb the clutter that makes the room feel chaotic. Pick the ideas that fit your sleepers’ ages, your room’s size, and your budget, and don’t try to do all nineteen at once.
The best bunk rooms grow with the people who sleep in them. What works for a six year old will need refreshing for a teenager, and that is completely normal. Because most of these ideas are based on paint, fabric, and simple accessories, you can update the look again in a few years without starting over. Give those bunks the fresh start they deserve, and enjoy the moment when everyone walks in and can’t believe it’s the same bed.